


DIY Outdoor Bench With Pretty Soft Cushion Back
3 Materials
$40
1 Day
Easy
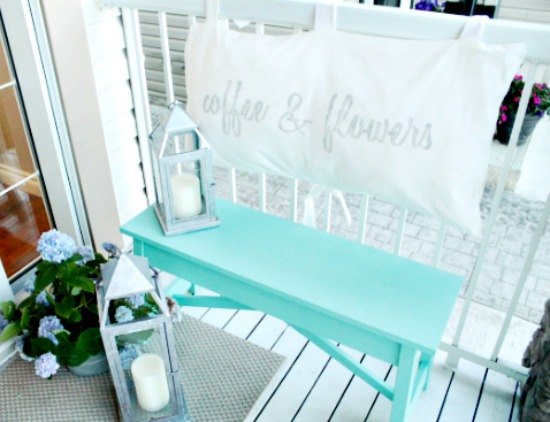
Home made bench and cushion, that can be adjusted to suit any size of front porch.
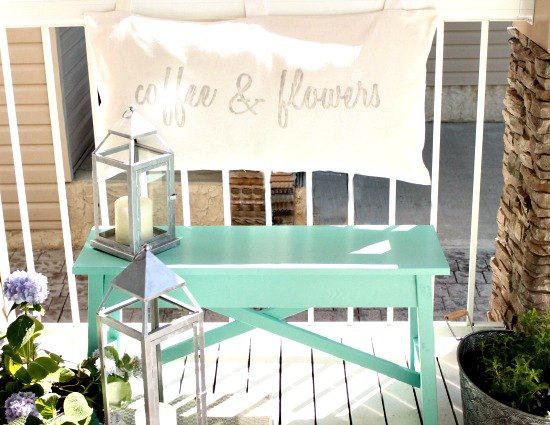
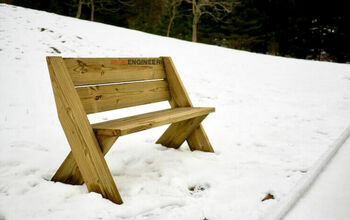
This bench was made to fit into a small front porch. It needed to be small enough to leave room for safe entry, large enough to sit on, and comfortable. Our neighbourhood has several Moms who sit out in their front yards visiting while the community children play. I am hopeful that I will find some time to sit out front and join in.
Hubs and I made this bench from Ana White’s Rugged Bench Tutorial. We cut the 12″ board for the seat to 36″, the rest of the tutorial we followed exactly. I love this bench because its different, its made from solid wood, it will take the punishment of being outdoors and it costs about $20 to put together. The paint is a Tiffany Blue Sherwin Williams Exterior paint I had made at Lowes.
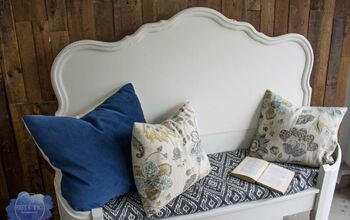
The bench is comfortable; the rod iron railings not so much. I originally thought of tying on two cushions but changed my mind. Instead I made one large cushion 16″ by 36″.
Here is the tutorial on how to make your own cushion back.
PILLOW INSERT
I wanted a very particular sized cushion to match the width of the bench and the height of the rod iron railing. Instead of trying to find a pillow form its much easier and quicker to make your own.
Cut two pieces of muslin 18 by 38 inches
Iron and then place good sides facing each other.
Sew around three seams, for the final seam leave a 6 inch gap open for stuffing. Turn the fabric right side out and iron.
Add the fiberfill stuffing (I reused some from old cushions) and then sew the opening closed. Its not a glamour photo but here is how the insert looks finished.

MAKE THE CUSHION COVER
Cut two pieces of the cushion material 18″ by 38″.
Cut 8 strips, 4″ by 15″ long.
Fold the strips over and run a narrow seam around 3 sides, leaving one narrow end open.
To make the tie ons, turn the strips right side out by working the fabric up through the open end. Iron well.
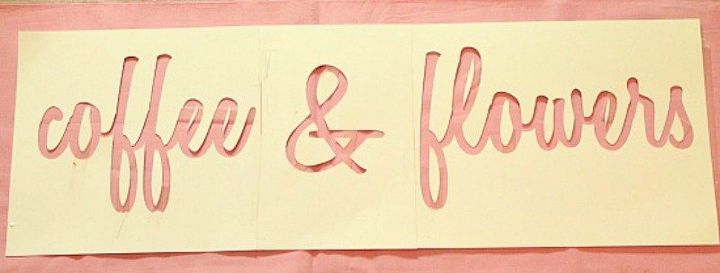
CREATE THE COFFEE AND FLOWERS STENCIL
When stenciling onto fabric I prefer to use freezer paper, unfortunately I had ran out. I have vinyl and stenciling material in my stash but its not worth using on such a simple stencil. My stash has a whole stack of inexpensive plain white card stock paper so I used that instead. Doing it with card stock is about $10 cheaper.
Using 3 pieces of 8″ by 11″ cardstock make a stencil. My stencil was made using Honeyscript font and the pixel size is 480.
To hold the centers of the o,f,e etc. I taped them into place on one side. I will remove the tape while painting.
Tape the stencil to the fabric making sure it is square and centered.
FILLING IN THE LETTERS WITH PAINT
This is really easy to do and I love the water colour look. Take 1 tbsp of grey chalk paint, add 1 tbsp of water and mixed them together. If you don’t have chalk paint you can use regular acrylic paint and fabric medium.
Load the brush and remove most of the paint on the side of the container before applying the paint to the fabric. Carefully brush onto your stencil starting on the paper and working towards the center. Never paint from the center to the outside. This reduces the chances of leakage and uneven letter edges.
Make sure to do the parts of the centers (o,f,e) that you can, keeping the tape in place. At this stage the letters do not have to be filled completely, the goal is to make the outline legible.
Hold the letter centers in place (I pushed on mine with a large needle) remove the tape. Apply paint where the tape had been.
Remove the stencil. With a dry brush carefully spread the paint around to fill in the letters. Apply more paint if needed, but you will likely be able to use the paint already on the material. Let it dry thoroughly. Once dry set the paint by sealing it with a hot iron.
ASSEMBLING THE CUSHION
To attach the tie ons. Take the non stenciled piece of material.
Pin two tie ons open edge to the seam and tails towards the center. For the top of the cushion place the ties on four inches in from the edge and one in the middle.
For the bottom of the cushion place two strips in the center of the cushion. Sew them into place and place back on your table.
To add the stenciled cushion front.
Take the painted front of the cushion and place face down with the top of the letters towards the top of the cushion where the three tie ons are. Make sure to keep all of the tie ins facing the center of the cushion, pin. Sew three seams, both longs side and one short side.
Insert the large cushion. The final seam can be turned in and fastened with micro fleece or snaps.
Please come by an visit my blog, I have more pictures of this post and many more examples and projects. I would love to hear from you.
Thanks Leanna

Want more details about this and other DIY projects? Check out my blog post!
Comments
Join the conversation
2 of 4 comments
-
Very cute bench and I love the color. Couldn't find the instructions for the bench on your blog. By the way, it's "wrought" iron, not rod iron.
-
The link to build the bench if right under the first photograph. Hope that helps.


Frequently asked questions
Have a question about this project?