


DIY Canvas Clipboard Text Art

by
Zest it Up
7 Materials
$10
2 Hours
Easy
I adore using inspirational quotes with decorating. Part of my obsession is that I love the graphic element of playing with different fonts and colors to make a statement, but that can be pulled off with a simple bar sign or such. Nope, the beauty of an inspirational quote is that it is personal. It means something and it reflects the soul of a space. Every space that we create, whether it’s a home, a office, or the site of a sweet wedding, has a purpose. It’s where you go to find peace, focus and drive, or celebration. I love how a quote has the power to both inspire the person in their space and simultaneously reflect a piece of their heart. It’s kind of a beautiful thing.
So, when Sam and I set out to decorate a local classroom, you better believe quotes were going to play a key role. This space is an English room, so we had the lovely Mrs. Miller pick inspirational quotes from the books on this year’s reading list…and then we got to work!
Photo Cred: Anya McInroy
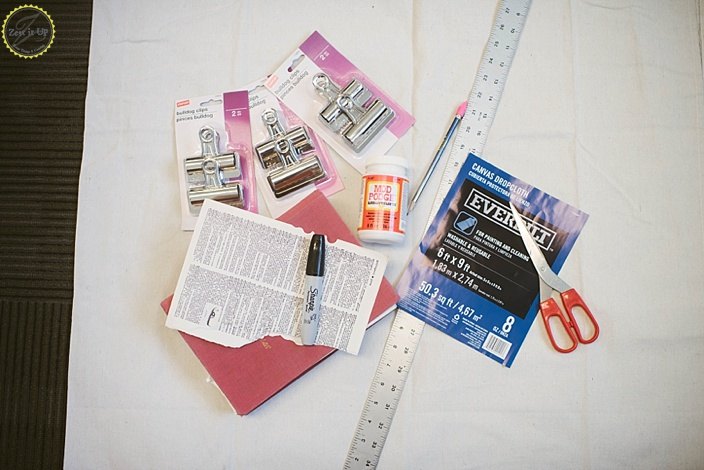
Supplies:
- large metal clips
- canvas dropcloth
- Mod Podge
- T-square ruler
- scissors
- sharpie
- old book pages (from a thrift store)
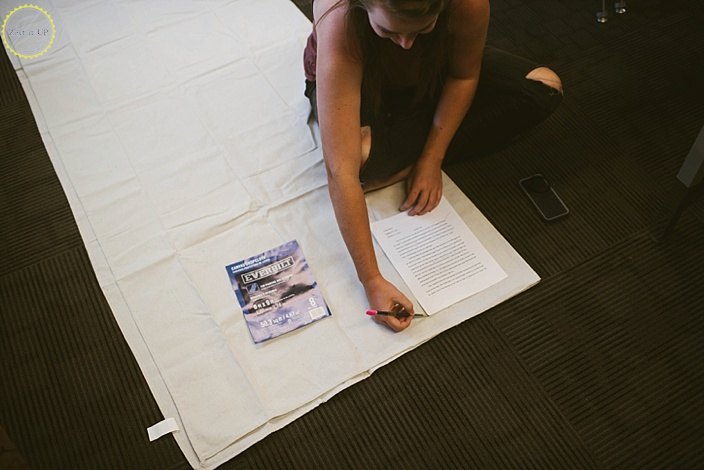
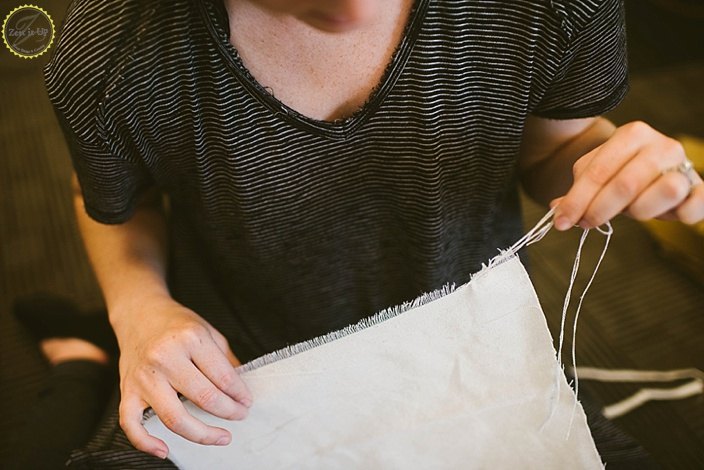
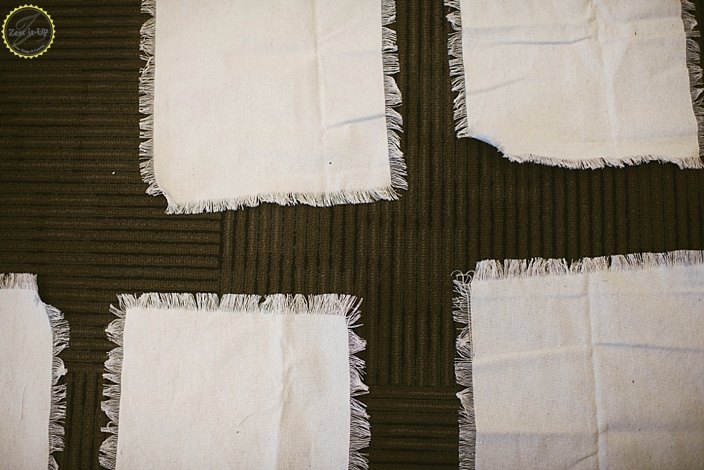
Start by prepping your canvas drop cloth. Lay it out on a big flat surface (we just used the floor….all best crafting happens while sitting barefoot on the floor, right?).
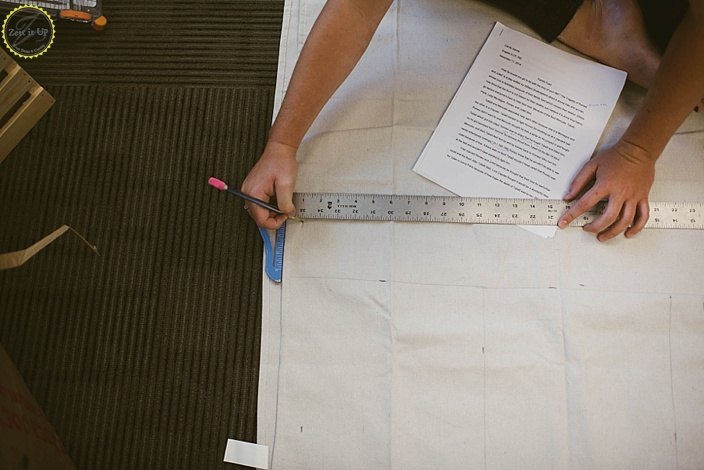
Use a regular sized piece of computer paper to trace out your cut lines. You will want to use a T-square just to make sure that you are keeping things straight. The goal is to create a good 2 inch border all the way around your book page once you Mod Podge it in place.
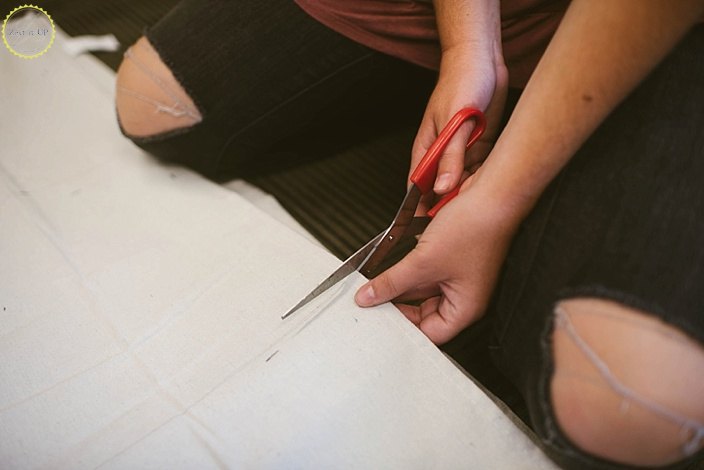
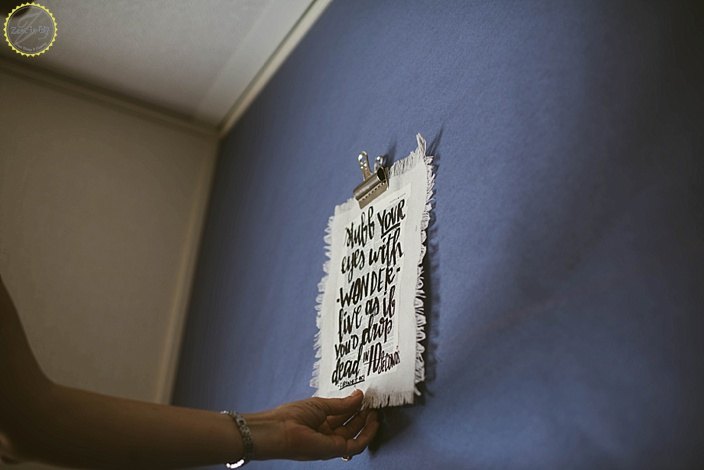
After you have cut out your rectangles, begin pulling horizontal threads loose on all four sides. I wanted the frayed edge to make a statement from far away, so we created a good 1/2 inch frayed border all the way around.
I kind of love destruction that is secretly constructive. This was definitely satisfying! LOL It’s like the complete opposite of my knitting.
Next up, it’s time to bust out the Mod Podge.
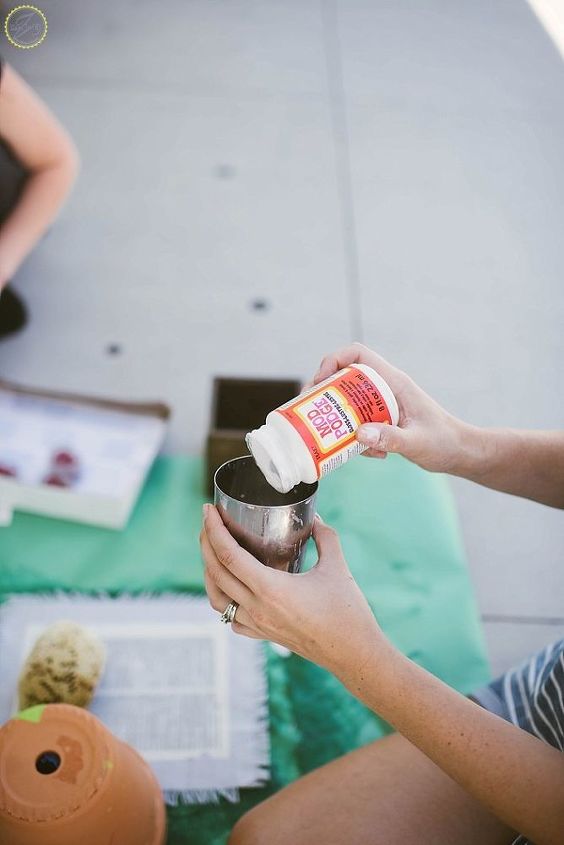
The goal, aside from affixing the book pages to the canvas, is to stiffen the entire project up. It doesn’t need to be as stiff as a board, but you don’t want any continued fraying, and it needs to hang flat on the wall.

Make sure to really coat the canvas heavily before you place your book page down. Then, give it a gentle coat, being careful not to tear the page. We actually used some water to loosen our Mod Podge a bit, just so that it really soaked into the densely woven canvas.

We placed ours out in the sunshine to really speed up the drying process. Then it was time to get scribing!

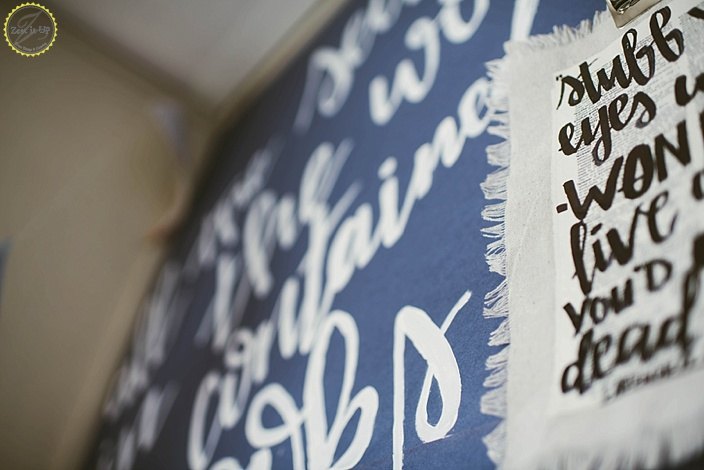
You can try different techniques here: you can freehand or you can print your text out and then use tracing paper to transfer it to your old book page with a pencil. After you have your sketched out words, fill them in with a black Sharpie.
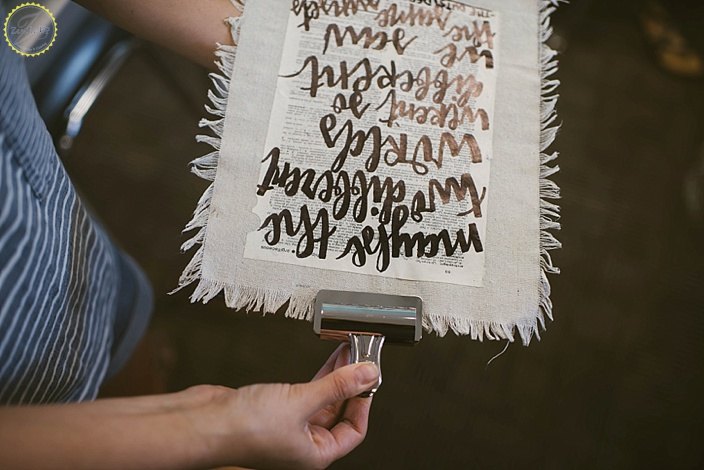
The final step is to attach a large metal clip and hang it from the wall!
A fun and dynamic wall for a classroom! I love it!
This would look great in an office or even your own home to add some unique decor!
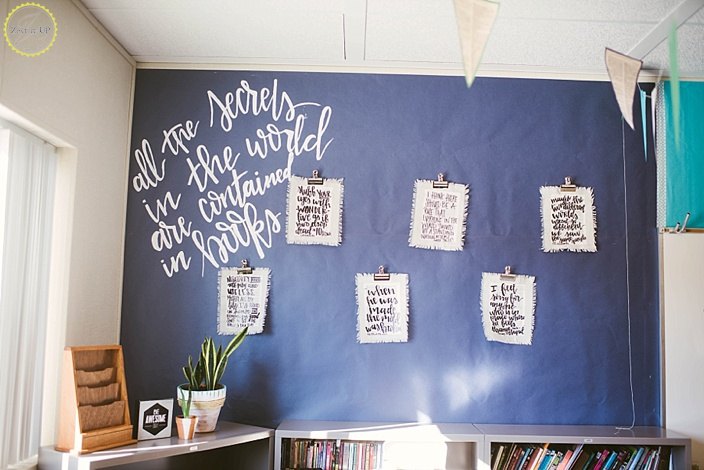
I hope it inspires the students who are heading back to school if, and when, their minds start to drift and their eyes glance around the room!
Happy crafting!
xoxo
Chanda
Want more details about this and other DIY projects? Check out my blog post!
Comments
Join the conversation
1 comment
-
I saw this today and made one tonight! I love Bible journaling so I used a page from an old church choir book, I love it!. My children are grown but I saved their T shirts from a devastating earthquake our family survived in 1983 so I will try making one with the survivor logo! What a great inspirational piece you have contributed!!! Thank you!!!


Frequently asked questions
Have a question about this project?
LOVE the file holder on the left; did you make it? How?