


Autumn is Calling, DIY Sign

by
Kelly-n-Tony
8 Materials
$3
3 Hours
Easy
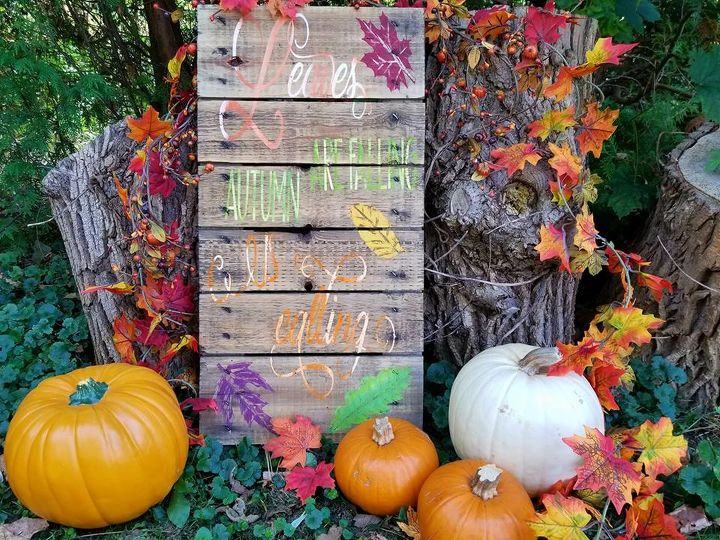
Now that the leaves are changing I wanted to create a sign to stand at my steps outdoors with my pumpkins. I'm so happy that I can create one so easily now!
Backstory--I went to my first paint party 2 years ago with my granddaughter. We LOVED it! But with the sign painting parties costing what they do it's hard to do it as often as we would like. So after researching it I discovered this could definitely be my DIY dream come true and purchased my first Cricut! Compared to the classes or party prices I have come out WAY ahead by purchasing my Cricut. In fact with research on deals I was able to get mine for about $100 after sale and rebate!
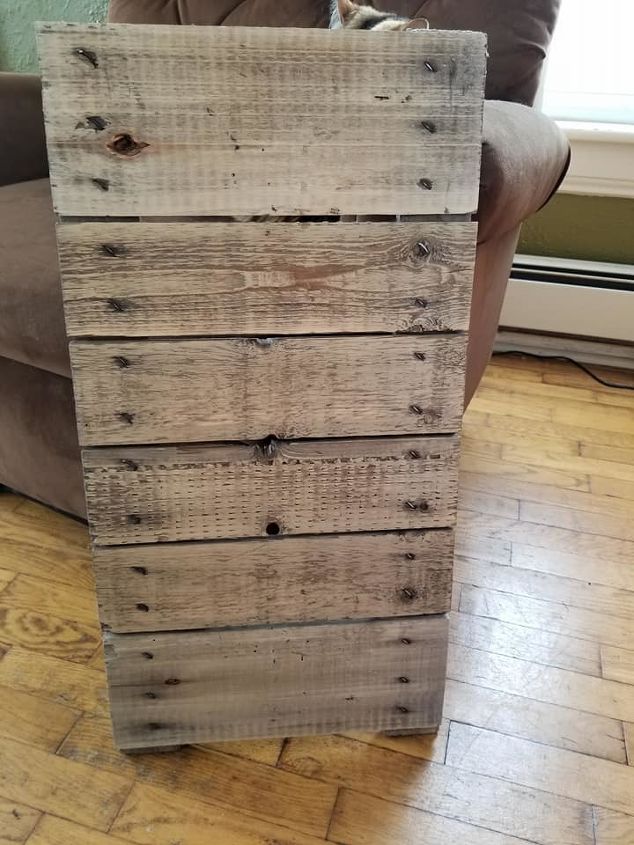
So onto the project-----there was this cool wooden crate that was in a pile of free pallets. I thought this long side would make a wonderful rustic sign!I did use the sander on it to smooth the wood and hammered down the staple nails. I sprayed it with Rustoleum clear coat so the paint would go on easily and not soak in and again afterwards to protect the paint from the weather. I love the natural wood color and natural knots with the staple nails- it's a very rustic, autumn feel!

With a Cricut I have the option of making my design from scratch or using a template. In this case I used an SVG template with the words and added leaves. I got mine free but don't see the free link anymore. Here is the same one but is about $3 now https://designbundles.net/afw-designs/27320-leaves-are-falling-autumn-is-calling-svg-dxf-eps-cut-files or you can do as I did and search "free SVG autumn leaves" which brings up a similar template that is currently free https://lovesvg.com/2016/09/leaves-are-falling-autumn-is-calling/ and free leaves here https://cuttingcrazy.wordpress.com/2010/11/17/free-svg-file-autumn-fall-leaves/
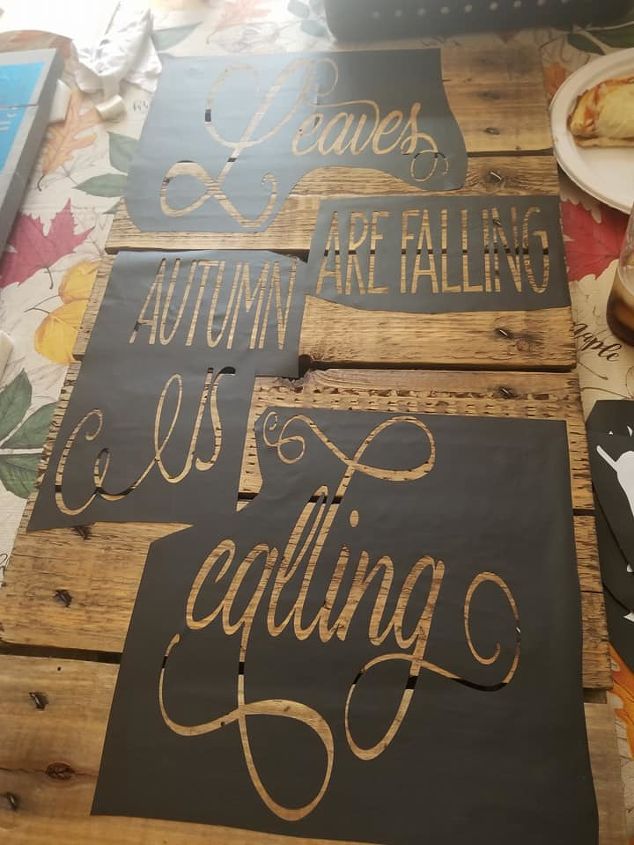
My Cricut machine cut the stencil out for me, then I weeded (removed the inside parts of the stencil) the vinyl using tweezers, then I added transfer tape to the top and applied it to my board pressing it down well. I did cut my stencil out in sections so I could move the wording and leaves around to better fit my larger sized board.
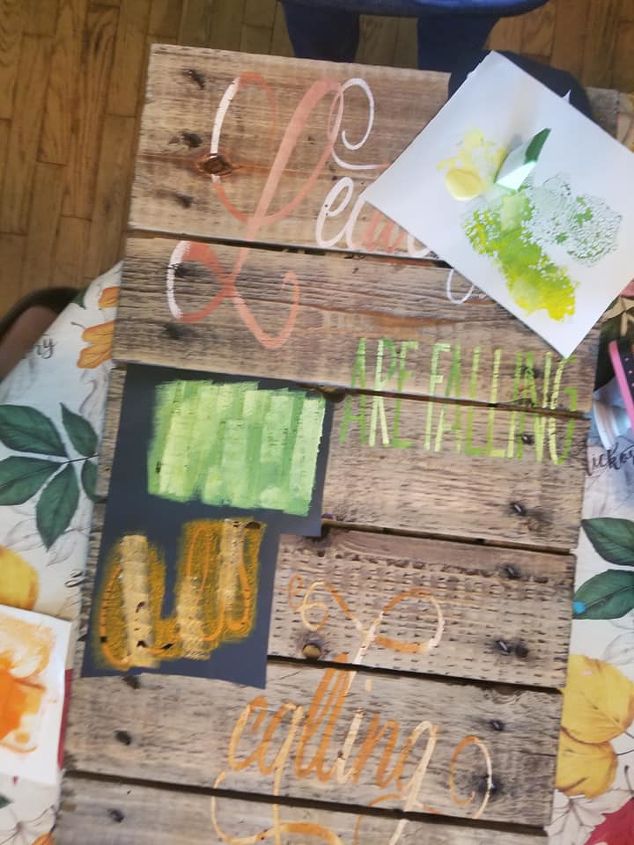
Using cosmetic wedges I dabbed the acrylic paints on lightly till I got the look I wanted. I used the edge of the wedge to add leaf veins to the leaves. Peeling off the stencil pieces to reveal the result always makes me a little giddy, lol.
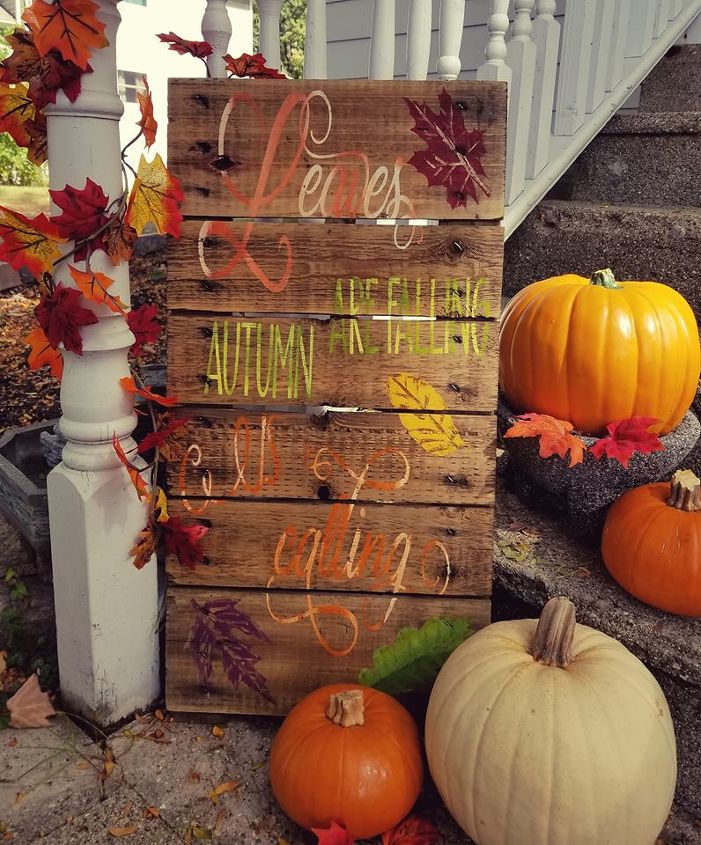
I really love the way it turned out and although it isn't completely legible in photographs it IS in real life. I love the fun fall colors and vibe it gives!
It costs me less then $3 in expendable supplies to make a larger sign like this. To do one at a painting party this size would cost me at least $45 so there is a huge savings. I love being able to create what I want, when I want.
This is an easy, inexpensive project if you have the right tools.
Comments
Join the conversation
2 of 7 comments
-
This is beautiful!
-
Love this, One could be done for winter too.


Frequently asked questions
Have a question about this project?
Csn the first cricut be used with this paper?
How did you cut your stencil and weed it with out making little slits in it? For example the O? I hope this makes sense.
I would love to try this..........where do I get the stencil to cut. It is very thick......I have an old machine as well. TIA