


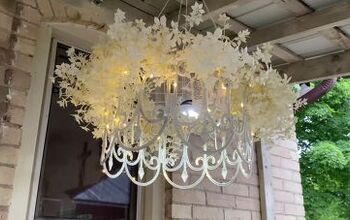
How to Make a Gorgeous Outdoor Hula Hoop Chandelier
Here is a fun and creative way to brighten up your outdoor space for spring!
Today, I will show you how to make a handmade chandelier from hula hoops and fairy lights.
This post was transcribed by a member of the Hometalk editorial team from the original HometalkTV episode.
So, let's get started and transform your backyard into a magical wonderland with this easy-to-follow tutorial!
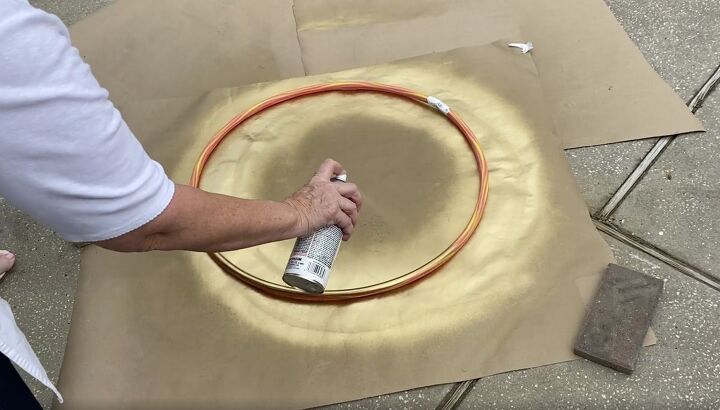
1. Spray and seal the hula hoops
You're going to want to take 3 hula hoops and some metallic paint that's made for plastics. Spray both of your hula hoops with metallic spray paint.
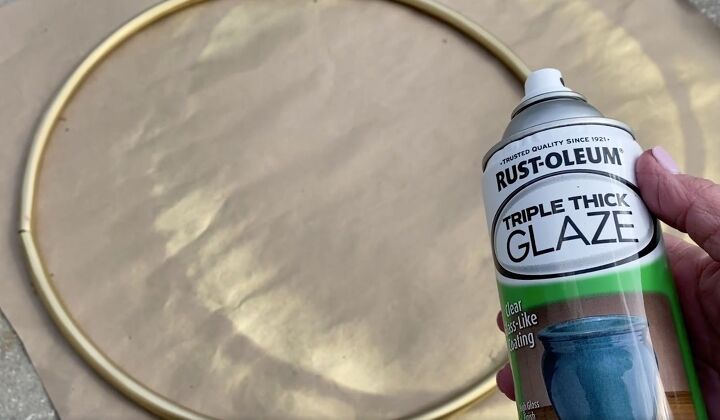
When they are dry, seal them with a clear sealer. I used Rustoleum triple thick glaze for mine. Make sure they are completely covered in gold before applying the glaze.
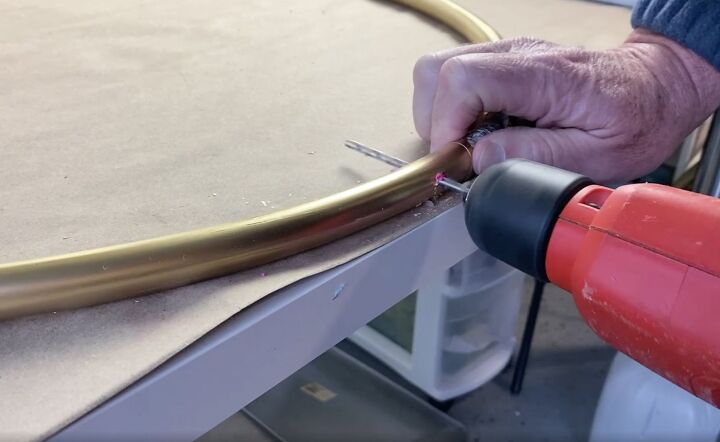
2. Drill holes
Next, you want to drill a hole in each side of the gold-painted hula hoops being careful not to chip the paint.
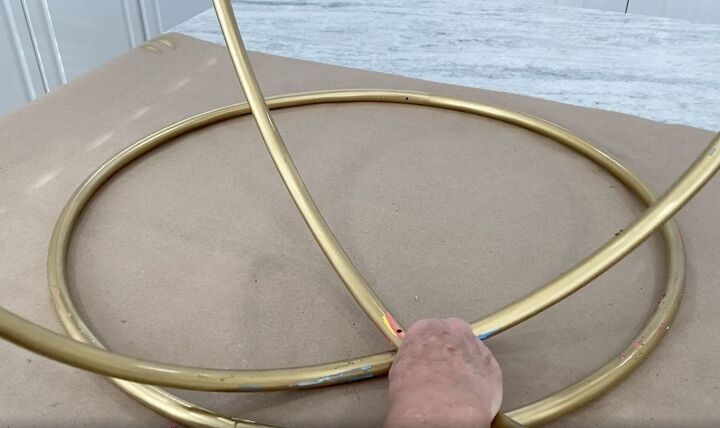
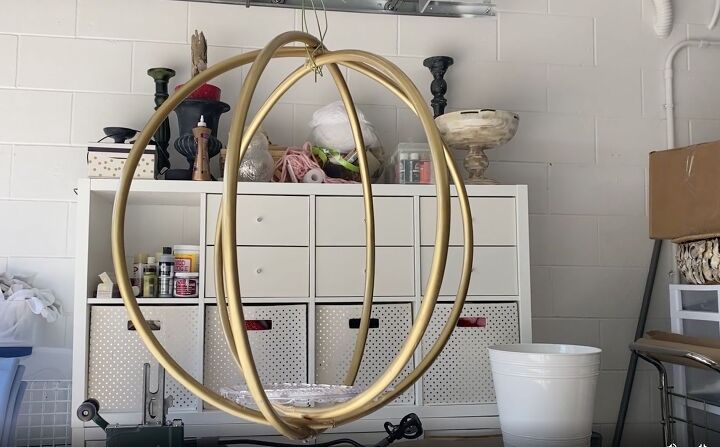
3. Assemble the chandelier
Once you have the holes drilled, it is time to assemble them. You can do this by placing one hoop inside of the other lining up the holes that you drilled.
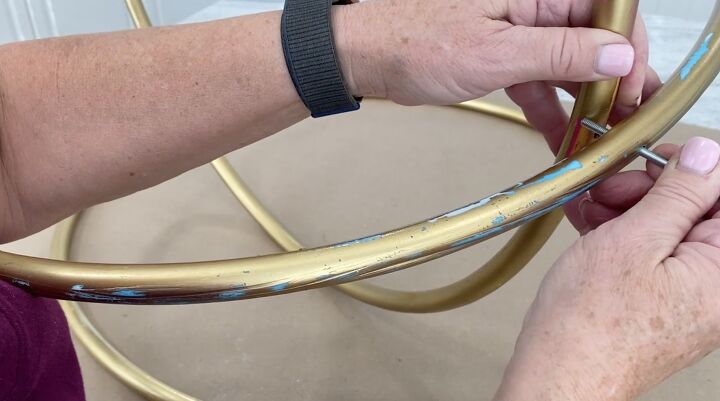
Push a long screw through the holes to hold them in place.
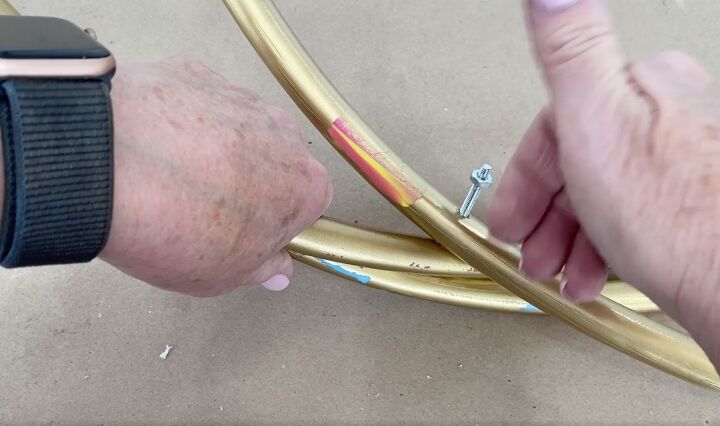
Then add a nut to the end.
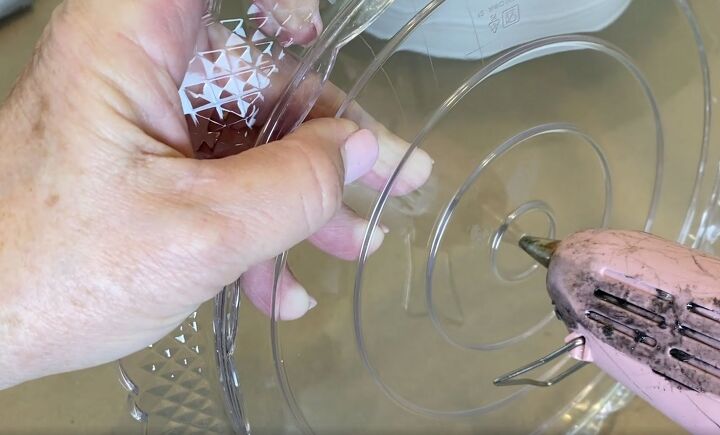
Next will be to add a cake plate to the middle. If you are using a plastic plate as I did, you can use your hot glue gun to make a hole in the middle. If not, you will have to use a drill.
With a hole in the plate, you want to put it right over the top of the screw that is through the hula hoops.
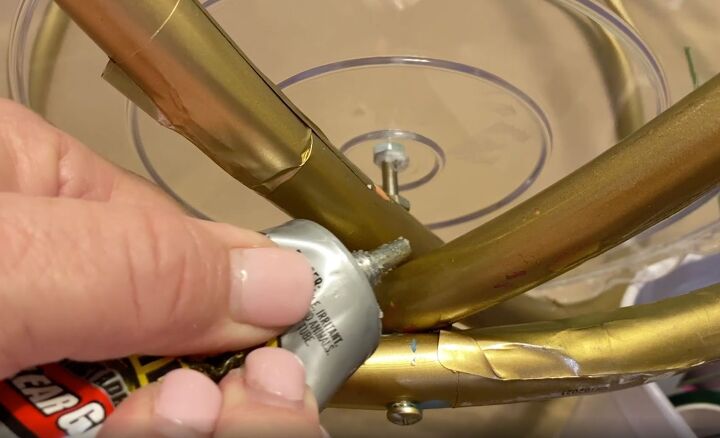
Now that it’s in place, take some gorilla, clear grip contact adhesive, and add some to everywhere the hula hoops cross each other or the plate. The adhesive will hold everything securely in place.
4. Decorate
With the base of my DIY hula hoop chandelier formed, it is time to add some flowers and lights. I found it easiest to hang it in my garage for this part.
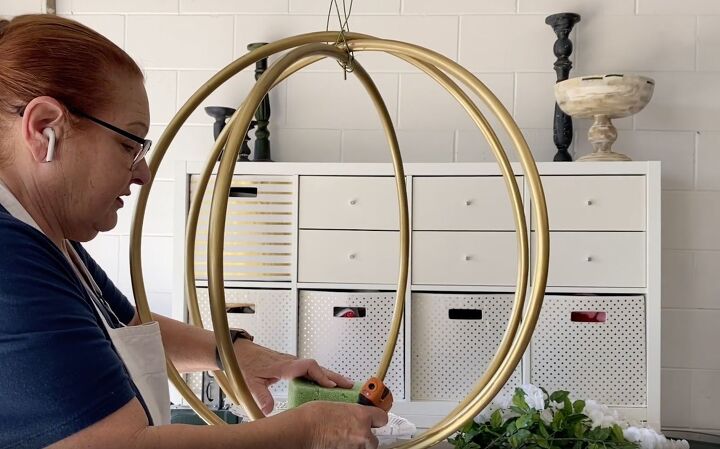
Using a hot glue gun, stick a chunk of styrofoam to the middle of the plate.
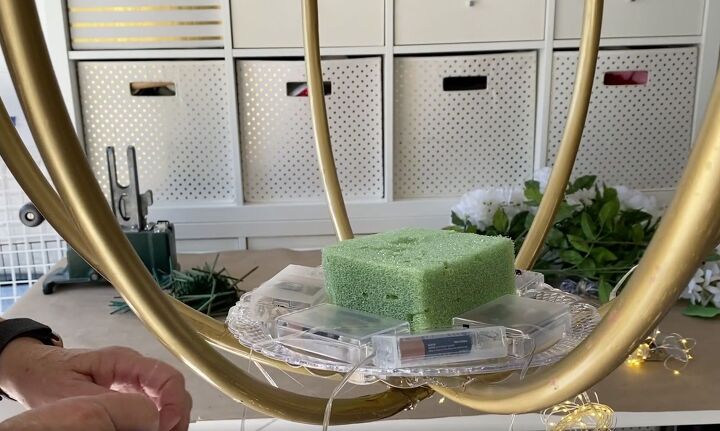
Next, add a six-pack of fairy lights. I found it easiest to lay them around the foam and hold them in place with clear tape.
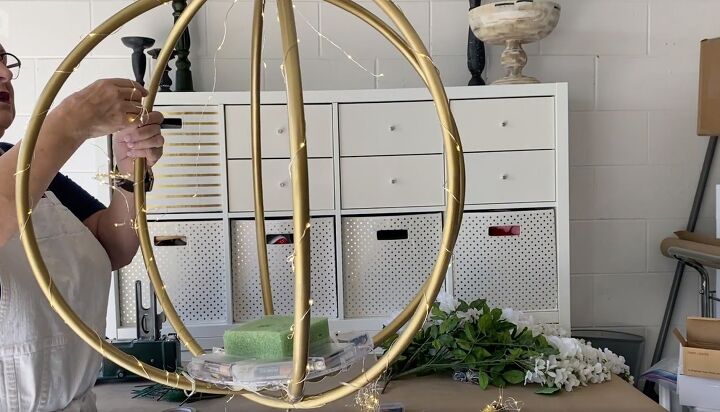
When they're all taped down, start taking them and wrapping them around the hula hoop up to the top. Make sure there are lights right at the bottom so that the entire hula hoop is covered.
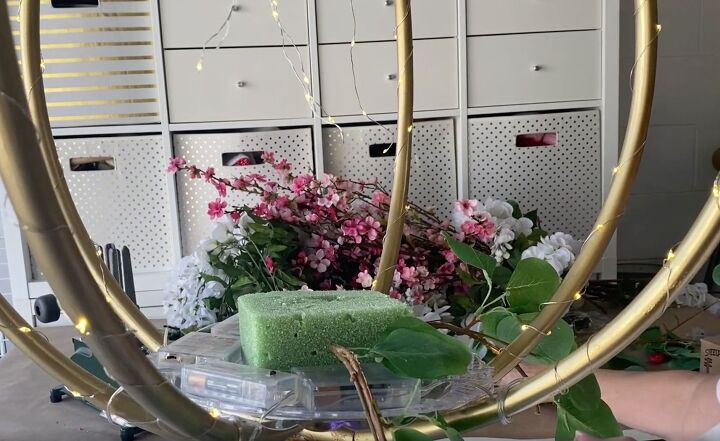
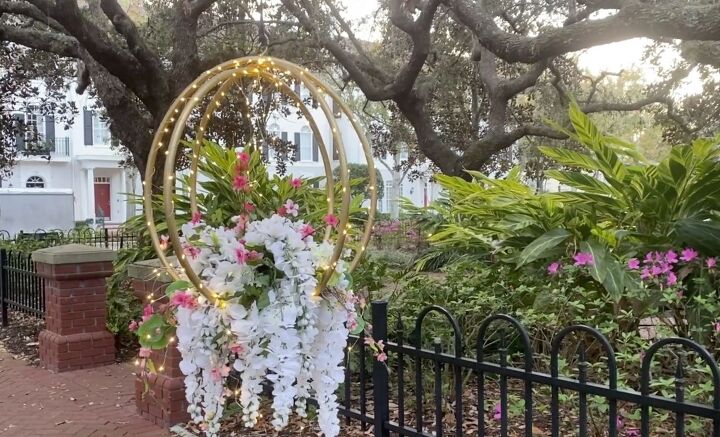
Once the lights are secured, it’s time to make a flower arrangement that kind of flows down.
If your stems are stiff enough, you will be able to take them and push them right into your Styrofoam and not have to glue them in place.
I started with some flat eucalyptus greenery and added that all the way around.

From there I added some Wisteria that hangs down and some soft pink flowers.
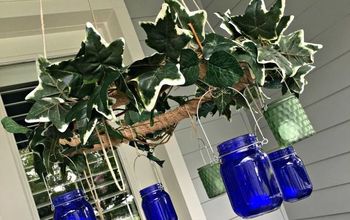
More DIY Outdoor Decor
Hula Hoop Chandelier Tutorial
Whether you're looking to create a cozy atmosphere for an outdoor gathering or simply want to add some decorative flair to your yard, this hula hoop chandelier is the perfect way to add a touch of charm and elegance to any outdoor space.
What do you think of the hula hoop chandelier?
You can see more of my projects here at Celebrate & Decorate!
Resources for this project:
See all materials


Comments
Join the conversation
-
Cute and that would be covered in spiders overnight
-
If I were going to make it I think I would drill the holes first and just make them a little bit bigger than needed for the screw and then I wouldn’t have to worry about chipping the paint.


Frequently asked questions
Have a question about this project?
Beautiful design
Are these battery fairy lights and if so since you taped them to the plate how do you get to them to turn them on and off with all the flowers on top of them???
What an attractive decoration!