


Pressure Treated Outdoor Bench

by
Zac Builds
4 Materials
$100
6 Hours
Medium
I have an on going project to revamp my outdoor deck space. Because I want my deck to be a space where I can entertain people in the warmer months I figured I'm going to need a lot of seating. What's the best way to seat a bunch of people? That's right, a bench! Love em or hate them, they are the corner stone of utilitarian outdoor seating and they are indestructible so we're stuck with them forever.
I'm planning on making this whole outdoor deck space using pressure treated wood so my shopping list for this project was pretty short. I'm using pressure treated wood because it's cheap and extremely durable, which is important for an outdoor bench that is going to be subject to many Canadian winters throughout its life. I didn't want to make something I would have to cover every winter or that would look shoddy after 1 winter outside.
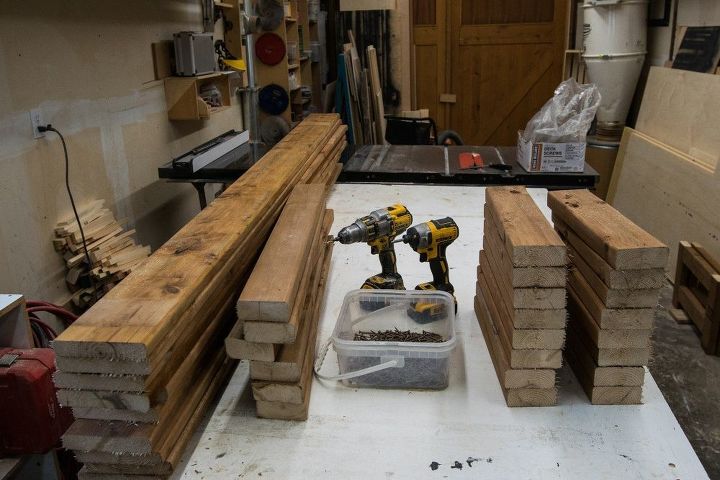
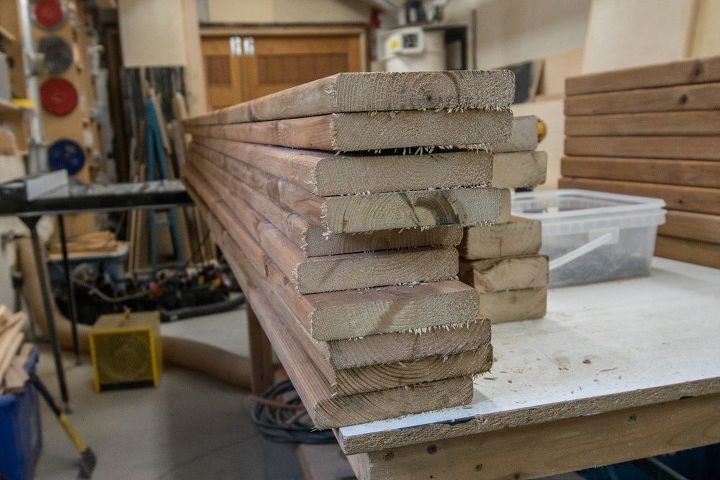
So here's all the supplies I used to make this bench. I only used 2 materials (4 if you include different types of screws). Brown pressure treated 2x4x8's and 5/4x6x8's.
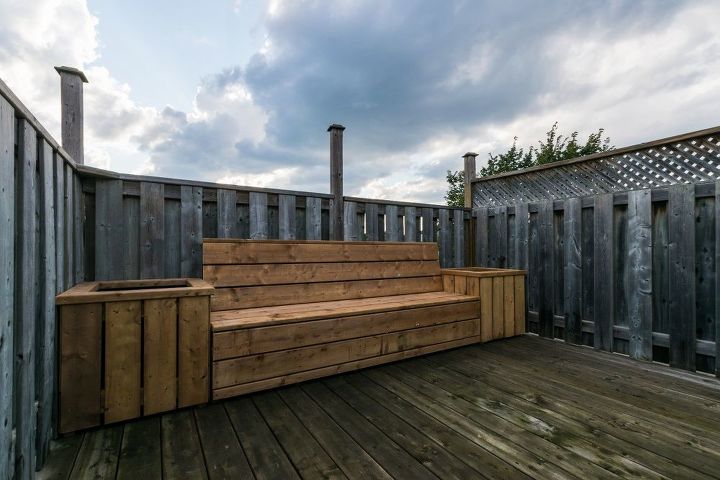
I wanted my bench to be 82 1/2 inches wide total so it would fit between two planters I built previously. Really this bench could be made as long as you want, I'll add tips along the way so you can adjust your length as necessary.
I started by cutting the 5/4 x 6 boards to 82.5, the same as the total length of my bench. These boards define the overall total length. If you want your bench to be shorter or longer cut these boards accordingly.
In the past some people have expressed concerns to me about safety of pressure treated wood. These fears mostly stem from the use of chemicals like arsenic that used to be used to pressure treat wood decades ago.
Modern pressure treated wood is very safe. I haven't been able to find any credible health risks associated with in any of my research.
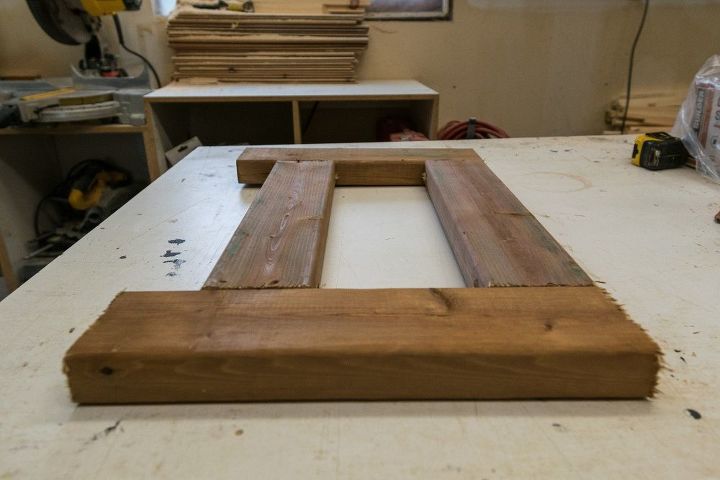
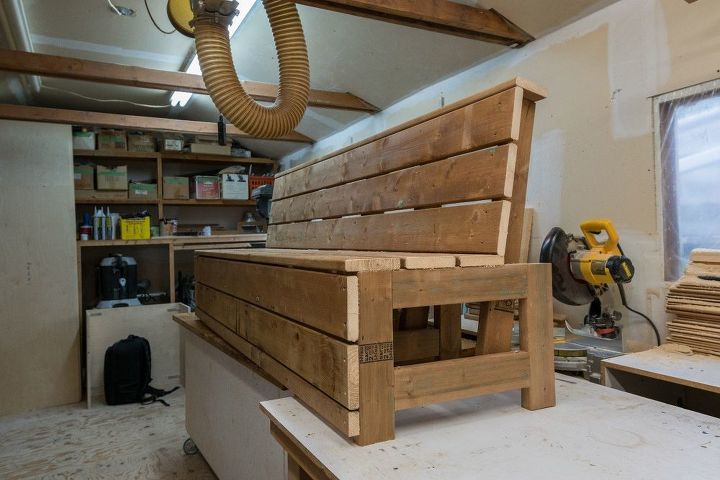
The structure of the bench is made up out of bunch of these frames. I built 6 total. One for every 16 inches of total length. If you wanted to make the bench longer, you'd need to add more of these as you go.
Each frame is 15 inches high, this measurement plus 1 inch effectively becomes you seat height, so adjust it as you see fit, I find 16 to be pretty comfortable. Each frame is 23 inches wide, the horizontal 2x4s are 15 inches each.
I screwed them together using the pocket screw technique and some 3" screws.
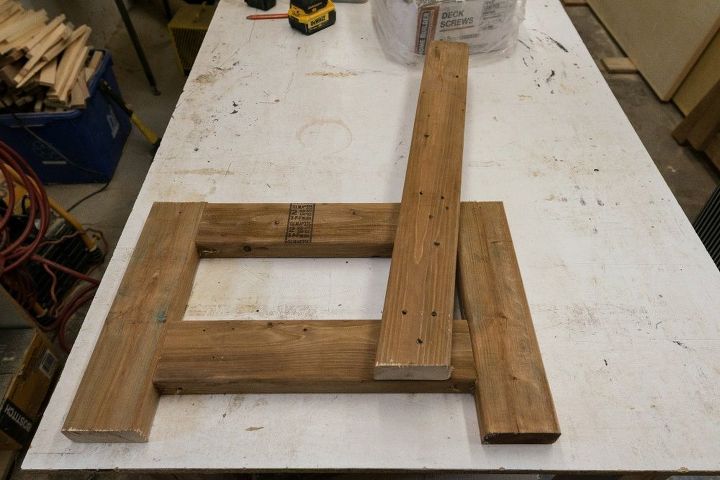
Next I attached a 31 1/2" long 2x4 to each frame. These 2x4's will serve as support for the back rest. I spent some time here trying out various angles. I prototyped a few different angles and got my girlfriend to pick the one she found the most comfortable. I immediately ignored her choice and just did the one I liked the best.
Because the bench is going to be sitting directly against a wall, I made sure that the outside edge of the frame lined up with the outside edge of the back support at it's highest point.
To attach these back rest supports I simply screwed them down into the frames with 3" deck screws as you can see in this photo.
Like I said before
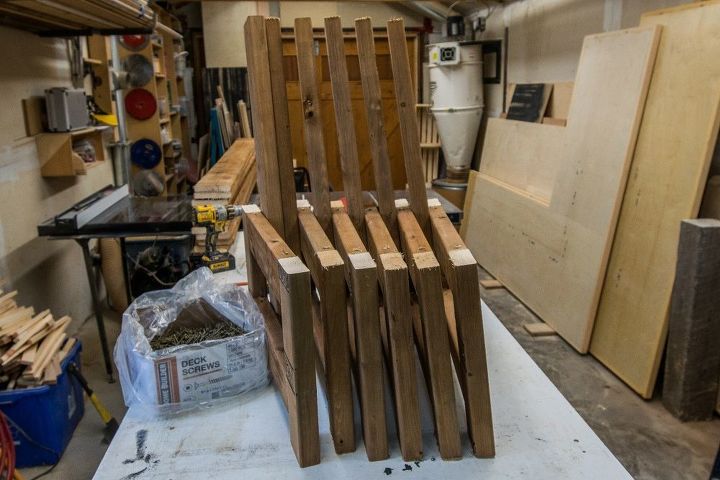
Like I said I needed to make 6 total. Here they all are.
This is a good chance to do some quality control, so I lined them all up to make sure they were the same height, width and angle.
Everything looks good so we can move on!
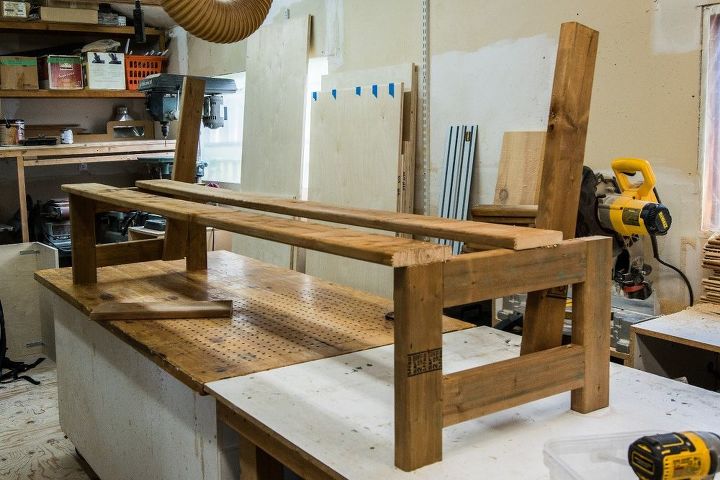
I stood up 2 frames and attached the two 82 1/2" long 5/4 x 6 boards I cut earlier like you can see in this photo. I really took my time here making sure everything was square and straight.
I attached the 5/4 boards to the frames using 2" deck screws.
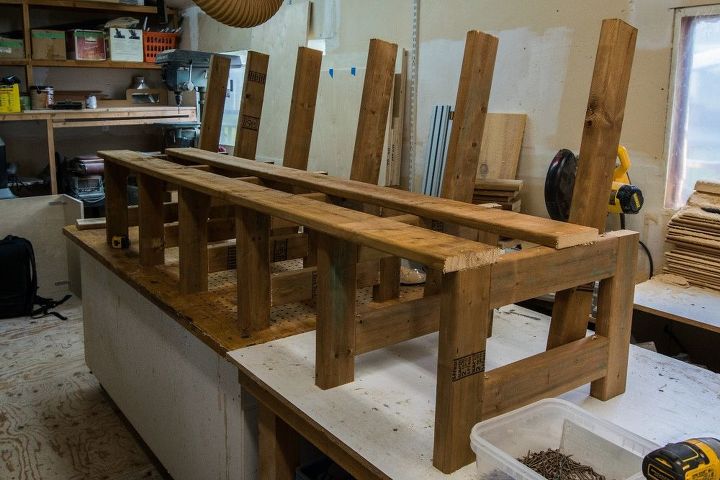
Time for the next 4 frames to join the party! Now you can see how this thing is going to come together, right?
Again I attached each frame with 2" decks screws. I spaced each frame approximately 16" apart because 82 1/2 " doesn't divide nicely by 16 :(
I screwed more 5/4 boards to frames. Notice I used 2 screws per frame per board. I try to keep my screws about 1 inch away from the edge of the board when screwing them to the frame. This helps keep the boards from cupping and keeps everything straight. At this point I tried lifting the bench a few times and realized I was going to have a lot of fun getting it onto my third floor deck.
If you're going to follow along at home make sure you use nice straight 5/4 x 6's. If you don't, your bench will have the same curve or bow as your 5/4 boards.
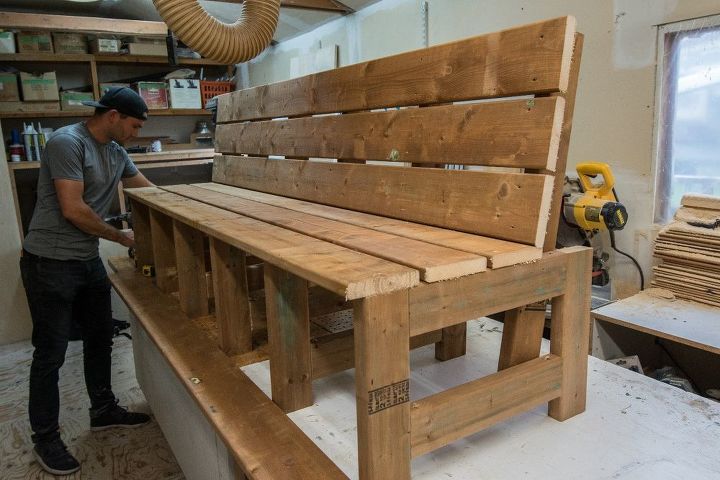
Almost done! Next I had to rip a couple of boards on the table saw to finish off the bottom of the front face and cap the top of the bench.
After I attached those 2 boards I gave the whole thing a quick sand with a sanding block to knock off any loose splinters or sharp edges.
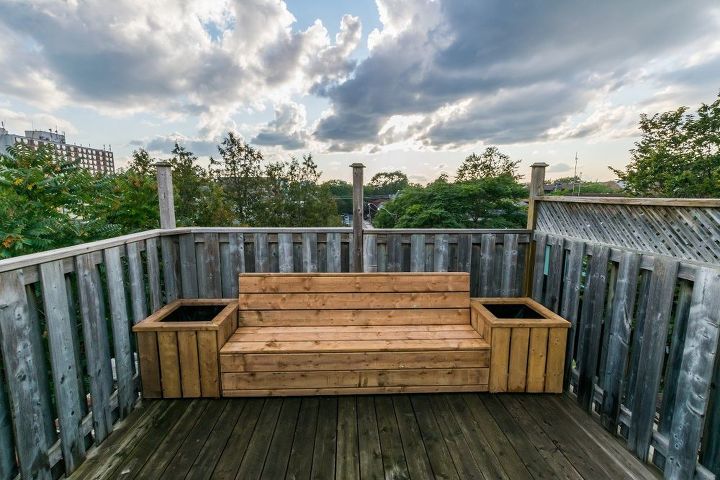
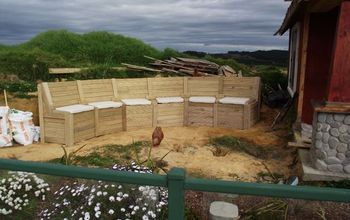
Here it is in place between the two planter boxes I mentioned earlier. Check my profile here on Hometalk or on my blog for a guide on how to make those!
Not pictured here are the two 60' long ropes that I used to haul this beast of a bench up onto my deck with the help of a friend. Should've grabbed a shot of us doing it, but I was too concentrated on not falling off the deck!
Now I'm really starting to get excited about outdoor space transformation. I've had this deck for years but I honestly never really used it because I didn't have proper furniture out there. My next project is to make more benches and eventually a large table.
If you'd like a more in depth guide on how to build this bench it's available on my blog below. Feel free to ask any questions or leave comments below.
Resources for this project:
See all materials


Any price and availability information displayed on [relevant Amazon Site(s), as applicable] at the time of purchase will apply to the purchase of this product.
Hometalk may collect a small share of sales from the links on this page.More info
Want more details about this and other DIY projects? Check out my blog post!
Comments
Join the conversation
2 of 7 comments
-
Love it. Getting ready to do something in our back yard and I thin this will fit the bill. Thank you for posting.
-
No problem Delphaine! Glad you enjoyed it and I hope it works nicely in your yard :)


Frequently asked questions
Have a question about this project?
````What was the degree you slanted the back ? GREAT JOB ! ! ````