Pottery Barn Mirror Hack

Hi!  I saw this Pottery Barn Mirror and fell in love, but the price was way out of my price range. So I decided to make one! :)
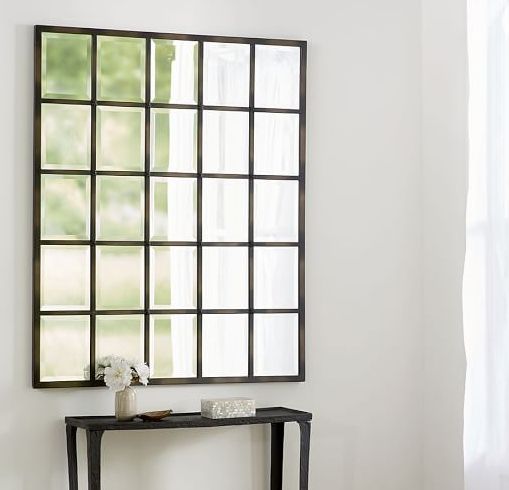
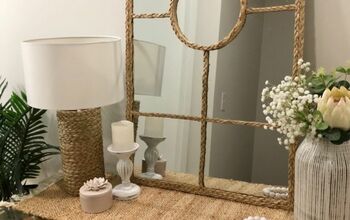
This is the original P.B. mirror I saw and fell in love with. It just made me happy to look at!
So let me just set the stage for this. It's 5 days before Thanksgiving, we're in the middle of painting the Kitchen and the Den and we're having 20 people for Thanksgiving dinner and many of them are staying over for the long Thanksgiving weekend. So we decide in all our infinite wisdom and lunacy to build a mirror! LOL, and this was right before I decided we needed a lighted cabinet too! Okay, so we might be a little nutty and suffer from A.D.D. but hey! you only live once right?
Now lets get back to this mirror. Math and I go together like rice and peanut butter, I know basic math, never used any other kind in all my life, so what I did was get my husband to do it for me! :D Smart right? Well, lets just say that that didn't work out as well as we thought. Nothing was true to size, the mirror although listed as 8" was really like 7 3/4", the molding wasn't truly 1/4" either. So I'm going to save you tons of time and tell you to cut your molding as you lay the mirrors in to see just how big the plywood will have to be when all the mirrors and moldings are placed. Mark them where they are and then you'll have no problem when it comes time to glue everything in place.
Here is all the molding cut and glued to the plywood and the mirror layed in (but not glued) so that everything stays where it belongs while it dries. We used liquid nails and it dried quickly. We waited about 3 hours before removing the mirrors to spray paint.
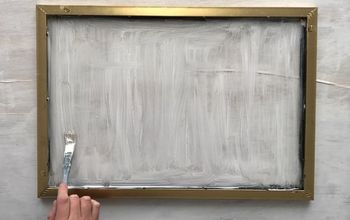
I wish I had better pictures but I get so involved with what I'm doing I almost always forget. Anyway, here you can get an idea of how it looked when sprayed. You'll notice it doesn't have to look neat, just make sure it's totally covered. While I waited for this to dry, I also sprayed the plastic star rosettes so that they would be ready to apply at the end. We let this all dry for 24 hours.
Once the whole thing was completely dry, I started applying the mirrors. The mirrors came with little pads on each corner, so if you decide to try this, make sure you remove these so the mirror sits flat. You can see I used Fuze*it Liquid nail for All Surfaces.
Once all the mirrors were glued down, I applied the plastic star rosettes with the liquid nail at the center of each molding where they meet at the corners, and left it sitting on my dining room table for the rest of the day as I went off to make pies and other make before Thanksgiving day dishes! It's now been a day and a half, the guests are coming in less than 24 hours and I was just laughing and cooking and thinking to myself that I was crazy! Don't be crazy, pick a nice couple of days where you have nothing better to do if you try this! 
And here is the finished product hung up on the wall right above my little lighted cabinet. I'm in love with it, and although doing what I did was a bit looney toons, I'd do it all over again.
The best part of this, is that you can make the mirror any size you want, long and narrow, a smaller or larger square whatever you feel like doing. Hope you enjoyed this post with all it's nuttiness! Please let me know what you think, I'd love to here from you!
I'm back! People are asking about the price I said it cost me to make this, so I thought I'd clear a few things up. First thing you need to know about me is that I will search the world over to find the best quality at the lowest and best price I can! I'm not cheap, okay, maybe a little but sometimes I can't see myself paying what they're asking.
Now that you know that, here is a breakdown of what I spent, what I had on hand and I'll try to post the links here since I messed up the other ones and can't correct them! 
I didn't get the mirrors from the link on this post, I thought I did, but went to look for the receipt and I got them at a place called QuickDecor.com and they were having a sale, perhaps because it was a Thanksgiving sale. I paid $35 including shipping. I had the plywood, and the trim I got from Home depot in there "damaged" box. I was going to cut it up to fit to size anyway so it wasn't a problem. I paid about $15. The liquid nails cost $6.98 and the rosettes cost $8.79 and the spray paint cost $5.88 x 2 which brings the total to $77.53, If I needed to buy the plywood 4x8ft at Lowe's it would have cost $17, which brings the total to $95. Oops, I was off by $5. When doing a project I always use whats on hand and search for the cheapest (in price not quality) priced items I need. I can't seem to pay full price because it's always, in my opinion over priced. Hope this clears up the cost!
Liquid Nail - Fuze it
https://www.lowes.com/pd/LIQUID-NAILS-FUZE-IT-Hybrid-All-Surface-Gray-Interior-Exterior-Multi-purpose-Construction-Adhesive-Actual-Net-Contents-9-fl-oz/1000183961?cm_mmc=SCE_PLA-_-Paint-_-ConstructionAdhesives-_-1000183961:LIQUID_NAILS&CAWELAID=&kpid=1000183961&CAGPSPN=pla&store_code=1886&k_clickID=007a2fb6-e7c8-465e-aa0d-992b51d47fea&gclid=Cj0KCQjwqM3VBRCwARIsAKcekb34jk9k12NoXUP9sN5znaLM7Q8MQwVqm5V9gZsg7zAw8KyVE3yvfa4aAmGAEALw_wcB
Rosettes - I'm giving you a link to clear but cheaper then the ones I bought as they've gone up in price.
https://www.amazon.com/Clear-Plastic-Rosette-CR-Laurence/dp/B006JCRT3Y
1/4" plywood
https://www.lowes.com/pd/UltraplyXL-Premium-Underlayment-1-4-in-Whitewood-Plywood-Application-as-4-x-8/1000069369
Mirrors 8" square and they were having a sale, so I got 40 for $35 including shipping. They're not on sale now so you'll have to look around for something cheaper. Sorry!
https://www.quickdecor.com/eastland-square-table-mirror-8-set-of-20.html
Hope this clears things up for everyone!
Enjoyed the project?
Resources for this project:
See all materialsComments
Join the conversation
-
 Gig69451122
on Aug 31, 2023
Such a creative idea! Turned out beautifully. Are you planning on staining the cabinet , to match the table & mirror? It will certainly anchor that beautiful mirror! Just my professional observation.
-
-










Frequently asked questions
Have a question about this project?
Where are rosettes?
what are the dimensions of the piece of plywood?
How heavy is the one you made?