


Primitive Little Keepsake Box

5 Materials
$3
60 Minutes
Medium
I made a primitive little keepsake box. It's made from pine. I really distressed the wood here. It's acute little curious looking thing. Let me show you how I made it. Oh this box was made for a woodworking challenge I was involved in. Check out the video to see the process, I think you'll find it interesting.
{
"id": "4588418",
"alt": "Keepsake Box",
"title": "Keepsake Box",
"video_link": "https://www.youtube.com/embed/78vRvdvDQSA",
"youtube_video_id": "78vRvdvDQSA"
}
{
"width": 634,
"height": 357,
"showRelated": true
}
Check out the video and read on for how I created this little fun to look at box...
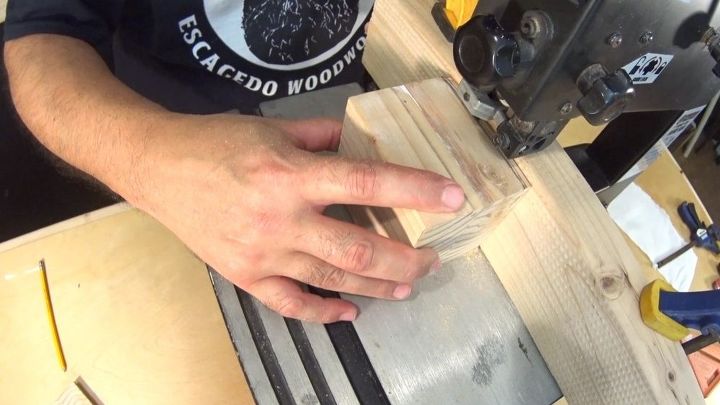
cutting out the back of the box
I took 2 2x4 pieces and glued them together. Originally this was a candle holder with a snowman painted on it. I sanded all that down so I could reclaim it and use it for this project. Here I am re-sawing a thin slice off the back of the block of wood. This piece I'm cutting off will become the back of the box. You're going to like this, it's a real cool way to make a box.

back of box and block of wood
Here is the piece that will be used for the back of the box and the block of wood. Now we can move on to the next part....
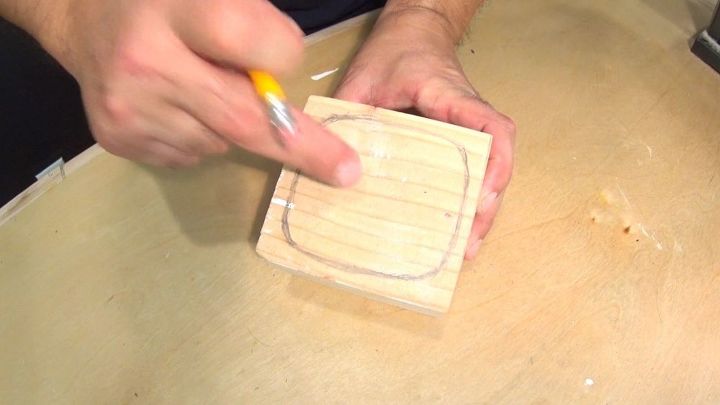
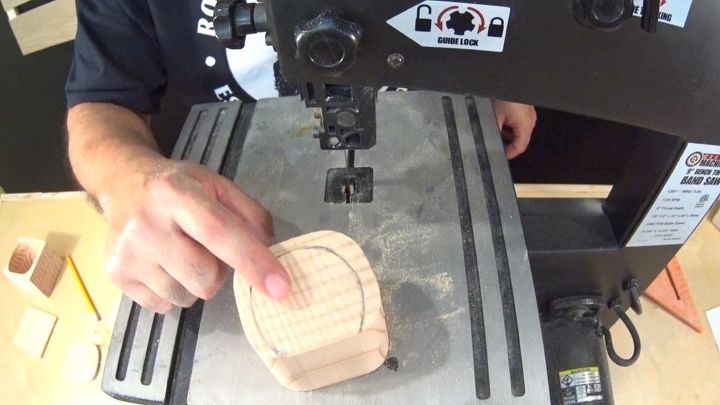
drawing the drawer
I traced out a shape for the drawer. This box is being made from one block of wood. The name for this style is called a Bandsaw Box. Now we will cut out the drawer, let me show you....
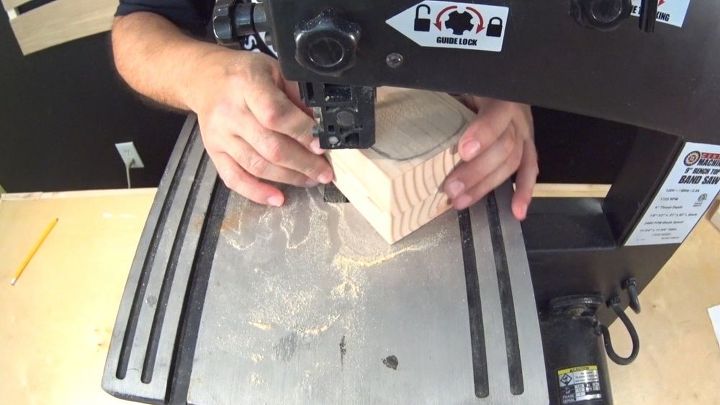
cutting out the drawer
I cut into the block of wood and followed the line I drew to cut out the drawer of the box. Check out the next photo...
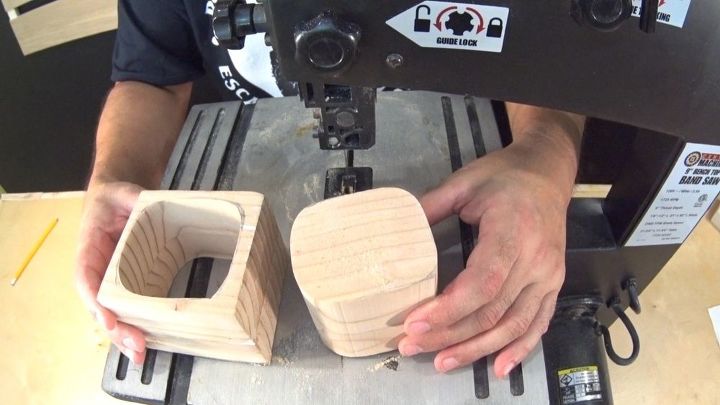
drawer
After following the line and cutting out the drawer, it slides right out of the block of wood. Let continue...

front and back of the drawer
The drawer I cut out? Well now I'll cut a slice off of the front and back. These will become the front and back of the drawer. At the end all these pieces will be glued back up together to for the finished project. Let's keep going...
cut out with the bandsaw
I drew this bowl shape. Now I'll cut out the inside and that will become waste material. All I need is that outer piece of wood. The two slices I cut in the step prior will become the walls of the drawer...you'll see what I mean, check out the next picture.
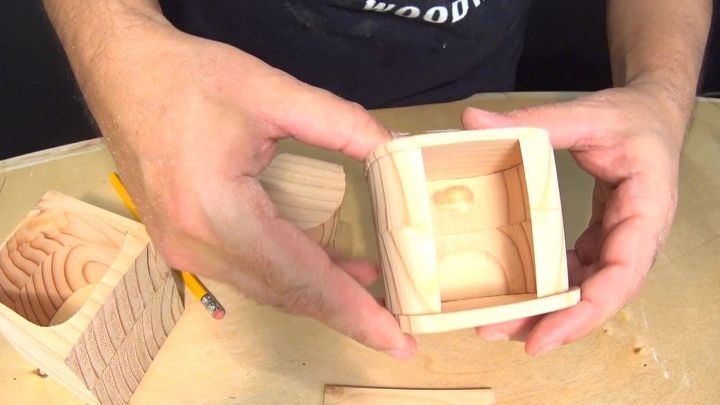
ready for glue up
Here is the drawer cut out. I have the front and back slices plus the bowl shape too. We will go ahead and glue all the parts up...
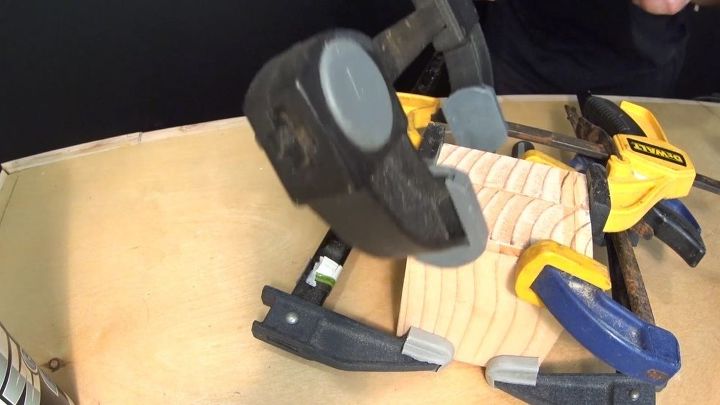
glued and clamped
So everything is glued and clamped. We will wait about a hour for it all to dry. Let's see the next step...
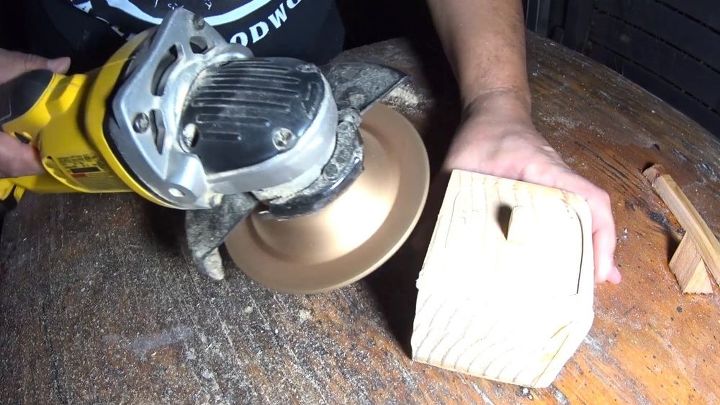
distressing wood
I took a grinder with a rasp wheel and distressed the outside of the box.
Now let's torch the wood to give it a primitive used look. Let check that out...
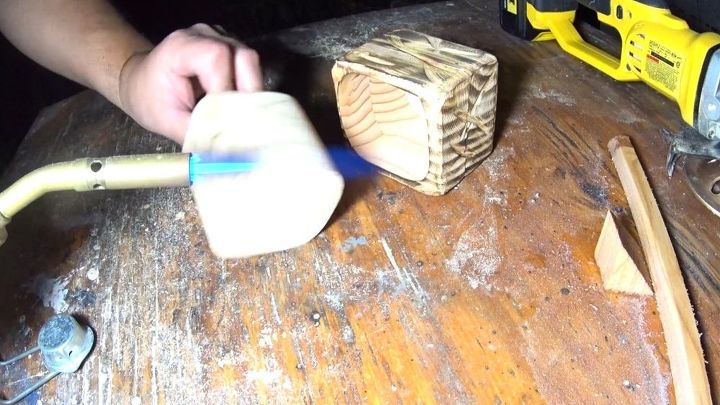
torching wood
You can see the wood takes on a rustic raw look as it's torched. I finished the box and I'm torching the drawer. Let's give it a coat of clear next....
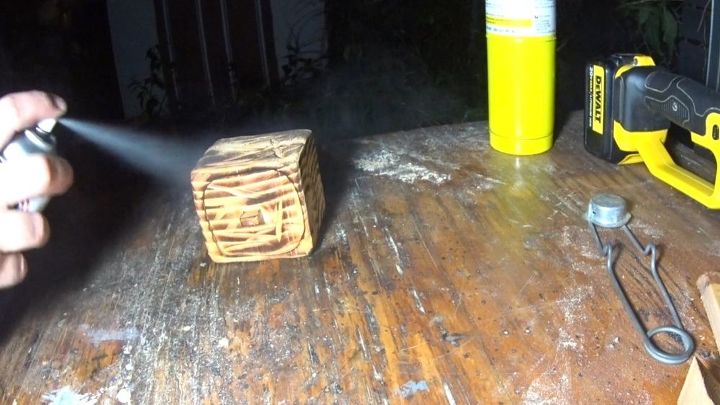
spray shellac
Now I'm adding a little bit of spray shellac to seal the piece. Once the clear is dry, our box is done. Check out the finished piece...
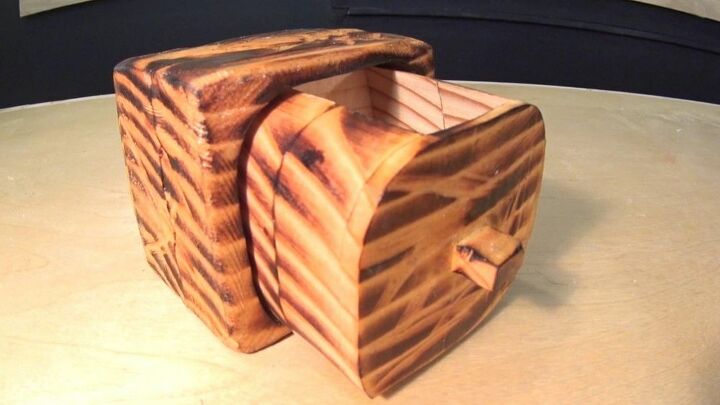
finished box
I hope you enjoyed reading and watching how I made this piece. Check out the links I provide for more builds and I'll catch you next time...
Resources for this project:
See all materials


Any price and availability information displayed on [relevant Amazon Site(s), as applicable] at the time of purchase will apply to the purchase of this product.
Hometalk may collect a small share of sales from the links on this page.More info
Comments
Join the conversation
2 comments
-
Cool! Back in the '90s I found a hunk of a tree that had been made into a 2-drawer unit similar to yours. As I recall, the bark was gone, but the wood hadn't been planed. Simply sanded and polished. I bought it as a gift for my husband, who wasn't as impressed as I was, and never did use it. We got rid of it somewhere along the line, but turns out I'm still as impressed as I was back then.


Frequently asked questions
Have a question about this project?