


D.I.Y. Tufted Bench

by
Adriana Boza
13 Materials
$60
2 Hours
Easy
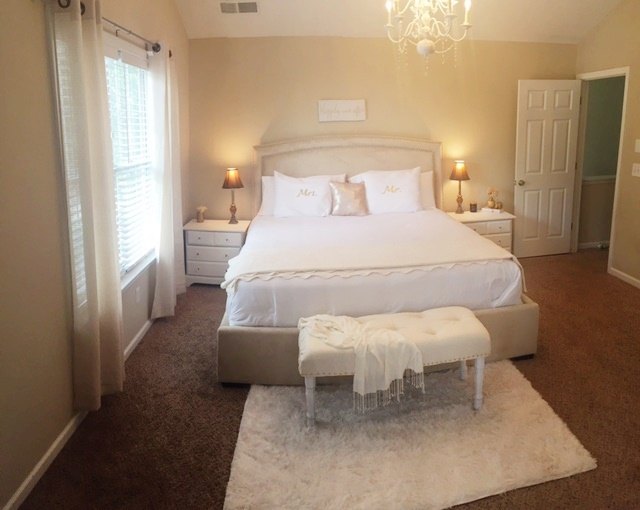
I've been looking for a tufted bench for my master bedroom for a long time, but couldn't find the one i needed , it was either the wrong shade of color or too expensive. so as always i decided to make it myself.
I was really surprised because it was super easy to accomplish and met my expectations, but most important of all, it was on my budget.
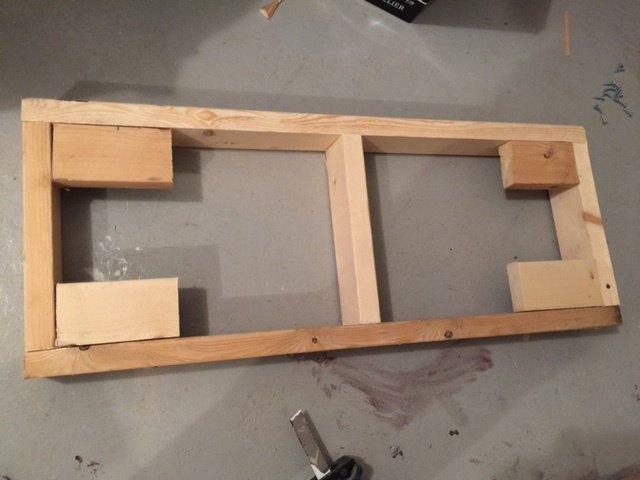
After you have your frame ready is time to attach the plywood sheet to the top
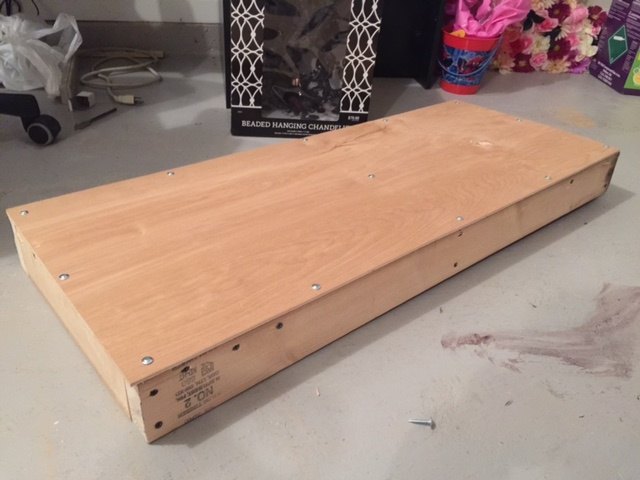
When you are ready you should have something like this
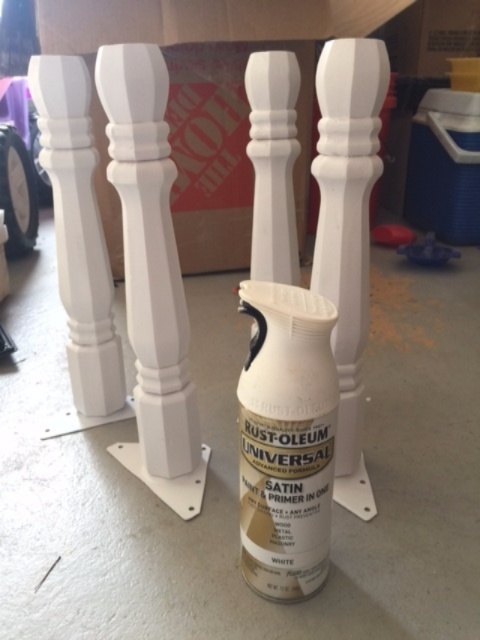
Next you could start painting the legs. you could get legs from an old chair or from anywhere. I chose the paint + primer in satin white. When they are dry you can un-screw the plates from the legs since you will need to attach the plates to the frame later.
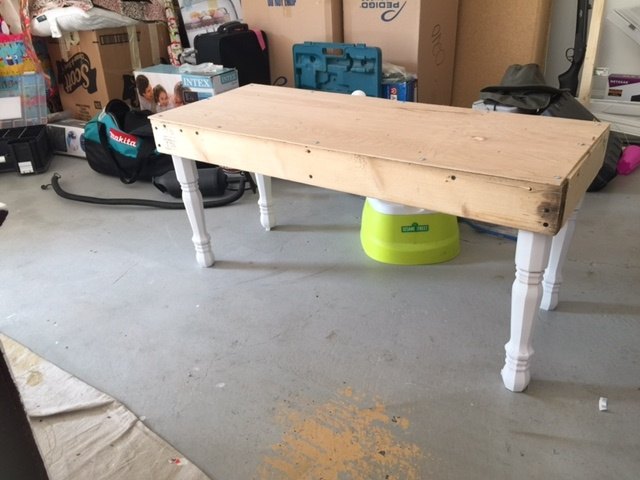
Next step is to attach the plates to the frame ( one in each corner) and then screw the legs into position. After you do this you will see your bench coming together and you'll be really happy!!! ( At least i was ) :)
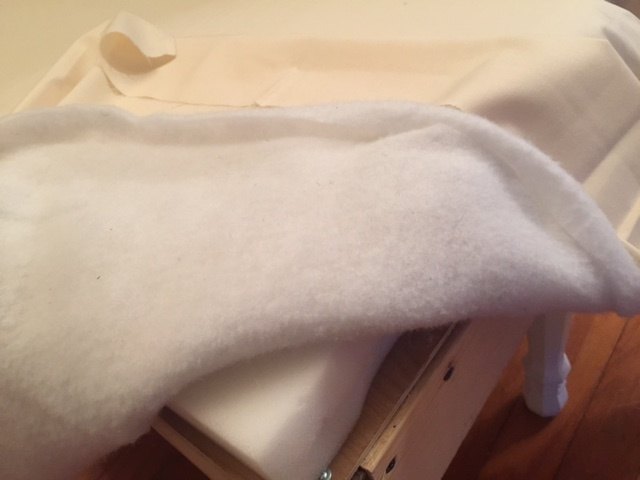
After this, what you want to do is to cut the foam to fit the top of the bench. After you put the foam in the top ,then comes the batting and then the fabric. (in that order). i bought two yards of fabric at walmart and it worked perfectly for the size of bench i was making. i bought the batting at Hobby Lobby and got 2 yards as well. I paid $6 for the fabric , and $5 for the batting with 40% off coupon.
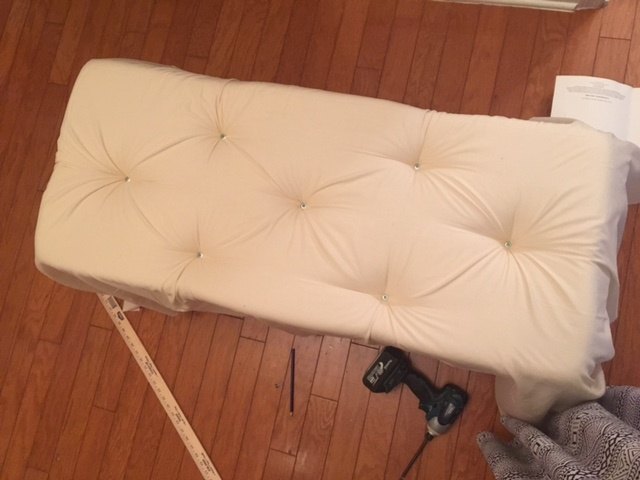
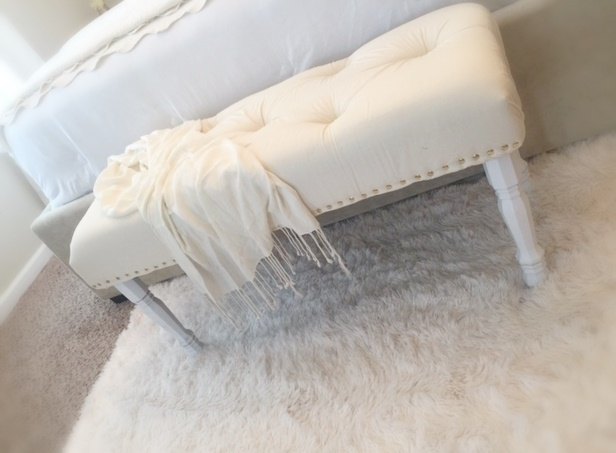
Up next is the TUFTING!!!  to be honest i was a bit scared about this step because i was afraid i was going to mess it up but boy! Did it work great! what you want to do is iron the fabric on top of the bench to be sure you dont have any lines or wrinkles, and the with a pencil ,mark where you will want to place your tufting points. After this is done you can proceed to drill your point with a small screw. Do this step without thinking to much , just go for it! start in the center and work your way out to the right and left side. When you are done you should have something like this: (D0 NOT staple the fabric to the frame prior to doing this step)
to be honest i was a bit scared about this step because i was afraid i was going to mess it up but boy! Did it work great! what you want to do is iron the fabric on top of the bench to be sure you dont have any lines or wrinkles, and the with a pencil ,mark where you will want to place your tufting points. After this is done you can proceed to drill your point with a small screw. Do this step without thinking to much , just go for it! start in the center and work your way out to the right and left side. When you are done you should have something like this: (D0 NOT staple the fabric to the frame prior to doing this step) 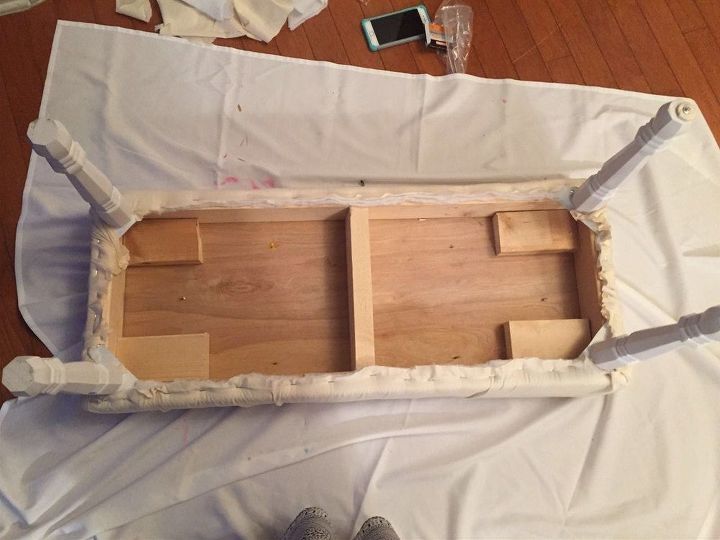
Next step is to turn the bench upside down and staple the fabric to the frame. you need to stretch the fabric and staple it . When you are done , you need to cut out the leftover fabric and you should have something like this:
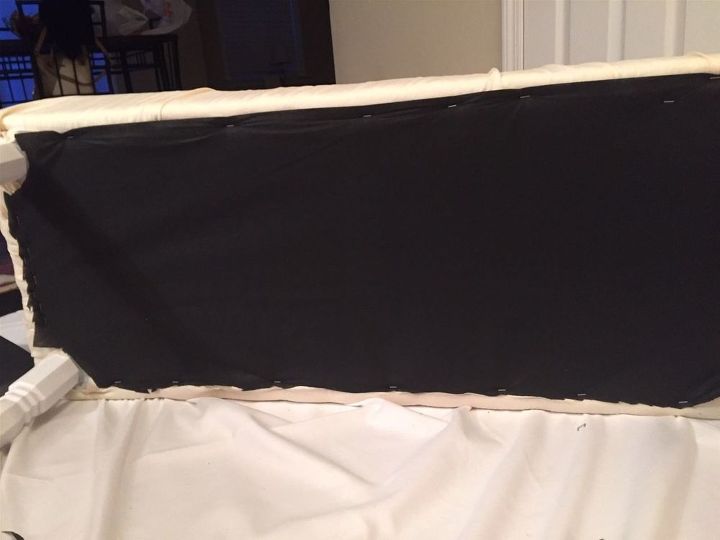
After thi step the only thing left is to attach the dust cloth )Hobby Lobby $2/y ) for a more proffesional finish, decorate the sides with the thumb tacks.(Home Depot $1.30) and cover your buttons with scrap fabric to cover the tufting screws.


Any price and availability information displayed on [relevant Amazon Site(s), as applicable] at the time of purchase will apply to the purchase of this product.
Hometalk may collect a small share of sales from the links on this page.More info
Comments
Join the conversation
2 of 18 comments
-
Wonderful job, it looks so great!
-
you did a great job on this


Frequently asked questions
Have a question about this project?
What type of buttons and how did you cover them
I also would like to know how did you cover the screws on top?