


DIY Accent Pallet Bathroom

We redid our bathroom maybe about 2 years ago when we moved into the house. Just mostly putting new floors and vanity. The space looked plain and I wanted to give it a little pop :]
We had most of our tools already and really only needed the nails for the nail gun. $8 and a couple hours of our weekend time was all it took!
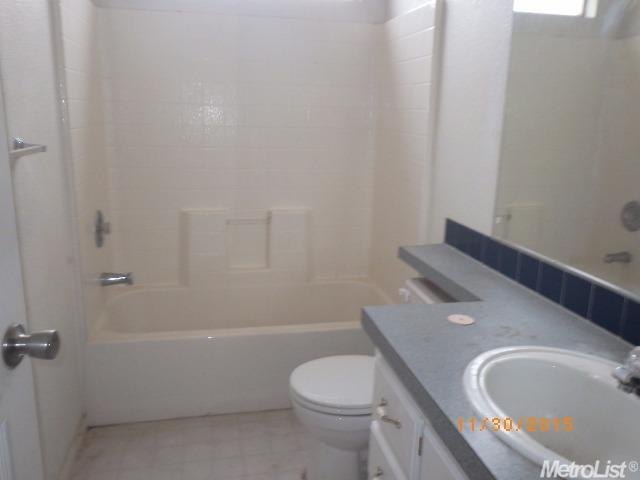
In my other post, I mentioned that this was the original bathroom that we did a quick remodel.
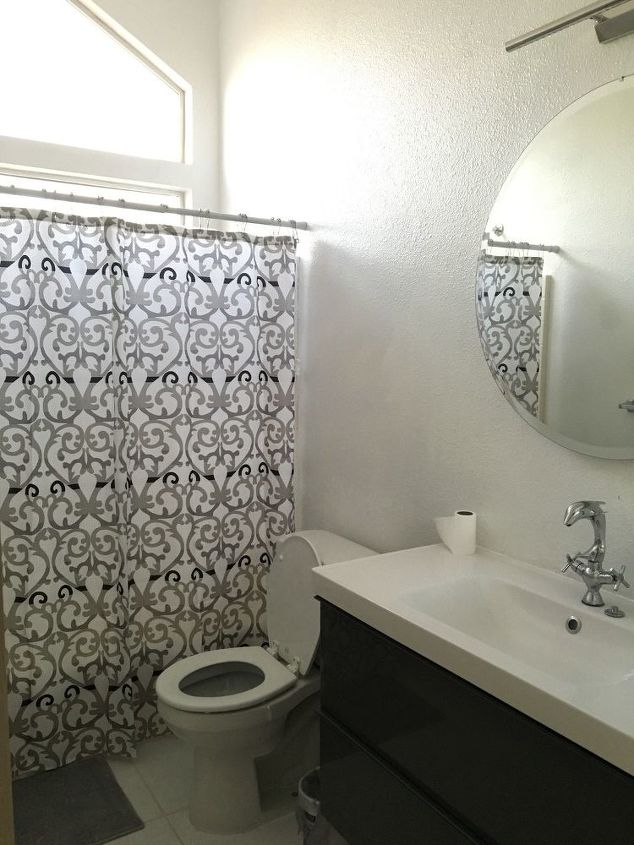
This is what it turned out to be when we redid it -- mostly redoing the floors and adding new vanity. The room was fine but it had a huge window and with the white walls all around it tends to get a bit bright in the middle of the day and there isn't much character so we set out to do an accent pallet wall :]
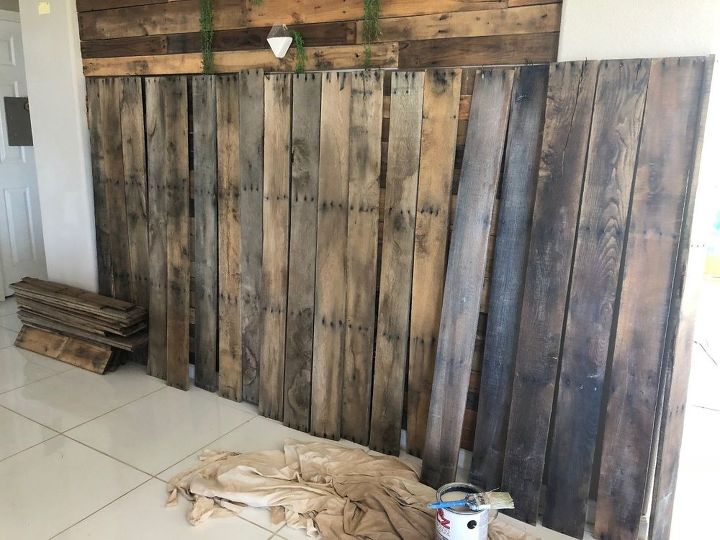
Pretty self explanatory -- get pallets, cut the pieces that you want to use for the accent wall. I used a couple coats of clear coat paint to seal the pallets.
We cut up the pallets months ago, and I clear coated them the week before the project (front, back and all sides). We used Kilz Klear Multi-Surface sealer.

Remove mirror and all lighting fixtures before you start the project.
Find the studs and mark them with a pencil so you will know where to nail gun the pallet pieces.
Here is a video of me nailing some boards -- we use a compressor and a nail gun attached to the compressor. Really neat thing xD
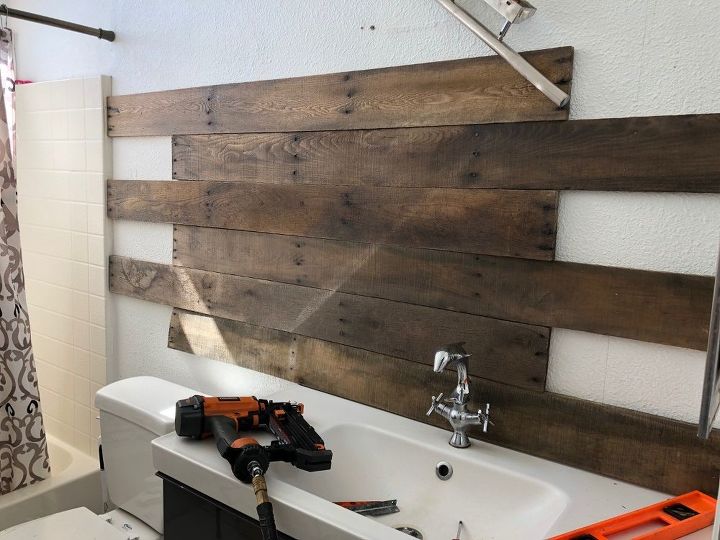
We started from the sink and made our way up. Use a leveler at every board to make sure that your board is still level as it goes up.
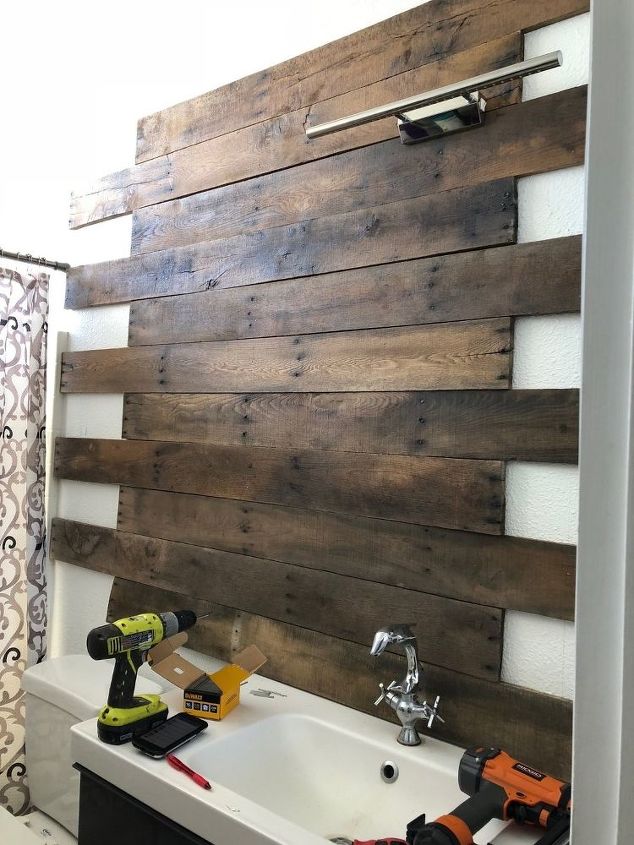
Slowly but surely just work your way up to the top. When we were high enough, we installed the light back on.
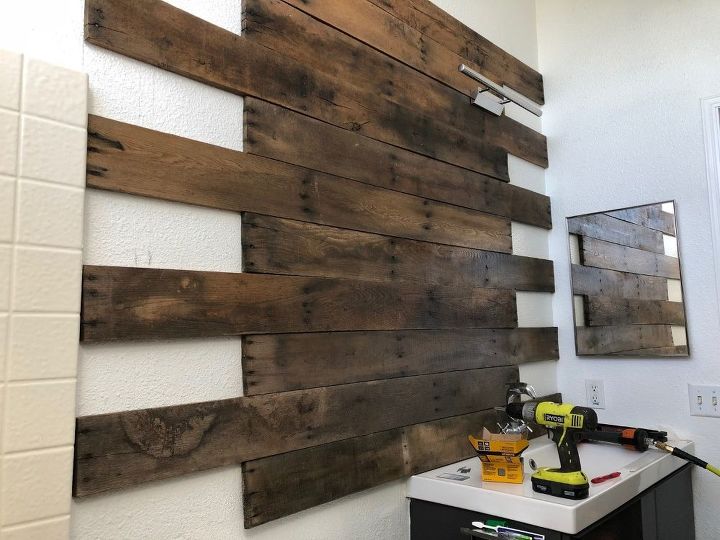
Really after all this, we worked and cut some of the pallets to put on the side, and then cut up more pallets to reach the bottom of the toilet.
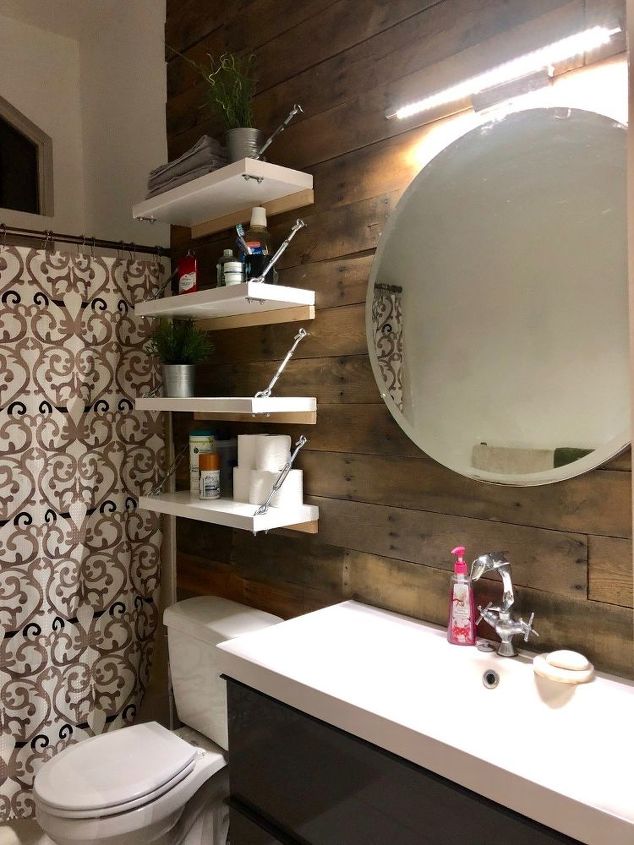
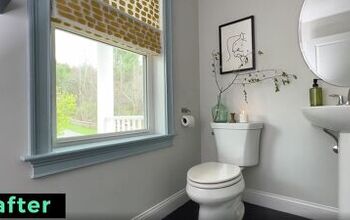
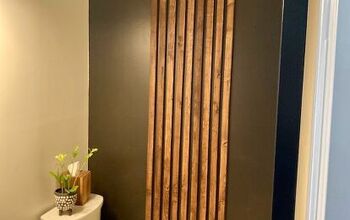
And this is the final result! Sorry pictures are a bit dark because we actually finished close to midnight.
I definitely like the accent walls and makes the room have that little rustic accent.
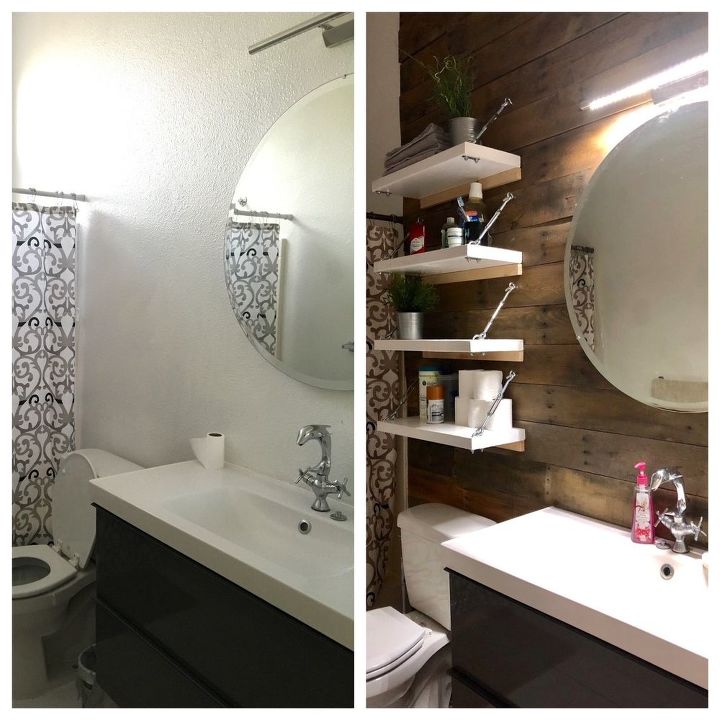
Here is the before and after of the project!
In another post I'll show how to build those shelves on top of the toilet ^_^
Thank you!
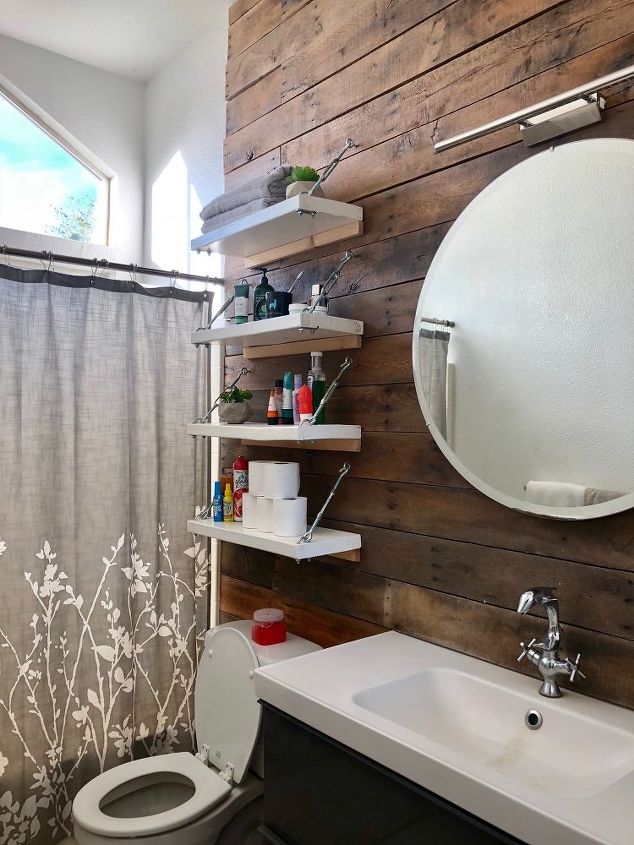
P.S- Finally managed to take a picture while its daytime :] and I decided to change the shower curtain too.
Resources for this project:
See all materials


Comments
Join the conversation
-
I really like your idea of using the u-bolts and turnbuckles for the shelves suspension. Very original.
-
NICE!


Frequently asked questions
Have a question about this project?
Wonder how those walls are going to look once this fad runs it's course?
This looks amazing, great work! Where did you get the dolphin faucet? It's really nice! Great job, thanks for sharing.
Great idea, love how it turned out!
Where is the first shower curtain from? I really love it!