


Hand Stamped Copper Garden Markers
6 Materials
$6
2 Hours
Easy
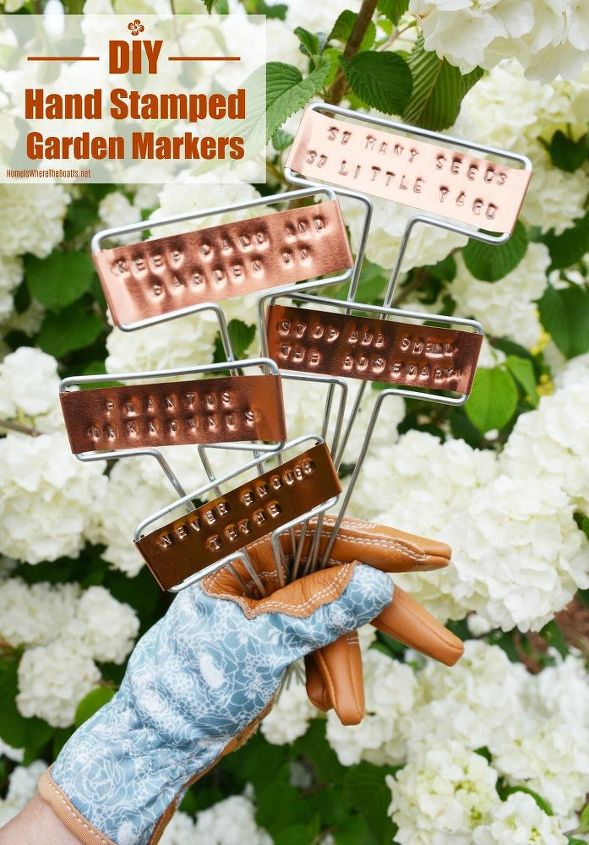
I ran across some copper garden stakes recently that I thought would come in handy for plant identification and to add a little garden whimsy as a fun DIY for spring gardening season!
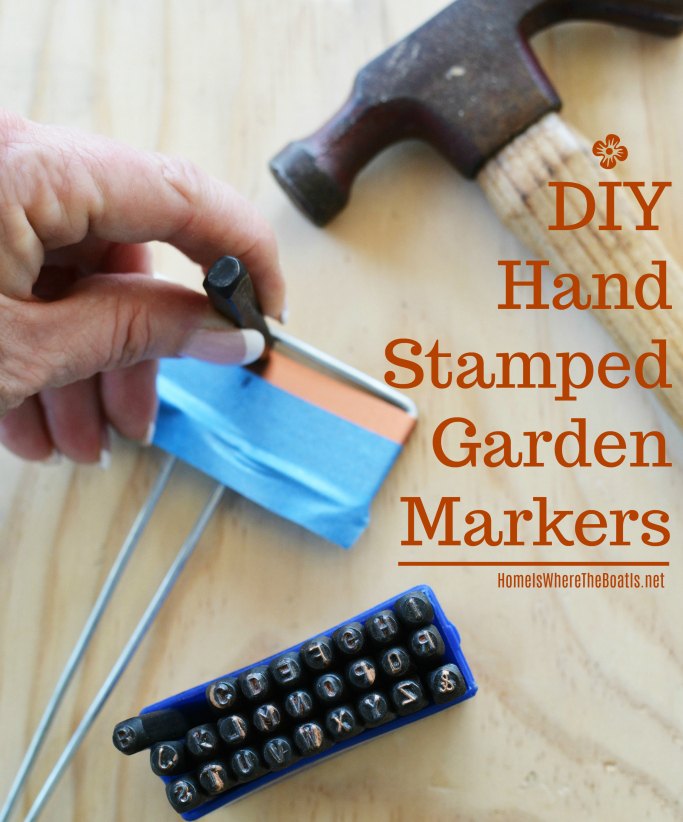
I purchased a metal letter punch set several years ago with the intention of making some stamped spoon markers. The stamped spoons turned out to be way harder than I imagined, requiring a lot of hand strength, not to mention ear protection! After many failed attempts and ruining several spoons I decided it was much easier to purchase the stamped spoons from Etsy. ;)
The copper banner on the garden markers is soft and only needs a few strikes with a small hammer to make a letter impression, unlike the surface of a metal spoon. There is a bit of a learning curve, but this a fun project that is addictive!

I found the copper garden stakes at the Dollar Spot at Target in sets of 6 for $3.00, but you can find them at garden centers and online. There are similar sets on Amazon for around 80 cents each.
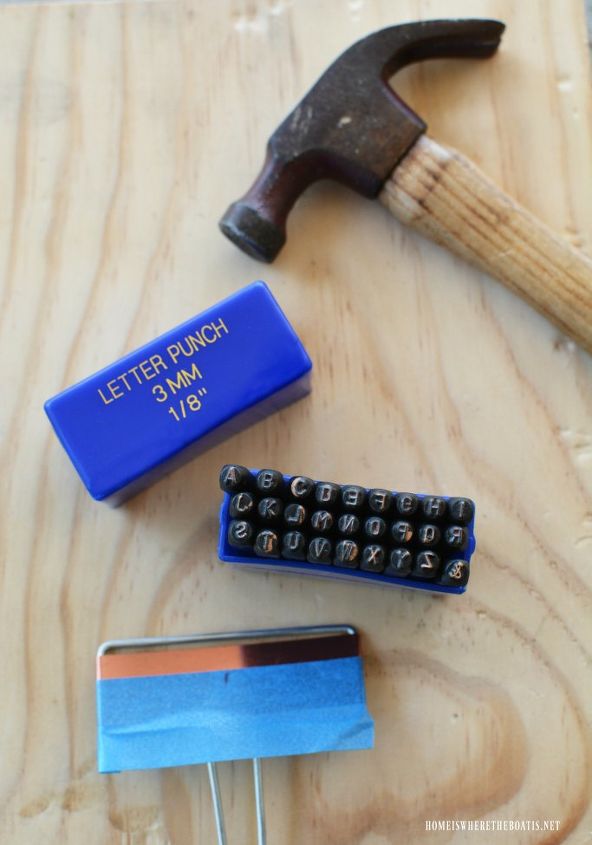
My metal stamp punch set is a 3 mm (1/8 inch) size and ideal for stamping the copper garden markers. You can find 3 mm letter punch sets on Amazon. A basic 3 mm metal stamp set like mine is available for around $12.
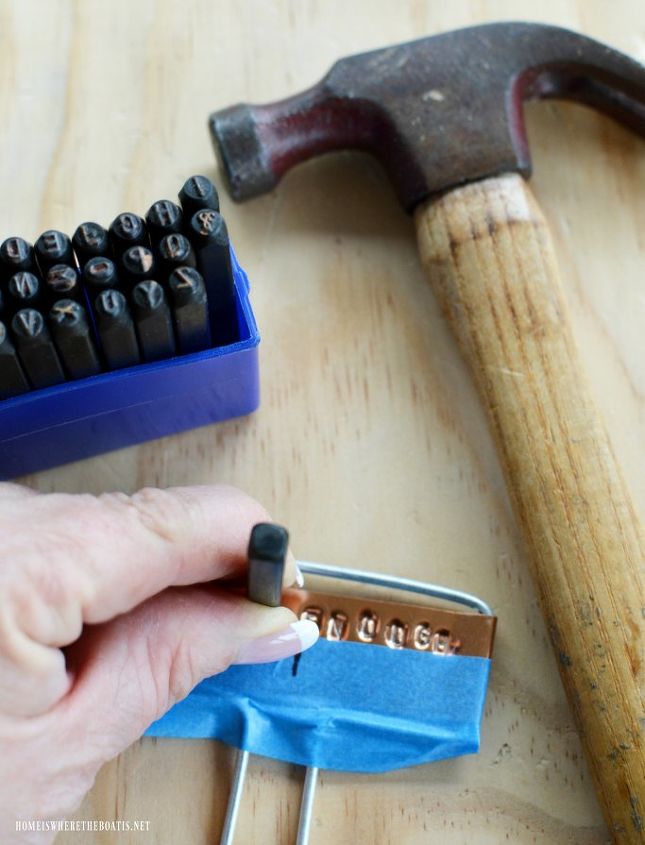
I used a scrap piece of wood as a base to lay the copper plant marker on to punch the letters. Since the copper is soft, you want a surface that is smooth and without any texture that might transfer to your marker. Use a piece of masking tape to help you keep the letters in a straight line. I marked the center of the tape and worked my way out from the center. You want to strike a balance (pun intended ;) between hitting hard enough to leave the impression of your letter, but not so hard that you punch a hole through the copper. It will also depend on the weight of your hammer. I found that 4 strikes per letter worked for me.
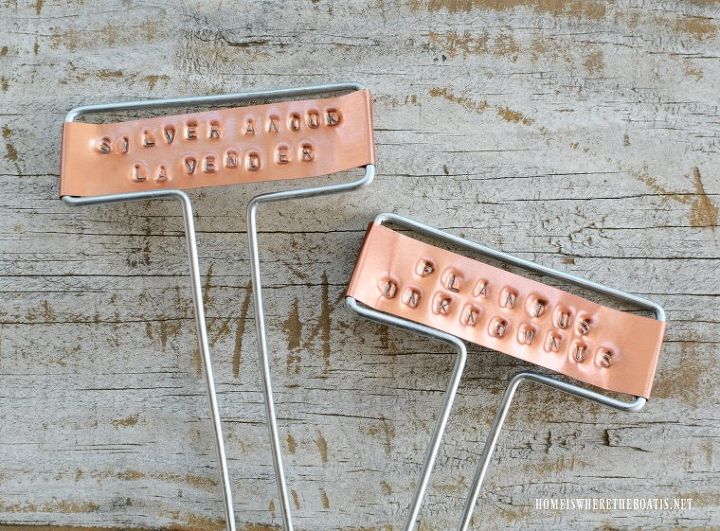
I made a couple of markers to identify some plants like Silver Anouk Lavender that I can never recall the name of.
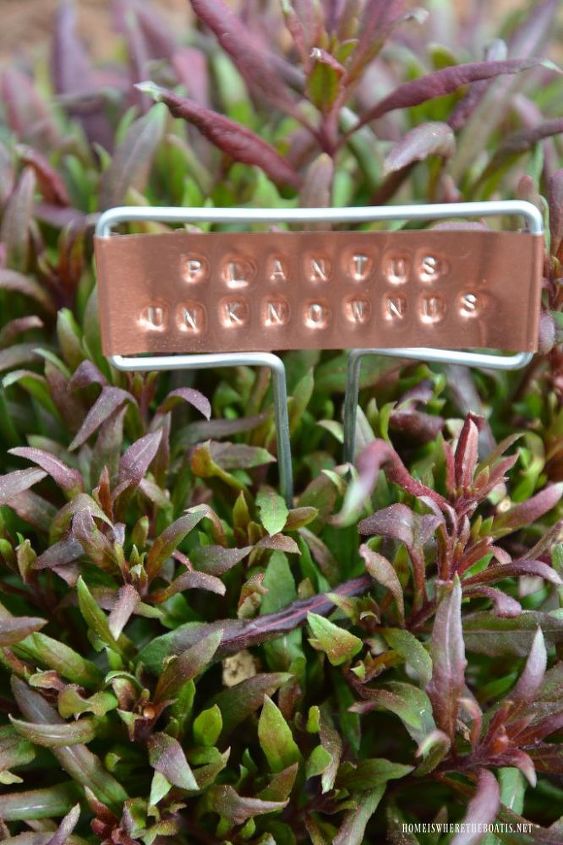
I have several plants coming up that I’m waiting to identify as they mature. For the moment, I’m referring to them as ‘Plantus Unknownus’. ;)
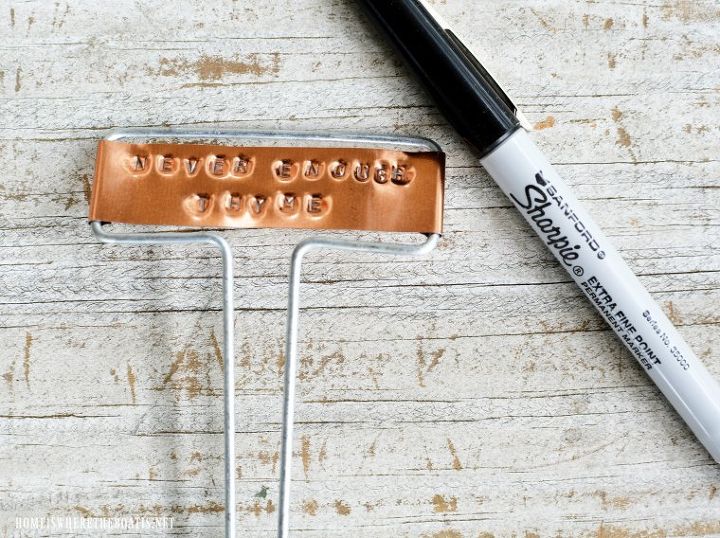
Use a Sharpie to fill in your lettering to make it more visible if desired.
(A fine Sharpie was too big for my letters, I needed the extra fine size for my 3mm size stamp.)
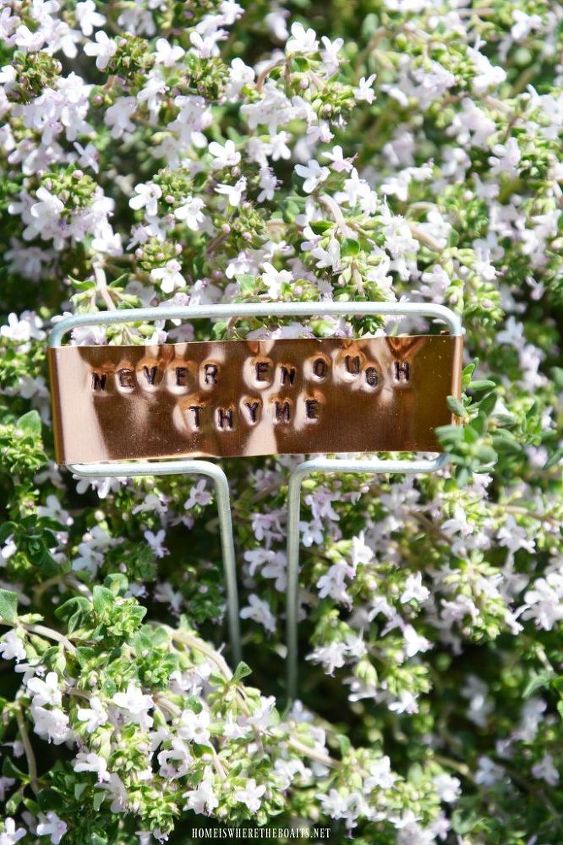
Never Enough Thyme

Stop and Smell the Rosemary
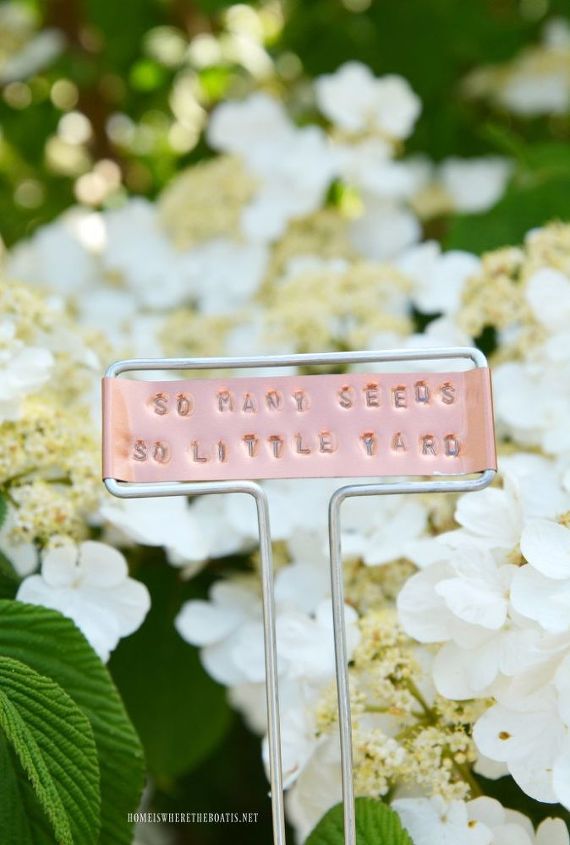
So Many Seeds So Little Yard
You can make garden markers for your veggie garden, flowers, herbs, or personalize them for gifts for your gardener friends or Mom for Mother's Day. They take about 10 - 20 minutes per marker to make depending on how many lines or letters you want to stamp. More photos at the blog link below!
Resources for this project:
See all materials


Any price and availability information displayed on [relevant Amazon Site(s), as applicable] at the time of purchase will apply to the purchase of this product.
Hometalk may collect a small share of sales from the links on this page.More info

Want more details about this and other DIY projects? Check out my blog post!
Comments
Join the conversation
2 of 18 comments
-
very cute. your Plantus Unknownus looks like my Lobelia, pre-bloom. (most pics I found have less purple in the foliage, but mine was definitely that shade. ) I like your name better ;)
-
how fun! Thank you for sharing


Frequently asked questions
Have a question about this project?
How can you work with your hands and still have beautiful nails?