


Front Door Halloween Scene Light Box
5 Materials
$20
2 Hours
Easy
Being Halloween I wanted to make something new for our home. The idea behind the box was, on Halloween night I will hang it up on the door or in my front window to let the trick or treaters know they can get treats at our house.
Front Door Halloween Scene Light Box
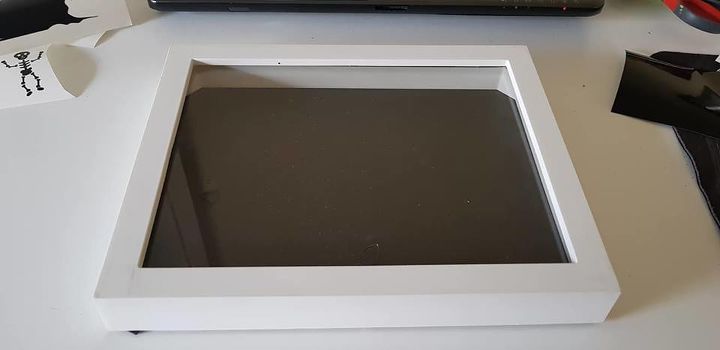
The shadow box was one I left over from my daughters bridesmaid invitations , but these can be picked up for about $7 at our budget stores and they work great.
Front Door Halloween Scene Light Box
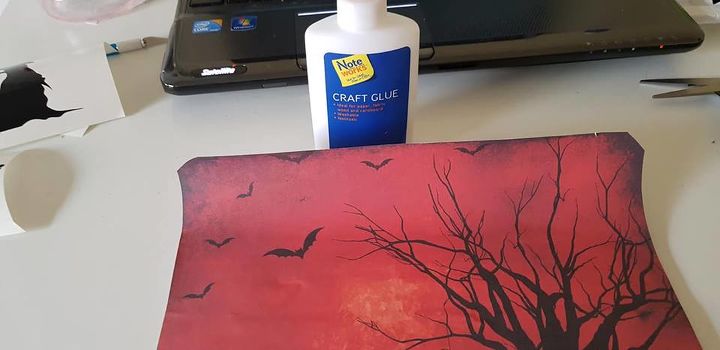
To find images I googled free Halloween images and I selected this one. When you take images off the internet you can use them for personal use as long as on your website you give credit to the creator with a link back to them. I printed my image and cut it to the correct size of the box.

Front Door Halloween Scene Light Box
A good way to find images for this project is to google free Halloween silhouette images and download them to your computer. You can print them out on black paper or card stock and cut them out and glue them to the front of the glass. If you have a vinyl cutter you can get more creative with the detail in your images. But It can still be done without one the designs will just be more basic.
Front Door Halloween Scene Light Box
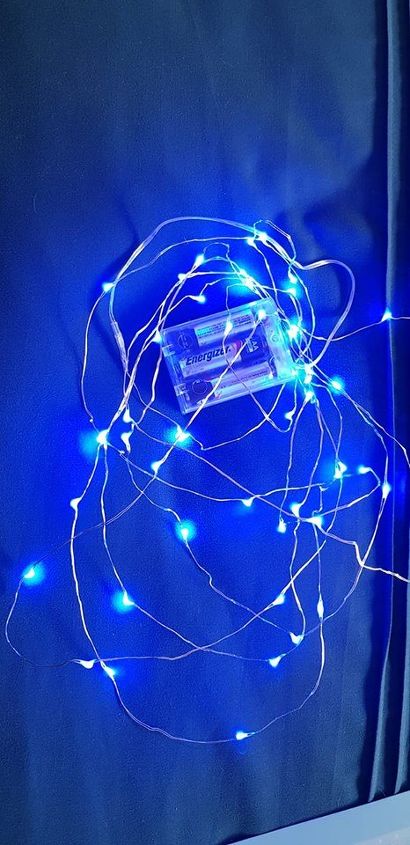
If you want to have the box on your front door you will need to use the string fairy lights that are battery operated. They were my first choice but when they arrived they were blue and I wanted red for my scene.
Front Door Halloween Scene Light Box
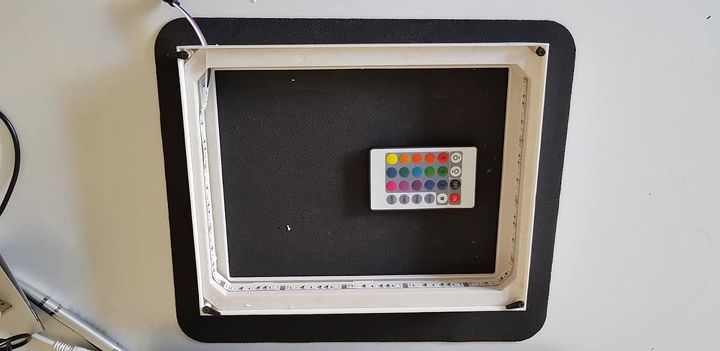
I had some LED remote control lights at home and I thought I would try them and see how they looked. And they looked awesome. They have a few settings on them to change the colour of the lights and can be set to flashing, strobe,smooth or fade. So they offer you more variety. The only downfall is they can not hang on the front door because the need to be plugged in a USB plug. But they will still look great in the front window. The lights had self adhesive tape that I removed and stuck the LED strip to the inside of the box.
Front Door Halloween Scene Light Box
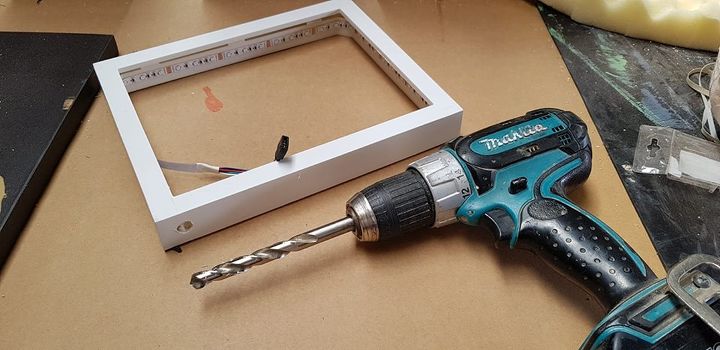
I used a drill to make a hole in the box so the wires can come out. If you are using the battery operated lights you can attach the battery box to the bottom where the hole is using double sided tape.
Front Door Halloween Scene Light Box
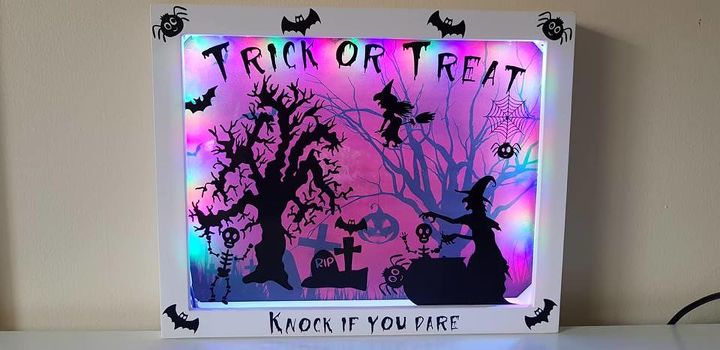
This was the end result with the lights switched on one of the settings. more images available on my website listed below.
{
"id": "5118017",
"alt": "Front Door Halloween Scene Light Box",
"title": "Front Door Halloween Scene Light Box",
"video_link": "https://www.youtube.com/embed/-uH4z2Ldda0",
"youtube_video_id": "-uH4z2Ldda0"
}
{
"width": 634,
"height": 357,
"showRelated": true
}
The light box in action with the various settings.
To see more great projects check out this great repurpose of an old headboard, and no it is not a bench LOL
The cost of this project will depend on what materials you have at home.

Want more details about this and other DIY projects? Check out my blog post!
Comments
Join the conversation
3 of 4 comments
-
Thank you Katelyn, I think the kids will love it on Halloween night. They certainly will not miss it when it is flashing 😂
-
what a simple and beautiful idea! doesnt seem like it would take too long, and it has such a great effect! Great job!


Frequently asked questions
Have a question about this project?