


How To Organise Your Freezer in 4 Easy Steps

Organizing my freezer was a task that I had been avoiding for way too long. After each grocery shop, I would gather up my frozen products, shove them in, and slam the door as quickly as possible.
As you can imagine, every time I opened the door to use something, I spent time cleaning up the avalanche of frozen french fries and kiddies ice cream pops that ensued.
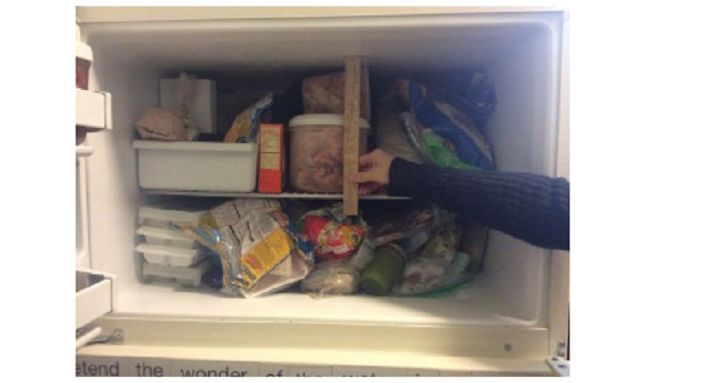
Then, one day I decided, enough was enough. As I had recently decided to eat more healthily and was expecting a delivery of some healthy prepared meals, I decided that it was time that I got my kitchen in order and I decided to start with the freezer. The good news is, I was pleasantly surprised with how simple it was to restore order! I began with a freezer that looked like the one above.
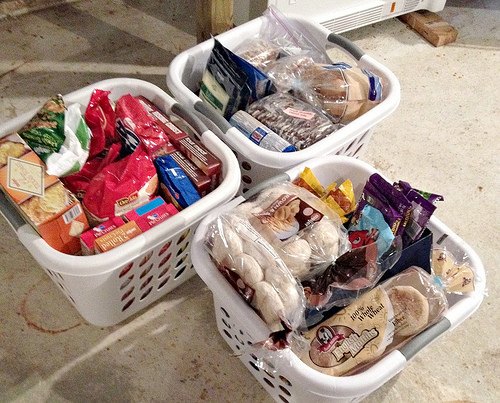
STEP ONE - Pull Everything Out
This was my favorite step in the process as I found it extremely therapeutic to finally be pulling things out of there instead of trying to battle the items to stay in there. Before you do this, run some hot water mixed with some washing liquid and a drop of bleach, so you can clean the inside of the freezer quickly once it's emptied.
You should try and minimize the time the frozen products spend outside the freezer, so you want to be as efficient as possible in the cleaning and organizing. When you have all the products in front of you, you should first separate the things you want to keep from the food you are going to throw away. Then you can move onto the next step.
STEP TWO - Organise Your Products
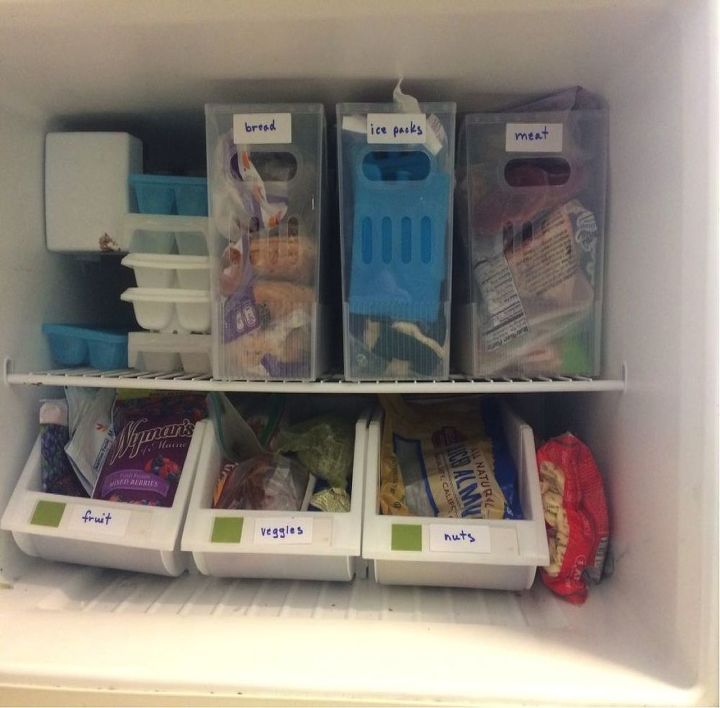
Now you know what you're keeping, take a look at all the products you have in front of you and try to section them up into categories. For example, separate meat, vegetables, bread etc. By the time I'd done categorizing, I had six categories, bread, meat, vegetables, fruits, nuts, and ice packs. The next thing you will need to do is find a way to keep them separate when you put them back in the freezer.
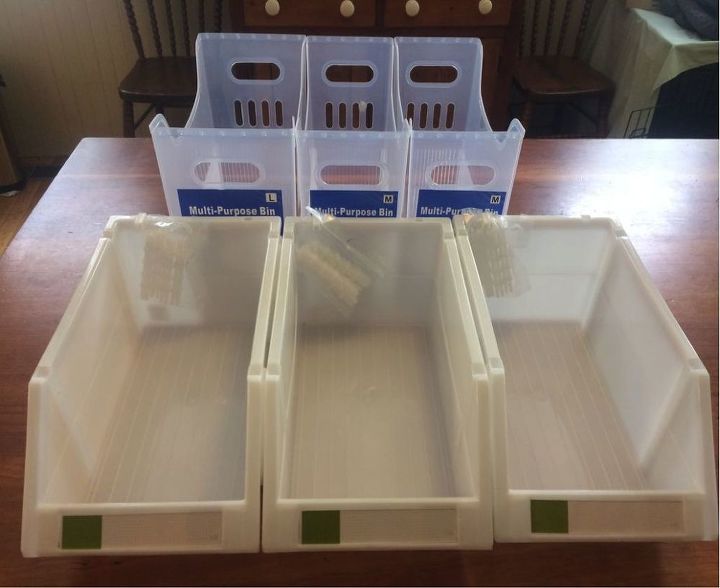
STEP 3 - Find Some Containers and Label Them
If you don't have a big store of tupperware in your house, then you may need to go to the store and buy some before you start the process. This is what I did, hence why you see a ruler in the first picture. I had to measure my freezer to make sure the tupperware I bought would fit.
If you already have some tupperware, great. You can go ahead and start putting the products into the tupperware. My advice is to fill the boxes first and put them in the freezer, then create the labels. This reduces the amount of time your freezer products will be outside of the freezer.
Once you've put all the filled containers into the freezer, you can go ahead and make some labels. Don't worry, you don't need any fancy label makers, you can simply use small scraps of paper and transparent tape. That's what I did on the boxes on the top shelf, but I was lucky because the boxes I bought for the bottom shelf already had label strips.
STEP 4 - Tidy Up Leftover Items
When you have finished categorizing and labeling, you will probably have a few different items left over that didn't fit in the boxes. For me, it was ice trays. For some reason, I had tons - probably more than anyone would need. I guess you can never have enough ice, right?
It doesn't really matter if you have a few items that didn't fit the boxes because your newly organized freezer should still have a ton of room available.
It's been a few weeks since I organized my freezer, and I'm still going strong on the organisation front. My advice is to remove any items you aren't using regularly. I do this every time I do a grocery shop, so I can stay on top of things and not end up with too much in there.
Good luck with your organising!


Comments
Join the conversation
-
good idea, I've found that heavier plastic is better. the bins I used split more easily after they froze.
-
Did y’all donate the left over food to a food bank or soup kitchen?
I’ve used a similar solution for years using restaurant supply containers, inexpensive and last forever.
I also use moving blankets under and over my frozen when I clean my freezer.
We keep on of the blankets in the car to keep the frozen stuff colder here in Texas even when using a cooler


Frequently asked questions
Have a question about this project?
Any ideas on how to organize a floor deep freezer?
any suggestions for organizing a refrigerator freezer that is on the bottom? ours has a big drawer a/a single shelf in top, (ice maker (left hand side of shelf as you look at it) takes up 1/3 of shelf space) the big drawer I think is a pain because even tho I started out standing items on end, stacking that way (front to back) some smaller things have accumulated on top of them since they mostly aren't as tall as the drawer is deep! Eek! it's a nightmare, any ideas welcome!
How to take out wet carpet smell from my car ?