


DIY Balsa Wood Lantern
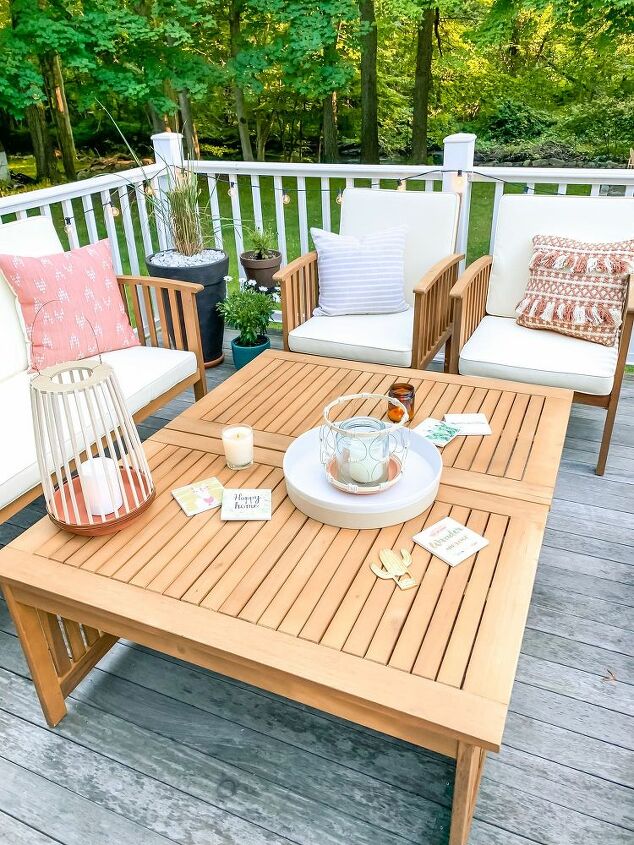
Hello summer! This year I have been determined to make my outdoor back deck the ultimate hangout space. I added some great comfy furniture, plants and flowers, and colorful throw pillows, but there was one thing missing: mood lighting! My favorite time to hangout on the deck is right as the sun sets, so we definitely needed some cozy lighting. I decided to DIY some lanterns that would not only fit our decor, but that would also be easy to accomplish. Today I am sharing the balsa wood lantern, inspired by some lanterns that I saw at my favorite home decor stores.
Watch the video above to see how you can easily make your own, or keep reading for step by step instructions. Enjoy!
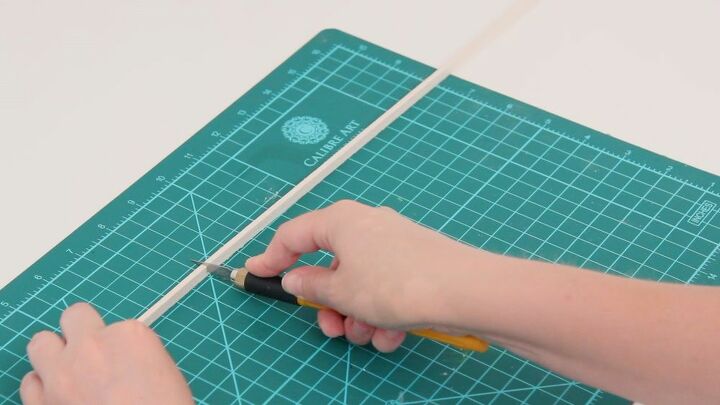
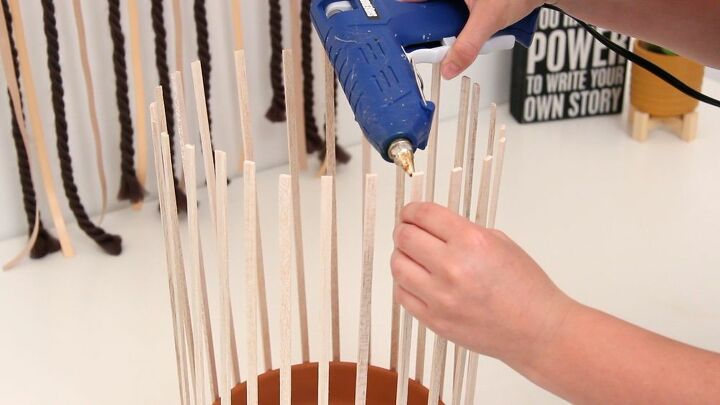
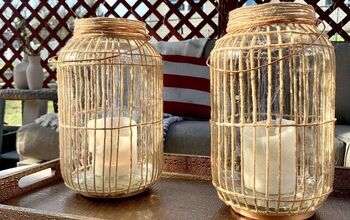
I started by cutting my 36 inch balsa wood strips into 3 pieces, 12 inches each. Balsa is really easy to cut and is slightly flexible, so I just used an X-acto knife.
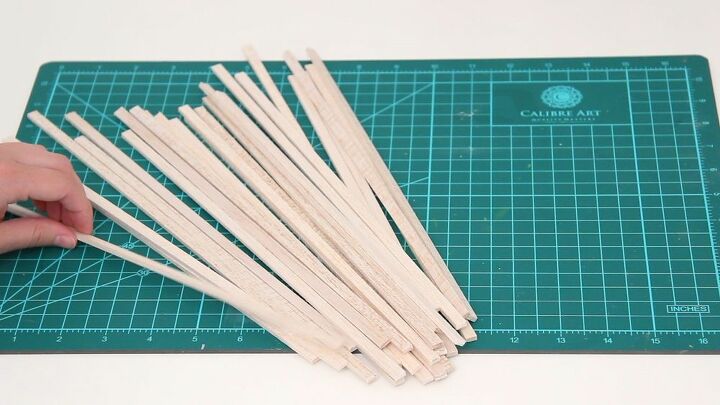
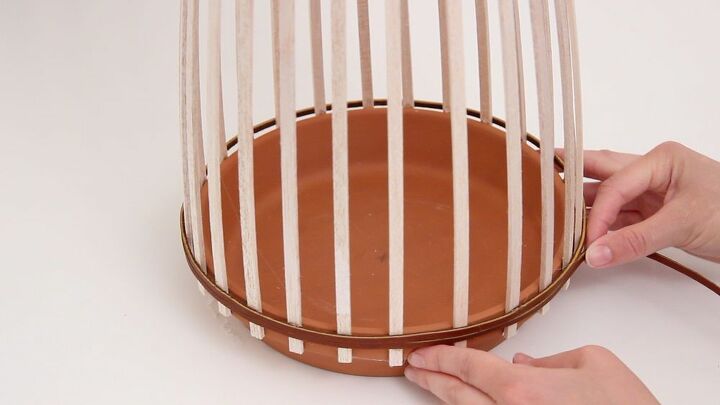
I cut about 25 strips as an estimation of how many I would need. For the base of the lantern, I used a terra cotta planter base. These come in all different sizes, but the one that I used had about a 26 inch circumference.
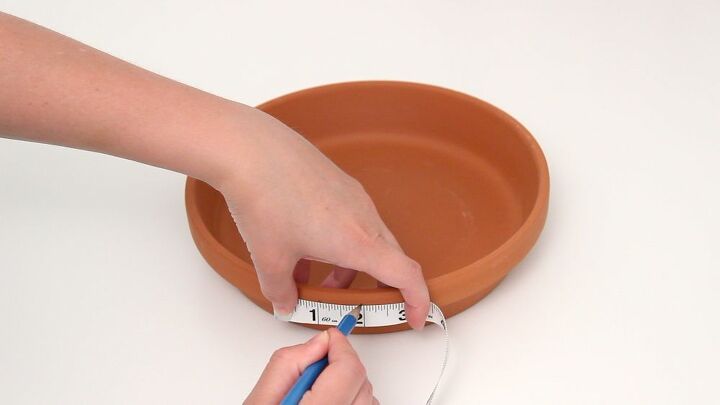
I made a pencil mark every inch on the base, so that I would know where to glue my wood pieces.
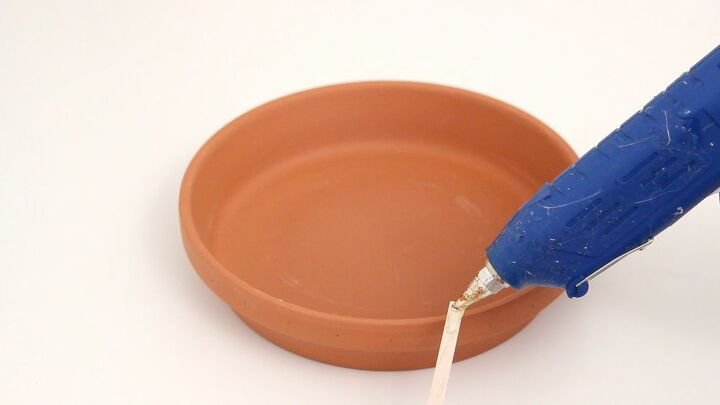
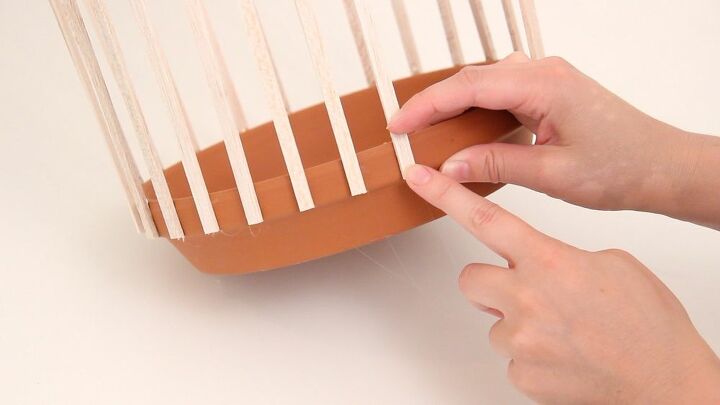
I added a bit of glue to one of the wood strips, and glued it on top of one of the pencil marks. I continued this process all the way around the base.
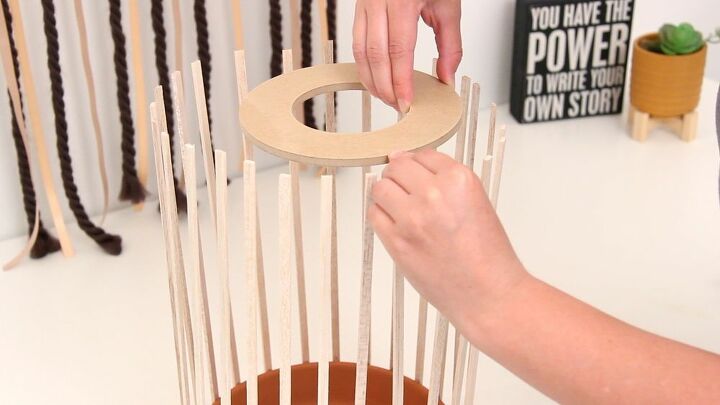
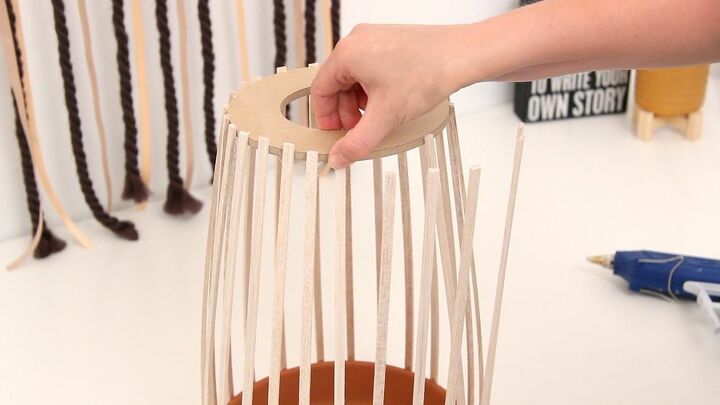
Once I had all of my wood pieces glued to the base, I took a wood floral/craft ring and repeated the process on the top of the lantern. I specifically chose a circle that was smaller than my base so that the wood would pull in slightly, which is another benefit of using a flexible wood like balsa.

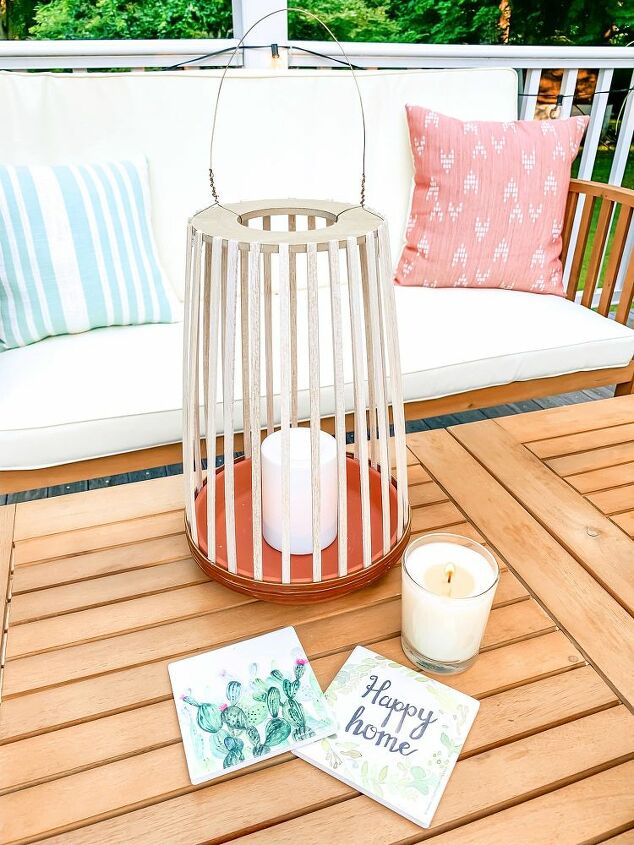
At this point, you can leave the lantern as is, or you can add a decorative trim at the bottom which is what I chose to do. I wanted to add a bit of extra contrast to the lantern and also cover up the area where I had glued the wood to the base. I chose a leather cord and simply wrapped it a few times around the base, gluing it intermittently.
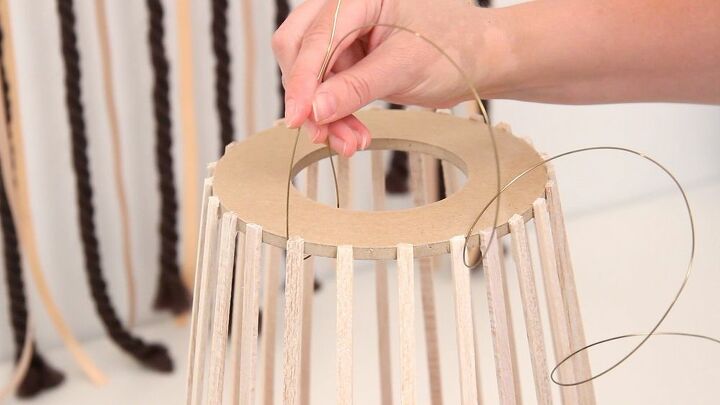
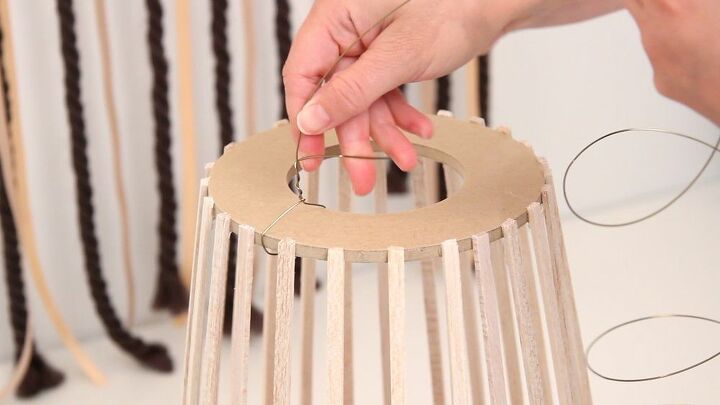
Last but not least, I added a decorative handle to complete the look. I slid some wire under the wood circle at the top, then twisted it around itself to keep it secure. I brought it over to the other side and repeated the same process.
I added a battery operated candle and set it out on my deck for the perfect extra lighting! It looks super stylish during the day and gives a warm glow at night. I couldn’t be happier with the outcome of this lantern and I hope you’ll try it out too! If you like this project and want to see more, visit my YouTube Channel
Resources for this project:
See all materials


Comments
Join the conversation
-
I think I will adapt this idea to a pendent or flush mount ceiling light! Thanks
-
Really smart and cute!


Frequently asked questions
Have a question about this project?
How do you remove the candle once it is finished?
What kind of glue did you use for the clay and wood material?
Is the wood flat or dowel? I followed your link but it was dowels so I wanted to make sure