


Child's Desk Chair Revamp
I decided to fix up my old childhood desk chair and it will be going in my daughters new room. Read more below to see before and after pictures and how I made this chair sparkling new once again!
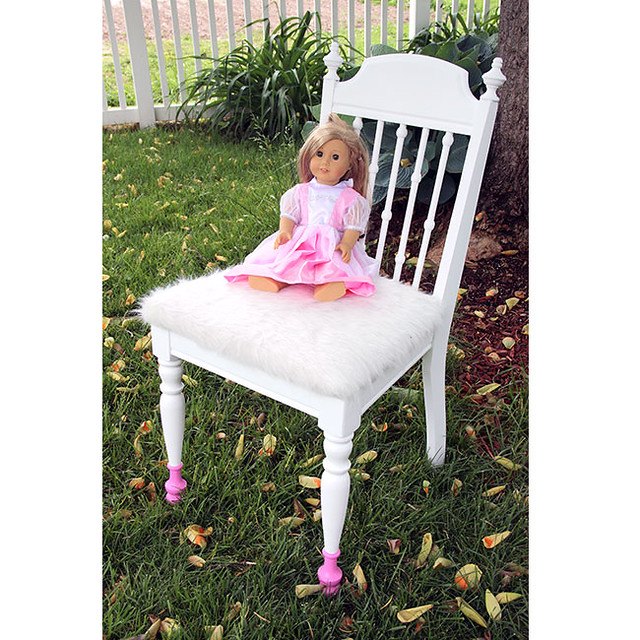
Here is how the chair looks, after I finished it. But, it had a long road of repair to get it looking new once again.
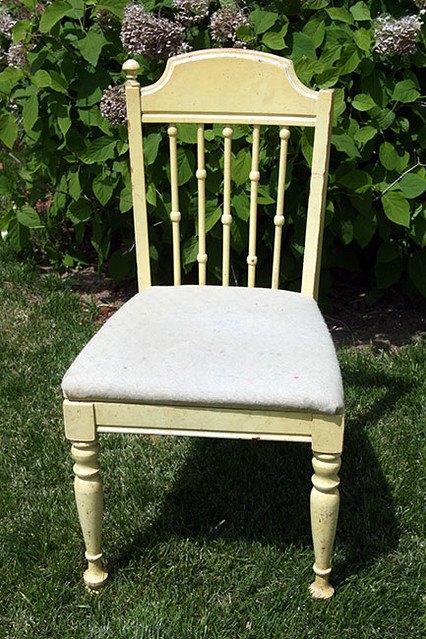
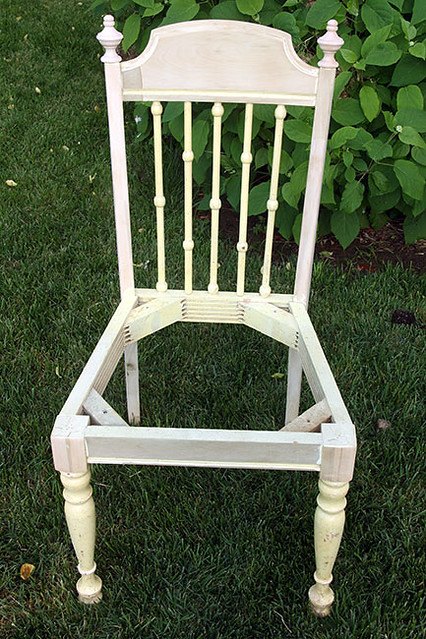
This chair is 35 years old and my mom bought it for me when I was 2 years old from JC Penney. You’ll see it has a yellow speckle finish, its scratched up, it’s missing a finial (the little decorative knob on the top) and the cushion is shot.

First, I wanted to fix the finial that had fallen off of this chair.
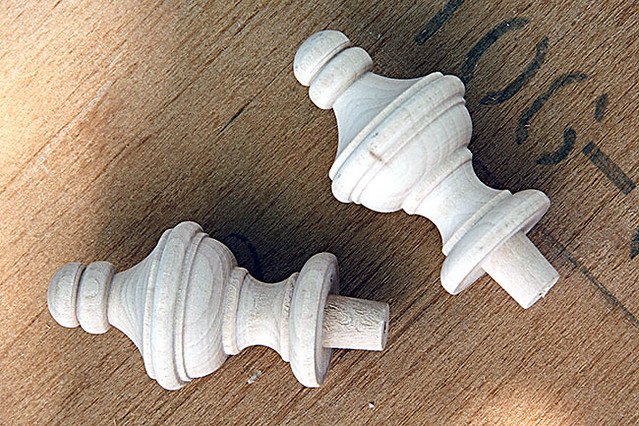
We tried to find a finial that would match it at Lowes, but they only had REALLY big ones (think bed post). SO, my husband suggested we check out a wood working store that he had gone in with his dad when he was younger. It was all the way in north county in St. Louis, but I did call before we drove out there and they did have finials! Since it’d be impossible to find an exact match, we had to buy two finials (they were under $2 each) and replace both on the chair.
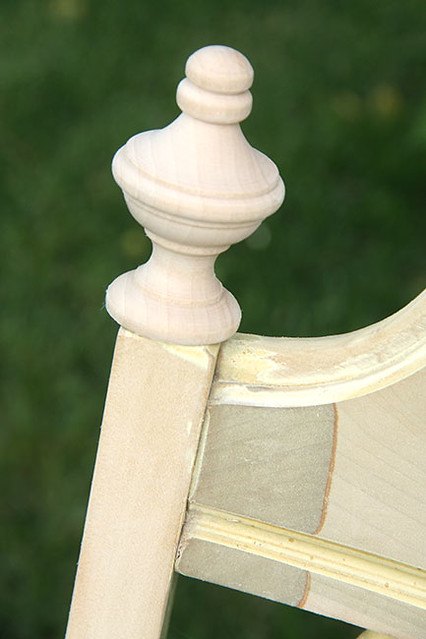
My husband sawed off the remaining finial that was on the chair, then used a half inch spade drill bit to drill a hole into each side of the chair to fit the new finials into. He used a little wood glue to keep them in place.
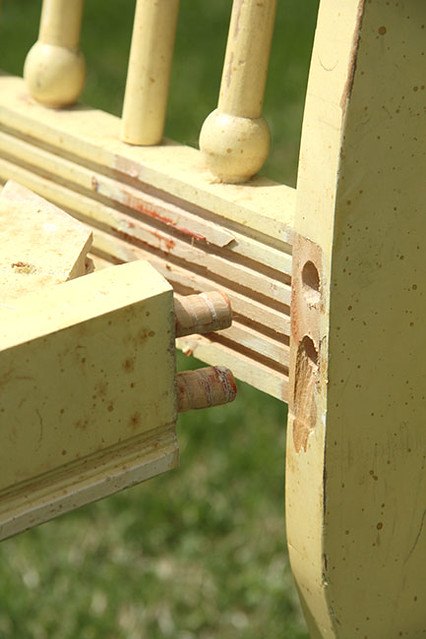
The chair was REALLY wobbly, because the overall frame had become loose over the years. I asked the hubby to fix that, too. (I leave the hard work to him!) To fix this, he drilled a hole on each side on the back of the chair. He then put a 3 inch screw through the back into the frame of the seat with some wood glue. He also counter-sunk the screw holes so that the heads of the screws were below the top of the wood, then covered them over with wood putty.
Then my husband sanded it with an electric palm sander… it is the kind that vibrates, not the orbital kind. I could have probably done this part, but my husband was kind enough to do it for me.
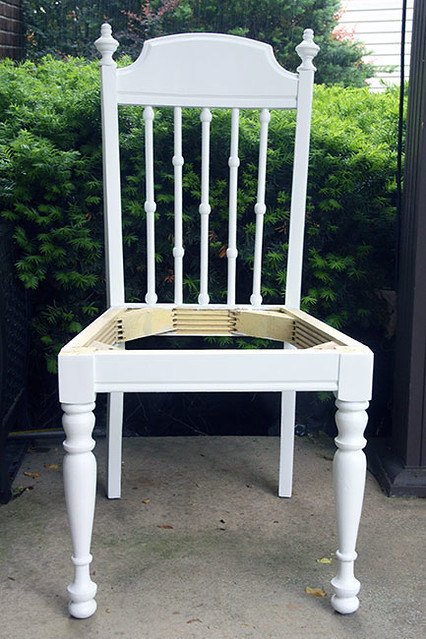
After the chair was sanded, I applied one coat of primer to the chair. Then, I used the same white paint that we had leftover from when we painted Autumn’s walls in her room. I painted two coats of it on the chair.
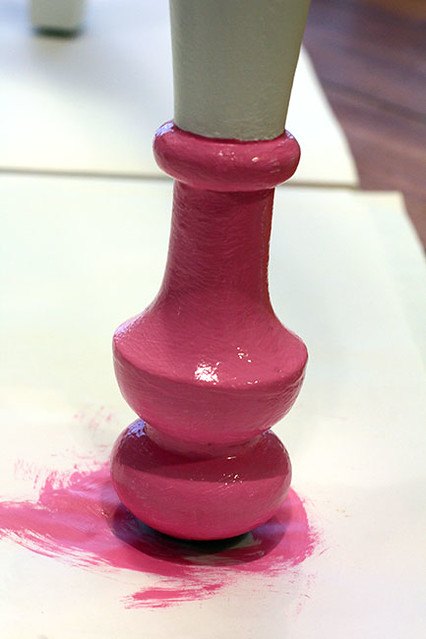
I wanted to give the chair a ‘dipped’ look… so, I decided to paint the bottom of the front two legs with pink paint leftover from Autumn’s room when we painted her rainbow wall. Here is what it looked like after I painted it. I did two coats of the pink paint.
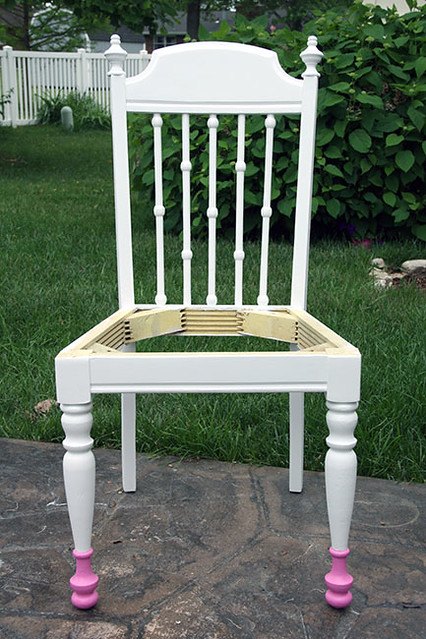
And, here is the chair with the front legs ‘dipped’ in pink. A little pink goes a long way!
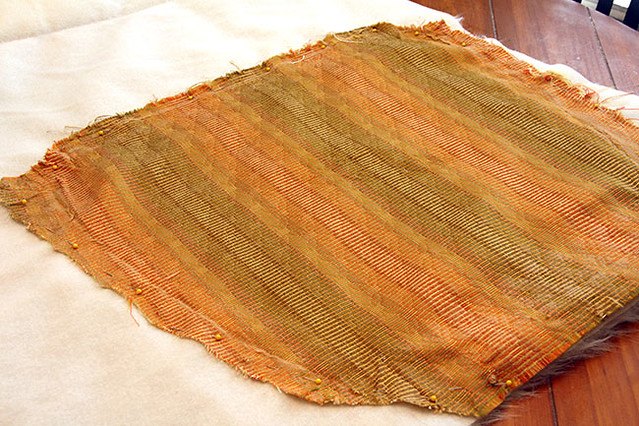
The last part of fixing up this chair was to reupholster the cushion. I knew I wanted to reupholster it in a white fur. First, I had my husband take the old cushion off (it was stapled on, so he removed several staples and then just ripped it off). Then, I pinned the old cushion onto the back of the new fur fabric.
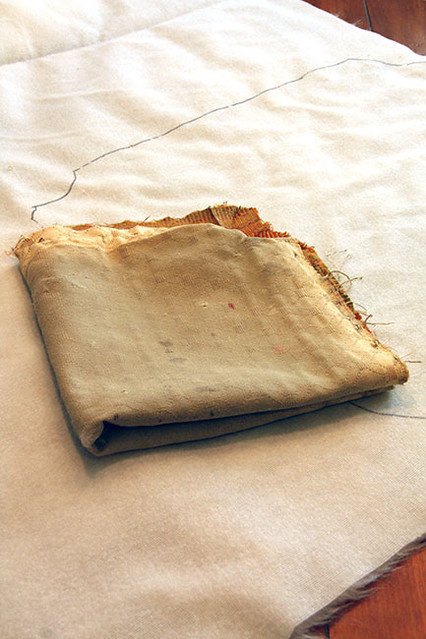
Then, I took a black marker and drew an outline around the old cushion. This was my husbands idea, too… to use the old cushion as a template.

Center the new fabric under the wood and foam.
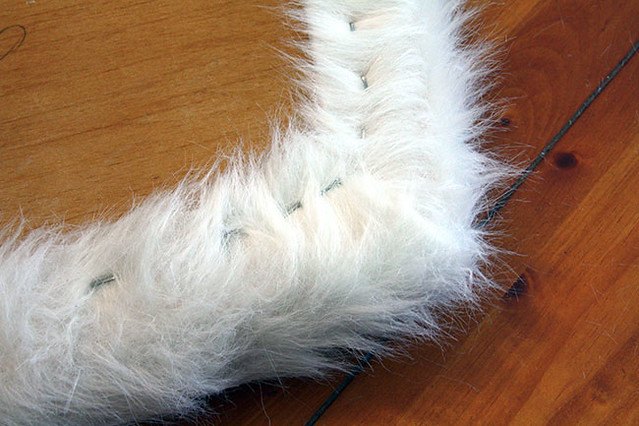
Use a staple gun to staple the fur fabric to the wooden back. I did do this part and the staple gun made me just a little nervous. Ha!!
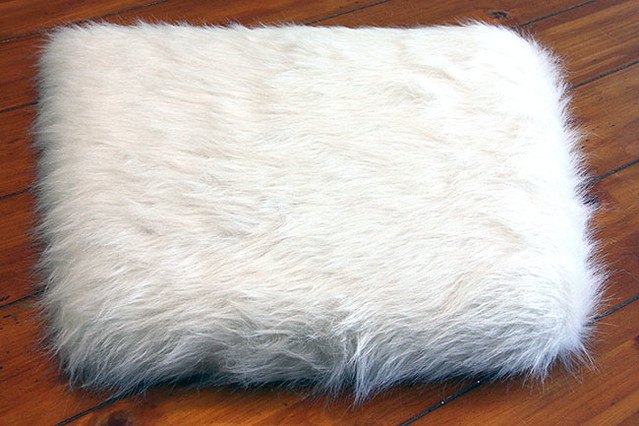
And, ta-da! This NEW cushion is oh so furry and soft! I hope you enjoyed my little chair makeover tutorial.


Comments
Join the conversation
-
Awwwwwwww.......so pretty for a little goil!!!

-
I've hand washed spots on it, but you could also easily replace it if it gets too worn in time. The faux fur material isn't expensive. I got mine at JoAnn's and I have enough to replace it if I need to in time. I think there are tutorials online on how to wash the faux fur in the washing machine.


Frequently asked questions
Have a question about this project?
What is the name of the store where you purchased the finials?
I have seen folks stick batting around the foam before the fabric. You did without. Does it matter?
How did u attach the seat back into the chair?