


DIY Pretty Patterned Pumpkins
Gather your prettiest napkins and mod podge, and follow this simple DIY for a unique, but very pretty take on pumpkin decorating!
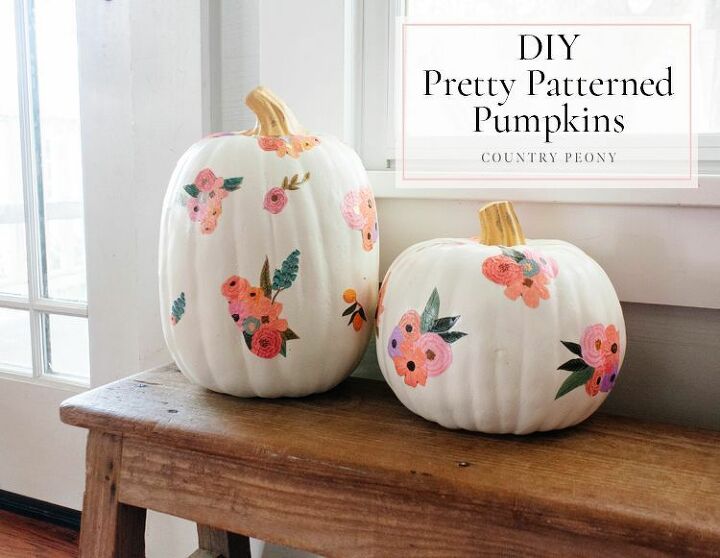
Are you looking for a simple and inexpensive way to add a little fun and whimsy to your tired Fall decorations? Then look no further than today’s DIY featuring a pretty take on Fall pumpkins using mod podge.
This technique is wonderful, because it is very customizable, simple, and inexpensive. Since you will only need about 2-3 paper napkins you can use napkins you already have, and pumpkins you already have that need a fun makeover.
Follow along below as I show you how to add a little extra whimsy and pretty to your Fall decor this year!
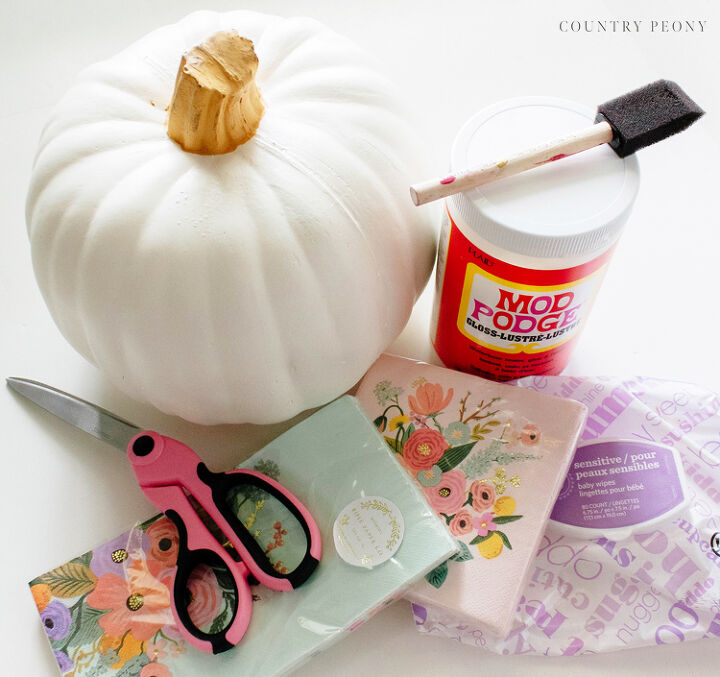
To make your own DIY patterned pumpkins, you will need:
- White Faux Pumpkins. You can choose to purchase white pumpkins, paint your faux pumpkins white, or you can paint real pumpkins white. *However, please keep in mind that this project is only good for one season if you use real pumpkins. I like to use white pumpkins, because the napkins pop off of the simple color background.
- Your favorite patterned paper napkins. I used these darling Rifle Paper Co. napkins from Amazon. (affiliate link)
- Mod Podge. I like to use the gloss finish to add a lustre to my pumpkins, but you can use whatever finish you prefer. (affiliate link)
- Foam Brush
- Scissors
- Damp Cloth or Baby Wipes to help with Mod Podge cleanup
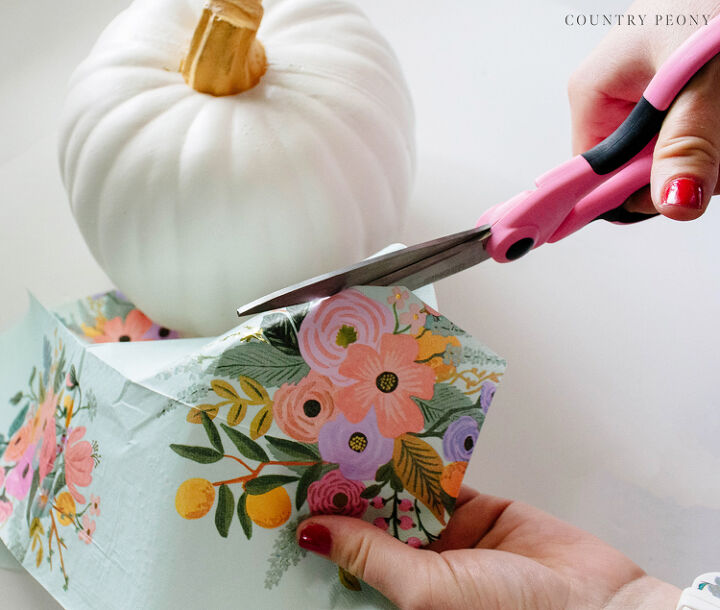
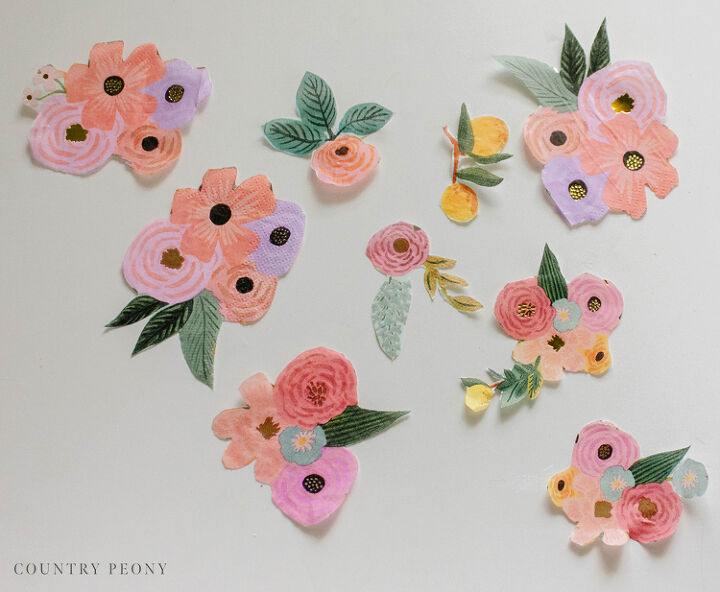
Step 1: Cut out your favorite patterns from the paper napkins. It is important to cut neatly and create crisp lines since they will show against the white pumpkin. Also try to remove any white space from the pattern so you create a pretty silhouette.
*This is the most tedious part of the DIY, but it is worth it to take your time so you create pretty lines and silhouettes for your pumpkin.
*I also recommend to keep your patterns as small as possible so they adhere easily to the pumpkin and lay flat onto the pumpkin with Mod Podge.
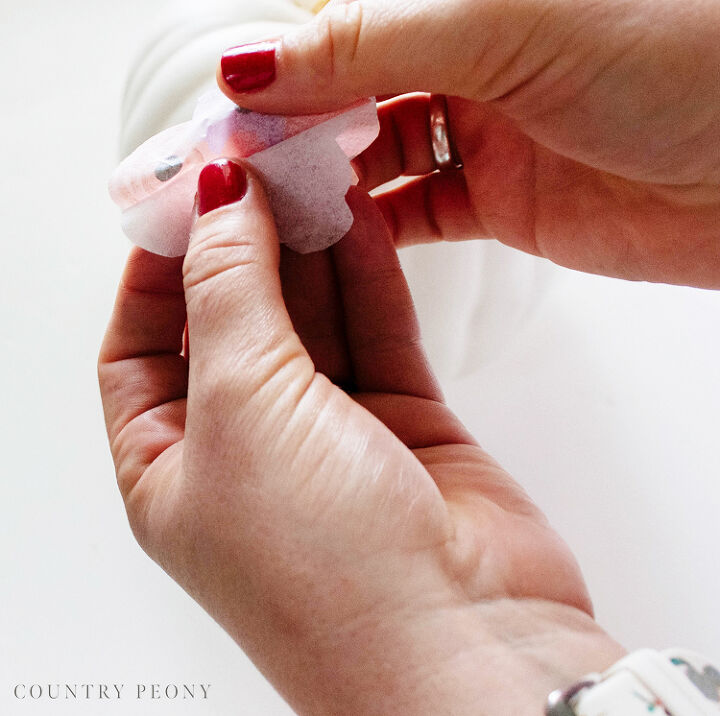
Step 2: Most paper napkins are made up of several layers. After you cut each silhouette (the extra layers make it easier to cut the napkins, and they are easier to separate once they are cut), gently separate the layers until you have the one, image-printed layer.
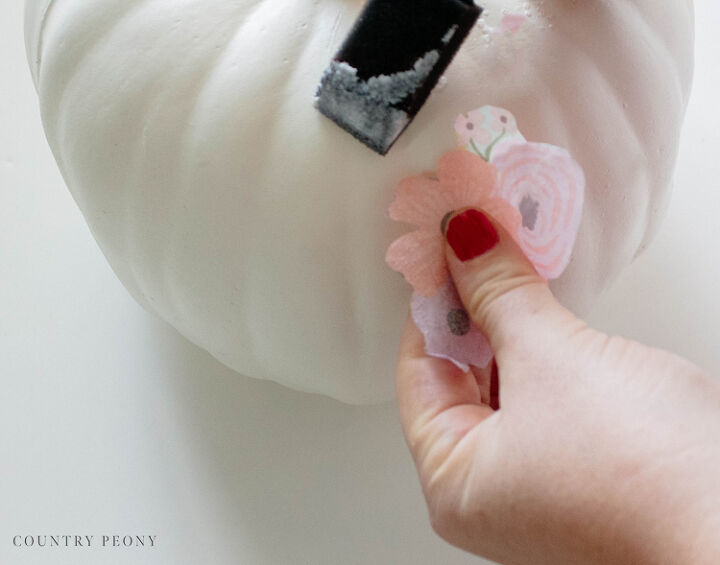
Step 3: With your foam brush, add a thin layer of mod podge directly on to the pumpkin where your first patterned napkin piece will go.
Then add the patterned napkin piece to the pumpkin and smooth it out onto the pumpkin.
*To help keep your hands clean keep a wet towel or baby wipe and dry towel nearby. If your hands aren’t clean and dry the paper napkin will stick to you and your project will not come out as pretty as you intended.

Step 4: Once your patterned napkin is on the pumpkin, apply one thin layer of Mod Podge on top of the napkin. Ensure all sides adhere to the pumpkin with Mod Podge.
Step 5: Add more patterned napkin pieces to the pumpkin with the Mod Podge.
Set it aside to dry.
*The napkin is very thin at this point, so be very careful and gentle when you apply pressure to the napkin so you don’t tear the pattern.
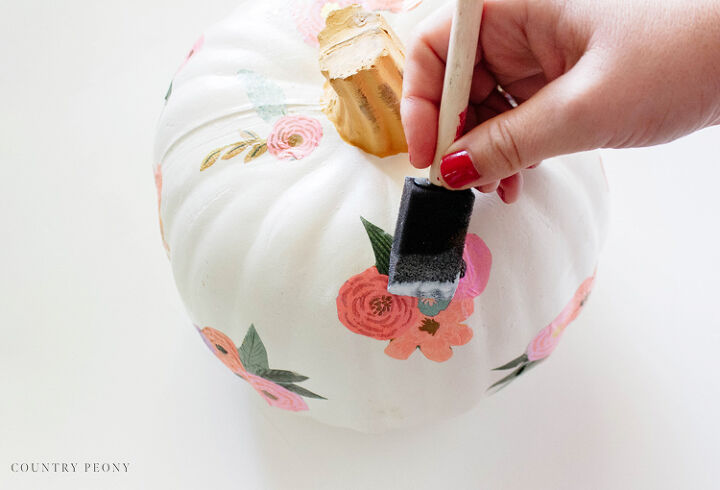
Step 6: Once the first layer of Mod Podge is dry, apply a second, thin layer of Mod Podge to each patterned piece.
Set it aside to dry.
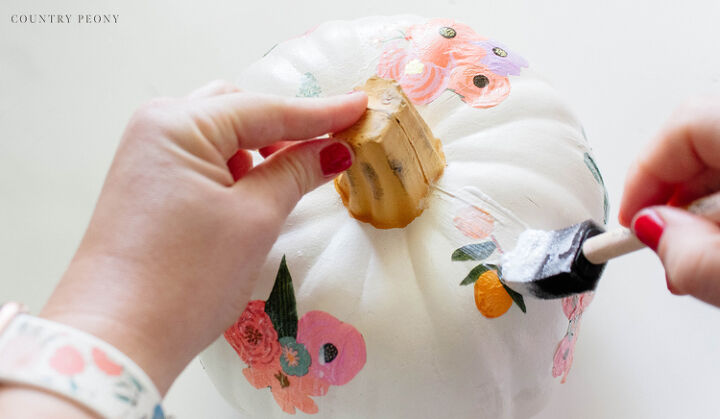
Step 7: Once the second layer of Mod Podge is dry. Apply a final layer of Mod Podge to the entire pumpkin so the finish and coating is consistent throughout the pumpkin.
Let the pumpkin dry.
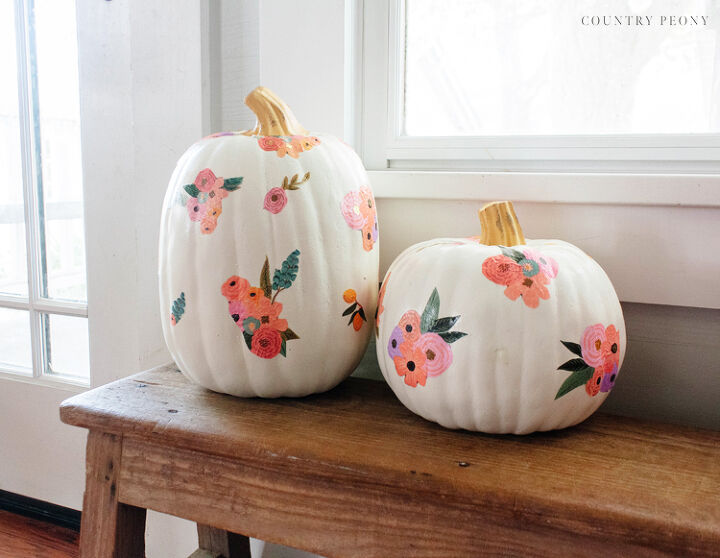
Step 8: Once the pumpkin is dry, display it for all to see and enjoy your custom creation!
I hope you enjoy adding a little extra whimsy and pretty to your Fall decor this year!
Resources for this project:
See all materials


Comments
Join the conversation
-
I love it. I've found many adorable papers at Marshalls, Home Goods to use for decoupage. I've had fun with this too, I love yours.
-
so pretty!!


Frequently asked questions
Have a question about this project?
I like it. Think thicker paper would work as well? Maybe not bend so easily without kinking.