


DIY Mantel
Do you like the look of a wood beam mantel without the cost? Learn step-by-step how to make a DIY wood beam mantle for a fraction of the price.
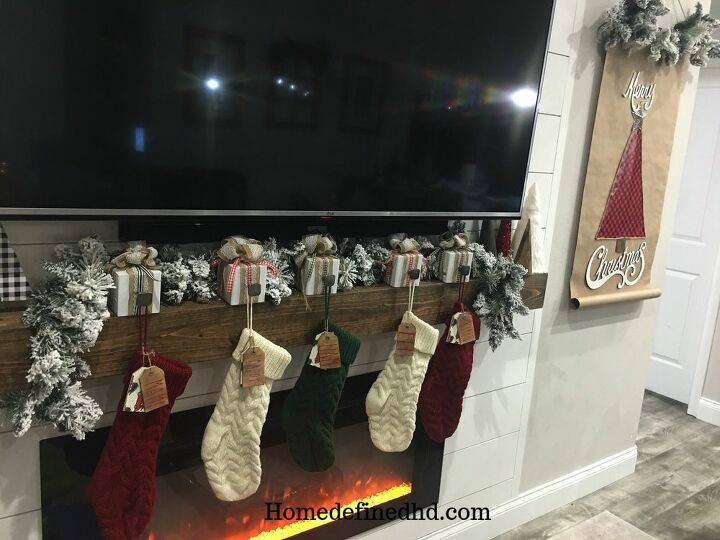

DIY WOOD BEAM MANTEL
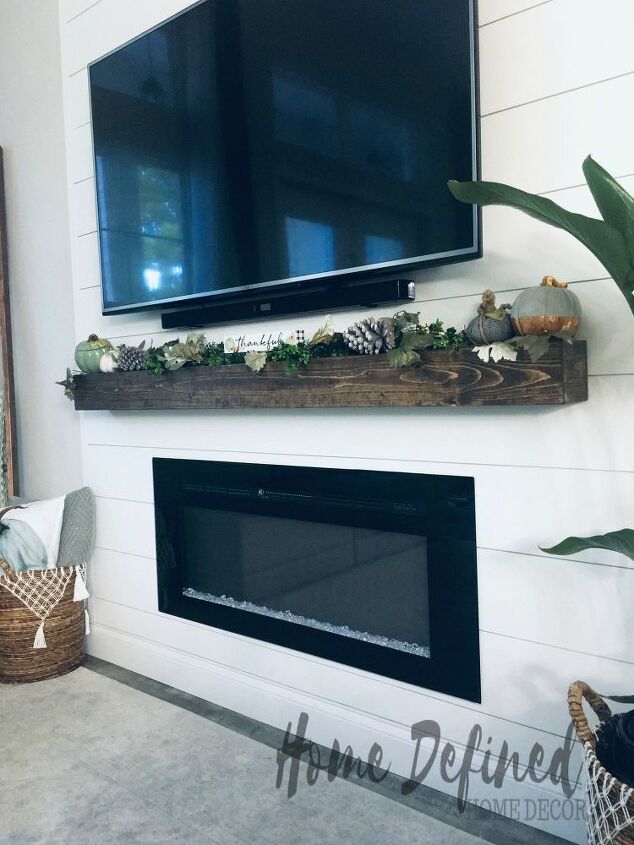
When we moved into our home the first thing we defined was the living room. We built a faux shiplap fireplace wall to go with our recurring modern Farmhouse theme. We added an electric fireplace insert, and of course, every fireplace needs a mantle!
STEP 1: Decide the length of the wood beam mantel.
There is no exact rule on how long or wide the mantel should be. It's based on personal preference. We went with 72 inches since we wanted it to be slightly longer than the TV and fireplace insert, but smaller than the faux shiplap fireplace.
STEP 2: Head to your local hardware store.
When shopping keep in mind which board you would like to be the most visible. We wanted a more rustic look without having to do a lot of distressing so we picked a board with a lot of visible knots.
Supplies:
- 3-1x8x6 white pine boards
- 1- 2x4x6 common wood
- Wood glue
- Finish nails
- Sharp/ blunt objects to “age” the wood
- Stainable Wood filler (optional)
- Stain and poly
- 150/250 grit sandpaper
- 2 1/2 inches wood crews
- Lint-free rag
Tools:
- Miter saw
- Drill
- Table saw
- Tape measure
- Combination square
- Stud finder
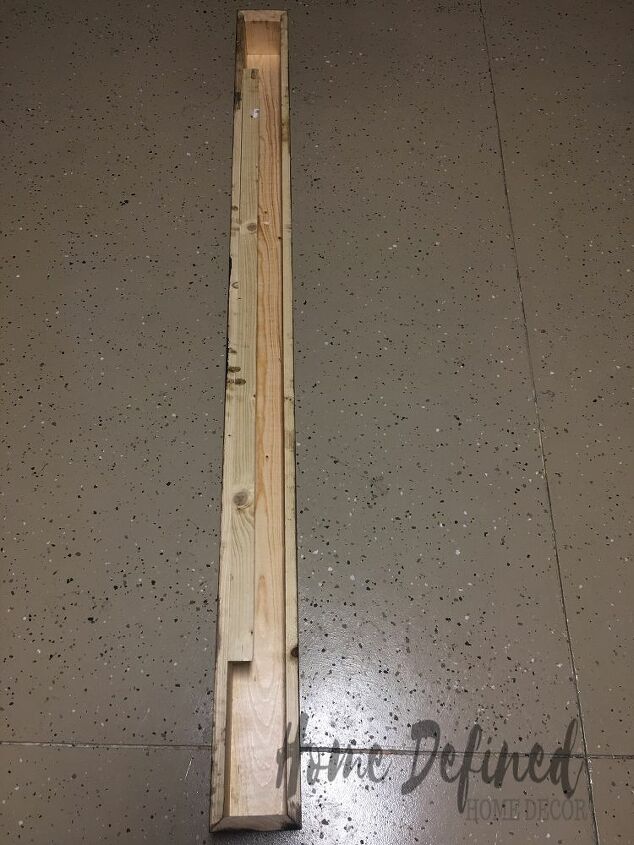
STEP 3: Cut the wood to size.
-Make 45° miter cuts on all 4 sides of the 1x8x6 board that you choose for your front piece. Use the table saw for the longer sides and the miter saw for the ends.
-Make 45° miter cuts on 3 of the sides of the remaining 2 boards. (Miter 1 long side and the 2 ends.)
-From the scrap wood, cut 2 end caps to match your length and width 6x6 inches. Proceed to miter all 4 sides on both of the end caps.
-Using the table saw cut the 2x4x6 to measure 50 inches x 2.5 inches. Then proceed to do a 45° miter cut down the middle. This board will use to create a french cleat to hang the beam.
These pictures were taken prior to knowing we will be starting a blog. I will walk you through the process to the best of my ability. If you have any questions feel free to contact us!
STEP 4: Glue and nail boards in place.
-Start by attaching the piece of 2x4x6 that you previously cut down to create the french cleat to your top board. ( one of the 1x6x8 that you previously mitered on 3 sides). You will attach them using glue, then finish nails to hold it while you add the wood screws to the top.
-Continue to add the other 2 sides by applying glue. Then, secure them with finish nails.
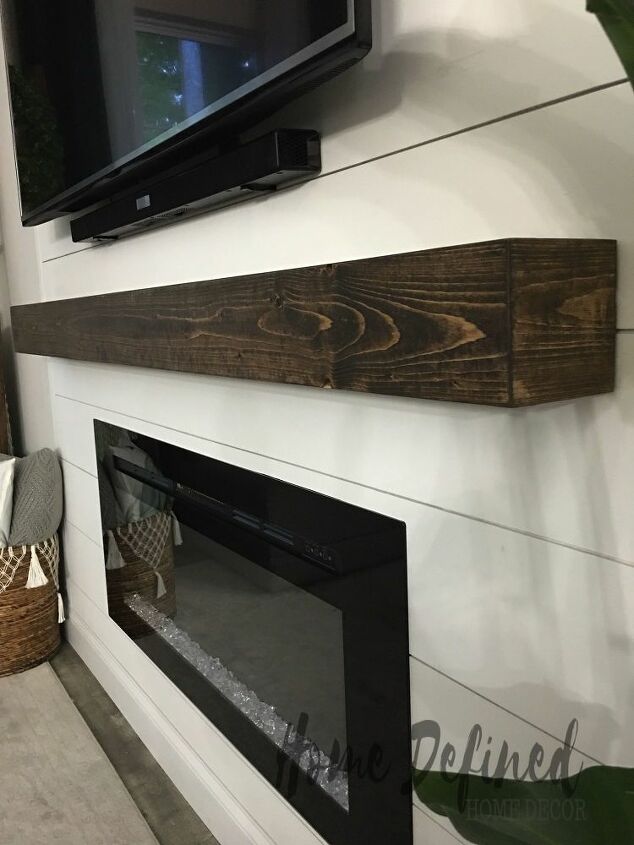
STEP 5: Sand, Distress, and Stain.
You can use a stainable wood filler to cover the nail holes and at the seams. we wanted a more rustic feel so we didn’t use it.
If you chose to apply wood filler, sand using 150 grit then proceed with 250 grit sandpaper.
At this point, you can use blunt or sharp objects to distress the beam or leave it as is. We used mallets and some nails to beat it up just a bit.
Then go ahead and apply the stain of your choice following the manufacturer’s instructions. We applied a stain and poly mix with a lint-free rag in the color dark walnut.
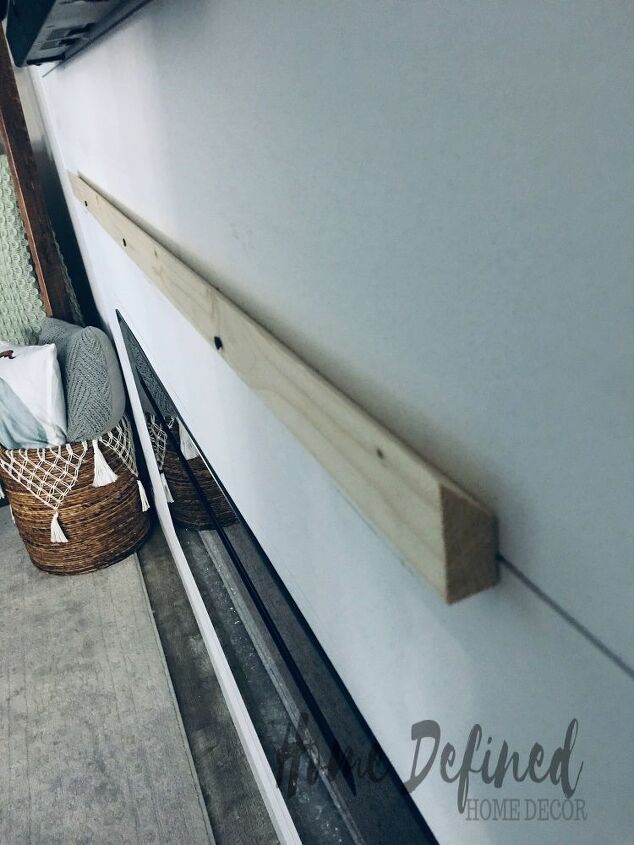
STEP 6: Hang the Beam.
Tip: Hang appropriately 12-14 inches above fireplace and 12-16 below TV.
- Find studs in the wall and mark with a pencil.
- Pre-drill holes on the wall.
- Using wood screws attach, the remaining piece of previously cut 2x4x6.
- Slide wood beam on to cleat.
Using this type of hanging method allows for easy removal and gives the mantel an added purpose- HIDDEN STORAGE!
Enjoy and Decorate your new DIY Wood Beam Mantel!!
Don’t forget to share!
Join our weekly newsletter for more inspiration ideas.


Frequently asked questions
Have a question about this project?