


How to Paint Windows Black: No Taping Required

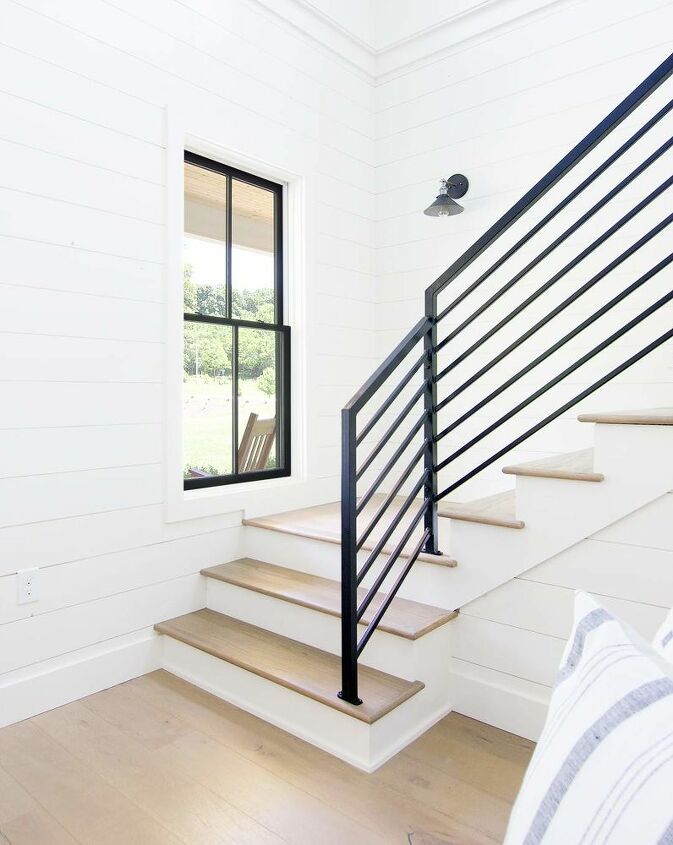
Black windows have been, and continue to be, on the rise in popularity. They are very aesthetically pleasing and add so much visually to the exterior and interior of the home. But they can be a bit pricey compared to standard white windows.
Henry and I decided to splurge and go with black windows a few years ago on our modern farmhouse. Although we wanted both exterior and interior black, we found out very quickly we would save thousands by only ordering black on the exterior and leaving the inside unfinished wood. But this meant that they would have to be painted on site.
It seemed like a daunting task but turned out to not be that bad at all.
Whether you are installing brand new windows on a new construction as we did, or you want to give your current windows a fresh modern look with, here is an easy technique you can use to paint your windows black.
What You’ll Need
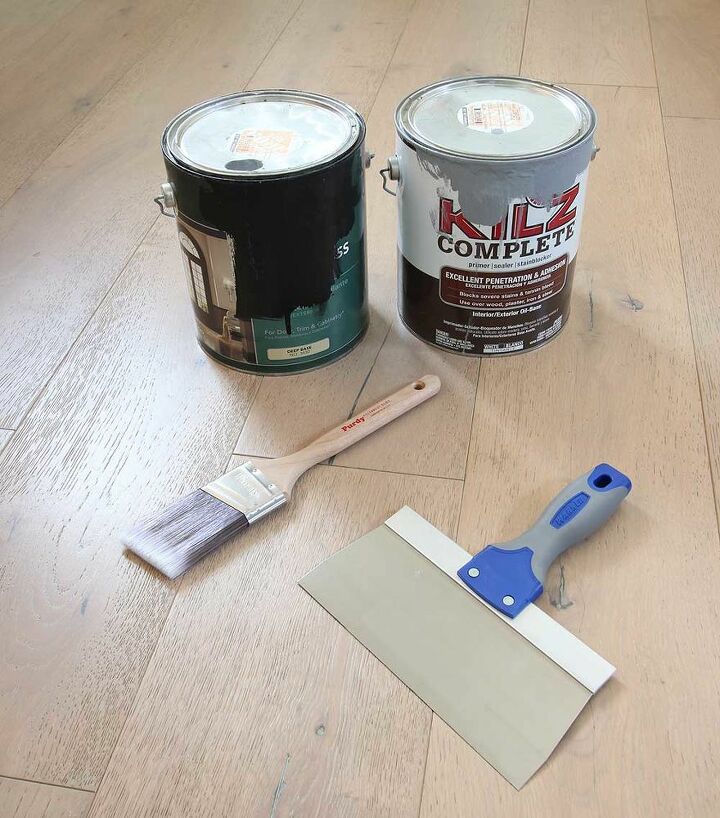
This job doesn’t require a lot of tools and materials. The most obvious tool is a good paintbrush, but maybe the most important is the large putty knife. With it, there is no need for painters tape. It makes getting a nice clean straight edge super easy!
- Tinted Primer
- Black Paint
- 2″ Brush
- Large Putty Knife
- Drill or screw driver
- Damp cloth
We used a 2″ paint brush. This size is excellent for cutting in and painting smaller areas.
The real hero of this project is the putty knife. I will go into detail later about this.
You will also need a damp small rag and of course the paint. We used a tinted Kiltz for the primer and a black oil based cabinet and trim paint for the final coat.
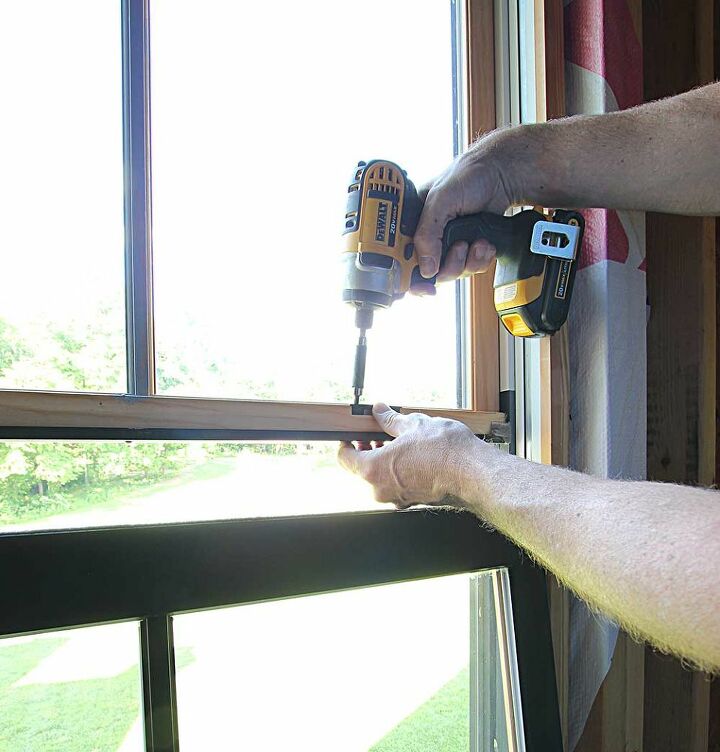
Remove Locks
After setting up, you will need to remove all locks from the window. This can be done with a screwdriver or a drill. More than likely the screws will have phillips heads, so you’ll need a phillips bit.
It’s a good idea to put all of the locks and screws in bag or container to make sure they don’t get lost, misplaced, or thrown out by mistake.
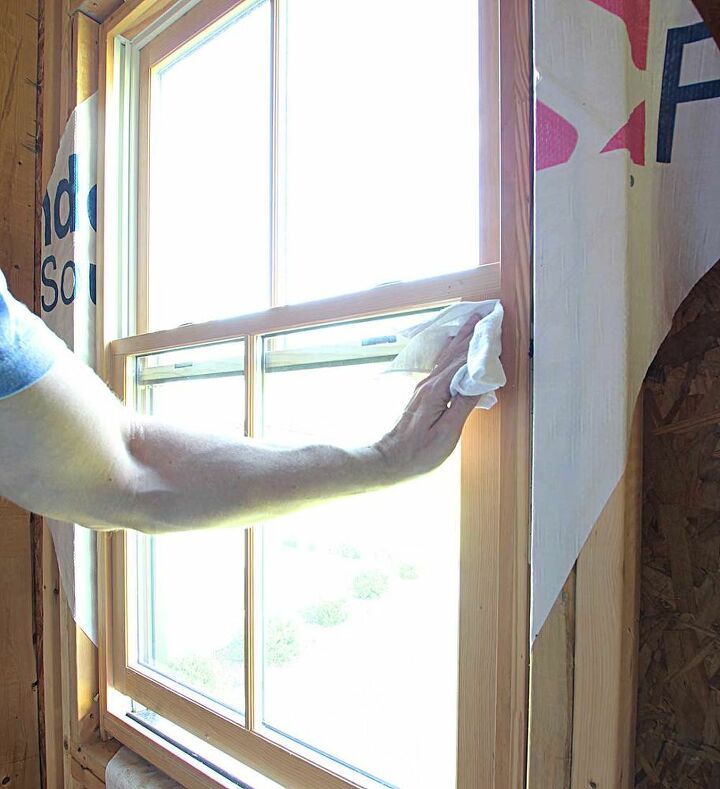
Clean the Surface
After you remove the locks and hardware, and before applying any paint, it’s very important to clean the surface of the window frames with a damp cloth to remove any debris and dust. This will help you get a smooth finish.
Apply the Primer
If you are painting double hung windows, you’ll want to paint the top sash first. To do this, release the bottom sash and let it lay down against the bottom of the window to get it out of the way.
Now slide the top sash down about an inch so you can see the entire frame.
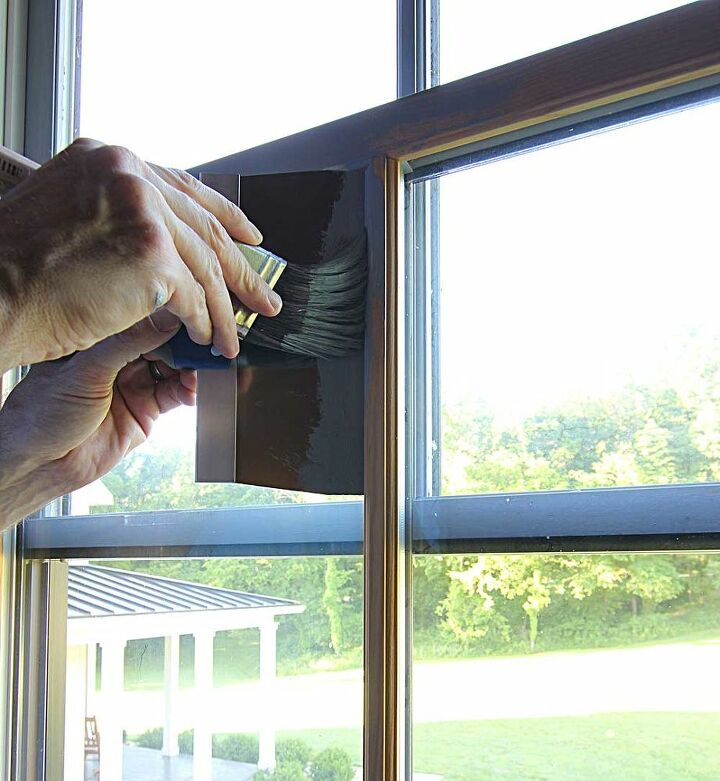
Now you will need to apply a good coat of primer. This is where the putty knife will become extremely handy. With it, there is no need to painters tape, which I have never been fond of.
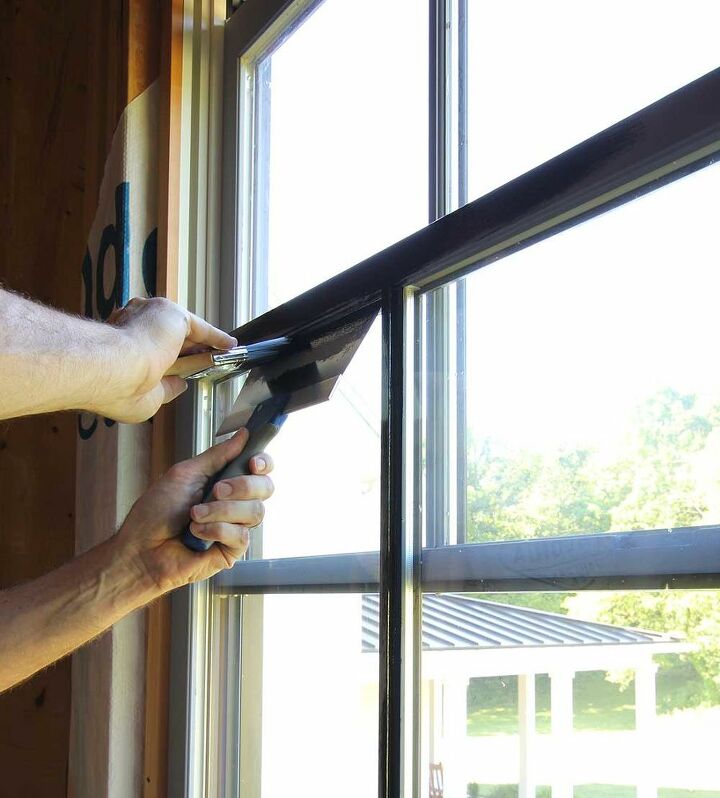
Hold the edge of the putty knife firmly with one hand at an angle where the grille or frame meets the glass. With your other hand, paint the grille or frame all the way down to the edge of the putty knife. Then move the putty knife to the next section and continue painting.
When you pull the putty knife away, make sure you don’t scrape it against the area you just painted.
This technique seems like a no brainer, but when I first learned how to do this, it was a complete game changer for achieving a super straight edge.
Once you finish applying the primer to the top sash, fold the bottom sash and up and apply a coat of primer to it.
Leave both sashes slightly open while the primer coat drys. This will prevent from rubbing or sticking to the seals.
Apply the Final Paint
The next day is the fun part and when the transformation really takes place. It’s time for the black paint to be applied. Brush on the paint using the same technique as you did with the primer.
After you’re finished, you will need to allow another 24 hours to dry. You may want to repeat with a second coat if you see primer showing through. But for our windows, we only needed to apply one coat of the black paint.
Put Locks Back On
The last step is to put the locks back on, and enjoy your new black windows!
This process can take a few days depending on how many windows you are painting, but will save you thousands of dollars on new windows, or it can completely transform your current white windows!


Comments
Join the conversation
-
For larger areas bigger than windows, like baseboards and near the ceiling we use a wallpaper tool that has a long dull metal blade that is great for keeping the paint from getting on the ceiling and baseboards.
-
I love this technique as I always make a mess! Also, I saw someone suggest on another post to use Elmer's glue on the glass, let it dry, paint, then peel of the glue, taking any splodges....given how messy I am is probably need to do both! Thank you for the great tip....your windows look wonderful too.


Frequently asked questions
Have a question about this project?
Why can’t see the technical complete? So , in the picture
I want to change mine from black to white on my 1950 cottage. Wondering how well kiltz and paint will stick to metal trim on windows