


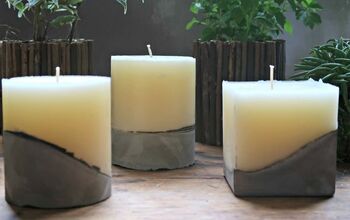
Easy Round Cement Christmas Candles
A cute DIY Christmas décor tutorial. Use a plastic ball to make a round cement Christmas candle!
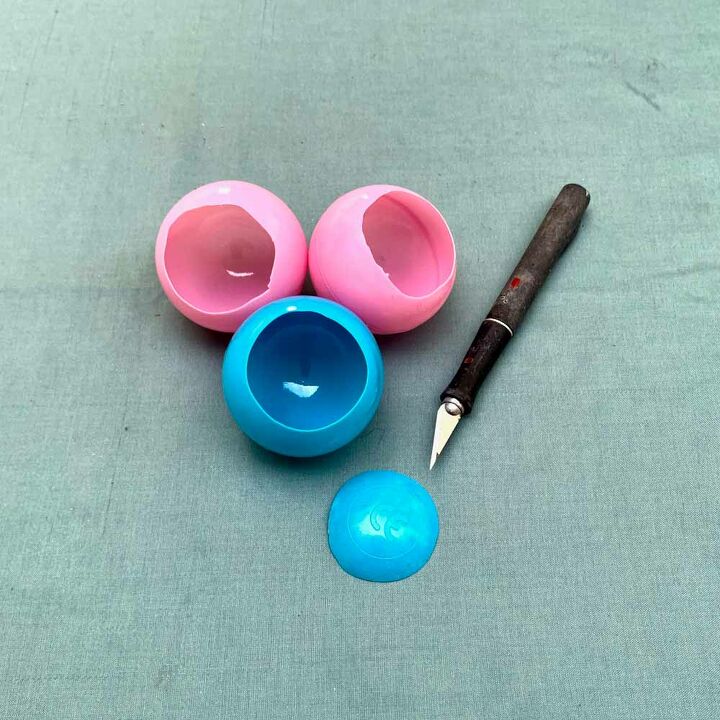
This project started out as something different which I will show you in an upcoming tutorial. As I was working on that project, lots of different ideas came to me on what else I could make with cement and these plastic bouncy balls.
Since we are coming upon the Holiday season, I thought I could make cement Christmas candles using these balls. There’s a whole bunch of materials needed for this, but considering the number of materials, these were incredibly easy to do. So much fun!

*If you love making concrete crafts, you should grab my Free Pocket Guide To Concrete & Cement Crafts Mixes! 
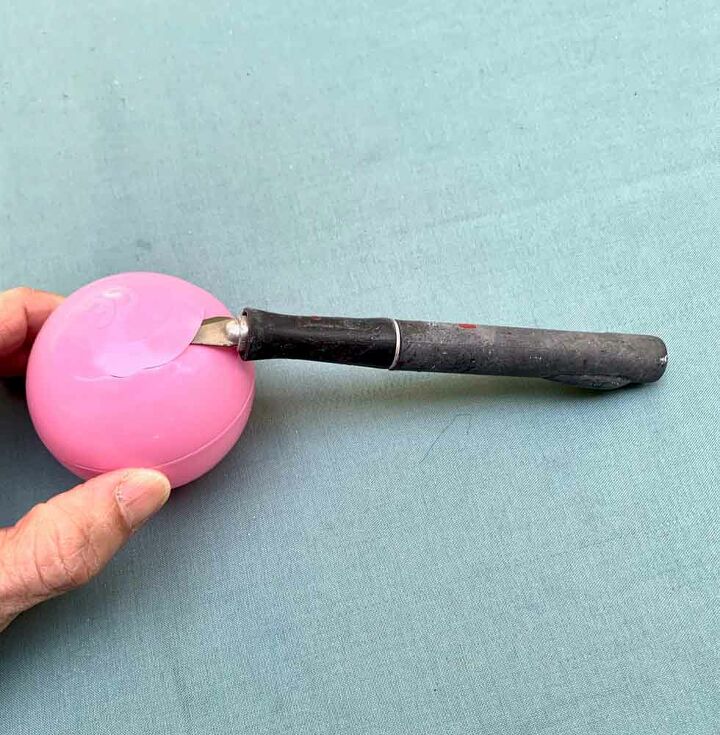
Cut the top off the plastic balls with the X-acto. It’s easier if you slice it sideways while you cut, rather than up and down. Also be sure to slice away from yourself.
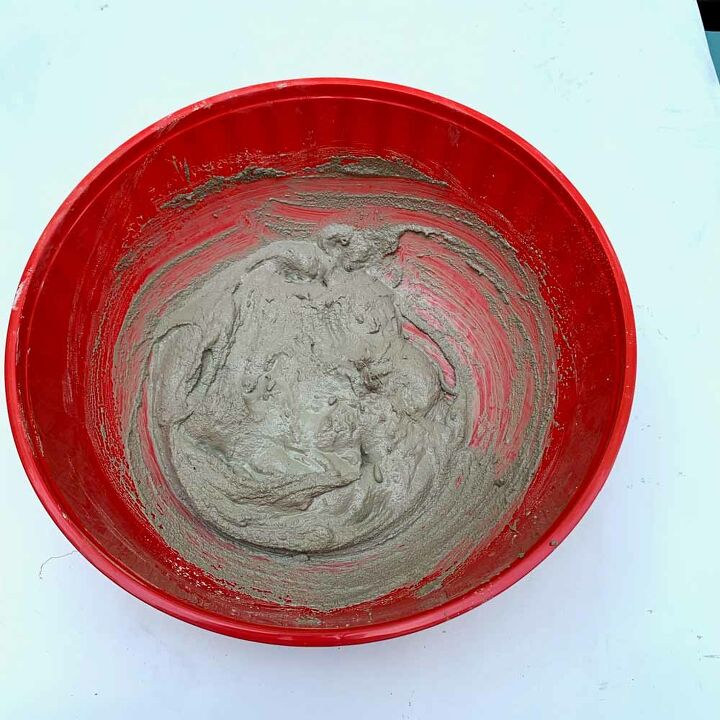
Mix the cement by adding water to the mix a little at a time and mix it thoroughly so there are no lumps. It should be a little thicker than a thick milkshake.
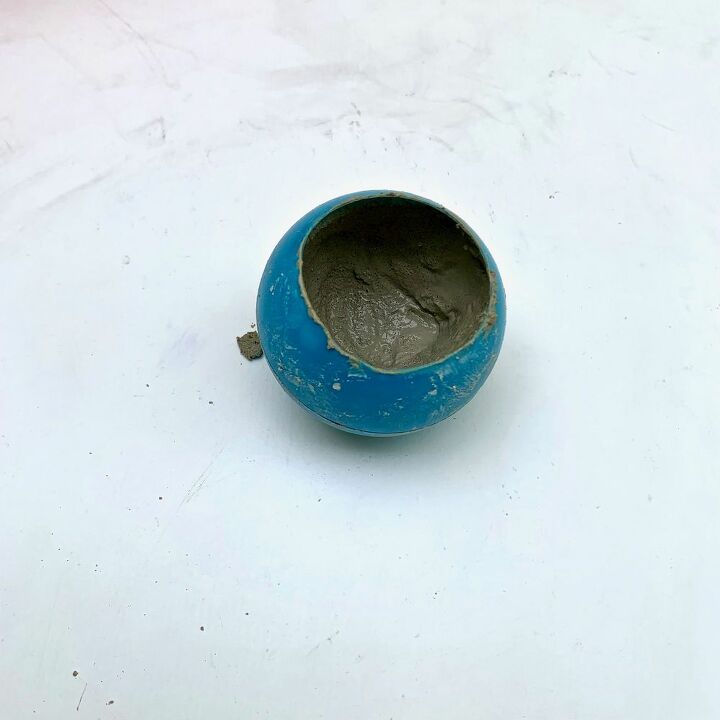
Now pour it into the balls or just use your gloved hand to squeeze the mix into the ball. Then use your finger to spread it around and mould it around the inside of the ball to smooth it. You may need to wait a minute so it sets slightly so it sticks to the sides better.
To help prevent the candle balls from rolling when cured, tap the bottoms on your work surface, lightly a few times. This will create and indentation that will help flatten the bottom.
Let the balls cure for at least 1½ hours.
Note:
If the mould for the cement Christmas candles has not fully cured, it won’t be shiny when you remove the plastic and instead it will be matte and look more like raw concrete/cement. Since I wanted mine to be shiny, I made sure to wait at least 1½ hours.
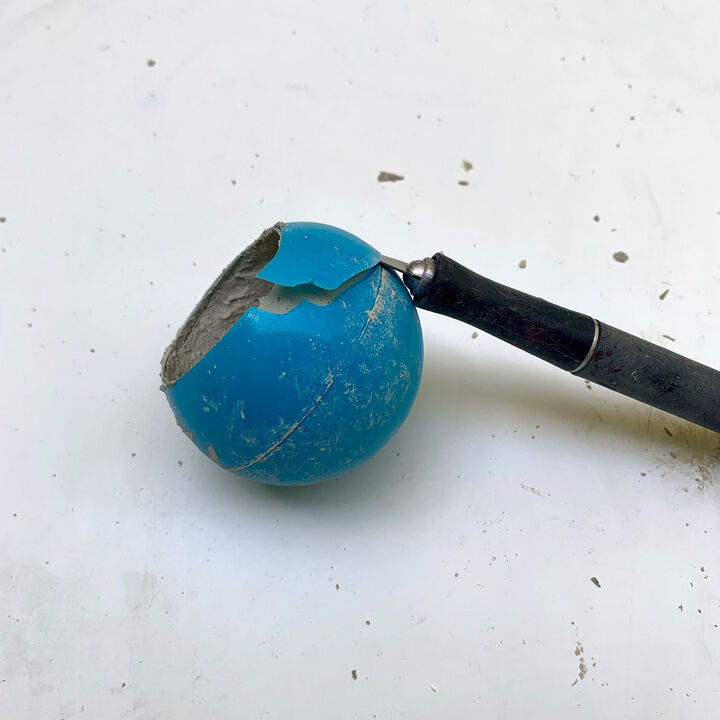
Remove the plastic ball casing and then use the X-acto blade to remove the plastic by slicing it carefully. Just pull outward to avoid cutting yourself or scratching the cement, and then peel the plastic off.
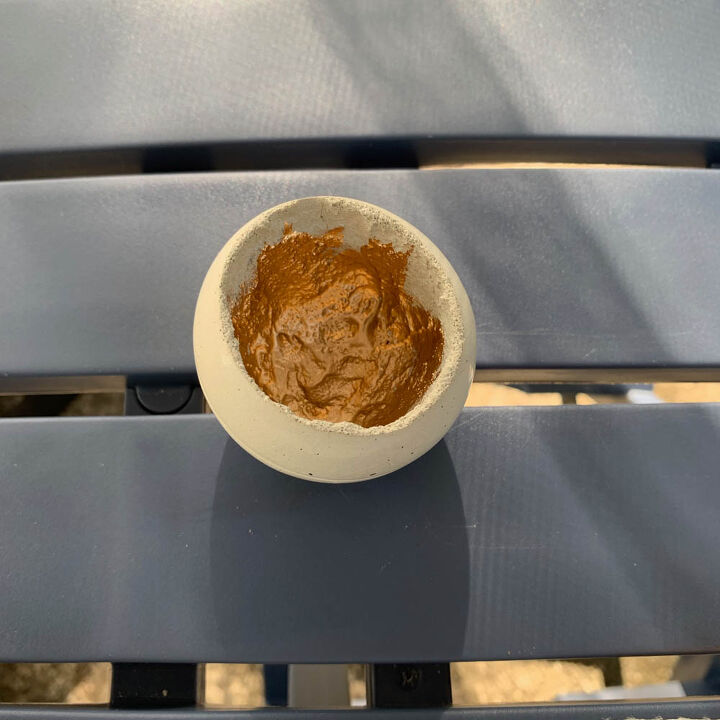
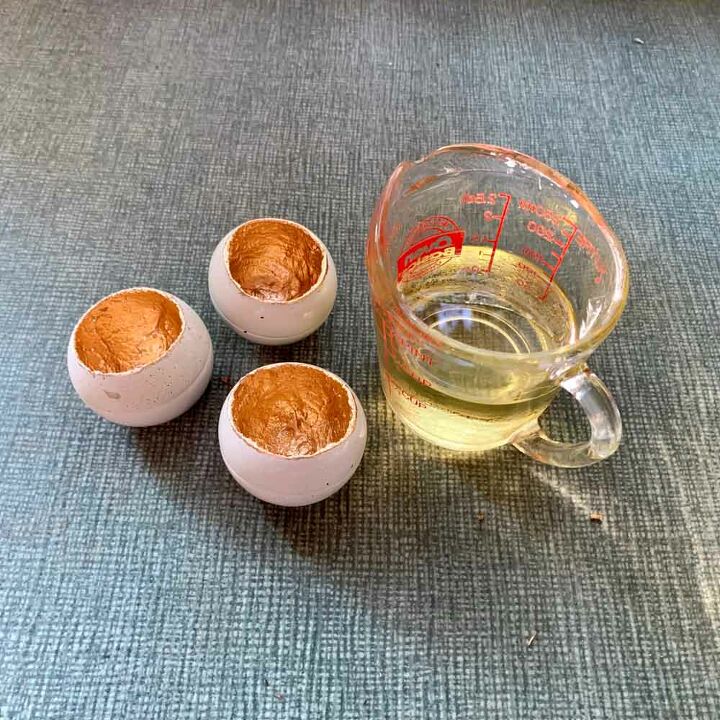
Paint the inside of the candleholder using a foam paintbrush and the iridescent gold paint (I forgot to get a photo of this step). Be careful not to get paint on the outside of the candle.
I wanted the rim to have the gold color and I found it easier to use my finger for this, so dipped my finger in the paint and put it inside the edge of the candle, then ran it along the rim.
*To see more cement Christmas projects, check out the Holiday Decor projects. 
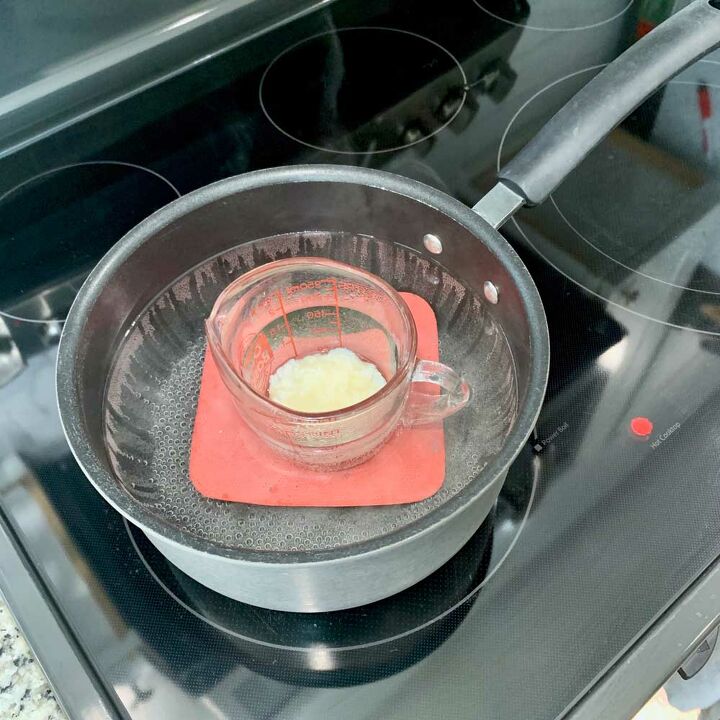
Take a saucepan and fill it half way with water, then put a glass measuring cup inside (I put mine on a rubber gripper to protect the pan’s coating from getting scratched), then add the wax flakes.
You’ll need about 3/4 of cup or more of flakes. Now turn the heat on to med-low and stir occasionally with the craft stick until melted.
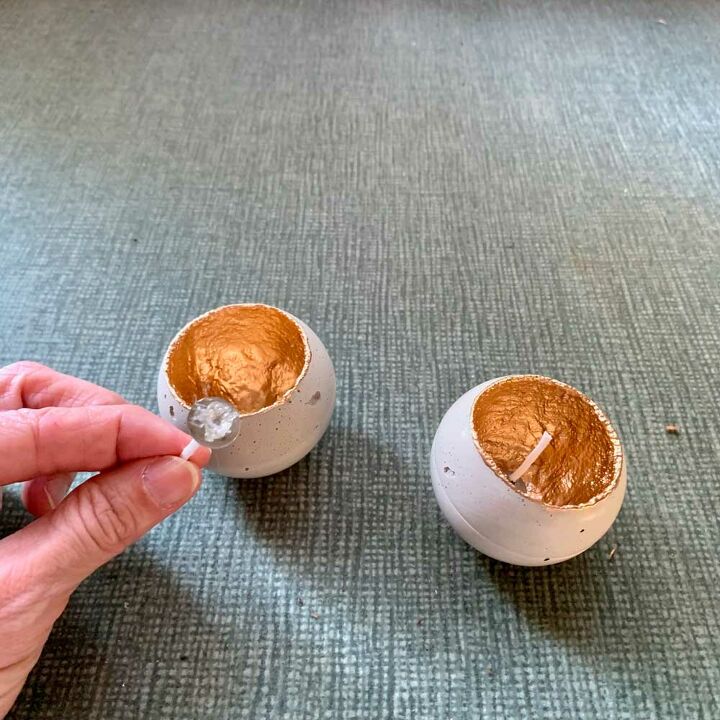
Once the paint is dry, glue your wick to the bottom with hot glue and trim the wick so that it will be ¼” higher than where you want your wax to end. This should put the top of the wick nearly flush at the top of the cement ball.You can use a hairdryer to speed up the drying time if you need to.
Pour in the wax, leaving ¼” of the wick free of wax. Be careful when you pour because the wax is very oily and it will stain the cement. I used a paper towel to hold under the glass while I cured so that if it did drip, it would hit the towel.
Let it solidify, about an hour.
Then go ahead and light up your cute cement Christmas candles!
Resources for this project:
See all materials


Comments
Join the conversation
-
Who says politicians are useless. At least they would be good for DYI projects
-
I would love to make these in a giant size for outdoor use!


Frequently asked questions
Have a question about this project?