


Antique Oak Chest of Drawers

5 Materials
$150
8 Hours
Easy
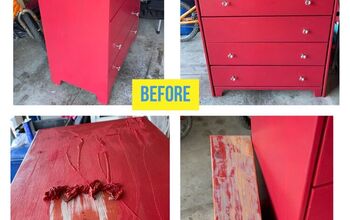
We looked for a few months to find the perfect chest of drawers for a client that could be madeover to fit her style. We found this solid oak piece that worked out perfectly!
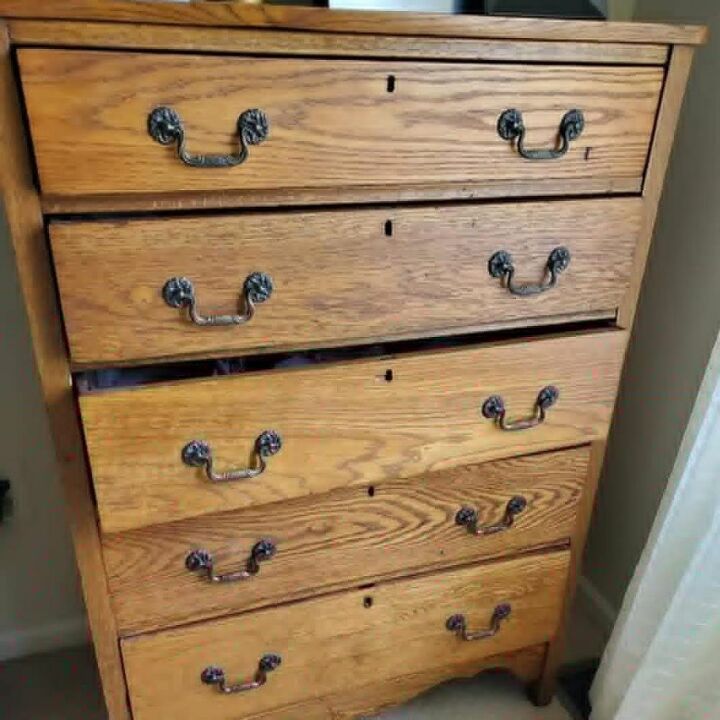
Isn't it cute? We started by removing the hardware and giving the piece a cleaning with Krud Kutter. After rinsing and letting dry, we filled the hardware holes with dowels and wood filler. After sanding those flush to the drawer front, we drilled new holes where the new hardware would go.
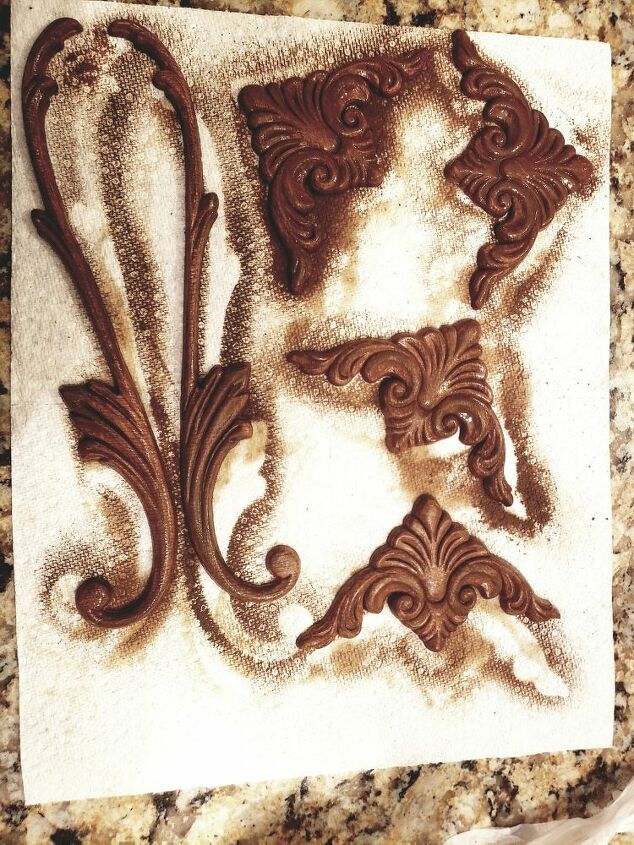
Since I knew one of the requests was for detail on the piece, we added these solid wood appliques from D. Lawless Hardware. You can find them here - https://store.yahoo.com/cgi-bin/clink?dlawlesshardware+NeCb4r+ wood-appliques.html
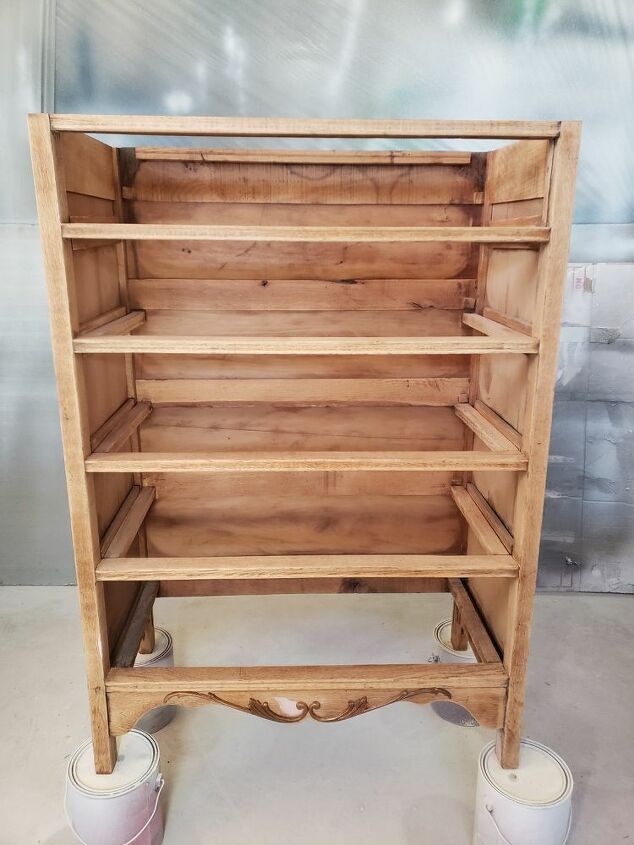
Sanding was the next step, so we took out our favorite new sander, called the Surfprep and put it to work. The really great thing about the Surfprep is that it uses a flexible pad so if there are curves on the profile it won't damage that. It virtually also alleviates the need for hand sanding of detailed areas. It is really our new best friend. Anyhow, we started with an 80 grit sheet and worked our way through the grits back up to 220. We made to remove all dust with a tack cloth. After removing the dust, we glued and nailed in the appliques to the chest. See the plumes on the bottom? Totally looks like it was meant to be. We then primed with Shellac, lightly sanded and removed the dust, then sprayed two coats with our Fuji Semi-Pro. We made sure to lightly sand in between coats with 600 grit to make sure it was smooth. Oh, almost forgot...after we sprayed the first coat before it was dry we took a damp microfiber cloth and wiped back some of the paint for this worn look. We did the same after the second coat too. Then after drying we applied our top coat, two coats, lightly sanding in between each one as well.
Here is a peek at where the other appliques went. We positioned them on the top and bottom drawers, sort of in the style of a picture frame border.
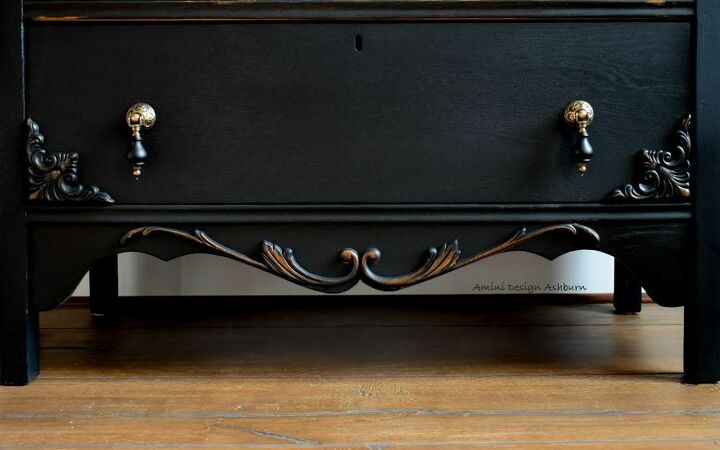
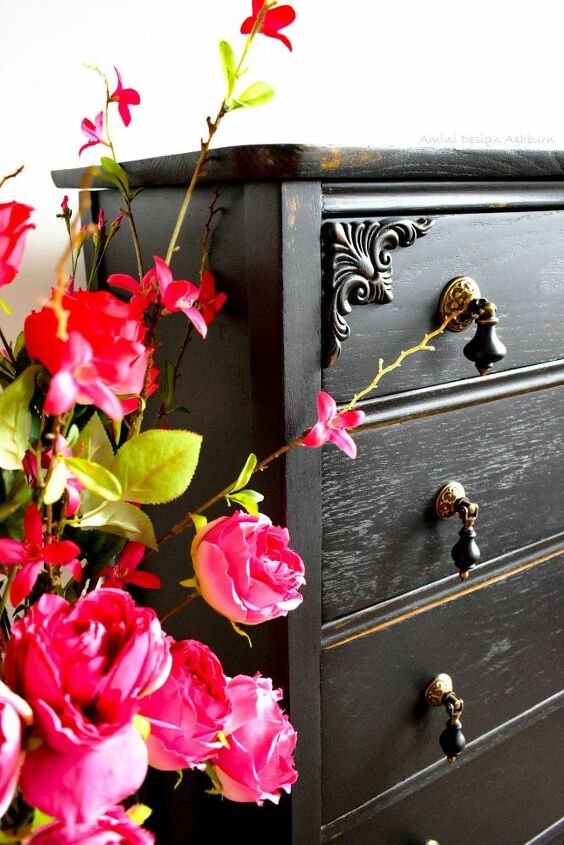
We then installed the gorgeous new drop pulls that our client picked and have to say, they were the perfect choice!

Here is how it turned out. It will now match her hundred year old farmhouse and we couldn't be happier. Thank you for following along.
Resources for this project:
See all materials


Any price and availability information displayed on [relevant Amazon Site(s), as applicable] at the time of purchase will apply to the purchase of this product.
Hometalk may collect a small share of sales from the links on this page.More info
Comments
Join the conversation
2 of 88 comments
-
Awesome job.
-
I loved this so much, I used the idea to makeover a dresser for my daughter’s room. I got the original dresser for free bonus! Thank you for the inspiration.


Frequently asked questions
Have a question about this project?
Where may I purchase the pull knobs?
So beautiful! I have a very similar piece but I am amazed that you were able to fill the previous hardware holes so well. They are not noticeable when you painted. Can you please describe this process in more detail? Thank you
is. The hardware you took off for sale? Please contact me at cyndilou2@hotmail.com.