


Dollhouse Remodel Bashing Part 1

Did you ever want to build a dollhouse but were too intimidated? What about that adorable dollhouse at the garage sale, or thrift store?
It's not as hard as you think. Dollhouse remodel in is big. It saves you the time of building. It's just a matter of being creative and having a vision. It doesn't have to be done overnight. As a matter of fact, Dollhouse Rehabilitation/remodel is very popular among dollhouse enthusiasts and miniaturists.
It's not as hard as you think. Dollhouse remodel in is big. It saves you the time of building. It's just a matter of being creative and having a vision. It doesn't have to be done overnight. As a matter of fact, Dollhouse Rehabilitation/remodel is very popular among dollhouse enthusiasts and miniaturists.
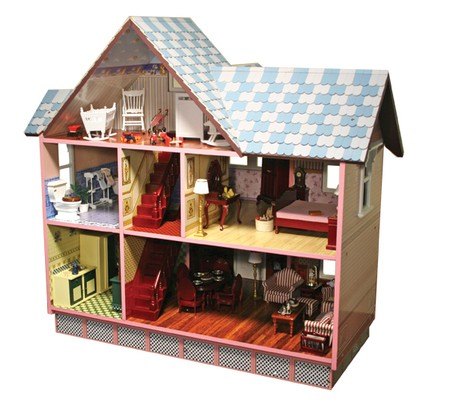
I had just finished my little cottage and was itching to start a larger dollhouse. I didn't know if I wanted to build or rehab a house.
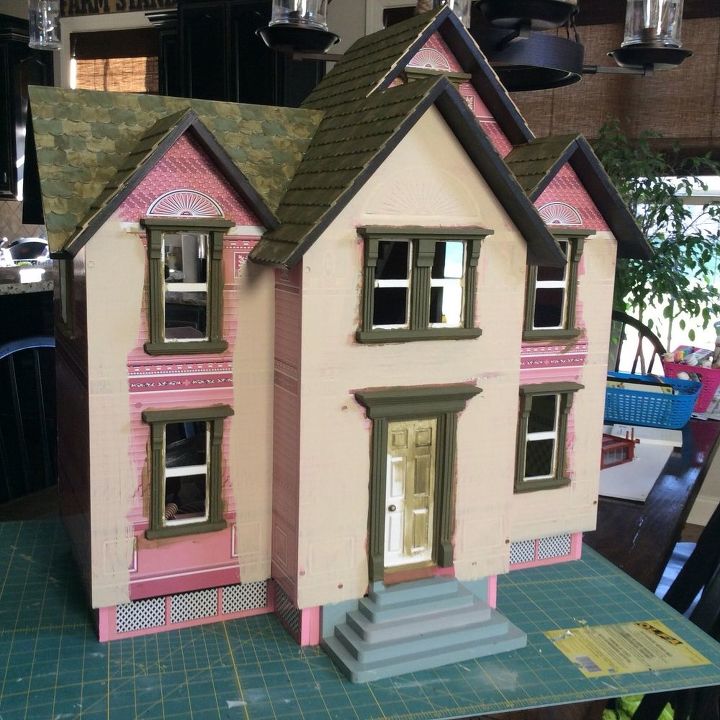
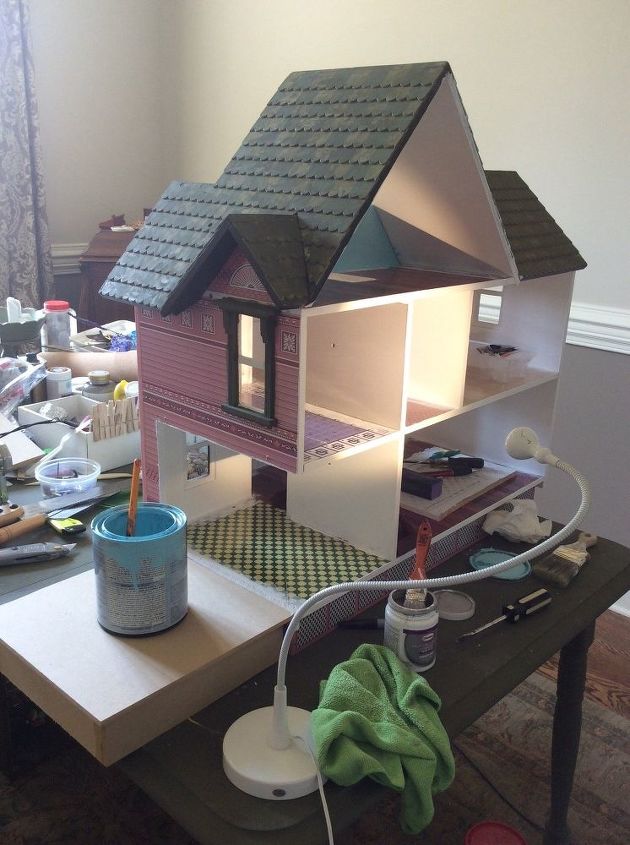
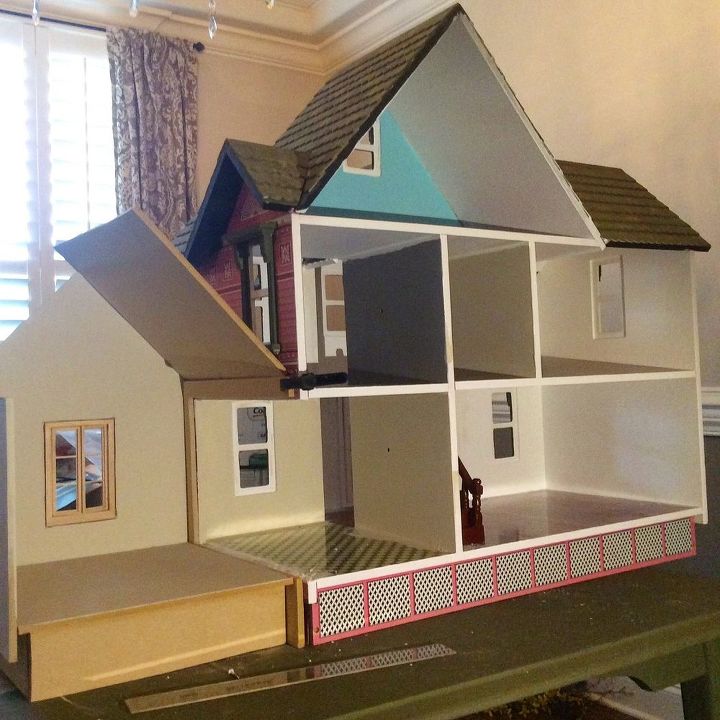
I started to work on the house immediately. I sanded down all the decals so primer would adhere to it. I loved the layout of the house but the kitchen was way too small for my tastes. I knew I was going to add an extension. That's where bashing comes in. Dollhouse Bashing is when you change the original structure. You can change Windows, doors, room layouts, or add more room. I was dying to do this, especially because most dollhouses have very small kitchen spaces that are dark and closed in. I wanted an open concept.
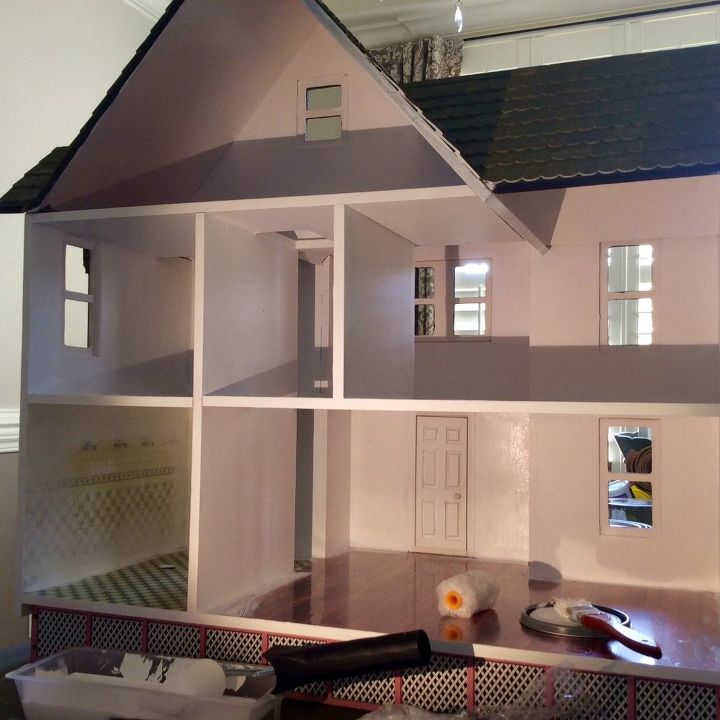
My next step was to determine my opening to extend the kitchen. I also had to build a base that matched up to existing floor height.
Building out floor extension. Next was the make the cuts to create a room. I also cut a whole and added a window
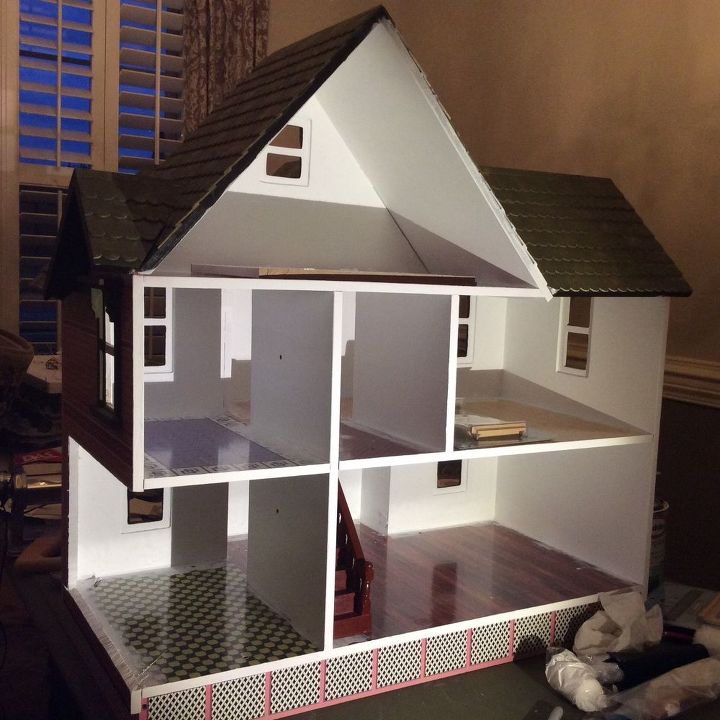
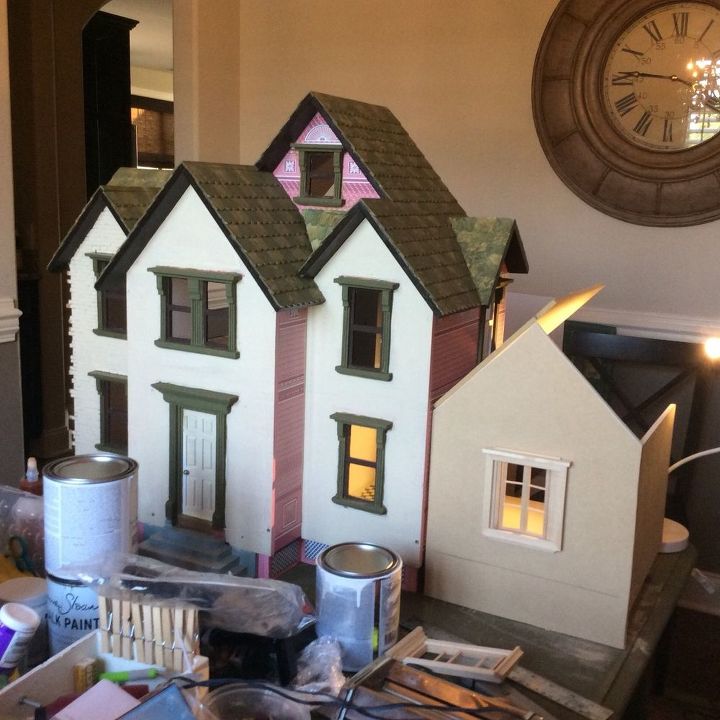
That extension made the kitchen so roomy. The possibilities of decorating were now limitless. Please keep in mind this was the first time I have used and electric tool and made something/anything, so it is possible for you to do it too.
Extension from exterior view.
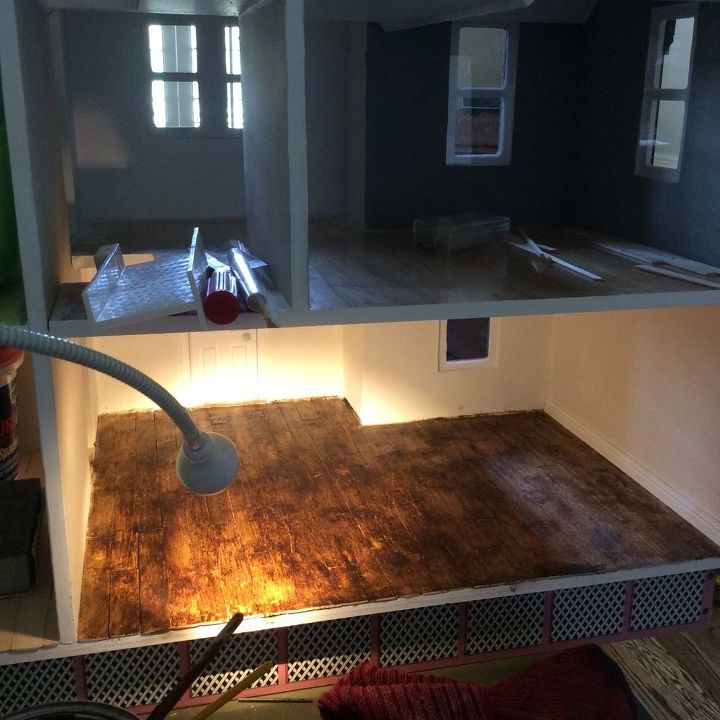
I used tongue depressors for the wood planked floors. I wanted a distressed finish so I went with Annie Sloan Dark wax with a heavy hand. The first floor was easy enough to cut and lay but the lighting is what held up the next two floors. When you hardware a house you do all the wiring before you lay down your floors. This is because you create grooves in the flooring to tuck your wires. This way when you go to lay your floor there are no bumps to lift your tile or planks. So of course is means you need all your lights in place when you are ready to lay your floor. I didn't realize that until I started my floors. So this kind of held me up since I didn't have all my lighting. I needed to make a lot of lights. Is is also when I realized I could put outlets into the baseboard molding for lamps.
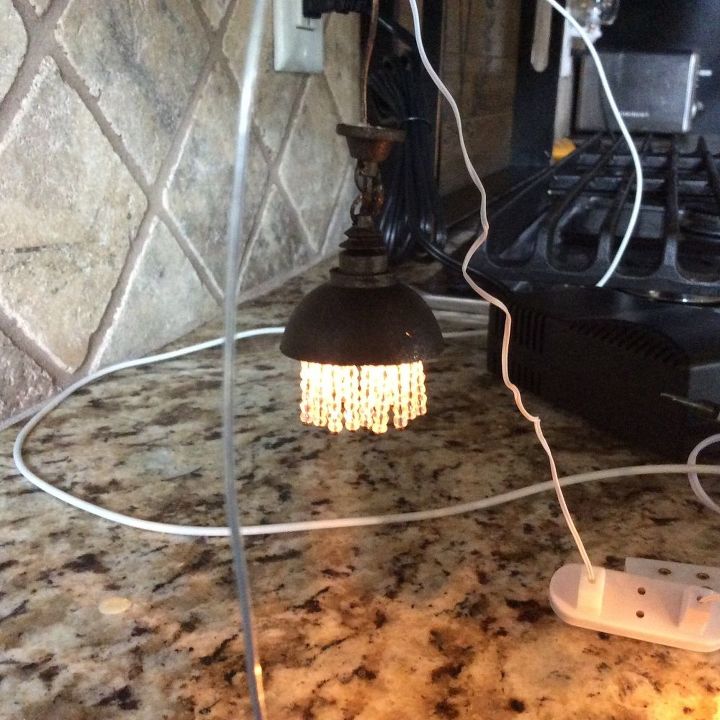
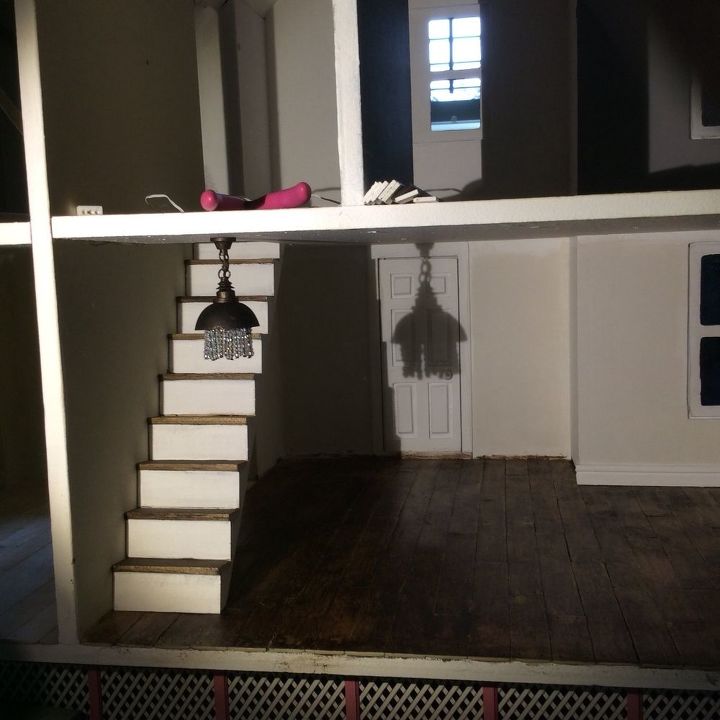
This was my first light fixture I made. It was a simple $5 dome light. I spray painted it an antique bronze and created the crystal hangings from mini crystals threaded through jewelry finding pins. I made a wire circle that fit inside the dome and thread those crystal drops onto the circle. I crazy glued the circle under the inner rim of the dome light. This was inspired from Restoration Hardware lighting, which I love. I may not be able to afford it for my home but my dollhouse can have it. Below is a picture of where I hung it above the main stairway on the first floor.
Next, I swiped this little sphere light I had made for my cottage. I never electrified it but that is a simple process. I went to Hobby Lobby and purchased wired light bulbs that have the plug. I spray painted the bulb recepticle and the wire and strung it through the sphere. I used this light for the second landing hallway. I just added a little hanging crystal on the bottom
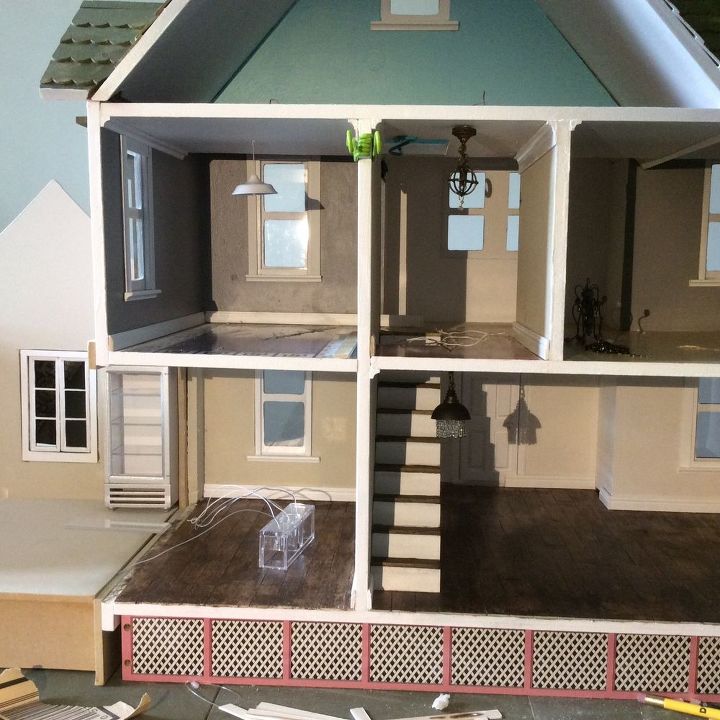
I also purchased the white industrial shade in the upper left room (bathroom). It was inexpensive and worked great with my theme.
Comments
Join the conversation
3 of 4 comments
-
This is awesome - I love the attention to detail!
-
I am so excited to watch this progress. What an awesome job and LOVE what you have done so far. Now I want to try and do this lol Thank you for sharing. :)


Frequently asked questions
Have a question about this project?
What did you use to remove the laminate on the exterior walls?