


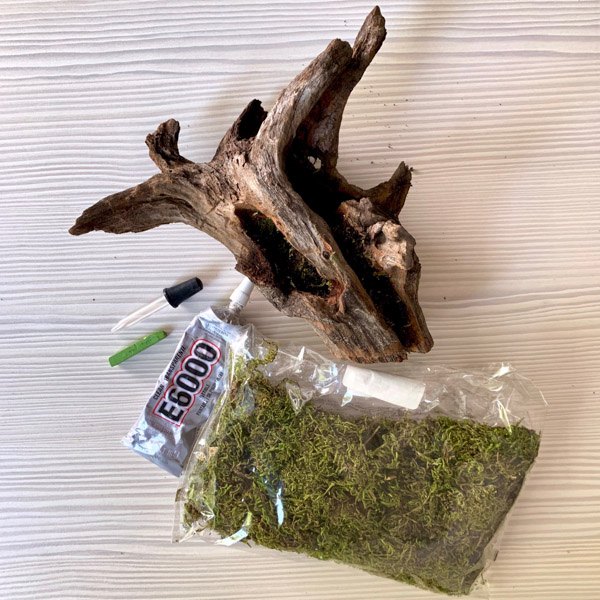
DIY Driftwood Planter- Use Any Old Wood!
I have a lot of woods behind my house and am fortunate that there are trails I can walk on. On my walks, I kept seeing trunks of cedar trees that had been cut down at some point because they were dying or dead. They had rotted from the ground and were easy to pick right up. I thought they were beautiful and unique looking and they reminded me of driftwood.
I don’t have easy access to driftwood so I thought I would take advantage of the cedar tree trunks and use them as ‘driftwood planters’. The only drawback to these is that cedar is an incredibly hard wood, so carving out deeper divots for planting the succulents was a little challenging.
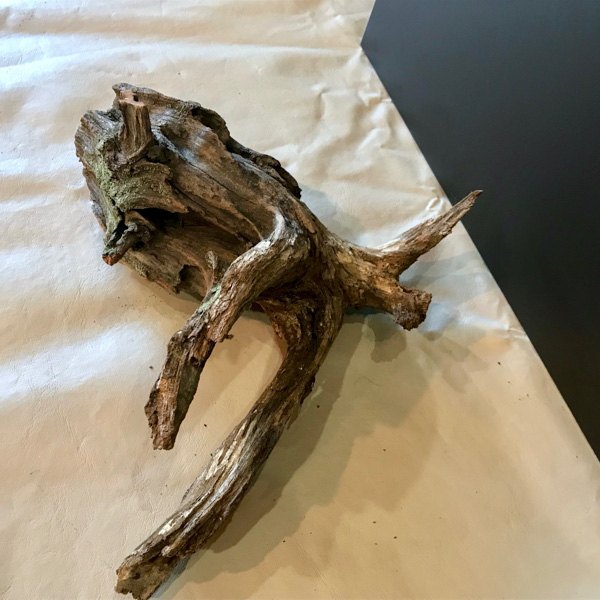
Choose a piece of tree trunk that has broken off from a dead cedar tree or other). I have quite a few of these dead trunks around my house. I looked for one that was visually interesting and had some natural grooves.
You really don’t need much depth to plant the succulents. I have some succulents planted where there really isn't a groove, just the moss holding them in.
If you can’t find a piece of ‘driftwood’ that is already separated from the cedar, then you may need to use a chain saw to cut the tree trunk off from a fallen tree.
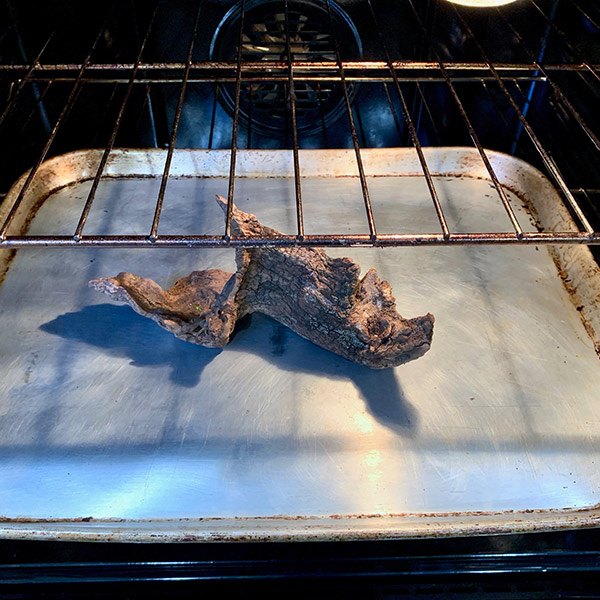
The trunk likely has insects in it, so the way to kill them is with heat. First, start by rinsing the dirt off the trunk. I did this in the winter, so I just rinsed it in the bathtub and spot dried it where the water puddled up in the grooves.
Now turn on your oven to 250 degrees, I didn’t bother pre-heating. Put the trunk on a tray to help keep your oven clean, in case more dirt comes off and then let it bake for about 2 hours.
Please keep an eye on it to make sure it isn’t burning, I set a timer for every 20-30 minutes to check on it. Finally, after a couple of hours, remove it and let cool down.

Mark out the locations where you want to place the succulents, using the pastel or chalk stick.
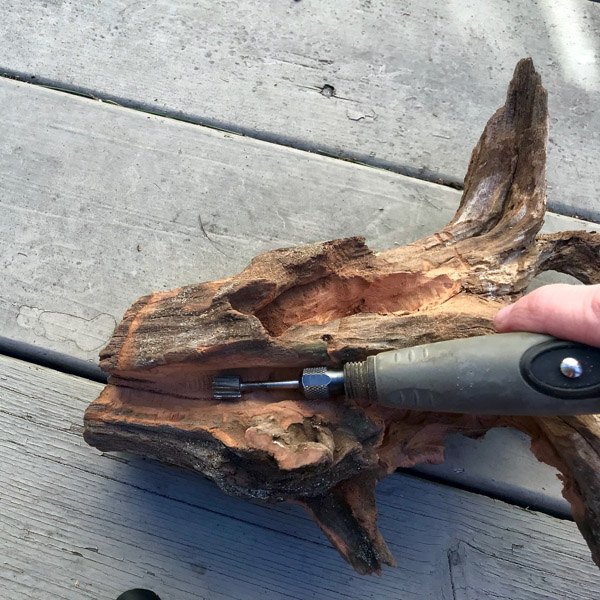
As it turned out, I probably didn’t need to deepen my cedar grooves as much as I did. If you think you need some depth, then create some depth using a Dremel with a cutting bit.Just hollow it out a little more in the areas you have marked for planting the succulents.
It would be a good idea to clamp the cedar in a table vise while doing this in case the trunk slips. I recommend cleaning up any undercuts that you may have created.
Remember, you only need a depth of 1/8 – 1/4″ to allow your plants enough space to attach their roots. If you don’t have deep enough grooves you can also build up the moss a bit to hold the stems to the planter.
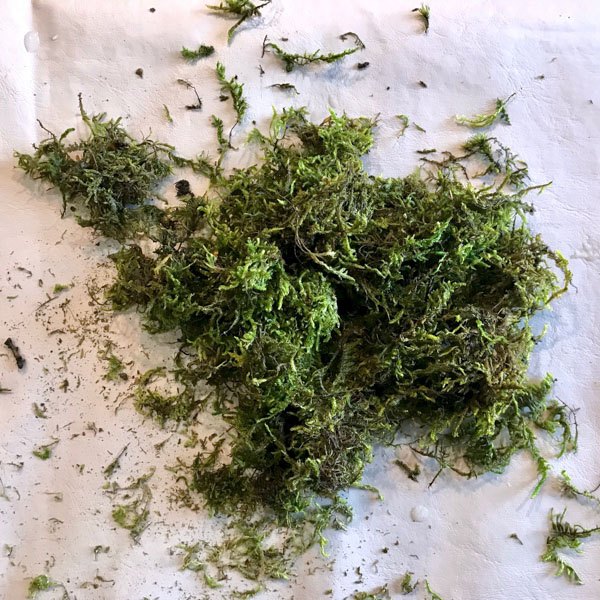
Since dry moss is very brittle and difficult to manipulate, making it a little moist will allow you to work with it more easily. Briefly wet the moss with water, then wring out the moss and put the moss aside for now.
**If you love planters, I make tons of different types of planters. You may want to check out my concrete and cement planters here- Cement and Concrete Crafts, and some of my other planters and outdoor projects here- Outdoor Decor. 
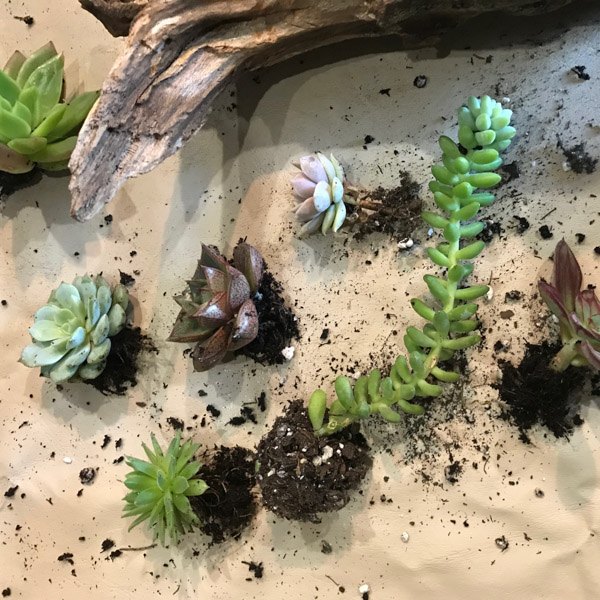
Carefully remove the succulents from the containers, and then shake off the soil and trim back some of the roots. You are supposed to let these callous for a few days before replanting, but I didn't and they still did great.
You don’t want them to be longer than your nooks are deep. In some cases, you may have little to no root. In that case, you can secure the succulent by pressing some moss on top of the stem.
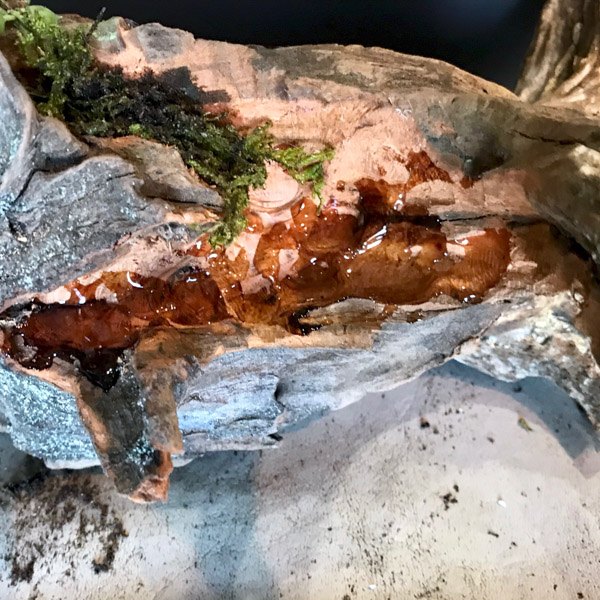
Squeeze a little bit of glue onto the locations of the cedar driftwood you are planting and start by planting the moss. You can also just dip the moss in some of the glue and stick it on the trunk.
If some of your grooves are deeper than an inch, you can add a bit of soil underneath the moss. The glue is waterproof and will adhere to the wet moss nicely.
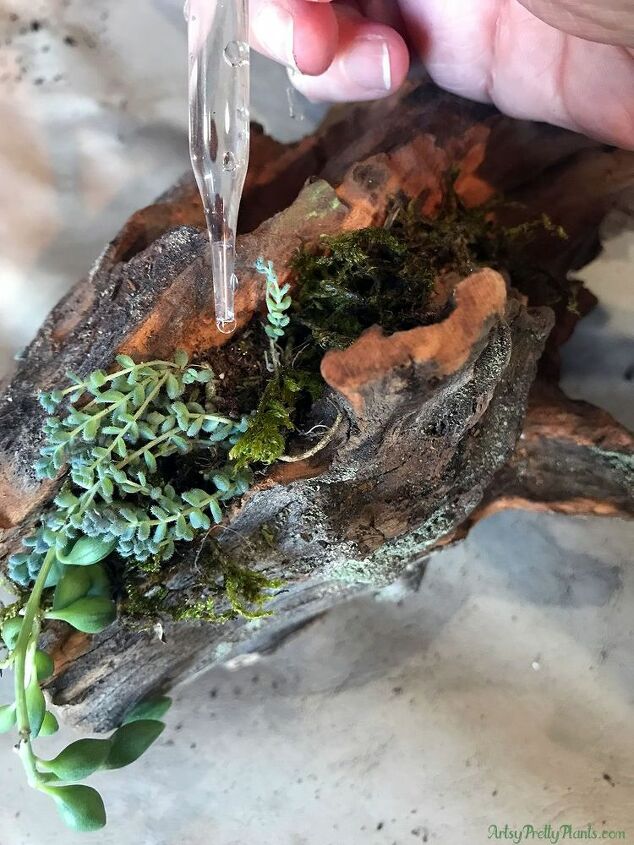
Next, start planting your succulents. Just dip the stems into the moss that has been glued.It’s okay for the stem to get glued. The moss itself should anchor the plants.
However, if the roots are a little dry, then they may not be as cooperative in trying to manipulate.Help anchor those using the eye dropper.
Continue working your way around the cedar trunk until you have your plants looking the way you want them. I advise holding off a few days before watering so your plants can get used to their new fancy home in the Cedar DIY Driftwood Planter!
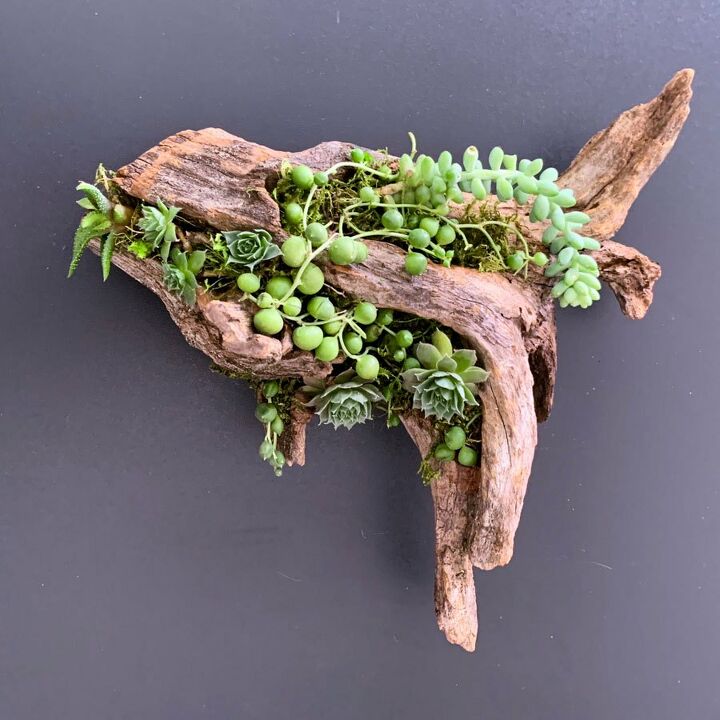
I had this succulent driftwood planter for a year, and during that year, I was pleased to discover after looking back at these photos, that out of the 8 or so types I planted, that there were only two types of succulents that didn't make it.
The succulents that gave me trouble are the same types that give me trouble in regular planters as well. I am seriously lacking a green thumb, so that’s a testament to the hardiness of these plants being planted on this type of planter.
The photo above is after I had to re-plant it because we moved across the country and I re-homed them before the trip.
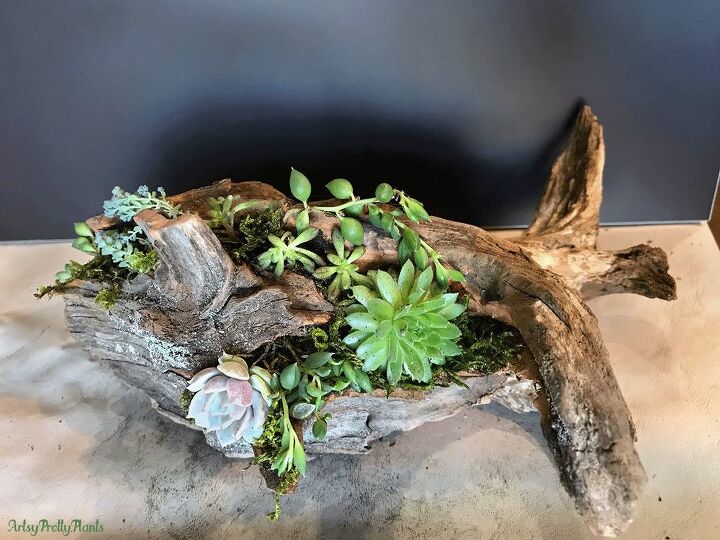
This is the original photo before I re-planted due to the move.
Resources for this project:
See all materials


Comments
Join the conversation
-
I love driftwood. I like the original better. Sometimes you can overdo with succulents.
-
Very pretty and nice idea of bringing the outdoors in. Love it!!!


Frequently asked questions
Have a question about this project?
I love this idea, I'm a collector of strange looking drift wood and rocks and have made several crafts out of the drift wood but never have done one with live plants. I would love to start doing this for gifts what could I treat the wood with so that it could be kept outside so the wood doesn't decay?
Very nice! Cedar is actually a softwood and not a hardwood. Does the cedar stump keep its fragrance?
could you put the wood in the freezer to kill the bugs rather than using the oven?