


Painting a Rug on Concrete
Over the past 10 years we have painted multiple concrete surfaces... some to look like stone and some to look like rugs. It amazing how creative you can be with some paint!
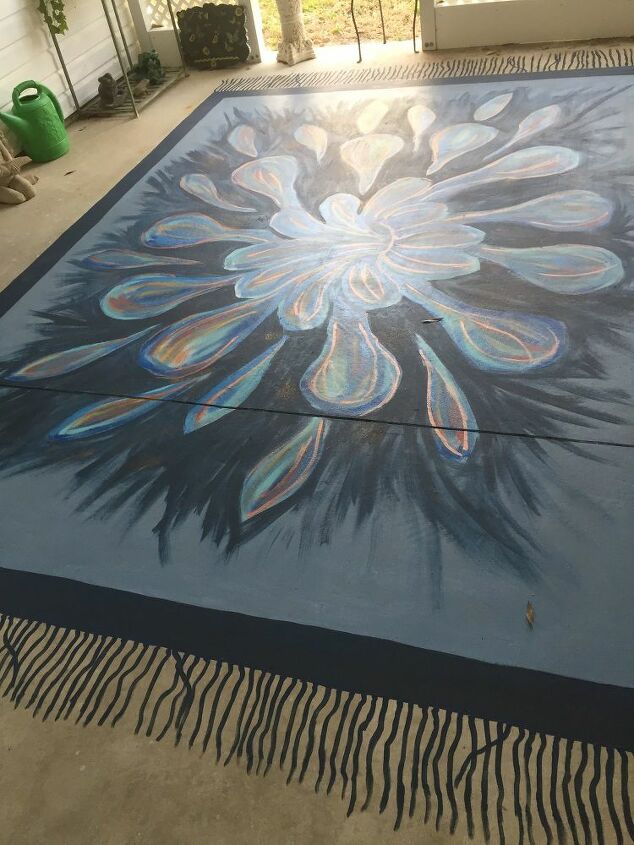
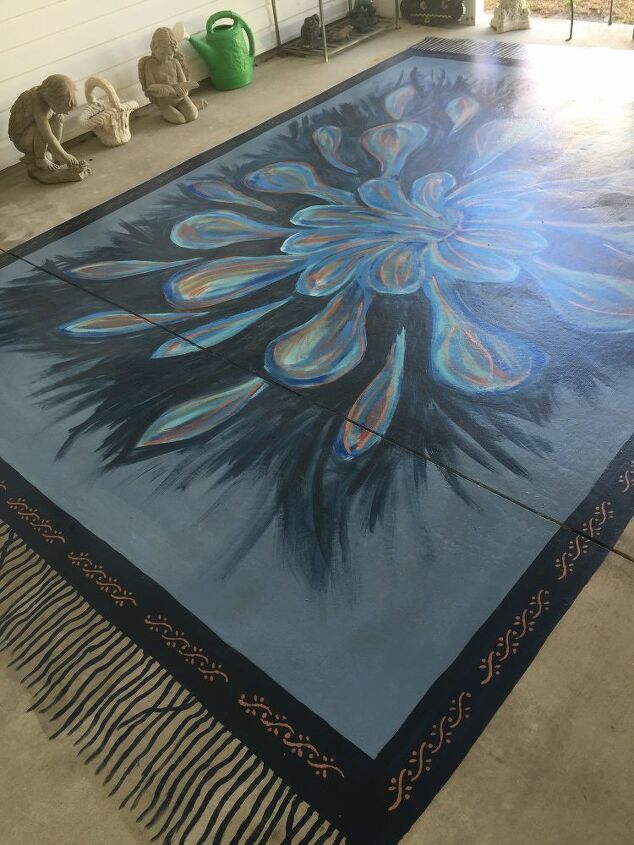
So you know where this journey is taking you... here is the almost finished rug. (:
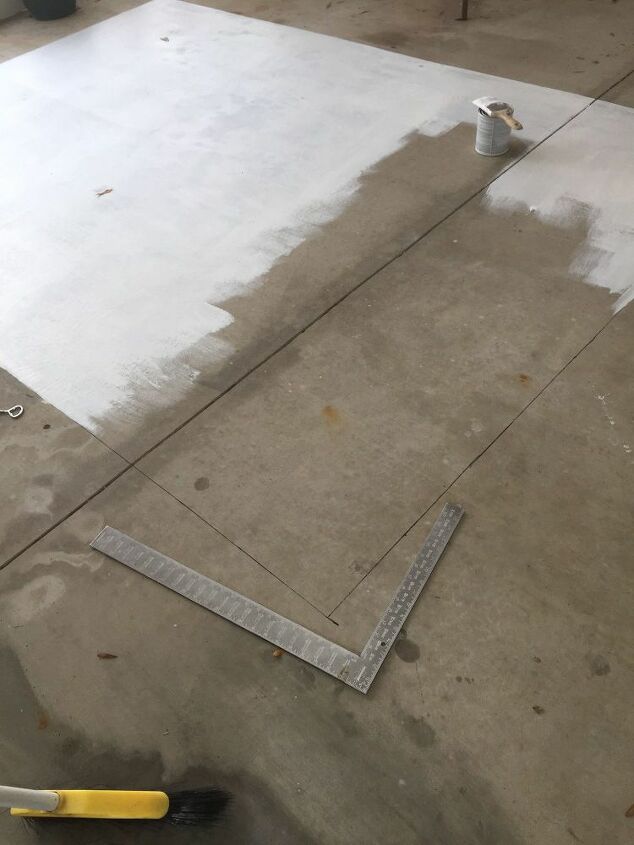
After power washing and drying, we drew the rectangle in the size we wanted (using felt tip pen, a square and either a chalk line or straight scrap of wood), the surface is painted with primer (we used Zinsser 123). An 80 x 120 took about 3/4 of a quart of primer.
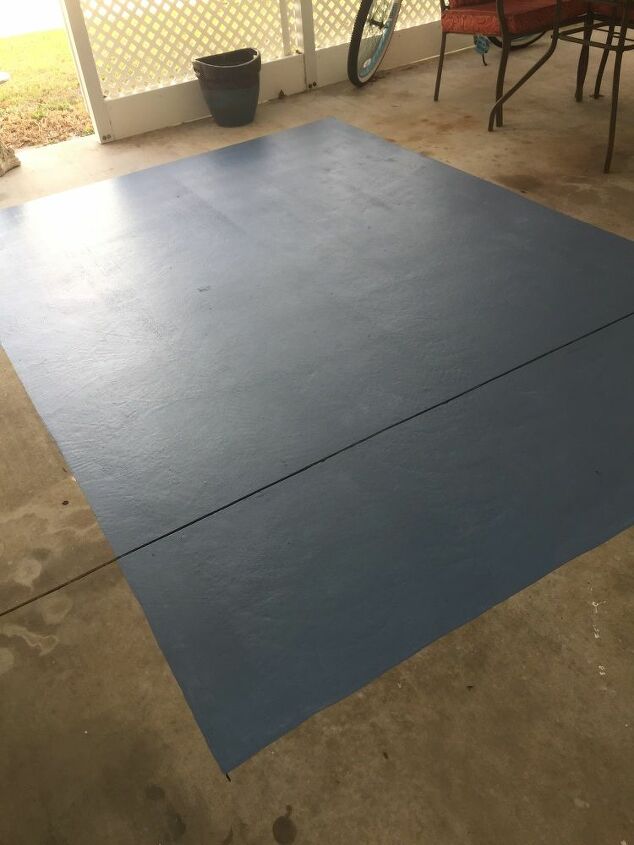
We added a base coat to match our homes shutters; this is Valspar Porch, Floor & Patio paint in 4005-6B Blue Sash. We used about 1/2 a quart since the primer has sealed the porous concrete. Notice that the felt tip marker line was covered over. (: This dries in an hour or less and is fine to walk on with bare feet or old socks.

I knew I wanted a lot of color to go with a red/orange/copper table and chairs, so using a paper plate for circles and piece of cardboard for petals, I drew the rough design. One nice thing about this type of painting is that it is very forgiving... and you can make changes and go in new directions fairly easily (:
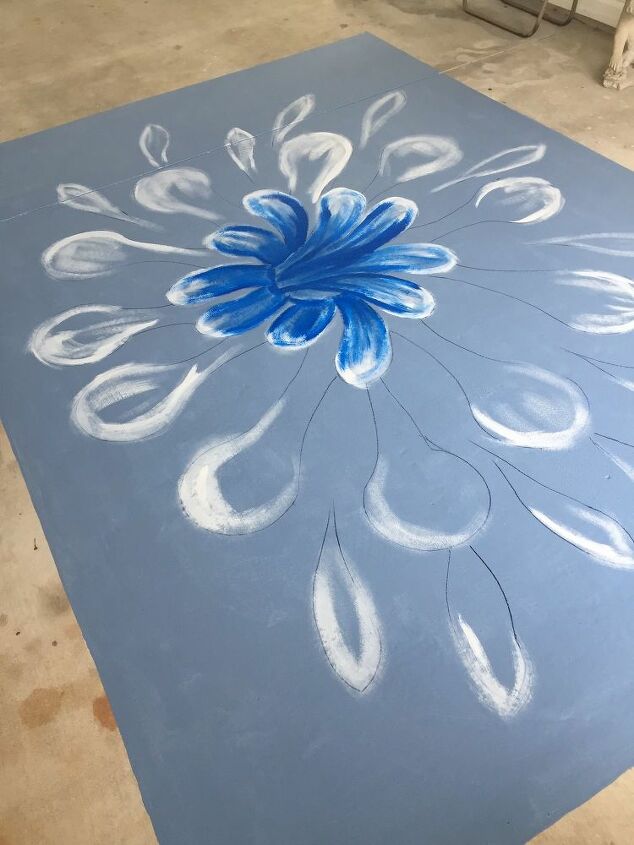
I wanted a bit of white for highlighting and then some darker blue. The paint colors are Rust-oleum ultra-cover latex (little 8 ounce cans are fine). You can also use small bottles of any latex craft paint. These colors were added using an old 2" paint brush.
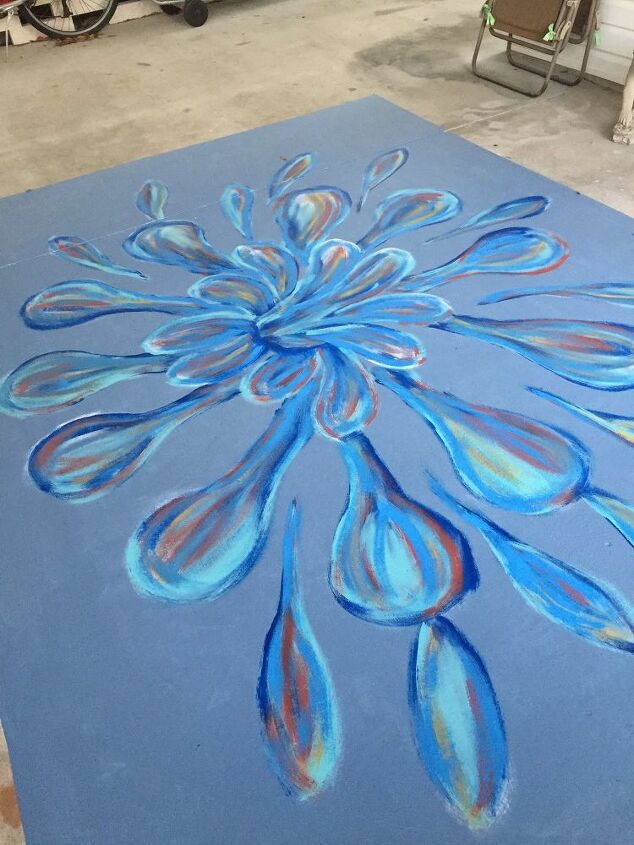
I began adding tones like turquoise and orange-red to go with the table and chairs we have. But this was looking too 'plain' and not enough contrast for me... I am still working with the same old 2" paint brush. (: You really do not need any dry time on this... it is more when your back has had enough for one day! (:
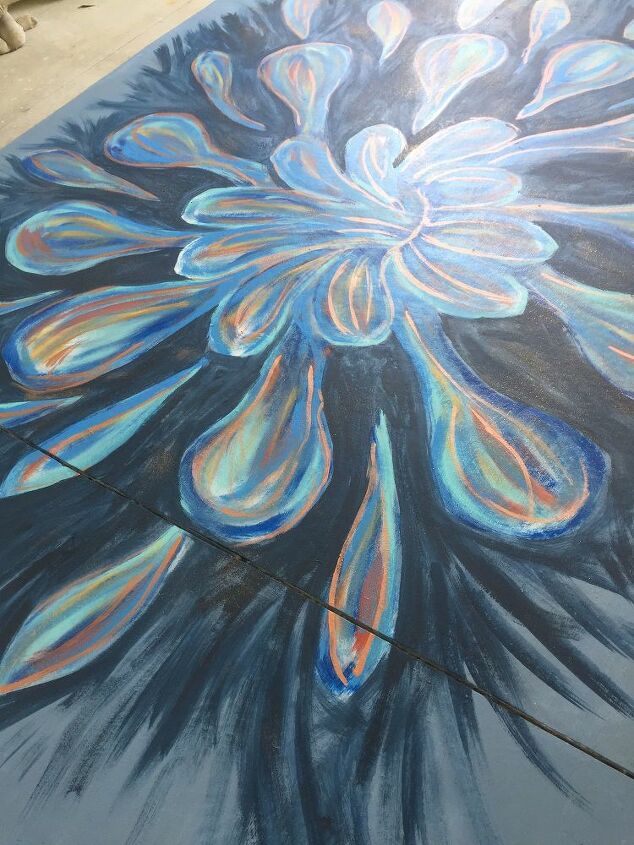
I added two things at this point.. some navy blue that I made by mixing some of the Valspar Blue Sash with some Rust-Oleum Ultra Cover Black to make a navy blue and brushed it out from the flower almost to the rug edges using that old 2" brush. I also dug in my hubby's paint stash and found some metallic - Modern Master's Copper Penny Metallic (3-4 ounces of a craft paint would also work). I added some copper streaks using a 1/3" flat craft brush.
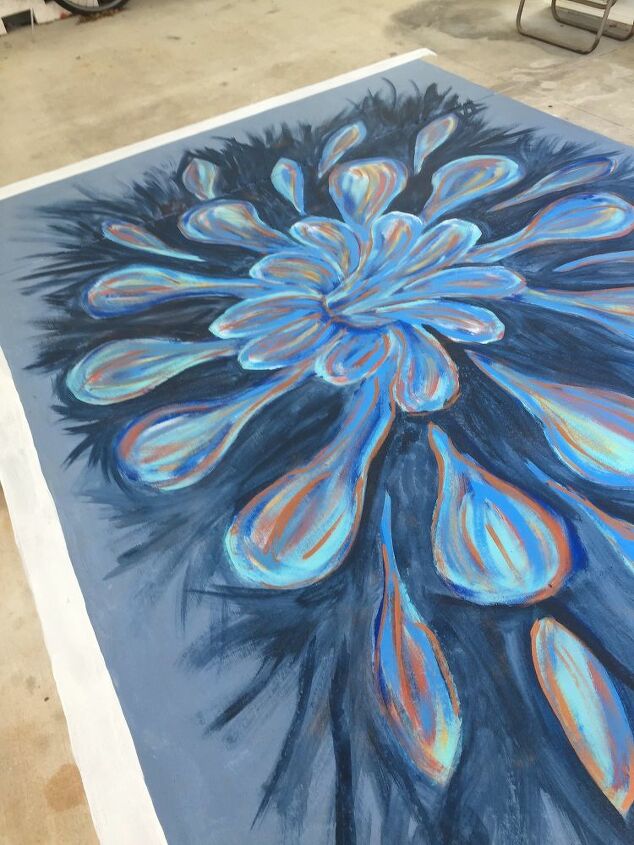
Only now I was too close to my original edge to add a border and this needed at least a 4" border to look 'balanced.' Sigh... so I took a 2 x 4 and drew a border all around, and primed it white...
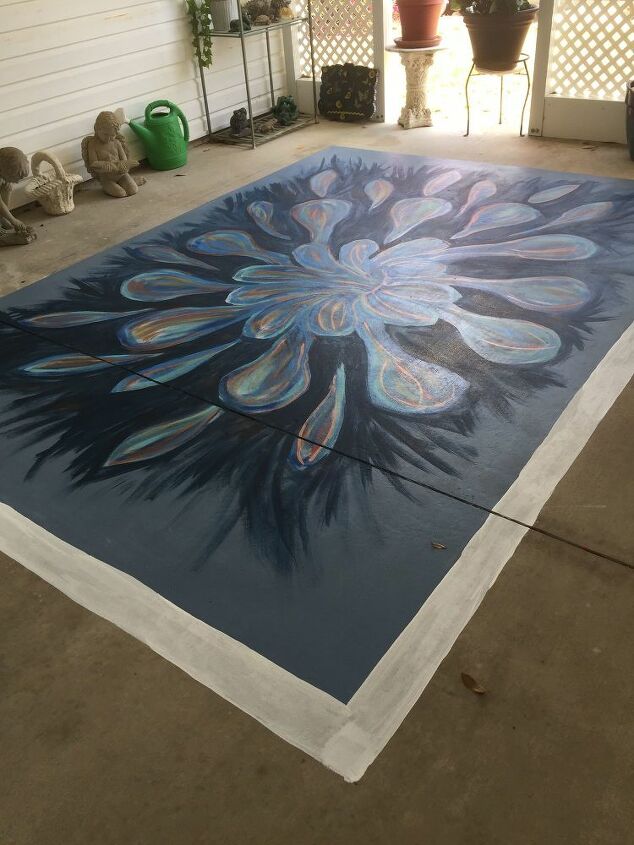
With the sun really bringing out the highlights of the copper touches, I got to thinking that a navy blue border with copper stenciling would look great.

Here is a wider view of navy border with copper highlights
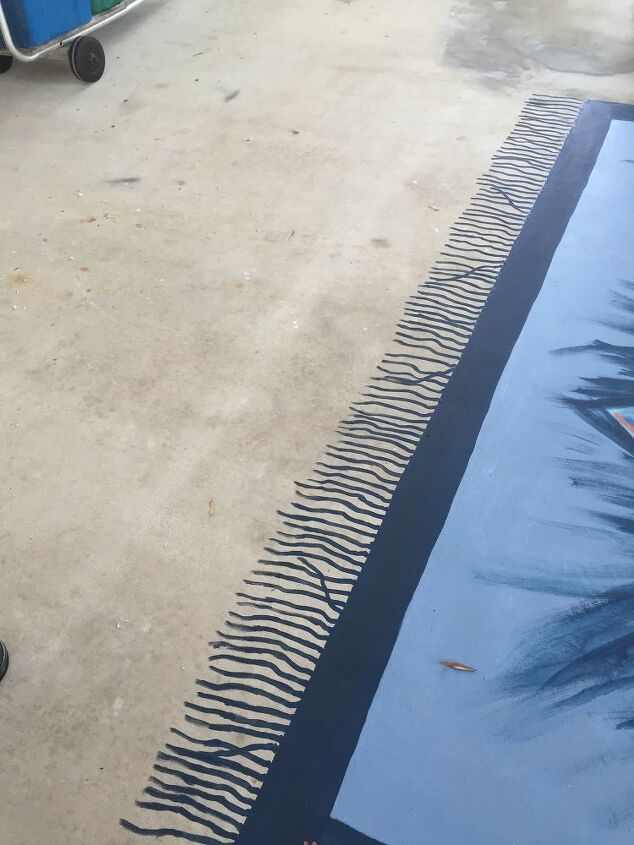
It is amazing what 5-6 inches of fringe does to make the rug look 'real.' Each piece of fringe starts with a small dot at the rug edge. Now and then a piece of fringe goes crooked...just like in a real rug.
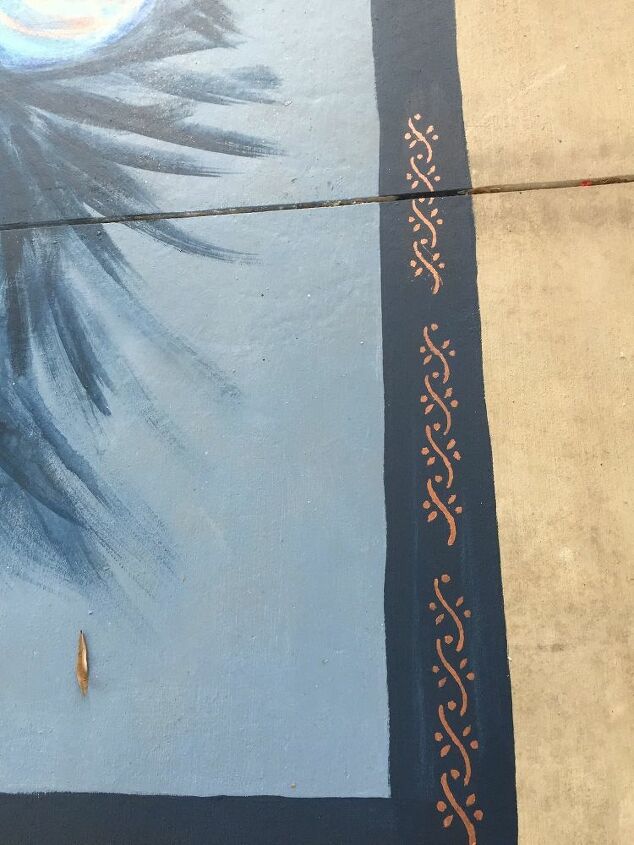
I then used a stencil to add a copper colored border all the way around the rug. The copper was the same Modern Masters Metallic Copper Penny used in the 'flower' - the border used very little, so a small craft bottle would work as well. I "patted" the paint onto the stencil using a 1" foam brush. Then lifted the small stencil and moved on. I needed to wipe off the stencil about every third use and would rotate going clockwise with one stencil application and then counter clockwise to allow the stencil a minute of dry time before I would lay the stencil back down again.
I added 3 coats of Min-Wax water based polycrylic satin finish over the whole rug (including fringe). In past rugs, the 3 coats held up well even under a porch swing (see 3 yr old rug below). I brushed on the polycrylic using that same 2" brush; for a rug this large, you might want to roll it!
These "rugs" are easy to blow leaves off and/or gently hose down! These both are under car ports. You may get some fading under direct sunlight.
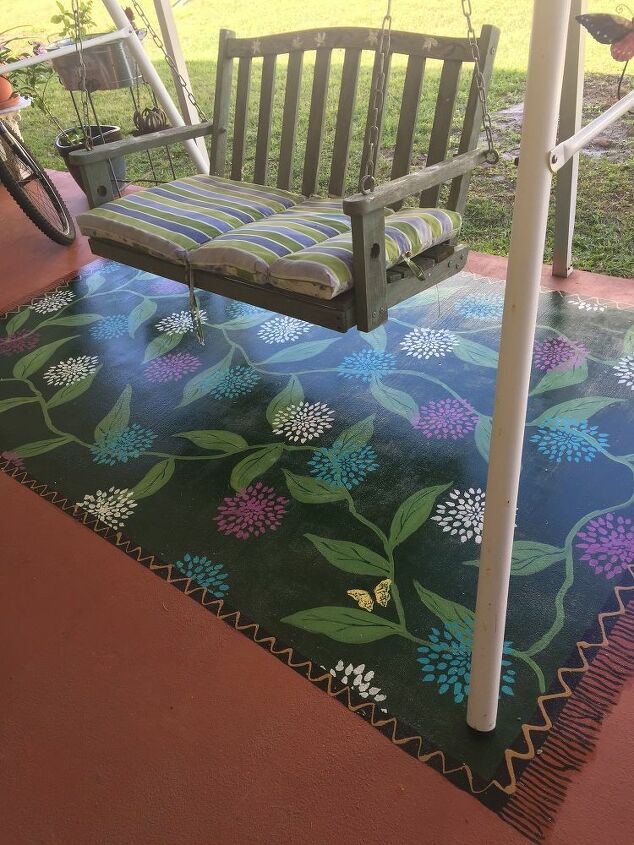
This 5 x 8 smaller porch swing rug was made using the same technique. The flowers are a stencil I made; the rest is hand drawn. These are so much fun!!
Resources for this project:
See all materials


Comments
Join the conversation
-
No I won’t be painting a rug. You know, bad back, bad knees, stiff joints etc. etc. etc. Old people problems. 😂😂😂. But it is lovely.
-
Amazing! I love it! I may do this in a bedroom with floors that were ruined by dog urine before we bought the house.


![Faking It [brick Paver Edition]](https://cdn-fastly.hometalk.com/media/2017/04/05/3806609/faking-it-brick-paver-edition-animals-appliance-repair-appliances.jpg?size=350x220)


Frequently asked questions
Have a question about this project?
Love the rugs!!! What is the color of your main porch( the one with the swing) before the rug? It looks watermelon but not sure.
These are beautiful!! I want your talent and patience.
both rugs are beautiful! Very nice job…!