


DIY Backyard Temporary Fence
Steph needed a fence in her backyard for the dog. Unfortunately, her backyard does not lend itself to traditional fencing. She has a tiny, I mean tiny backyard, with no grass but has lots of trees and bushes. Two sides of the yard border the neighborhood green space which is overgrown with lots of bushes, weeds and huge trees! Putting in a traditional fence would mean taking out much of the landscaping and even then it would have been difficult with the trees and their root systems.
So, for many months she used a very temporary, makeshift fence that most of the time would not stay up! It was time for a more permanent, temporary fencing solution.
Hey, let's be friends, sign up for our once a week newsletter right here!
Take a minute to watch the video before you read on. At the end, we share what happened when Steph didn't wear ALL the right PPE!
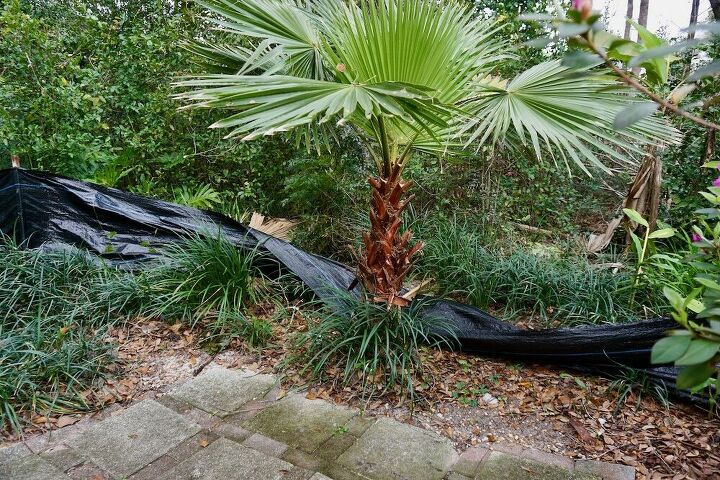
This was Steph's very makeshift fence. More times than not, it was down on the ground rather than standing. It did keep Mac the greyhound contained though--yeah, we were surprised as well! Time for an UPGRADE in the fencing department!
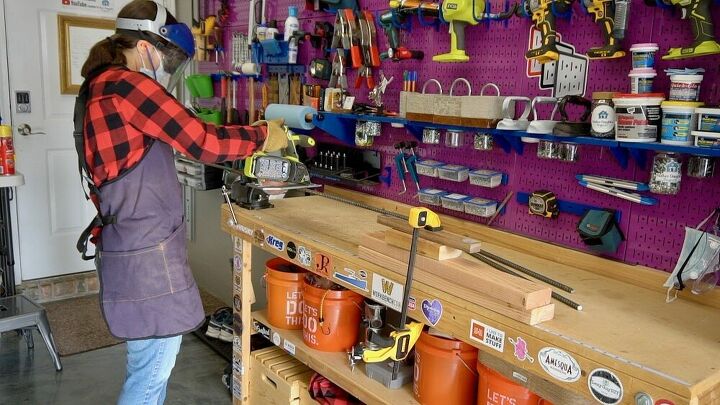
We determined how many posts we were going to need and then bought supplies. Rather than repeat all the supplies and quantities here, please refer to our blog post for that information. Here Steph is using a Diablo metal cutting blade on a circular saw to cut the rebar into pieces that are 24 inches long.
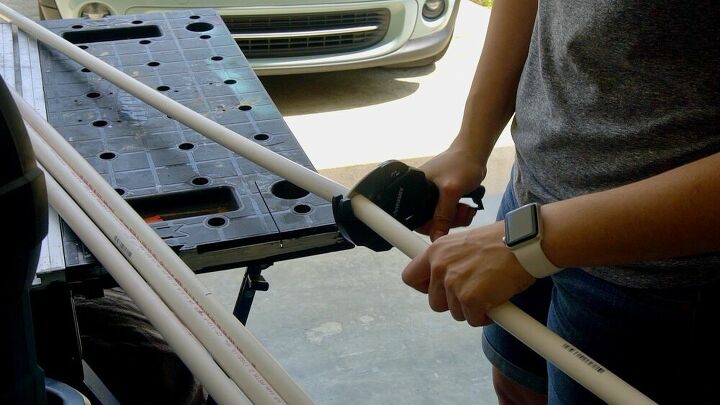
We are using one inch diameter PCV pipe cut to 40 inch lengths. These will slip over our rebar anchors onto which we will attach the plastic garden fencing. Once the pipes were cut, we painted them with Rust-Oleum forest green spray paint. That's a ratcheting PVC cutter that Steph is using to cut the PVC.

To assemble the fence, we used a rubber mallet to pound the rebar anchors into the ground, let we added a PVC cover, added a PVC cap and then zip tied the plastic fence to the posts.
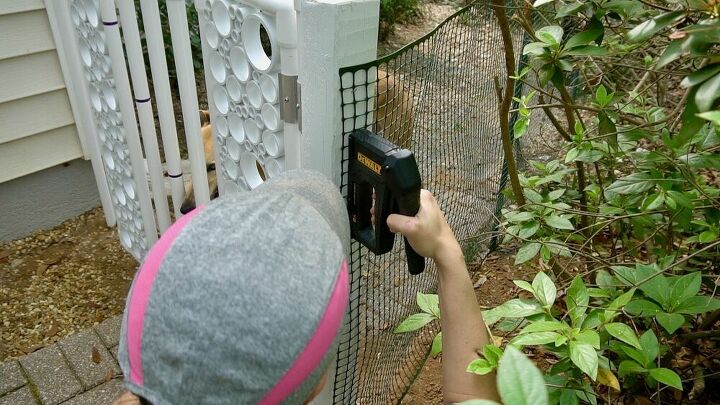
We created the garden gate in a recent post. To finish the fence, we simply stapled the fencing right onto the gate post. That DeWalt stapler is lightweight and doesn't require much force to pull the trigger.
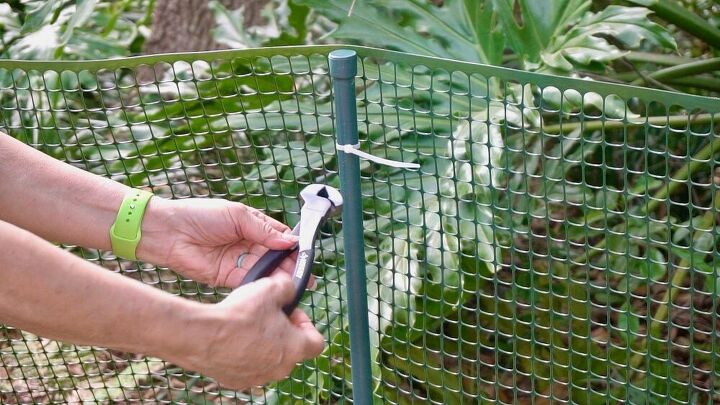
The final step was to cut off the excess zip tie tails with a pair of end nippers and then we sprayed them with the same PVC post spray paint. We thought we were done at this point, but....
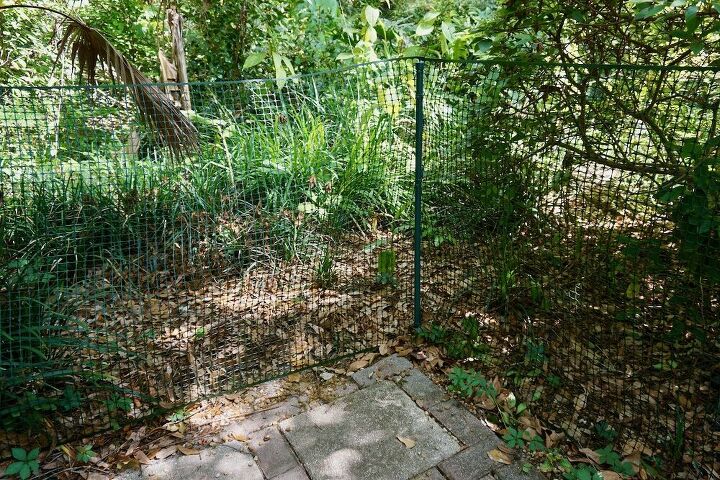
Once we thought we were finished, we realized some of our posts needed to be moved and others added to address several places where the fencing sagged. Because this is a temporary solution it was very easy to pull the rebar out of the ground and move them. With this fence design, we were able to go around obstacles like large trees and bushes rather than having to take them out.

The new fence is greyhound dog approved and is keeping her safely contained in the backyard.
Resources for this project:
See all materials


Comments
Join the conversation
-
Great idea for the fence...easy !


Frequently asked questions
Have a question about this project?
How far apart did you space the poles?
Hi. Why rebar, instead of T-posts?