


Staircase Makeover
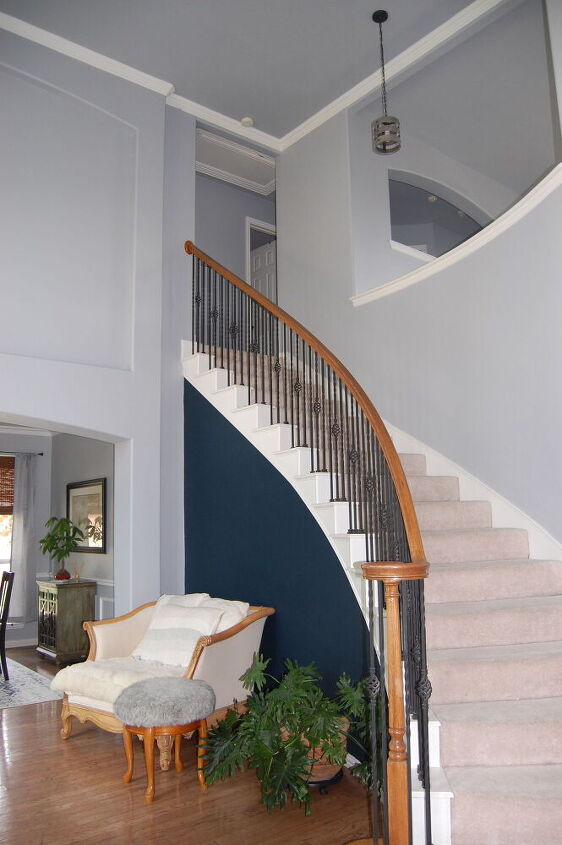
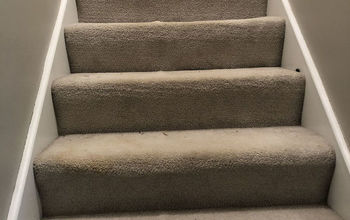
My front curved staircase is the first thing you see when entering my home. The staircase was the reason I fell in love with my house initially but keeping carpeted stairs cleaned and vacuumed was a giant frustration. After looking into replacing with wood, I decided on tile. A hardwood replacement would have been far more expensive and required additional tools. I wanted to create a statement look and love Spanish tile detail. There are a lot of options for tile, but in the end I didn't want to spend thousands of dollars on high end tile for the stairs. I ended up buying my black and white tiles from Lowe's for $1.29 per tile and the larger tiles ran about $30 per tile from Home Depot.
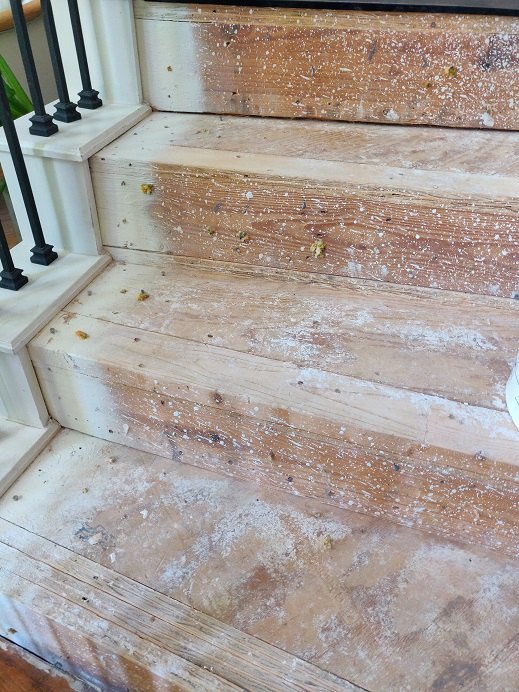
Remove all staples and hammer in remaining nails. The carpet can easily be removed by using a small crowbar or flat head screw driver to get a corner of the carpet up and then easily pull the rest up.
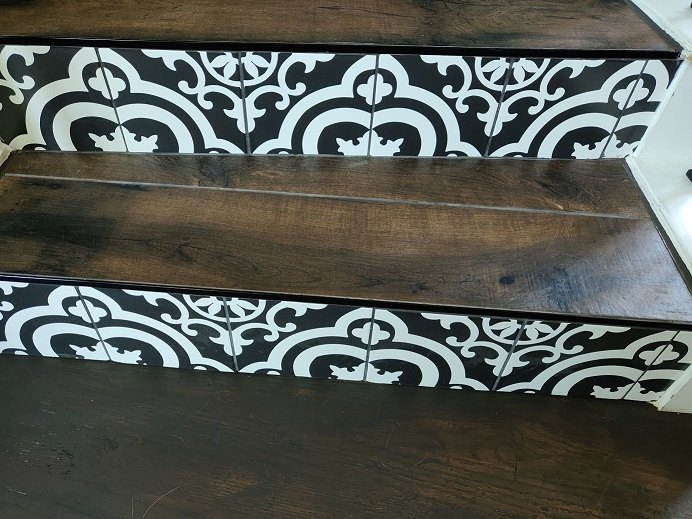
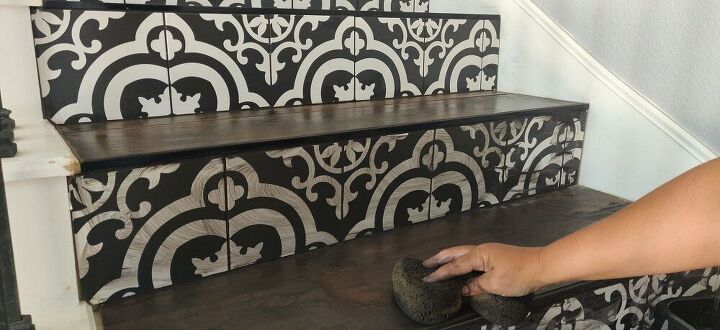
Decide on type of tile and how best to position the tiles. I wanted the top of each step to match the new flooring we installed upstairs, which was a walnut color laminant. So I chose a tile that was long enough to fill the full width of each stairs ( 48 inches long). This way there would only be one grout line for the large steps and none on the smaller standard width. I chose a detailed tile for the face because I wanted a statement look. If this style is too bold for you, consider using the same large wood looking tile for the face of each stairs.
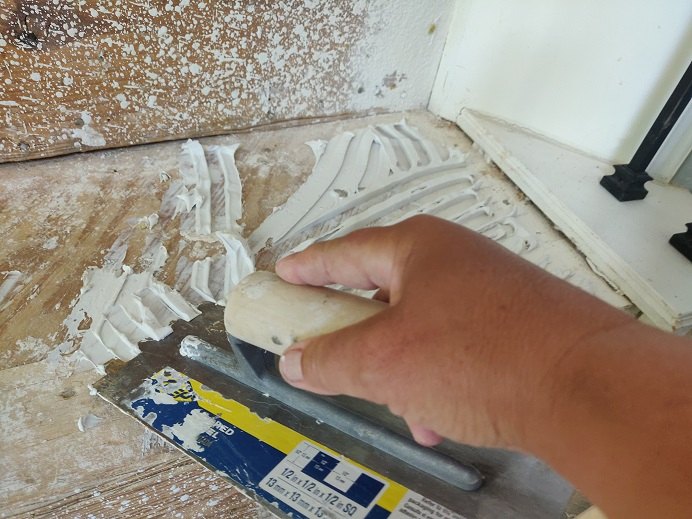
Start by applying mortar with a trowel to the top side of stair.
This step is much easier if you have a partner who is measuring and cutting the tiles with a wet saw, while someone else installs.
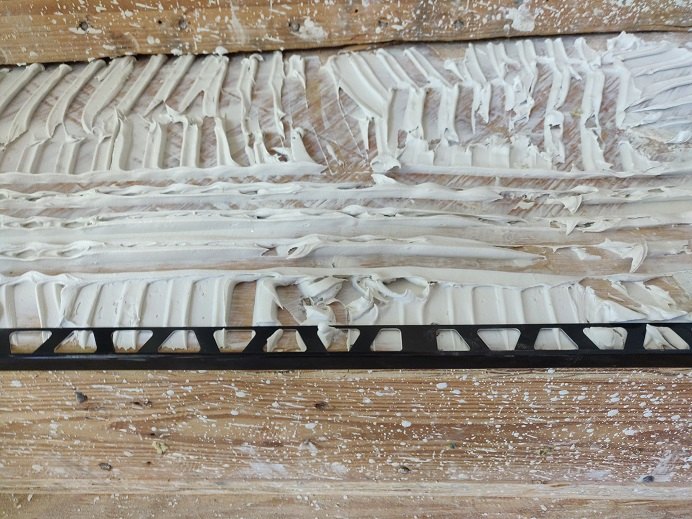
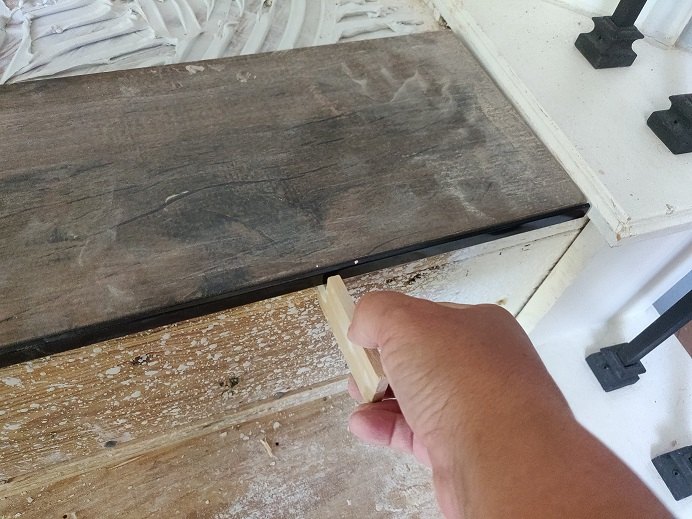
You will need to make sure the schluter edge and the tile stay about 3/8 of an inch over the step, to cover the black and white tile that will cover the face of each stairs. We improvised by making a small cheater guide with wood, cut to the correct distance. This was easier than measuring each step.
For more of my grouting tutorials:
https://www.flawlesschaos.com/blog/2020/03/31/masterbath-vanity-update/
https://www.flawlesschaos.com/blog/2019/03/26/upgrade-your-patio-with-beautiful-slate-tiles/
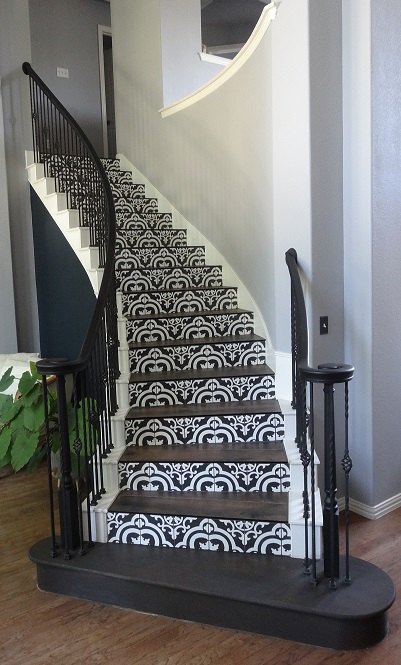
I used a white caulk on the face (edges only) and a dark/wood colored caulk on the steps. I ended up painting the banister black and staining the final step a similar walnut color as the wood colored tile. We will refinish the lighter hardwoods on the first floor eventually but for now I don’t mind the difference. Overall, I’m super happy with my new staircase, which is beautiful and very easy to clean!


Comments
Join the conversation
-
WOW, what a difference. Absolutely Georges!
-
I agree with Sherry, Very stunning!!!


Frequently asked questions
Have a question about this project?
It’s been 2 yrs, how’s it holding up? Any cracks?
I would like to take up the carpeting on my stairs and use hardwood. Is it expensive or hard to do myself?
Love this!! Just wondering why you didn’t use the laminate that was going in upstairs? Tile easier to put in or easier to clean? Or ?