


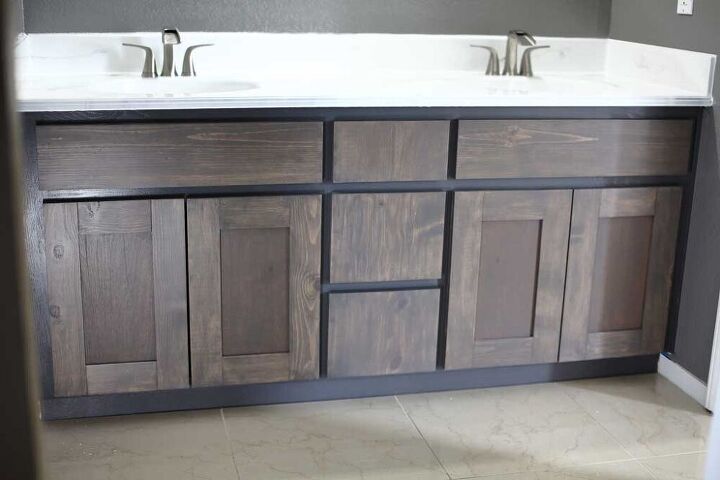
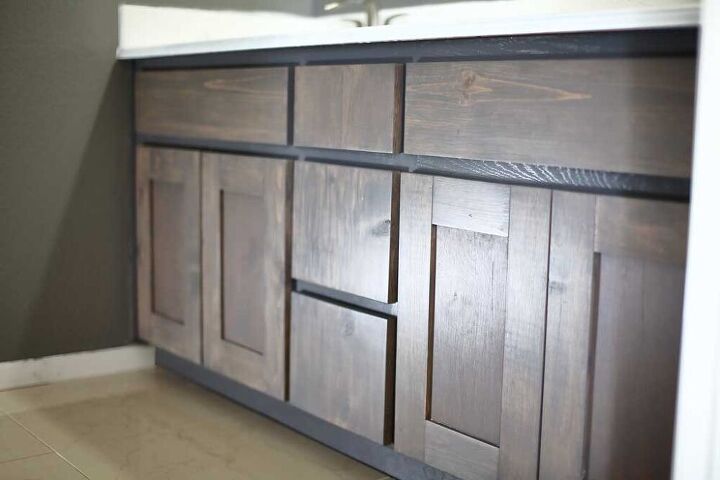
How to Make DIY Cabinet Doors and Drawer Covers for Bathroom Vanity

Bathroom remodeling is the most common home improvement project, according to the U.S. Census Bureau. Whether you’re remodeling from scratch or simply want to refresh an outdated look, you should always consider the budget before starting. It’s so tempting to just purchase a new bathroom vanity or sinks. But when you look at the price tag, you wonder if there’s a less expensive way to remodel. So instead of going to a furniture store, I’ve just built and installed DIY Cabinet Doors and Drawer Covers for bathroom Vanity for only $40 of material.
For more picture and information on how I built it see my website, TheDIYPlan.
Tools for this project
- Tape Measure
- Drill
- Miter Saw
- Table Saw
- Kreg Jig
- 1 3/8″ Shank Forstner Drill Bit
- 7/64″ Self Centering Drill Bit
- Sander
Material List
- 1x12x8′ (x1)
- 1x8x6′ (x1)
- Wood Glue
- 1 1/4″ pocket hole screws
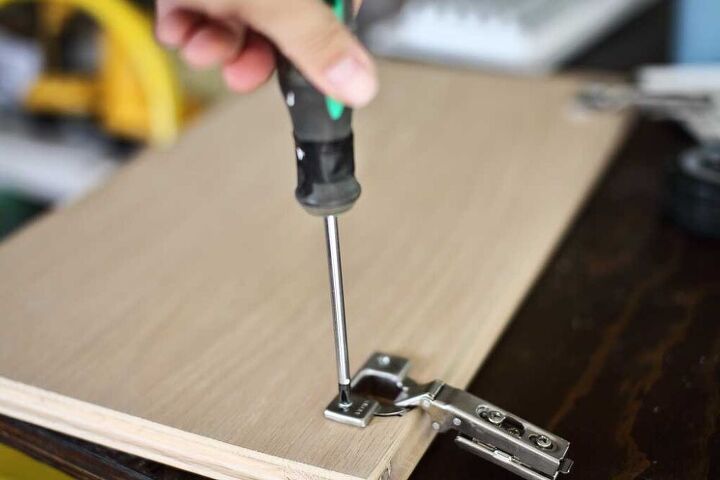
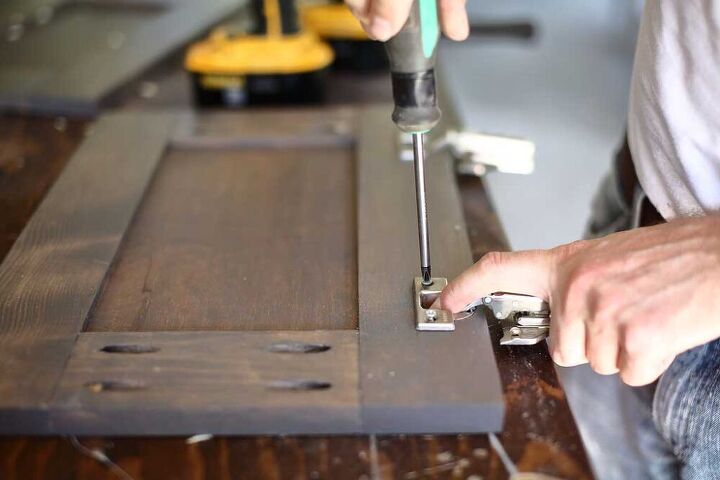
First, start by removing the cabinet doors and drawers. Most of the cabinet hinges come apart into two pieces by pressing the release plate. But some cabinet hinges come apart by loosening the middle screw. Once you detach the doors from the cabinet frame it’s much easier to unscrews the hinge from the door and the frame. But you could always unscrew the hinges from the frame while holding the door it’s just more cumbersome.
If the hinges are still in a good working condition, then there is no need to purchase new hinges. The same hinges could be reused on the new doors.
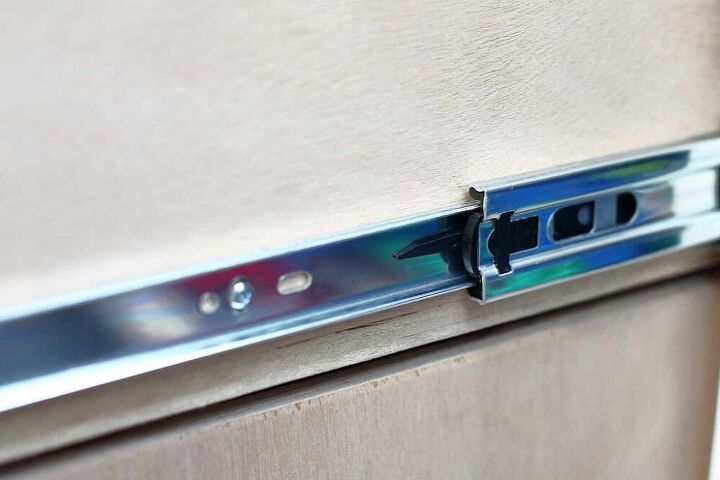
Next, remove the drawers from the bathroom vanity. There are some variations in drawer sliders out there, but most of them are very similar. Slide the drawer out completely and push on the latch inward, toward the track to release it. The latch should be pushed up on one side and pushed down on the other side of the drawer. Then pull out the drawer.
The drawer slides in my bathroom were really old and had a different release mechanism than most newer drawer slides.

If the drawer boxes are in good condition, it’s a good idea to reuse them to save time and money. You just need to replace the front cover of the drawer.
There are many different ways these drawer boxes could be assembled. Sometimes the front cover is attached with brad nails and sometimes with screws. The drawer covers in my bathroom were attached with large staples and wood glue. So I used a flat screwdriver and pried the cover from the box and then hammered it out completely.
Once I removed the cover from the drawer box, the staples were still in place in the front of the box. Instead of trying to pull out the staples, I used a grinder to cut them off. Initially, I tried to clip them off with pliers but it doesn’t completely remove the staple. I found that using a grinder is the fastest and easiest way to remove them.
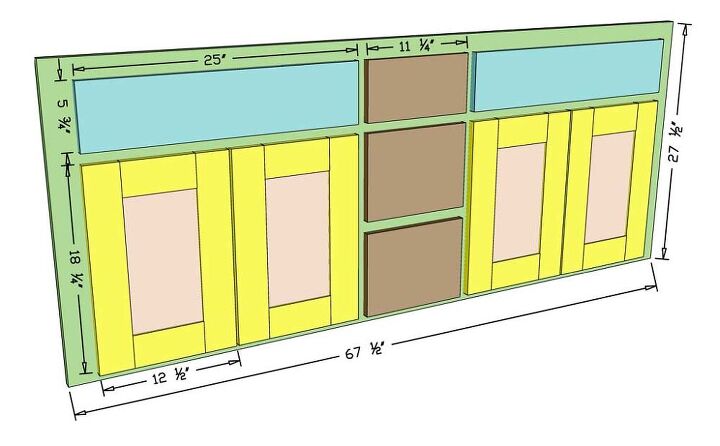
My goal for this project was to make the doors and drawer cover exactly the same size as what was there previously. I just wanted a different style and different color. I will provide dimension to what I’ve built, but you could easily modify the sizes accordingly to match your needs.
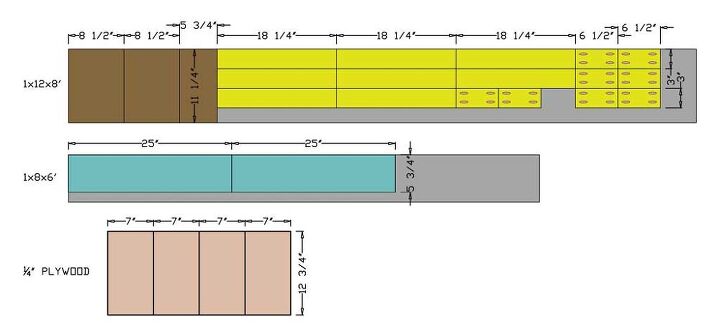
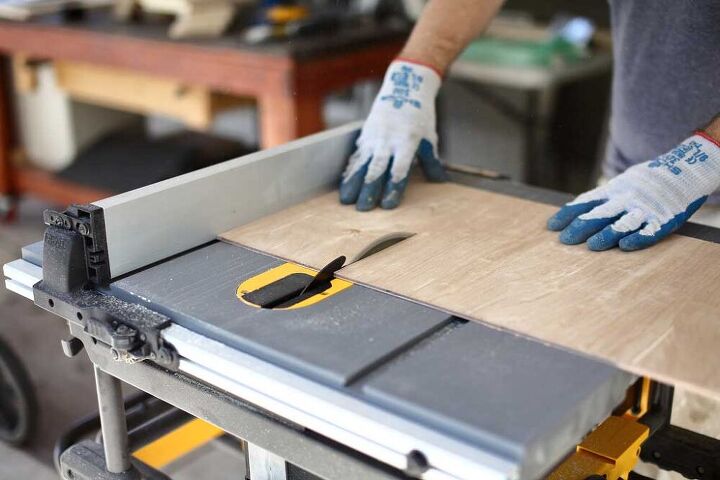
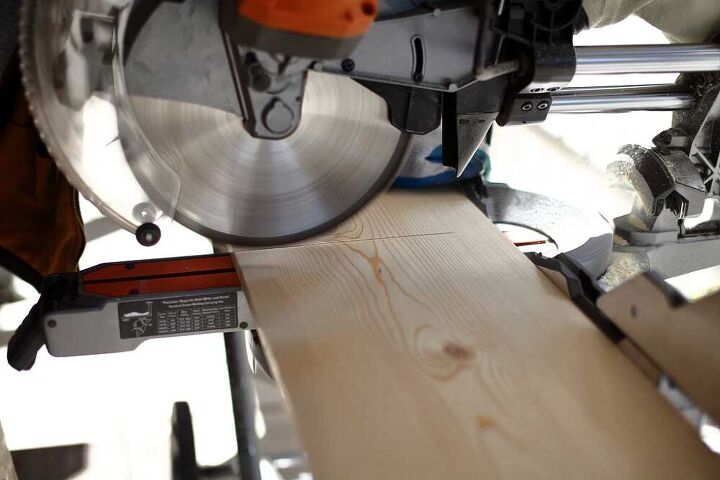
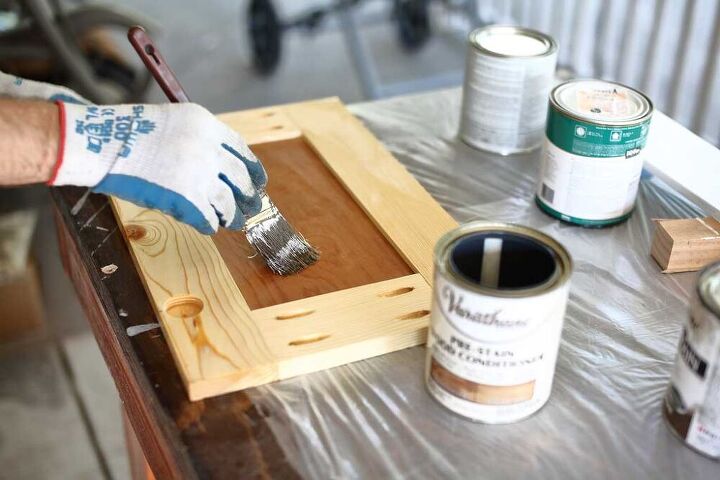
When building the cabinet doors it’s very important to have all of the boards perfectly straight. You don’t want a door to bow out in one direction or to be warped. I didn’t want to spend a lot of time going thru lumber at the store trying to pick a bunch of straight 1×4 boards. Instead, I bought one straight 1×12 board. Then using a table saw I cut the boards to the dimensions I wanted. Cutting my own boards gives me confidence that everything will be straight.
Since I was using a 1×12 pine board, after cutting the frame boards, I wanted to assemble the doors the same day. When the boards are cut and left untouched for a week or two, they might start to warp, especially if you’re in a humid area. So I always like to finish the project soon after the wood is cut. Once the frame is glued together and painted, then the doors most likely will not warp.
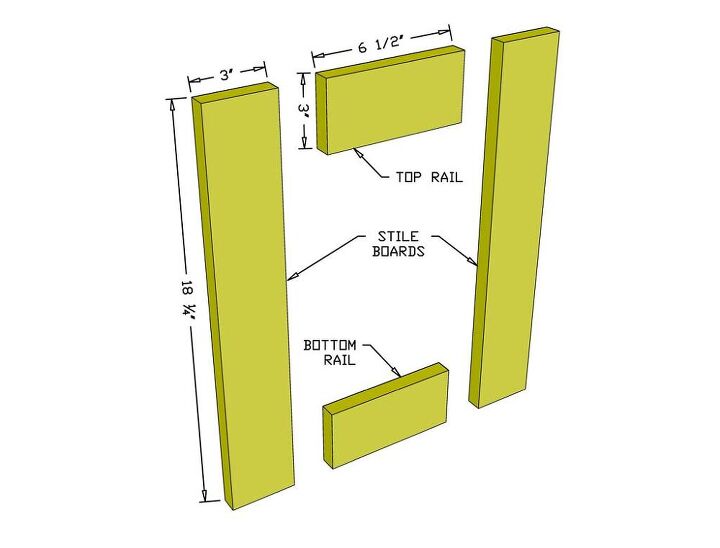
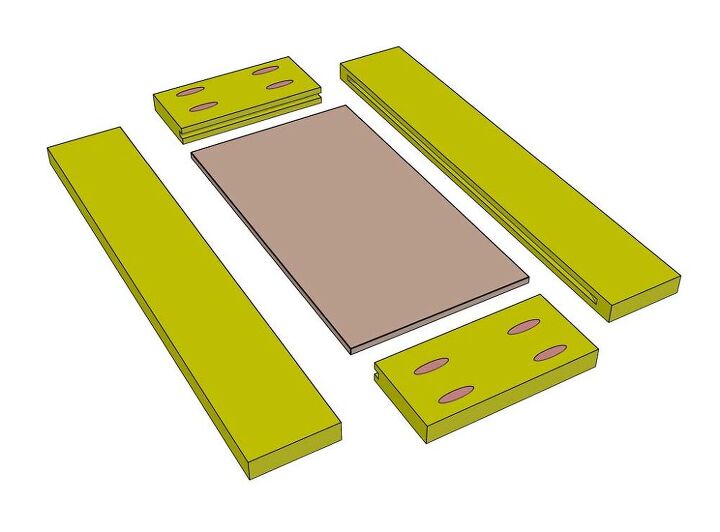
The door consists of a 3” wide frame that clamps the ¼” plywood panel in the middle. First, cut two stile boards to 3” x 18 1/4″, then two rail boards to 3” x 6 1/2″. These boards will hold the plywood panel in the center. If you’re building more than one door, then repeat this step for additional doors.
Next, cut a ¼” plywood panel to 7” x 12 3/4″ using a table saw.
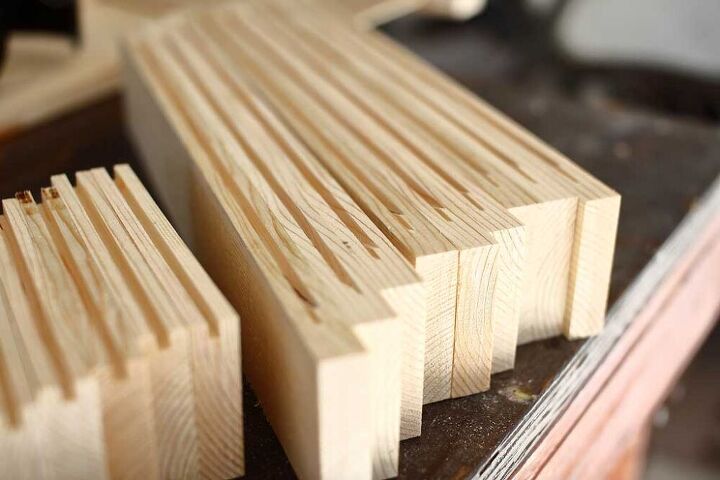
This middle plywood panel will need to be clamped inside the door frame boards. The rail and the stile board will need to have a ¼” deep groove along the inside edges. The width of the groove needs to be cut wide enough for ¼” plywood to fit easily, but not too loose.
To accomplish this, raise your table saw blade ¼” high. Then draw a centerline at the end of one of your test pieces. Place this piece on your saw, and then adjust the saw’s fence so that the blade is positioned slightly off the line. Make your first pass, then flip the board end for the second pass. This widens the groove. Check if the groove is wide enough by inserting the ¼” plywood. If the groove is too narrow, nudge your saw fence a tiny bit and repeat both cuts. Once you get the plywood fitting perfectly, then cut the stile and rail piece.
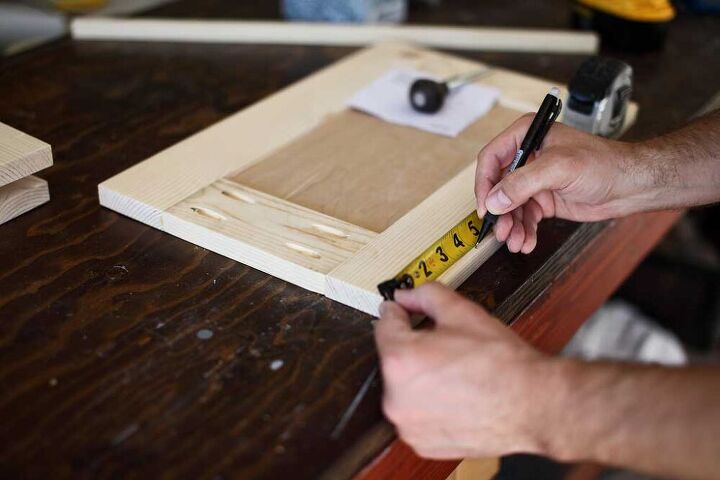
The groove on the stile piece will not go across the entire board. I started the groove about 1” from the top and finished it about 1” from the bottom. But the top and bottom rail boards will have a grove that goes across the entire board.
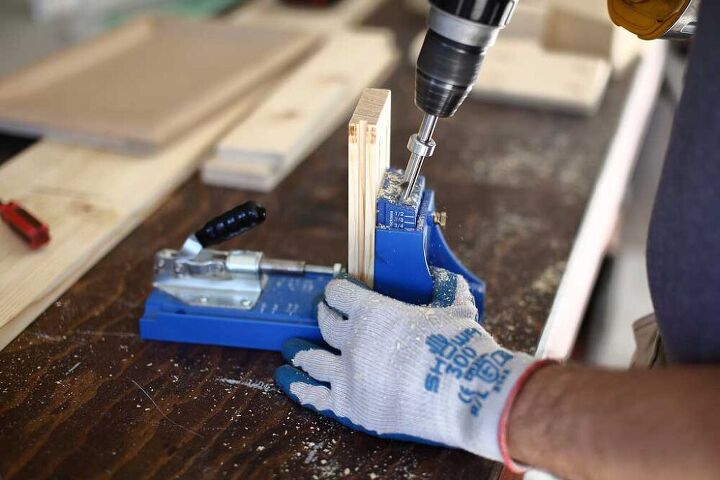
Now take the bottom and top rail boards and drill two pocket holes on each end. Make sure your Kreg Jig is set for ¾” wood thickness. Then using a random orbital sander, sand all the boards to remove any rough edges.
Position your boards on a workbench, then apply wood glue in the grooves and on the edges where the rail boards meet the stile boards. Insert the ¼” plywood into the top and bottom rails first and then into one of the stile boards. Using Kreg face clamps, clamp the boards at the seam to prevent the board from shifting while driving in the screws. Make sure the clamp is tight, otherwise you’ll have uneven boards in the front. Since we’re using 3/4″ wood, use 1 ¼” pocket hole screws. Then place the second stile board and secure it with screws. Repeat the process for each door.


Comments
Join the conversation
-
OH MY GOSH. I love that coloring. You did a beautiful, wonderful job on it.


-
For those of us not so talented with tools of that magnitude, you can also nail or glue thin plywood or flat paneling on the doors or drawers. Just cut to size, sand and glue or nail on. That would have to be the route I would have to take.
This is beautiful and I so wish I had that talent.
I would have loved to see a before picture as well.


Frequently asked questions
Have a question about this project?
Love the color...you say stain and paint.. what do you mean by that?