


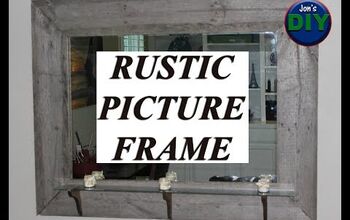
How to Build a Stunning DIY Mirror Frame
A SUPER EASY WAY TO UPDATE YOUR BATHROOM
One of the easiest things you can do to update your bathroom is to update the mirror. Unfortunately, sometimes mirrors can be a bit expensive. For this bathroom update, we had already spent a bunch on hardware and counter tops and floors, and as such, the mirror was just not a priority. Well, the most affordable thing to bring to a giant mirror glued to your wall circa 1989 into the current century is to give it a fresh mirror frame! Here I will teach you how to give yourself a bathroom mirror frame.
I’m sure we’ve all heard the saying that you’re supposed to measure twice and cut once and I’m definitely guilty of having to cut two… or three… or four times. I was definitely living on the edge today because I only had exactly the amount of wood that I needed. If I make one wrong cut, I’ll have to start over.
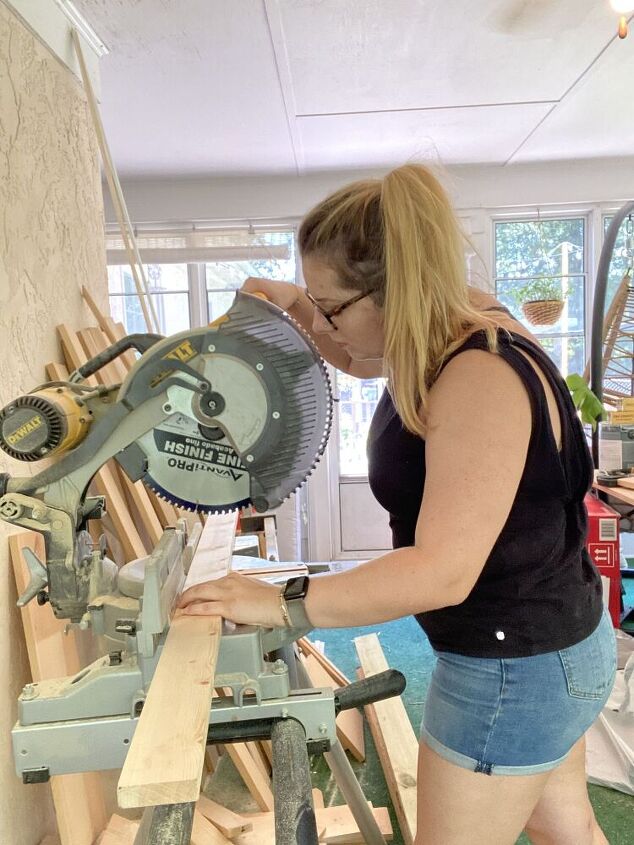
First I cut my pieces to size, and this time, I definitely measured twice. I used a miter saw to get the 45-degree angle I needed.
Once I was happy with the cuts, I used a disk sander to soften the surfaces. I used 220 grit because it’s the finer grit that I had on hand and I just wanted to get the surface smooth before I stain it.
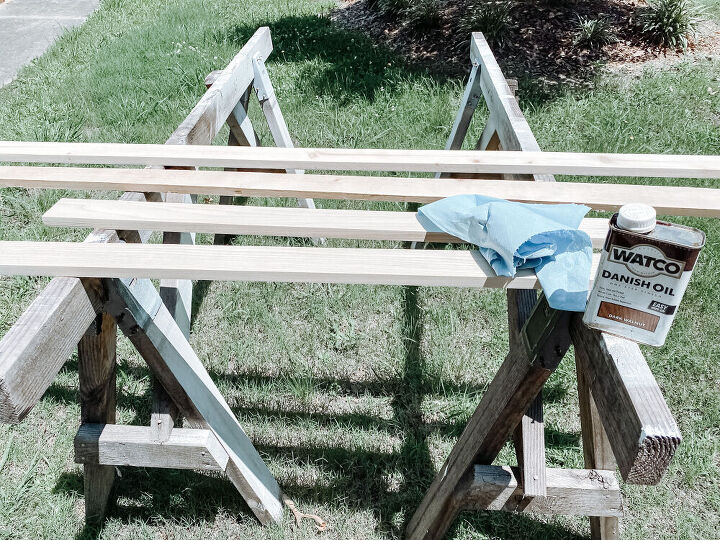
For staining, I just winged it. To be honest I don’t know much about stains and oils. I started by wiping the boards with a slightly damp cloth to get any loose sawdust up. The first stain I used was Dark Walnut Danish oil and because it wasn’t quite right, I used Miniwax red oak on top of it. I did this to try to match the floor in the designated bathroom.I’ve seen others use a wood conditioner first, then top it with a stain. I think it’s supposed to reduce uneven absorption of the stain but I don’t have any experience with that. The conditioner might be the right way, but as I said, I winged it.
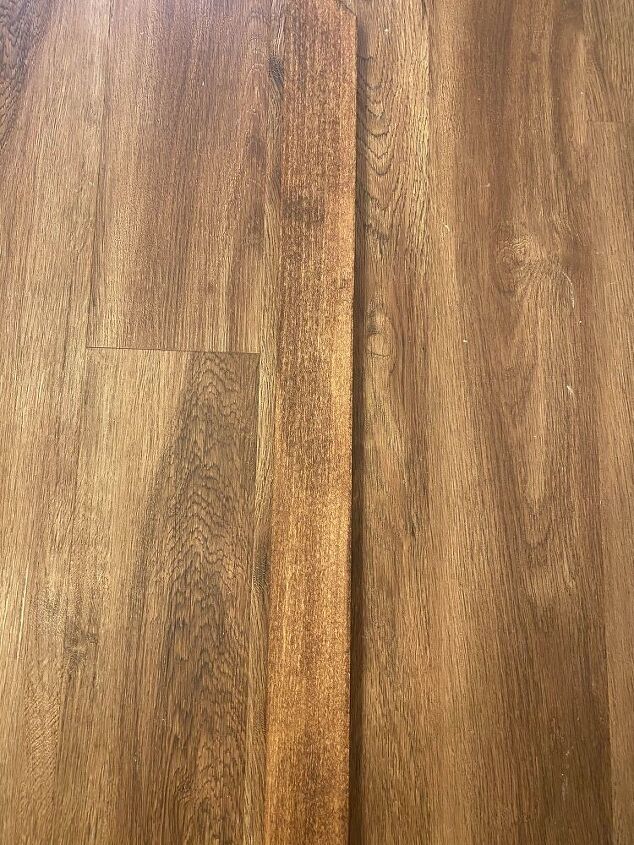
I am actually pretty excited about this stain because I wanted it to match the floors in the bathroom. How do you think I did?
So I was pretty limited on space for this mirror frame. There isn’t much room to nail the frame into the shiplap, so I decided to use Liquid Nails where needed. I was hoping the side pieces, with 45-degree cuts on the ends, will help to support the top piece while the glue keeps it upright.
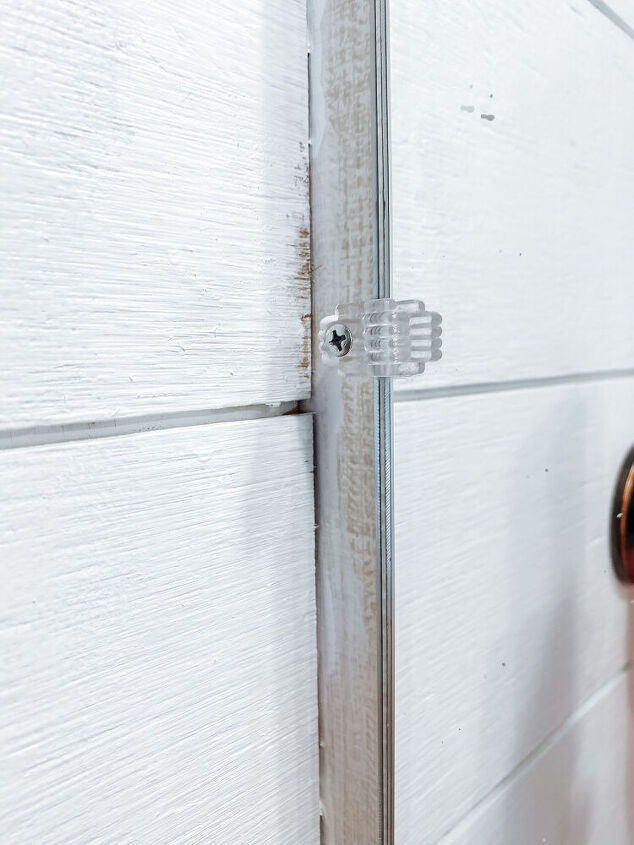
Most mirrors are glued to the wall behind it AND are clasped on with these plastic clasps. I’m removing the clasps but replacing them with the frame nailed to the wall off to the side for support. I couldn’t help but think I was going to crack this mirror with my nail gun and be stuck with 7 years of bad luck, but luck was on my side.

I was super excited that it was finally time to put the mirror up but once I did, I noticed something….
I could see the reflection of the unstained backside of the wood! Well… I didn’t want to just accept it so I took it back outside and I treated the stain on the edge. Now that I fixed that little issue, it was finally time to put it in place!
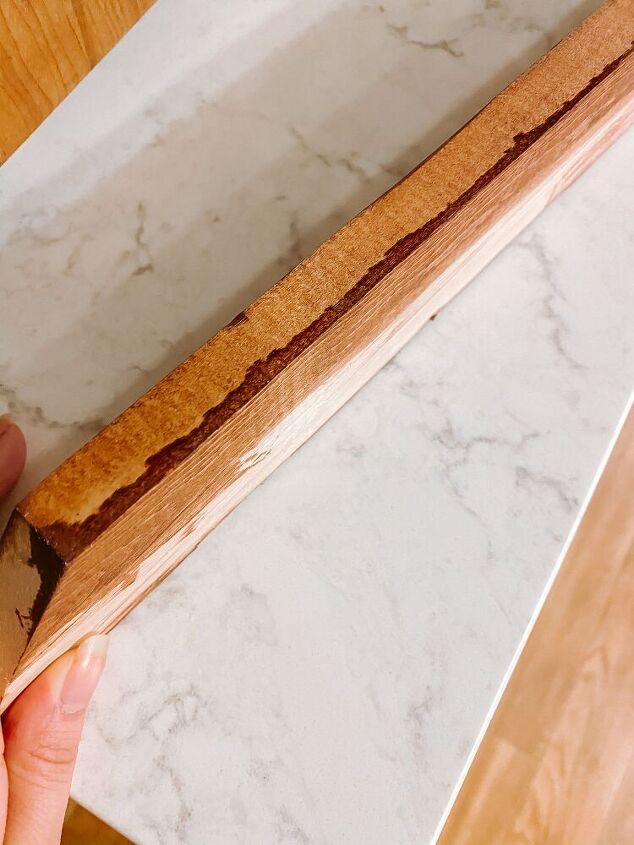
And… not quite. In my attempt to make the remaining staining go quickly, I rushed, and my stain dripped. I had to sand that edge down and stain it again. So close to being able to put it up, but I kept making little mistakes.
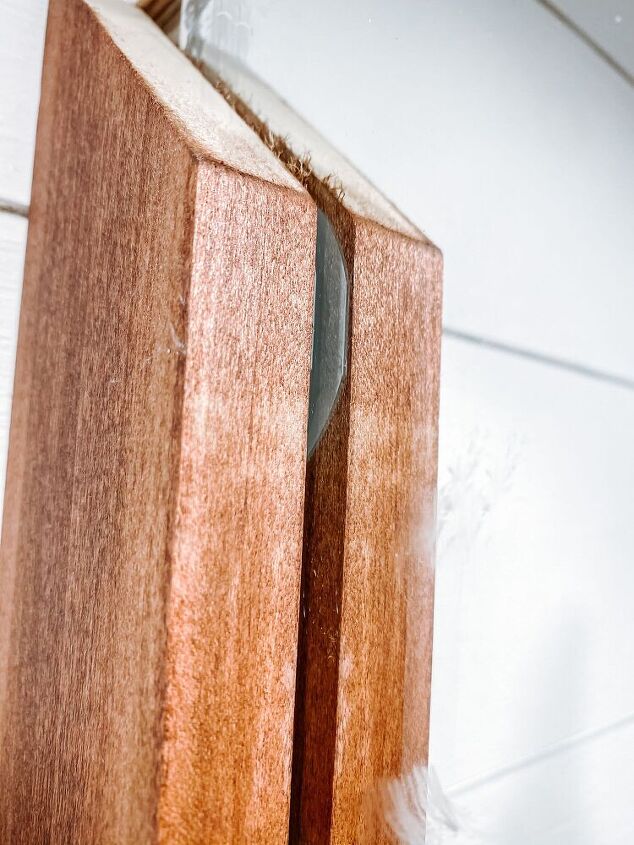
I removed the plastic clasps and used liquid nails to get the frame in place. I encourage you to learn from my mistakes here. Remember the issue where I could see the unstained backside of the wood in the reflection? Well… same applies for the liquid nails, which does not dry clear. By the time I put the wood up, it was too late. I made sure to not do it on the other pieces but seeing this glue will haunt me, even though it’s likely no one will notice.
The other, and more major mistake, was that I didn’t properly inspect my wood. I didn’t check for warping, and any warping that I did notice didn’t seem like a big deal. Boy was I wrong. Three of the four pieces went on very well (other than the glue issue, of course) but that third piece was all kinds of twisted. Since I am a bit lazy and a bit stubborn, I refused to redo the piece by cutting a new one and staining it and all that. So I decided that I was going to FORCE this piece of wood to bend to my will.
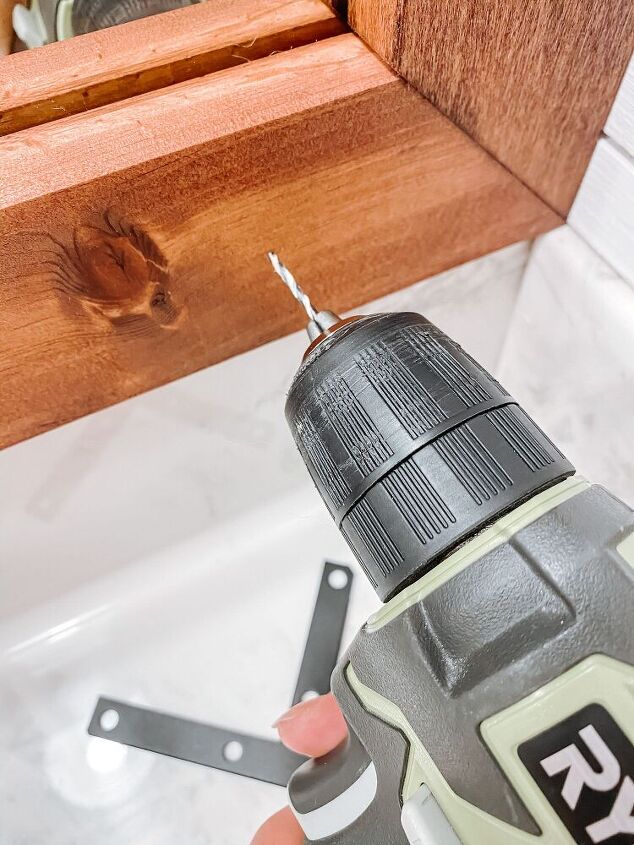
To do that I got some more liquid nails back behind the board since it had already started drying while not touching the wall. Then I used two 90 degrees corner L- brackets (bent at the halfway point, not like the decorative ones) and used them as temporary supports. I screwed them into the top of the frame and into the wall (which I can easily patch up later) to hold it securely in place while it dried. Finally, I carefully nailed the side pieces into the drywall beyond and nailed the top piece to the sides from above.
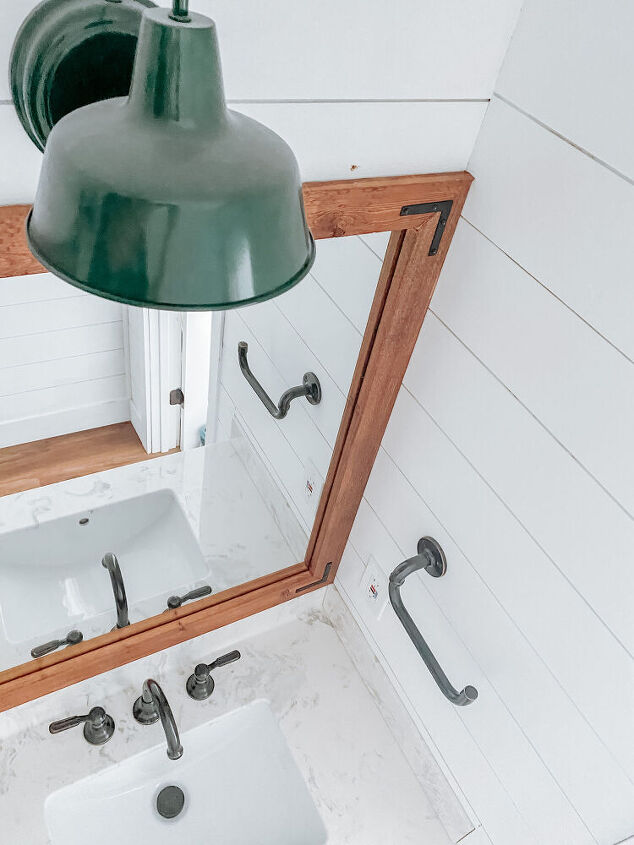
We did it! The last step was to dress up the mirror frame with these L-Brackets. They were painted to match the hardware and fixtures in the house. I ended up using the decorative L-brackets as a means to force that corner to straighten more. So both decorative AND functional!
I drilled pilot holes to help the screws go in more easily. I had painted the screws to match the brackets and, as I suspected, the paint got a little ripped up. To fix it, just spray the paint onto a paper plate and touch up with a small brush.
I’m of the mind that when I make something myself, I want it to look like I could have bought it. I want it to be a surprise when I tell someone I did it myself. This frame might be that project for you because you have definitely learned what NOT to do thanks to me. Though the corner didn’t turn out as flush and clean as the others, it’s honestly not that noticeable, as long as I don’t point it out.
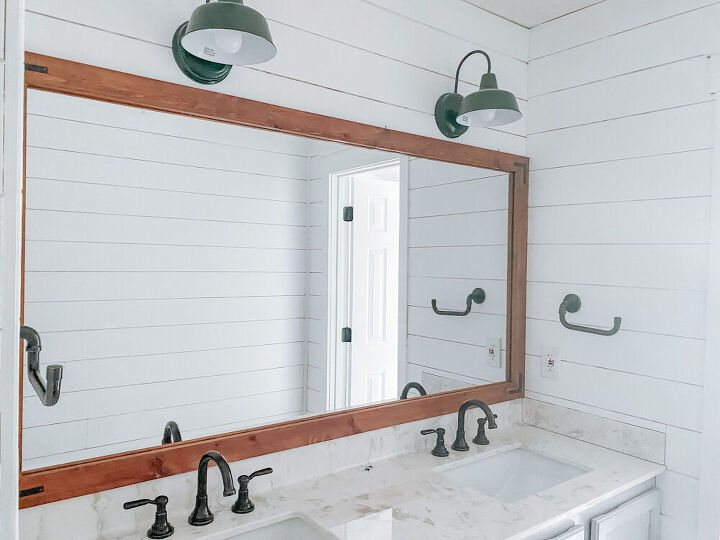
I love this bathroom! Its the upstairs bathroom that my roommate gets to use. I don’t see it much but when I do, I remember that this was mine and Taylor's first space we renovated. Its got a LOT of imperfections but we are beginner DIYers and we are slowly learning. The projects are only going to get better and better.
To be perfectly honest, the bathroom has been done for almost a whole year, but I was missing the final piece, the mirror frame!
Now that it’s done, I feel a huge sense of relief. (Well until I remember that I never finished caulking the shiplap).

Comments
Join the conversation
-
I have to say that was one of the best DIY descriptions and basically a lesson plan on how to do the mirror. I love that you not only mentioned mistakes but showed the picture your mistakes snd how you recognized it! I have saved diy info from this site got several years and I plug along incorporating as I can (try to make my lil house more charming for myself, my kids, and our pets and I don’t think anyone really notices but me) anywhoo… I don’t think I’ve ever left a comment for someone even though I think I have 1,009 saved projects. You just did a really amazing job of being real, explaining, teaching, etc. Im gonna look up your other stuff. Go you!


Frequently asked questions
Have a question about this project?