


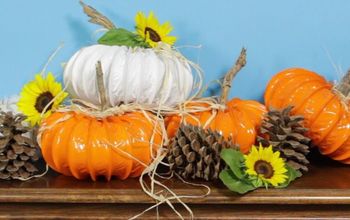
DIY Pumpkins Using Dryer Vents!

Using a flexible dryer vent and spray paint, these make the cutest fall decor!

Shape your flex foil duct into the desired size and cut off from the rest of the roll. You can do larger pumpkins by stretching out the foil duct or keep it tight for a smaller pumpkin. Once you have your desired size, cut the vent using a wire cutter. (Note: You will be able to use scissors to cut through the flexible part but will need wire cutters for the hard wire)
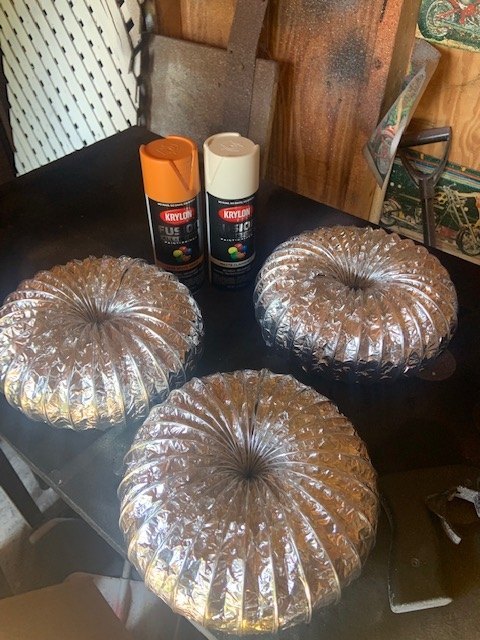
Glue the two ends together using a hot glue gun, holding the ends until they adhere.
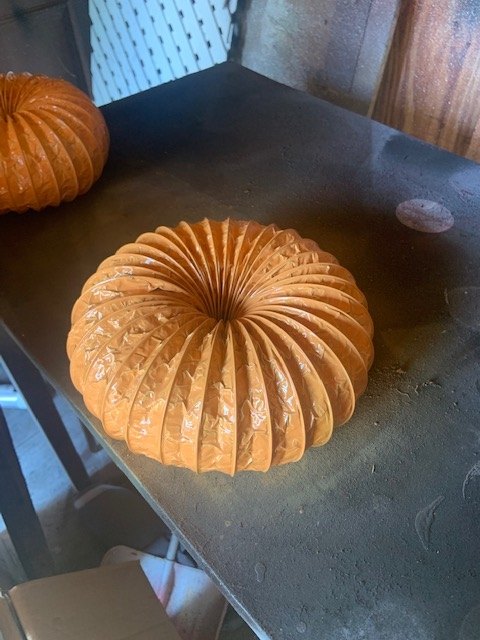
Let these dry completely before handling. Apply a few light coats of spray paint, making sure you cover the top, bottom and all sides completely. I used about 3 light coats.
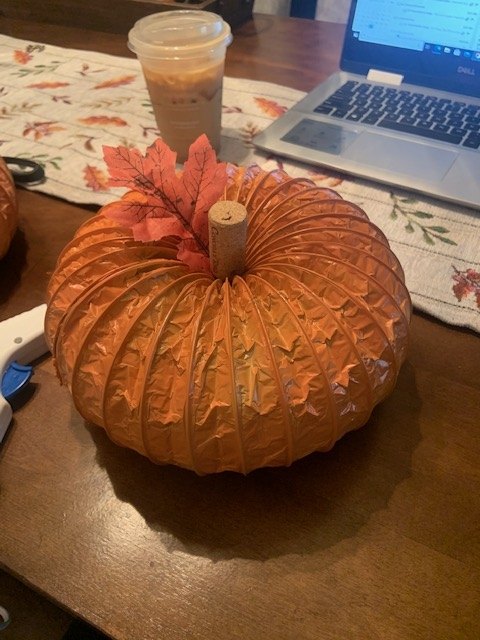
Once your paint has dried, hot glue gun a wine cork in the middle of the pumpkin for a stem and add a faux leaf for added decor. You can use any other items you have on hand for a stem!
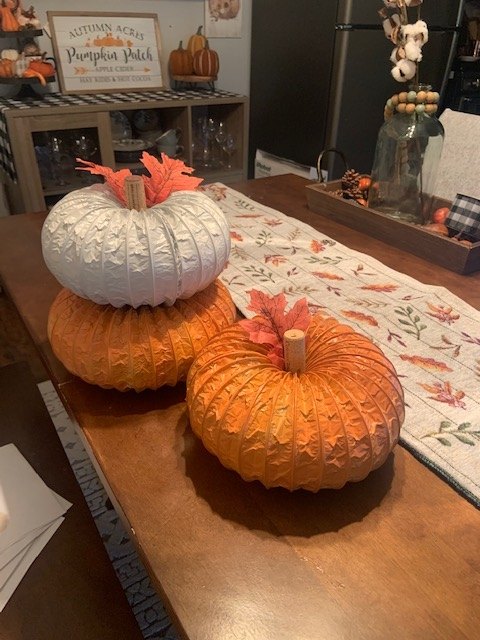
You can create different sized pumpkins for a tower, or individual ones. Customized to your liking, you can also add some ribbons etc.
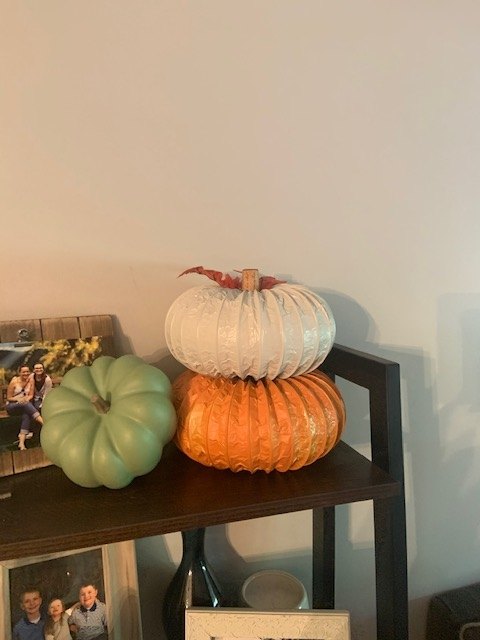
Perfect addition to fall decor :-)
Resources for this project:
See all materials


Comments
Join the conversation
-
I used to make these years ago & sold them at craft shows! Plus I also made snowmen and snowladies. If you are going to make a lot of these you might be able to find the white vinyl dryer vent online. It’s much cheaper than the silver! 😀
- See 1 previous
-
What a great idea! Love this.


Frequently asked questions
Have a question about this project?