


DIY Fabric Pumpkins
Autumn is that time of the year when everything is in the sign of pumpkins, from takeout coffee to festivals, it’s all about the pumpkins! So it’s only natural for us to want and decorate our homes with some pumpkins as well.
These DIY fabric pumpkins will turn your home interior into a proper autumn-inspired area. You can put them all over your dining room, living room, bedroom, hallway, and bathroom without worrying if you overdid it. No amount of pumpkins is too much during autumn, so knock yourself out.

Make these cute decorations in three different sizes with the help of our tutorial. It doesn’t matter if you’re a sewing beginner or an experienced veteran, this project is equally fun for both!
The essentials
You don’t need all that much for these pumpkin decorations because it’s a simple project. Here’s what you do need:
- Fabric - cotton, velvet or upholstery fabric
- A piece of brown felt for the stem of the pumpkin
- Fabric pumpkin pattern (in 3 sizes - small, medium and large)
- Stuffing
- Embroidery floss
- Glue
And the standard sewing tools: scissors or rotary cutter with its mat, ruler or measuring tape, pins or clips, iron and ironing board, matching thread, hand sewing needle and heavy duty thread, sewing machine
With all of that ready, you can proceed to the next step of this project.
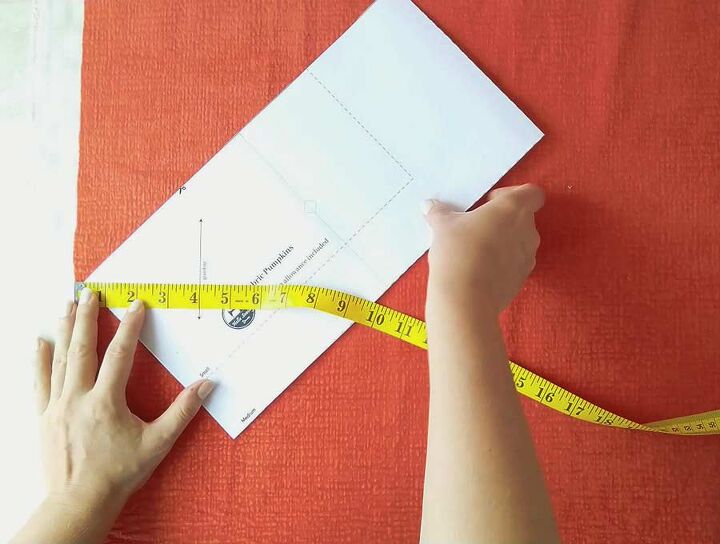
Print out the free downloadable fabric pumpkin pattern onto a piece of paper. Set it on the 100% size US option.
Cut off all excess paper and your pattern will be ready for use.If you want, you can readjust the dimensions to make the pattern smaller or larger. As long as you keep the ratio of the sides at 2:1, you can change the measurements as much as you want.
Cut the fabric
Place the pattern onto the fabric at an angle, aligning the arrow with the selvage. Cut the fabric on the bias like that.
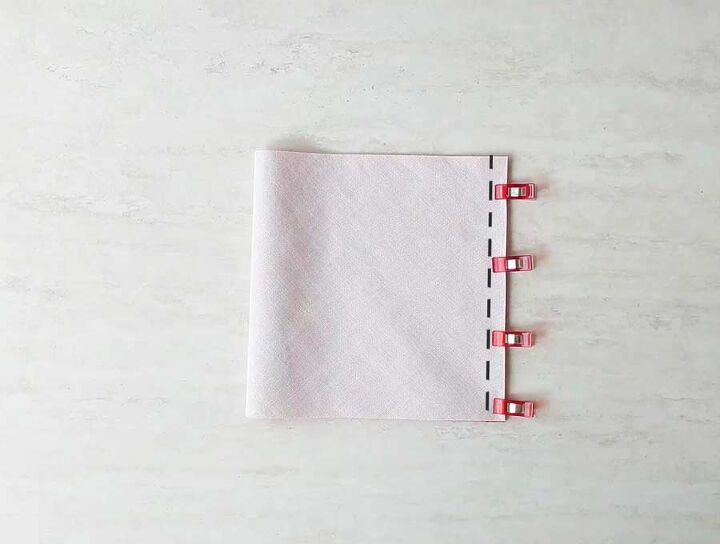
Fold the fabric in half vertically, keeping the right sides in. Align the edges and pin the fabric in place.
Use a quarter-inch seam allowance and sew the two layers together on the edge parallel to the fold. Reinforce the seam with some backstitching.
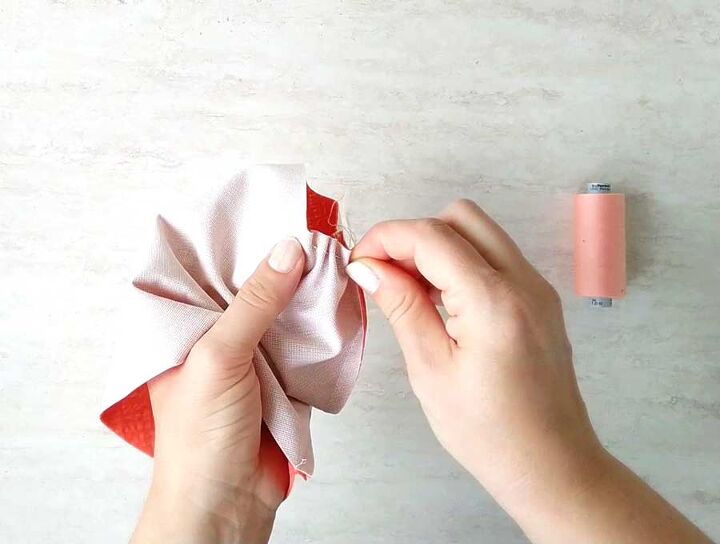
Sew two parallel gathering stitches all around the fabric. Keep them about a 1/4 inch away from the edge and about 1/8 inch away from each other
Gather the fabric by tightening the two ends of the thread and pulling the fabric away from them. Do this on one side first and then tie up the threads. After that, repeat on the other side as well.
Sew the opening shut with a double thread.
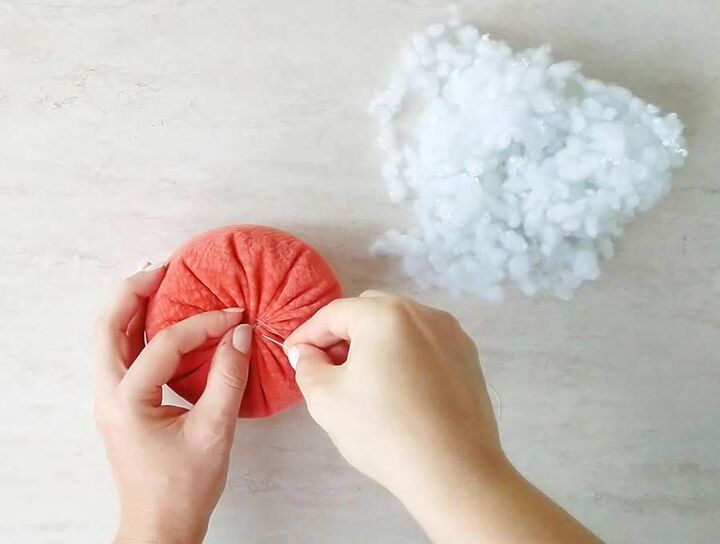
Fill up the pumpkin with stuffing as much as you can. Make the second gathering stitch on the open end of the pumpkin. Do it just like you did for the first gathering stitch.Gather the fabric on the open end of the pumpkin and sew the opening shut with a double thread.
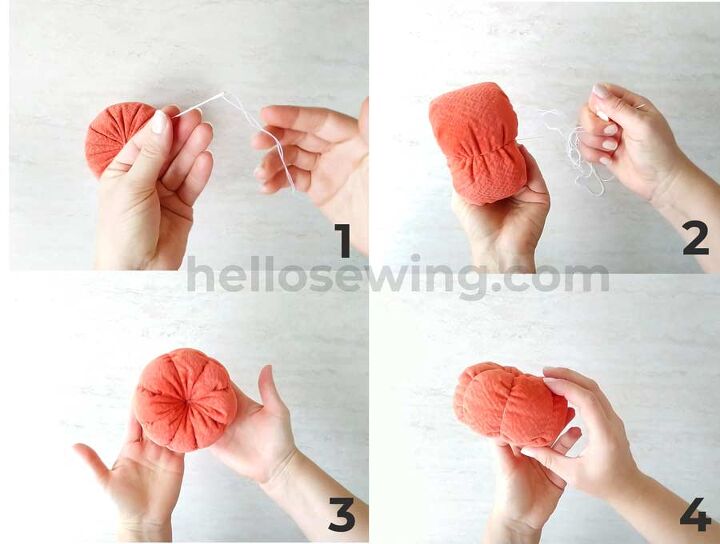
Take a needle with embroidery floss and run it into the top of the pumpkin. Pull it out from the bottom and pull the floss over the side of the pumpkin. Run the needle into the top again and tighten the floss to form one ridge.Make about eight ridges like this and then tie up the floss and cut off the excess.
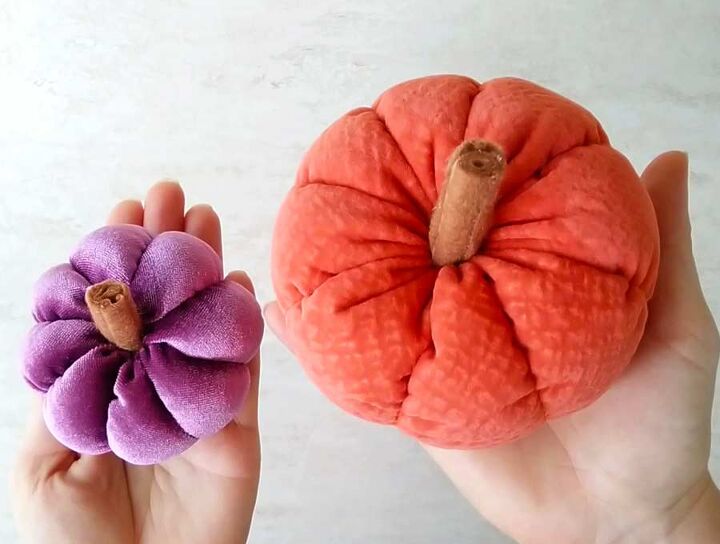
Cut out the felt into a rectangle of 1 x 2 inches for the small pumpkin, 1 x 1.5 inches for the medium pumpkin, and 2 x 4 inches for the large pumpkin. Roll it up and glue it in place. Then glue its bottom to the top of the pumpkin.
Your autumn decoration is finished now!
Did you enjoy this article? Try making a few of these DIY fabric pumpkins and let us know how they turned out. Have fun decorating your home with pumpkins!
For in-depth steps, head over to Hellosewing for the full fabric pumpkins tutorial
Looking for more great home decor ideas? I've just hit publish on a DIY bunting banner tutorial, make sure to check it out. It comes in three shapes, and has a video to help you visualize each step of the process


Frequently asked questions
Have a question about this project?
What if you use a cinnamon stick for the stem?