


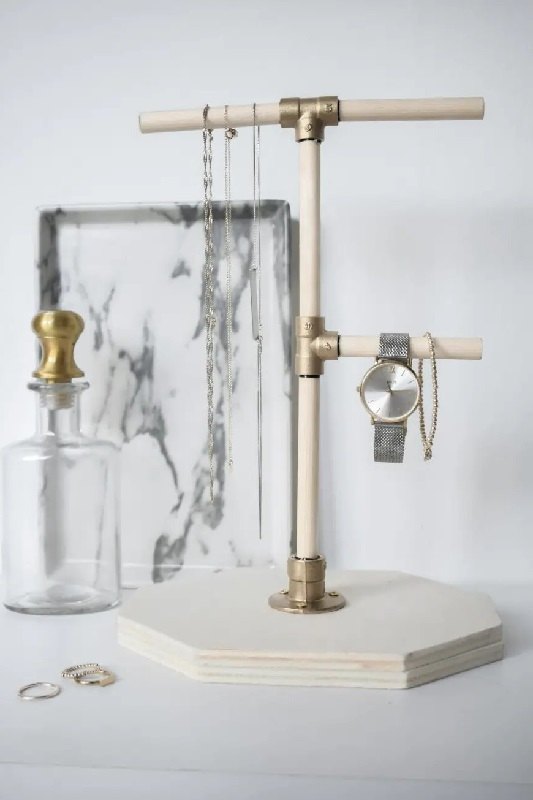
Making a Jewelry Stand From Wood

Are you looking for a place to store jewelry? Give your jewelry a place of honor with this jewelry stand made of wood! You collect your most beautiful items on a jewelry stand. And an advantage is that you can immediately find them every day! When working out the design of this wooden jewelry stand, I discovered that copper tubes could easily be replaced by wooden beams. This time I therefore started working with a combination of brass connectors and wood. A super nice combination! Why would you still store jewelry, when you can hang it on this beautiful DIY jewelry stand?
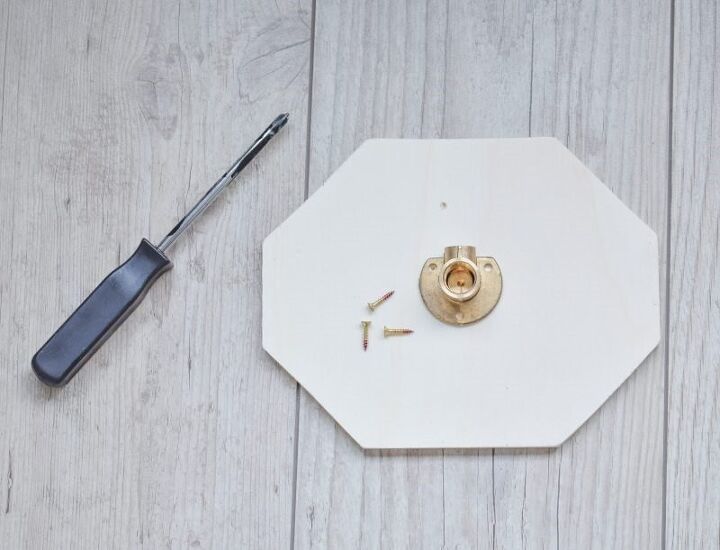
Determine the shape
Think of a shape for the stand and cut it out. Then determine the center of the shape and attach the base plate here.
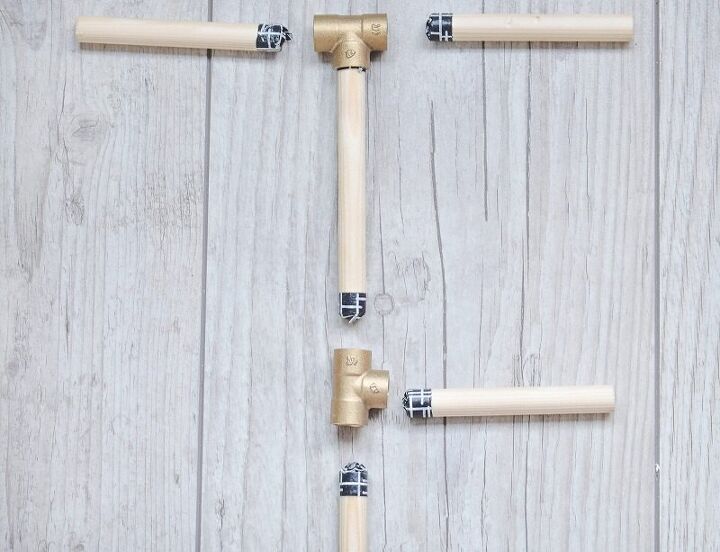
Saw the slats
Then cut the slats to size. Depending on the length of your jewelry, you can determine how long the slats should be. I used 4 slats of 9 cm and 1 of 11 cm.
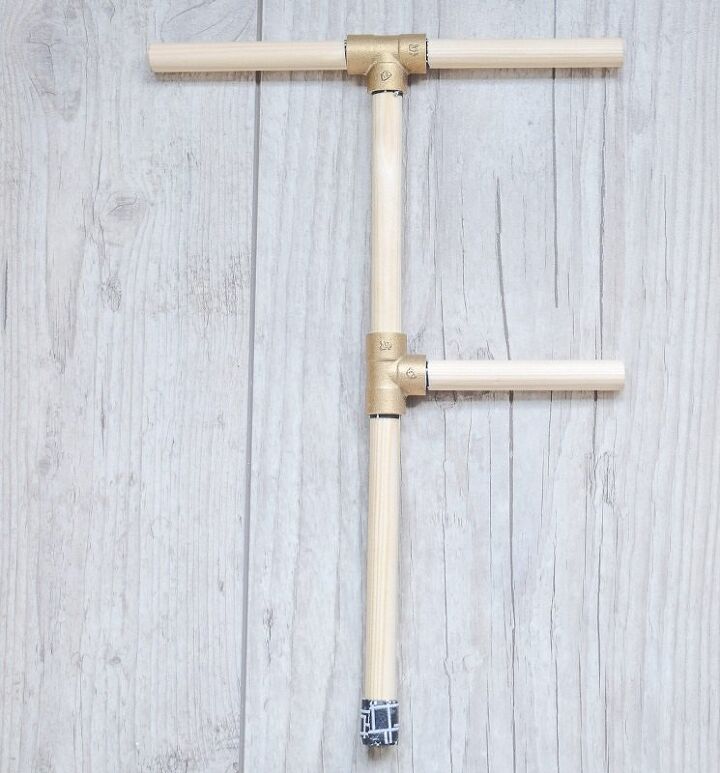
Slide the slats into the connectors
Then the slats can now be slid into the connecting pieces. By forming an edge at the ends of the slats with washi tape in step 3, the slats will remain firmly in the connecting pieces without having to use glue.
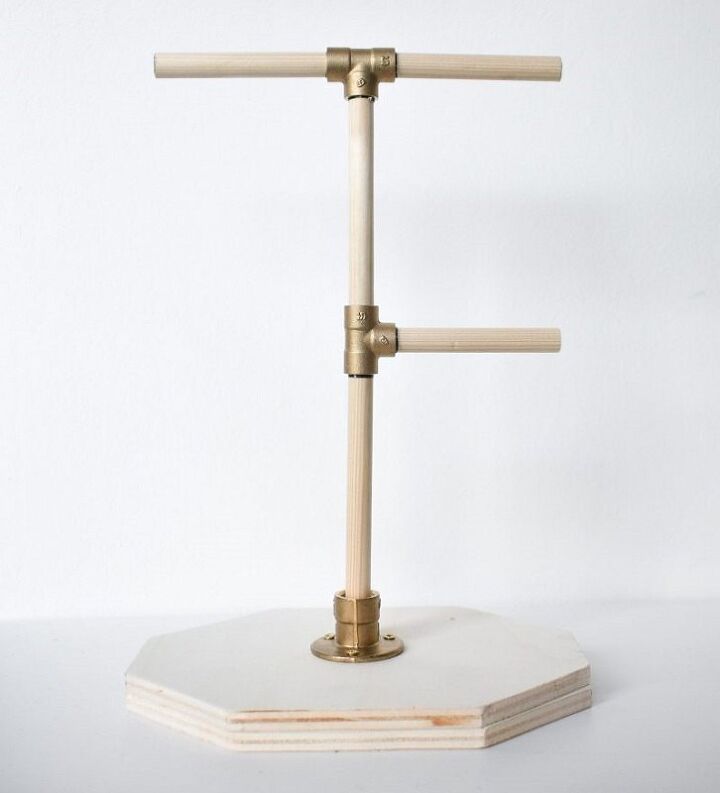
Attach the rack
Finally, put the rack on the bottom part and find a nice place for this DIY jewelry stand!
Resources for this project:
See all materials


Comments
Join the conversation
-
Made something similar with pvc pipe and put foam pipe insulation on the horizontal pieces to keep necklaces from sliding together. My niece used it at a jewelry show and got lots of compliments on it!
-
I bet you could use washi tape on the pvc pipe to decorate it up wrap around.


Frequently asked questions
Have a question about this project?