


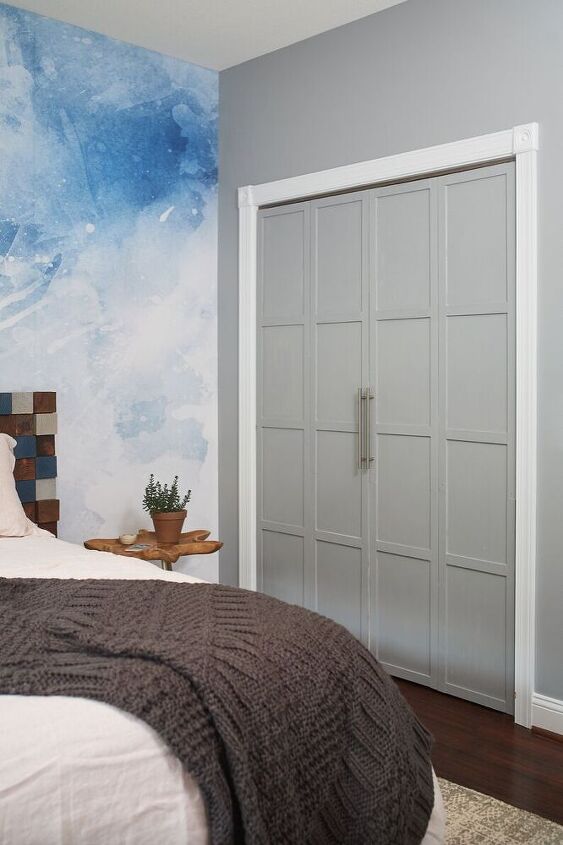
Updating Flat Closet Doors

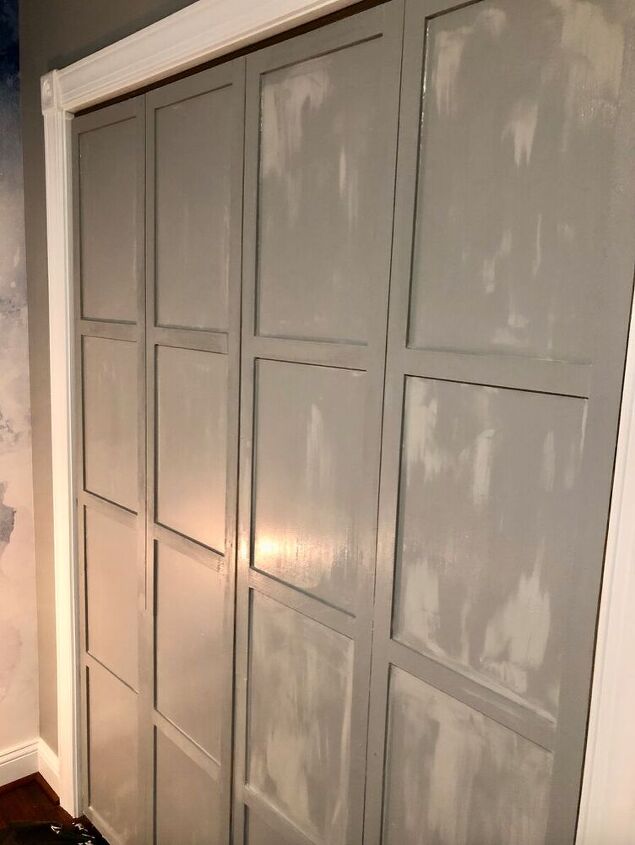
I love a quick DIY update and these closet doors were the perfect candidate for one. I was working on the guest room update for a design challenge that gave me six weeks to complete a space.Towards the end of the six-week challenge, I was trying to choose between painting the doors blue or grey when I came across an IG image with a headboard trimmed out in molding which I fell in love with and decided was perfect for the doors! A little visual interest was exactly what the doors needed.
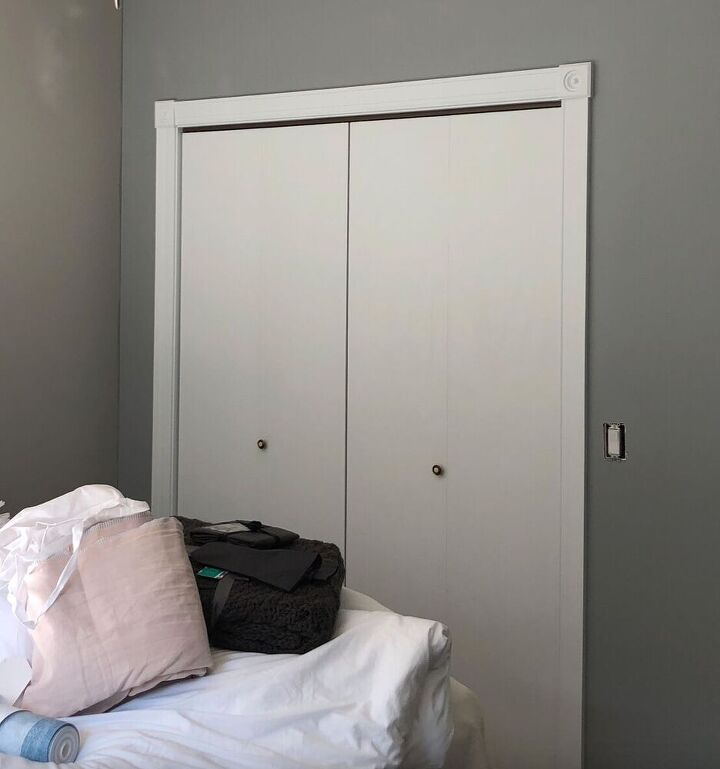
The other thing I was looking for was AFFORDABLE as I had budgeted carefully for the space and the coffers were running low. The doors were in good shape just a bit meh.
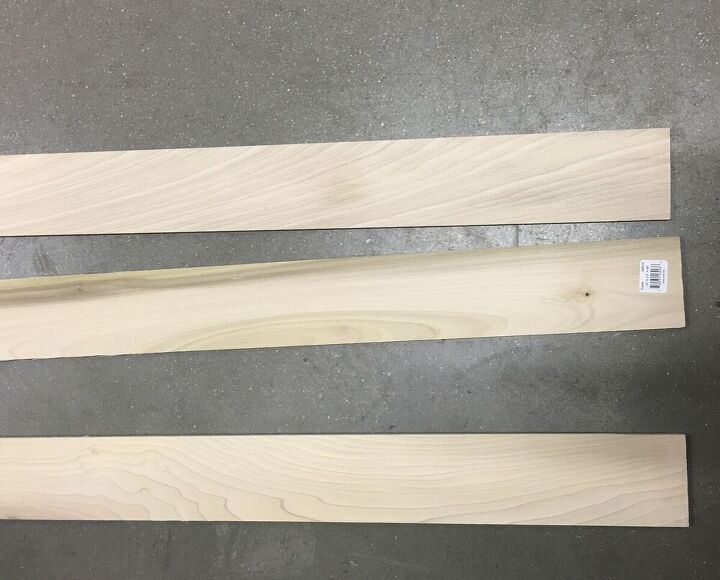
Materials Used:-Wood moulding (we used 2-inch strips from Home Depot)-Miter saw-Wood glue-Pneumatic nailer-Spackle-Paint-Chaulk We found these inexpensive wood strips (below) at Home Depot for around $1.00 per foot.
I had grandiose plans to lay out a very intricate design when my husband reminded me of my limited geometry skills. Point taken. Since I was short on both time and math skills I decided on a simple design. We got started gluing the strips to the doors and added a few pneumatic nails to help hold them in place while the glue dried.

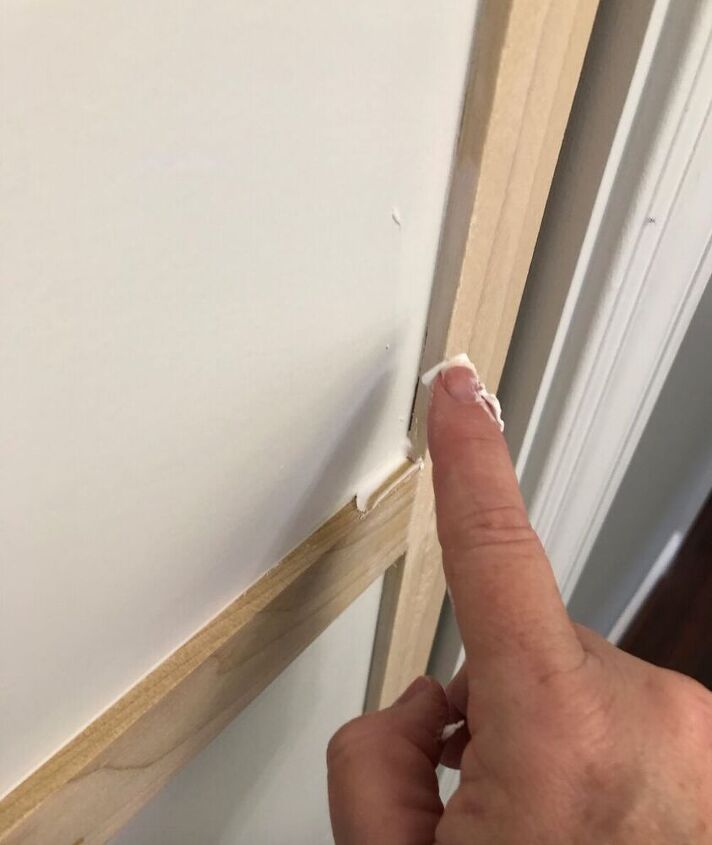
Once the moulding was up I filled in along the edges with spackle in order to assure a clean line when painted. It drives me crazy to see those little lines where the paint separates from the wood piece in moulding.
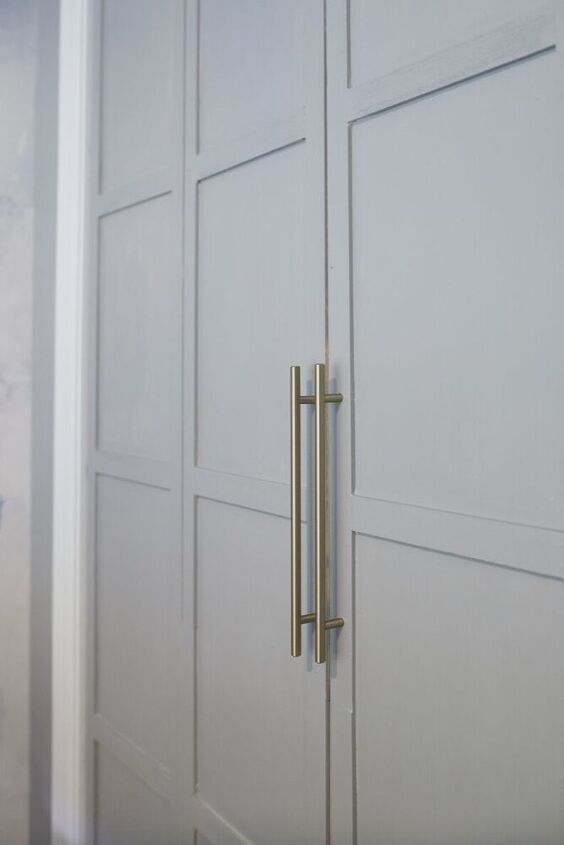
The final step was using high-quality paint. I am a fan of Sherwin- Williams Emerald Interior paint and primer in one. The color I used is called Gray Matter SW 7066. It took three coats.
We added brass hardware which are actually appliance pulls.I mentioned it was quick and easy. The paint was leftover from another project but even if I had included a quart of paint total cost would have been less than $80.00 and took a weekend. It's the little details that make all the difference!
Resources for this project:
See all materials


Comments
Join the conversation
-
I love it ! You did a great job and I am putting that in my "what I am going to do next" file ! ❤
-
Hi Libby,,
Thanks for your response. I’m clear now on materials to use. I’ll send photos of my completed project.
Thanks, Nancy


Frequently asked questions
Have a question about this project?
Love your closet door reform, I am also thinking I like your headboard,
any chance that I could see a photo, and ask what you have done.
Thank you very much, for sharing all your wonderful ideas, and projects with us.
What size trim did you use? It takes me to a Amazon link with skinny craft sticks. Yours looks much wider. Thank you.
Hi! Just ran across your closet doors! Exactly what I am looking for. I am alittle confused on the wood though. It takes me to Amazon... small craft sticks?? Yours look much bigger. Please let me know when you have a sec. Thank you! Ready to get this project going!! Suzi