


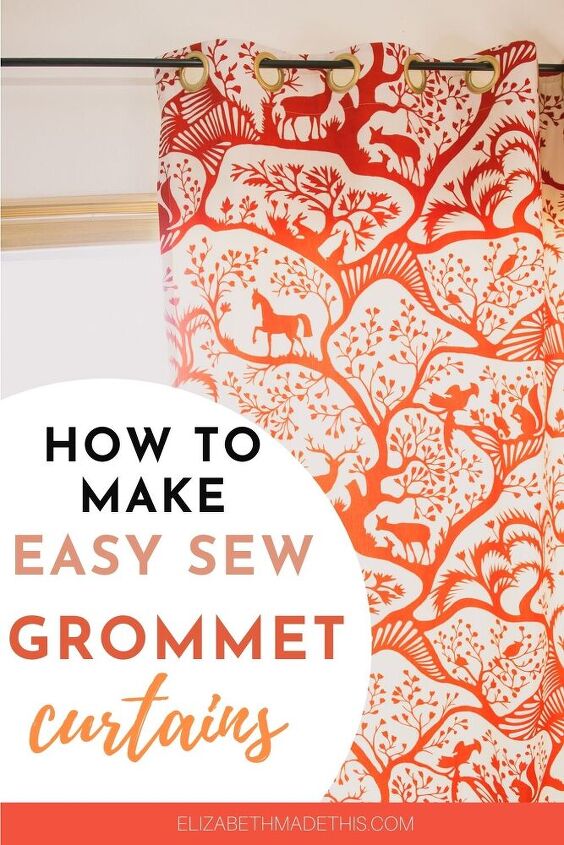
How to Make Curtains With Grommets [and Lining]
I've hunted for soooo long for fabric for curtains for my bedroom. Finally after changing out some decor in another room I had 1 panel of this cool print. Ebay came through for me and I was able to find more of the same fabric.
But you don't have to be like me to make your own DIY grommet curtains. A couple hours, some good fabric and some hardware and you can make these classy curtains fast. Here's how:
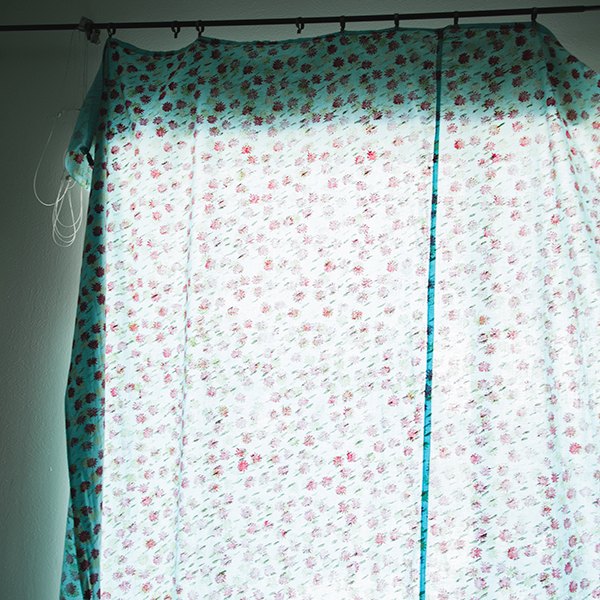
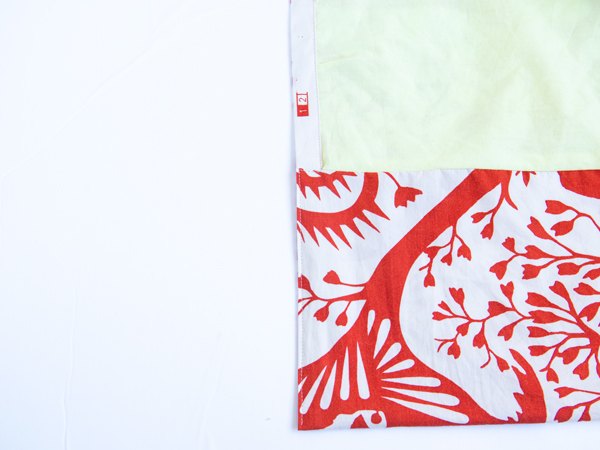
(This was the old curtain. Still good fabric but ready to be something else)
Supplies for sewing grommets with curtains
- 2.5 yards of 54″-60″ wide fabric
- 2.5 yards of cotton voile or muslin for lining
- 8-12 plastic grommets or metal grommets
- Grommet setter if using metal grommets
- Olfa circle rotary cutter (strongly recommended)
- Buckram tape (iron on or not)
- matching sewing machine thread
- Universal 80/12 sewing machine needle
- Manila envelope
- Ruler + pen
- IRON!
How to sew curtains with grommets
Prepping your fabric
Prepping everything is going to be the longest step here. The sewing is quick, but you’ll have to be patient on this step.
After you’ve washed your fabric, you’ll need to square the top edge. I should say the the top edge will be one of the short sides of your jumbo rectangle here.
You can do this with a ruler and a gridded mat like I show in this step of How to Sew Curtains the Easiest Way.
Alternatively, you can make a small cut near the top and pull. On most woven fabrics, you should be able to tear a straight line right across the top.
Either method will ensure that your fabric is going to hang straight.
Prep the lining fabric
Next, square off the top edge of the cotton voile.
You’ll want to cut the voile a little shorter than the curtain fabric. For me, I cut mine 6″ shorter to allow for the hem.
From here, iron all of the outer fabric and the lining.
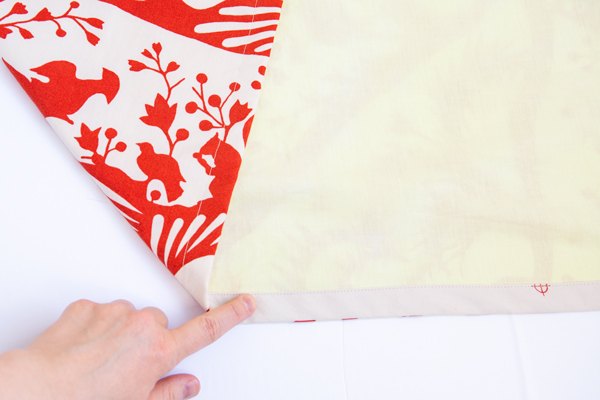
Press the sides
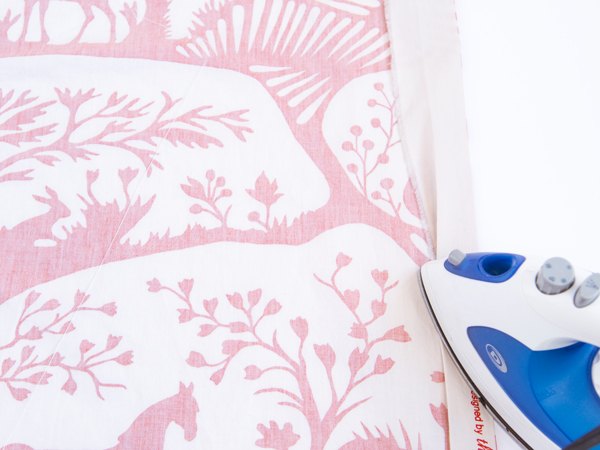
After this, fold the selvage of the outer fabric towards the wrong side and press. The printing on most home dec prints ends about 1 to 1 1/2″ from the finished edge of the selvage. This is the perfect amount to make a double-turned hem.
Go ahead and press a double turned hem on both long sides of the outer fabric.
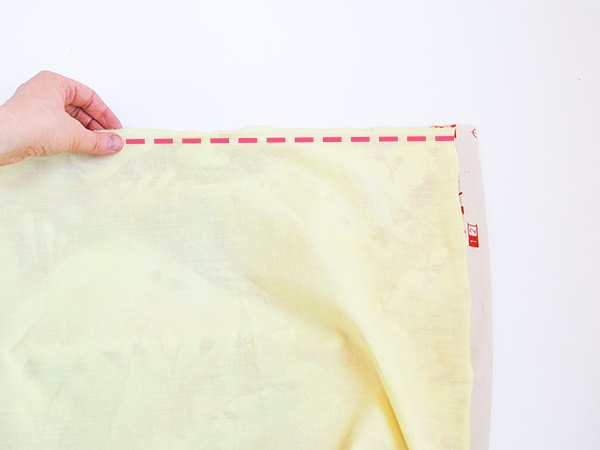
Cut down the width of the lining
If your voile is wider than your outer fabric (mine was), you’ll want to do this next.
Place your voile on the wrong side of the pressed curtain panel, matching up the edges. Add a couple pins to hold things down.
Slide one long end of the voile so that it’s even with the first pressed line of one side of the hem. Add a couple pins through all the layers on the side you’ve overlapped the fabrics.
Slide the other edge of the voile under the second pressed edge, then make a small vertical slit in the voile only that’s even with the first pressed line of the other pressed hem.
Pull on the voile to tear a straight line down the length of the fabric.
Now we’re ready to sew our lined grommet curtains!
Adding buckram [Don’t skip this step]
Next we need to add buckram to the top of the outer fabric.
What’s buckram you ask?
Buckram is a stiff nonwoven header tape that will beef up the outer fabric, protecting it from tearing as grommets are added. Buckram will also support the weight of the grommets themselves and also make the curtain make nice little vertical curtain folds.

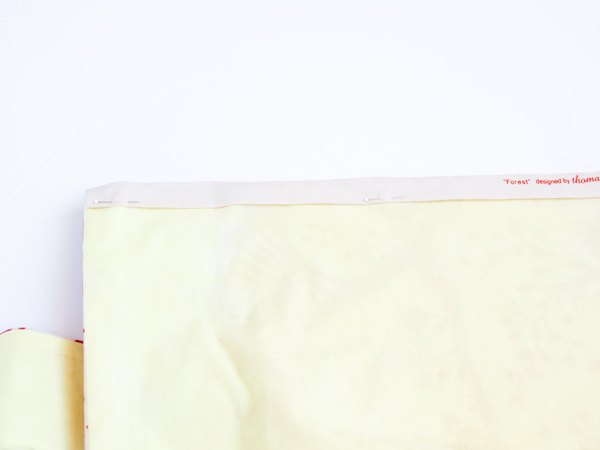
To prep your curtain fabric for the buckram, first draw a line 1/2″ from the top on the wrong side of your fabric. If you’re using iron-on buckram, simply place the buckram right below this line glue side down and fuse in place with your iron.
I’m using sew-in buckram, so I simply used a little glue stick to hold the buckram in place for the next couple steps.
Sew the top of the curtain
Next, put the voile and the outer fabric right sides together.
Sew the top edge with a 1/2″ seam allowance.

Press the seam towards the lining, then flip the lining towards the inside of the curtain. You won’t be able to see the buckram anymore.
Sew the sides
Next, lay your curtain out in a big flat area. The biggest table you have probably won’t cut it, so sorry, but this is a working on the floor situation probably. I did promise fabric wrangling and this is definitely that.
Slide the long edges of the voile under the pressed hems. Smooth everything out really well, then pin both sides so that the voile is secure under the outer hems.
From here, stitch down the hems on the long edges through all layers. Sew from the top of the curtain to about 1″ from the bottom of the lining on both sides of the curtain.
Stitch the top of the curtain 1/8″ away from the edge. Also stitch horizontally across the curtain near the bottom of the buckram. If you’d like, draw a horizontal line with a marker then stitch right on that line for sweet results.
Marking the grommets
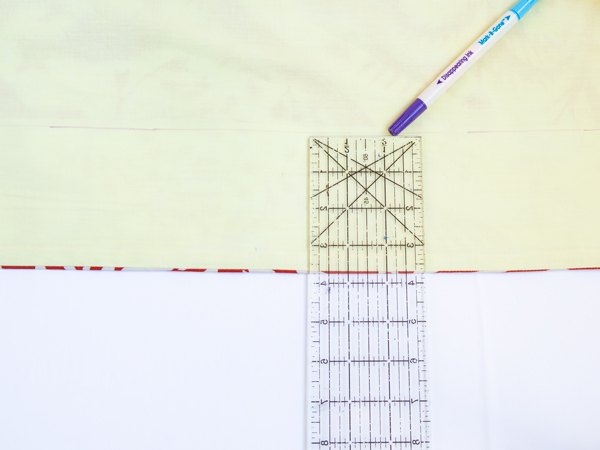
Cut several strips of paper from the manila envelope 3″ wide. Tape the pieces together until they’re long enough to fit across the top of the curtain.
Draw a line horizontally down the center. Make 2 vertical lines 3″ from each end.
Then you’re going to need to divide the rest of the space evenly for the number of grommets in your curtain. I’m working with 10 grommets, so I made vertical marks every 5 3/8″.
If you bought a grommet set with 8 grommets, space your grommets 6 5/8″ apart. For a set of grommets with 12 grommets, space the grommets a little less than 4 3/8″ apart.
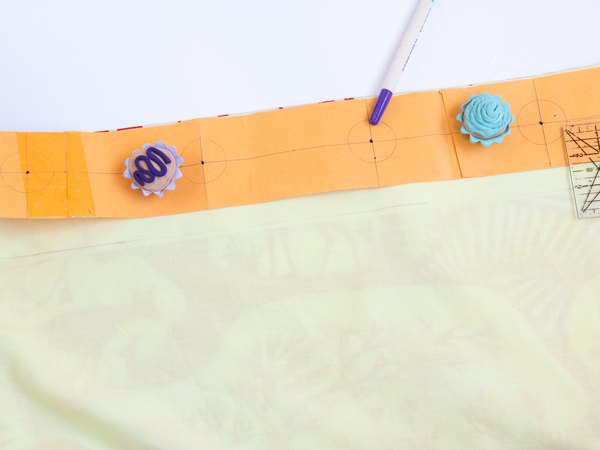
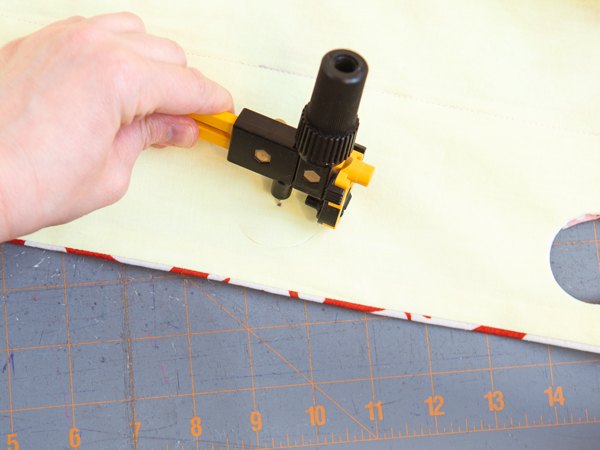
At every intersection, use a compass to draw a circle with a 1.5″ diameter. You can skip this step if you’re going to be using an Olfa rotary cutter. If you’re not, go ahead and cut out these circles.
To transfer the marks to the curtain, first flip the curtain to the wrong side. Lay the template on the top edge. Trace the circles right on the fabric with a fabric marker or push a fine tipped marker through the center of the circle at each point.
Use scissors to cut out the circles through all layers of the curtain or use your Olfa rotary cutter to cut out a circle on the smallest setting.
Time to set the grommets!
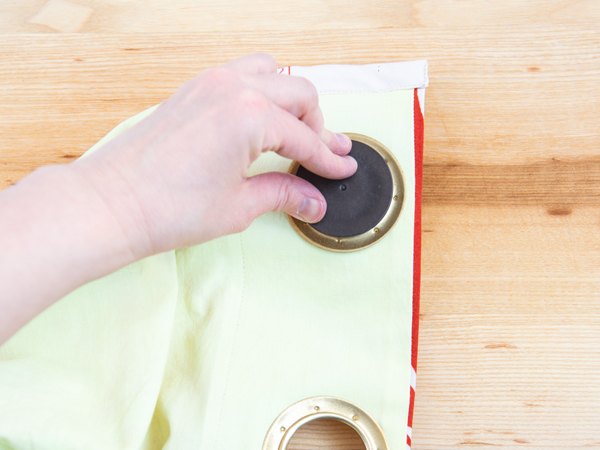
Setting the grommets
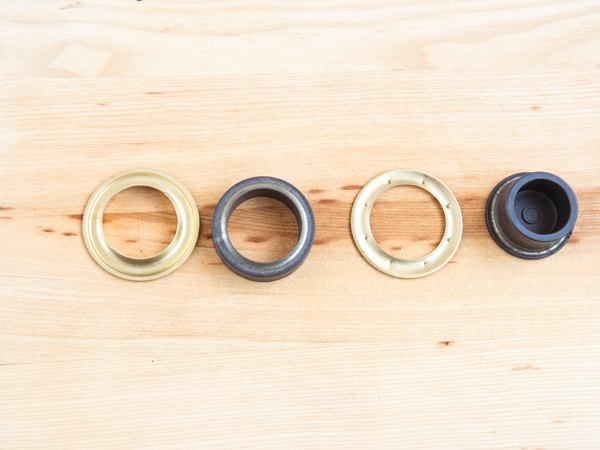
There’s 2 parts to the grommet. The outer grommet, and the inner ring.
For metal grommets, place the outer grommet face down on top of the base of the setter.
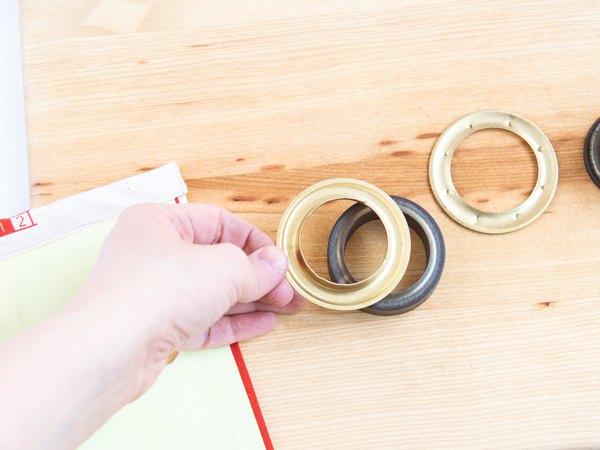
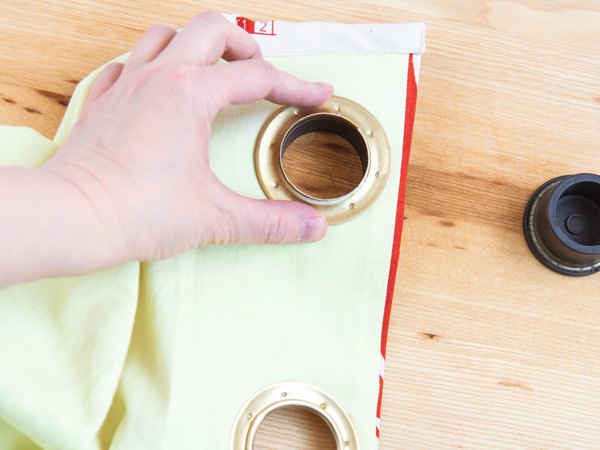
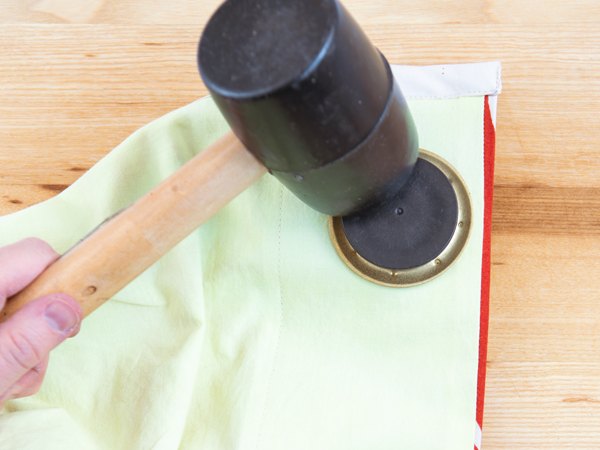
Next pop the grommet’s back through the fabric so that the back of the grommet pokes through to the wrong side of the fabric. Lay the grommet’s ring teeth side down over this, then pop the male part of the grommet setter through the back of the grommet.
Working on a padded surface, use a mallet to set the grommet. When you’ve whacked it properly, neither part of the grommet will move inside the hole you’ve made.
Continue this way for all of the grommets.
If you’re using plastic grommets, fit the grommet front to the right side and pop the second side around it on the back. Super simple.
Check the curtain length
Before you finish the curtain, hang it up on your curtain rod.
Bring the bottom of the fabric up to meet the bottom of the lining. Overlap and pinch the lining and fabric together by 1/2″. Check the length.
I like curtains to just be touching the floor, though you might like them a tiny bit longer or shorter than that.
If your curtain is too long, make a small horizontal cut at the bottom of the outer fabric and rip straight across the bottom for a nice clean cut edge. Double check the length again before finishing everything up in the next step.
Finishing the hem
Now that the top of the curtain is all finished, turn the whole thing inside out through the lining.
Match up the right side of the curtain with the bottom of the hem. Sew straight across the bottom with a 1/2″ seam allowance. Leave the sides of the outer fabric unsewn.

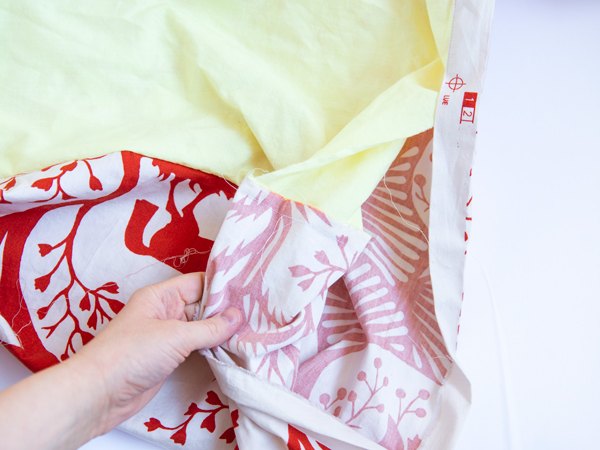
Turn everything right side out again through one of the bottom sides. Press the seam between the lining and the outer fabric.
To finish everything off, bring the pressed edges of the outer fabric together. Tuck the lining fabric inside the sides.
Make a small clip in the inside layer of the curtain fabric to but not through the seam line right at the point where the lining meets the curtain’s side.
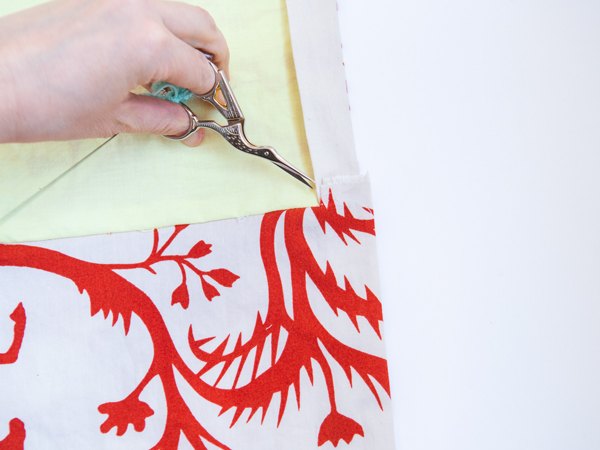
Tuck everything in and sew through the unsewn edges from top to bottom. Press your whole curtain to finish everything off.
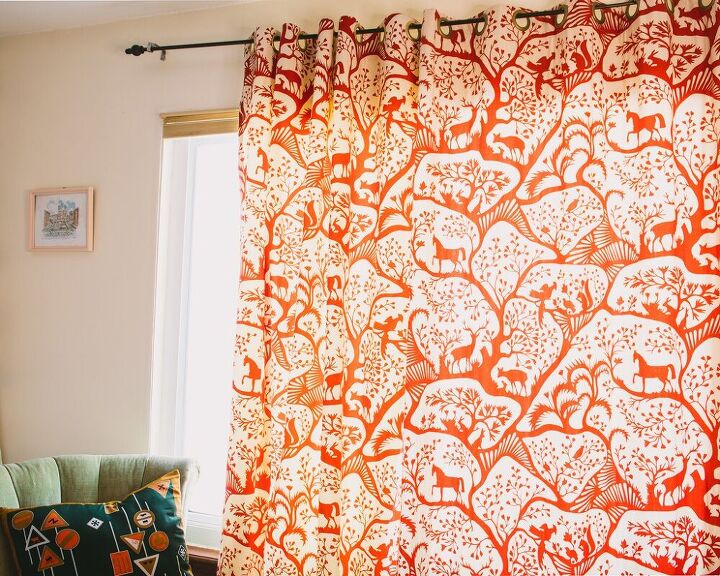
Voila! Now you know how to make curtains with grommets! Hang them up and enjoy their simple luxury.
For the full project and lots more easy sewing projects for your home and life, come join me on my blog: Elizabeth Made This
Resources for this project:
See all materials


Comments
Join the conversation
-
Your curtains came out lovely. I did the same thing but for a shower curtain. I hate short curtains, and I made one that is only an inch or so from the floor. Used smaller grommets and curtain hooks. Everyone loves my shower curtain. It is nice and full and long.
-
awesome job, and lovely fabric!


Frequently asked questions
Have a question about this project?
I'm curious about your compass. Can you tell me about it? I've never seen anything like it