


DIY White Picket Fence Planter Box
Who doesn’t love white picket fences? They are the epitome of cozy cottage charm! With some supplies I had on hand, I created a DIY White Picket Fence Planter Box. It makes a lovely container for all types of seasonal florals.
Inspiration For My Planter Box
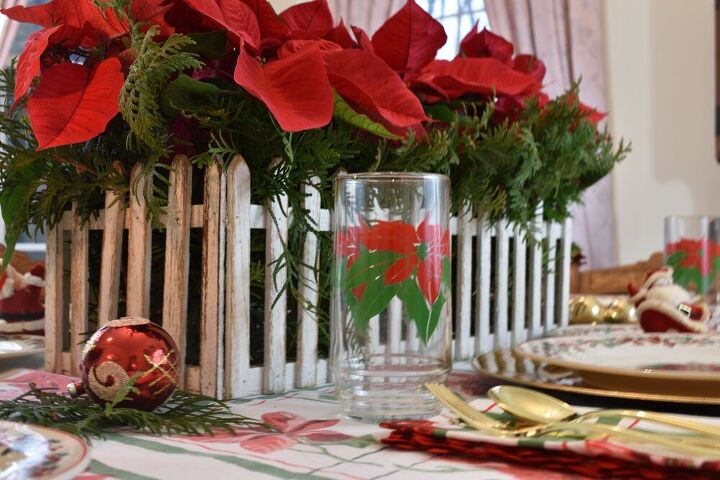
I actually already have a white picket fence planter in my possession. I bought it at a church tag sale years ago and I love it! It was the star of my Poinsettia Motif Christmas Tablescape in 2018. It’s quite large, however, and I wanted a smaller version.
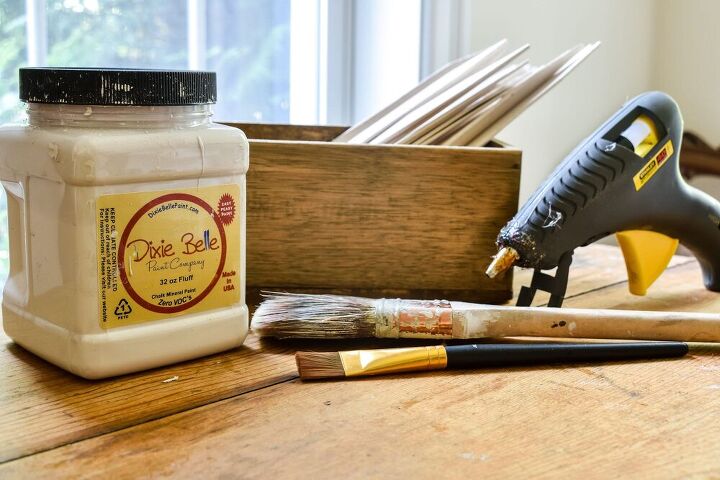
Supply List:
- wooden box (mine is 4″ tall by 8″ long)
- 28 craft sticks (mine are 1″ wide x 10″ long)
- pencil and ruler/measuring tape
- wood cutting tool
- sand paper
- gray paint (Dixie Belle Manatee Gray)
- white paint (Dixie Belle Fluff)
- paintbrushes
- glue gun and glue sticks
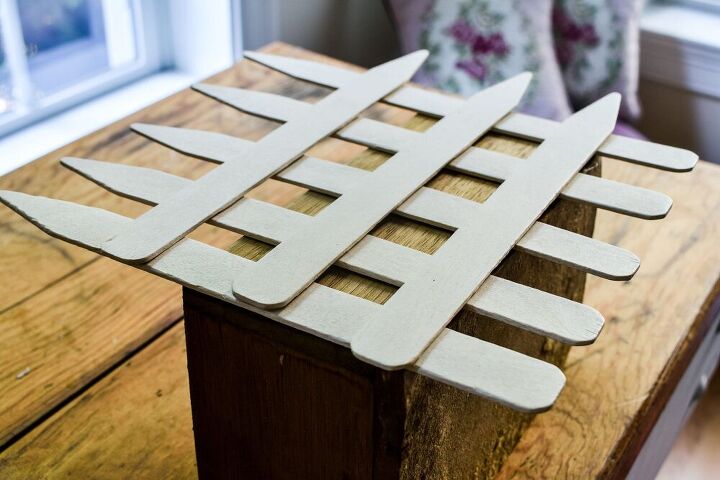
Step 1.
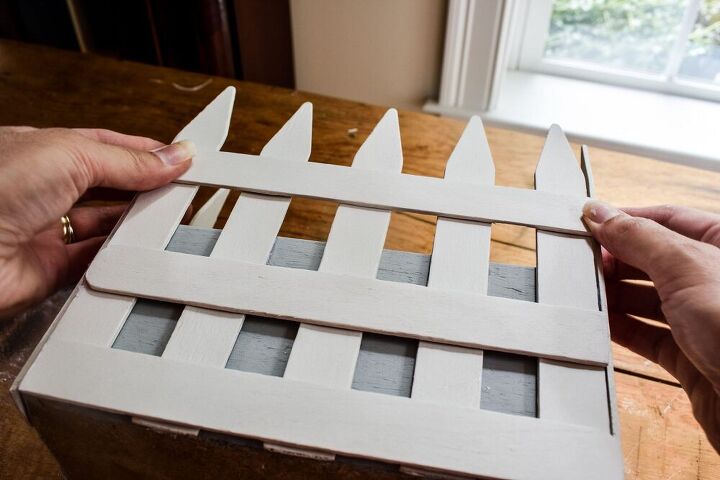
Position the craft sticks on the long and short sides of the box to find a pleasing arrangement. If your sticks are too long, you’ll need to trim them with a wood cutting tool.
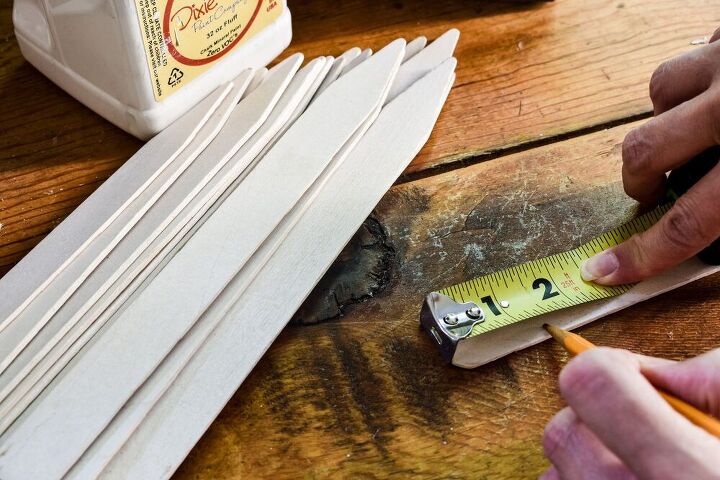

Step 2.
Measure and mark with a pencil where you’ll need to trim the craft sticks.
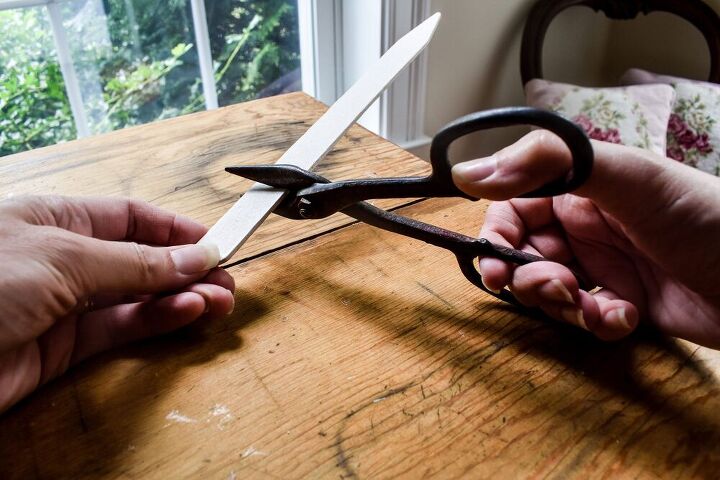
Step 3.
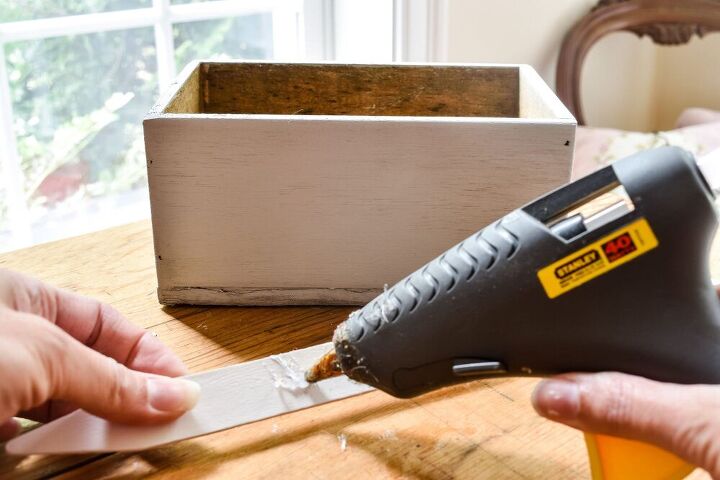
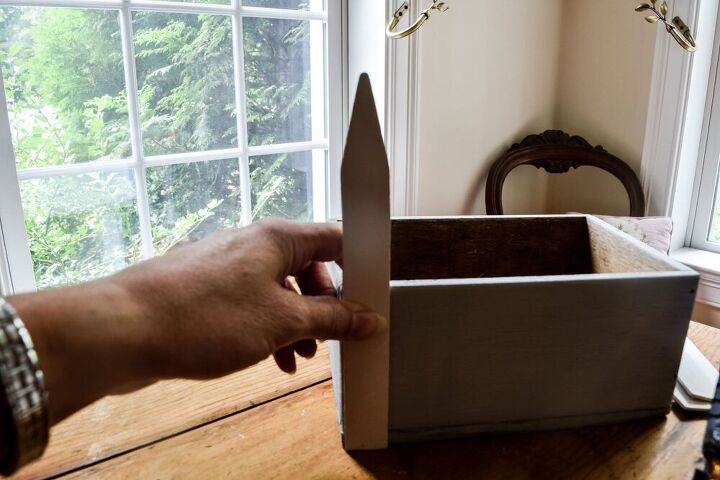
Use your cutting utensil to trim the craft sticks. I used some sharp, vintage metal shears. *Note: If your craft sticks don’t already have pointed ends, create them with your cutting tool now.

Step 4.
Sand the cut edges where you trimmed the craft sticks.
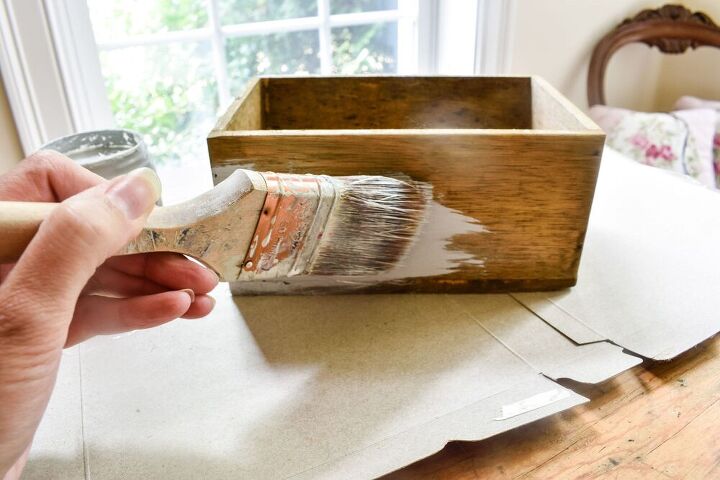
Step 5.
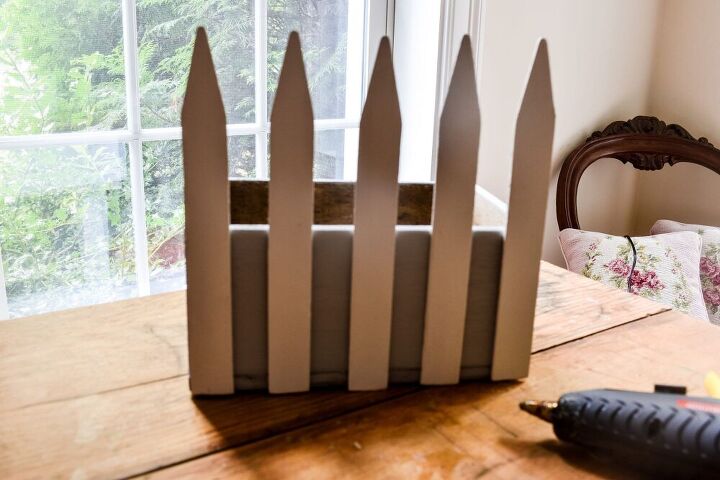
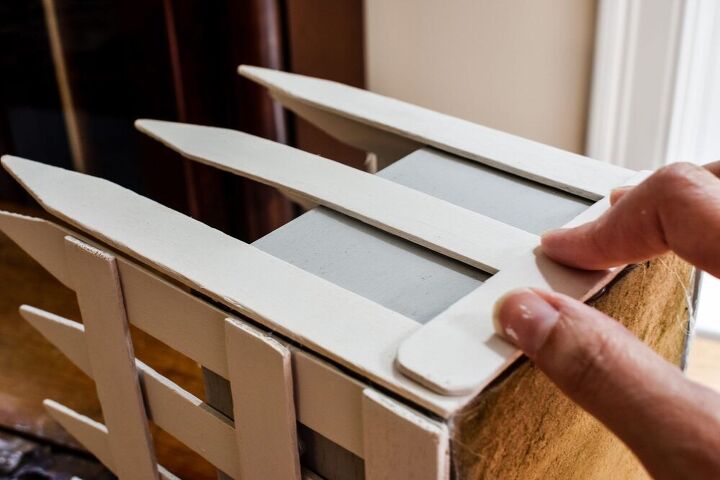
Paint the box, if you wish. I painted mine a soft grey to complement the white “pickets”.
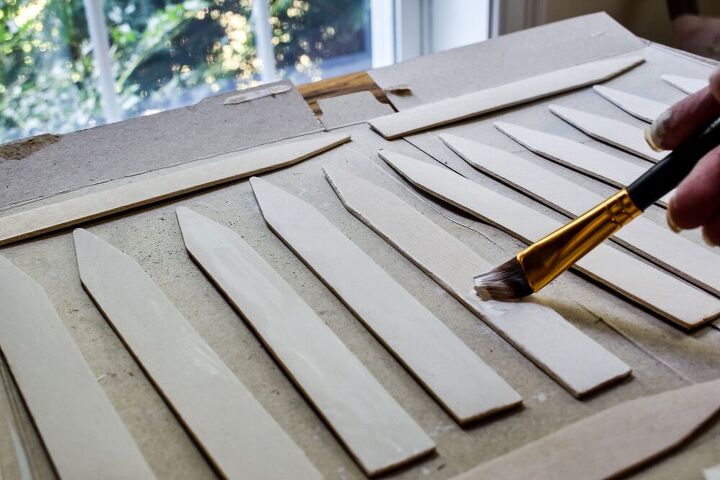
Step 6.
Paint the craft sticks white (front and back).
Step 7.
Apply hot glue to the craft sticks and attach them to the box. I completed both of the longer sides of the box first, then I finished with the shorter sides.
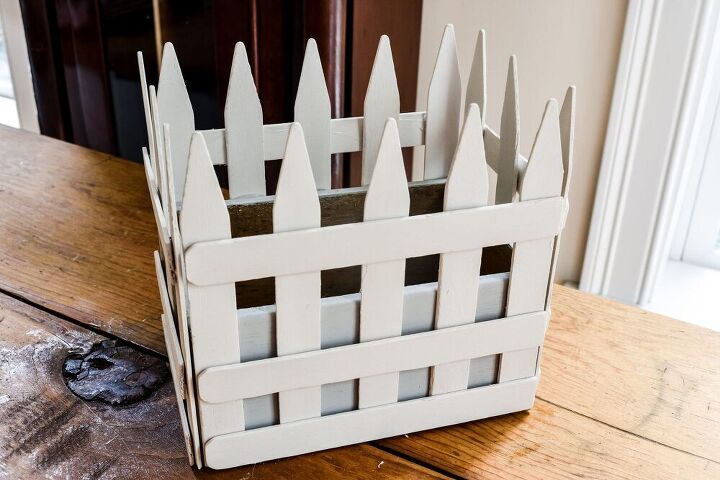
Style and enjoy your new picket fence planter!
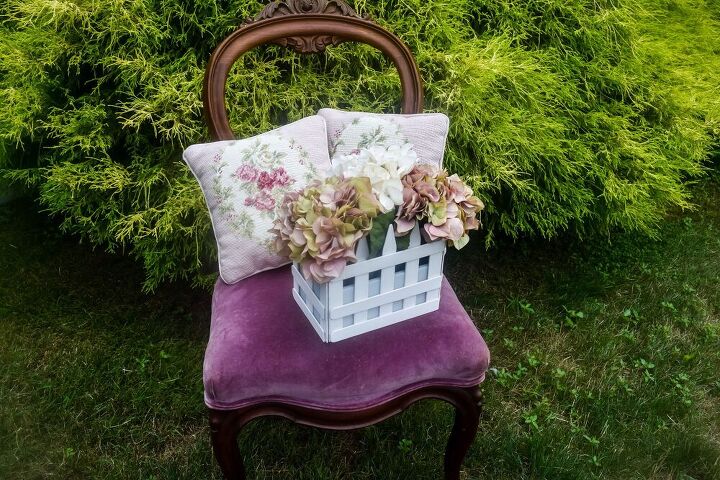
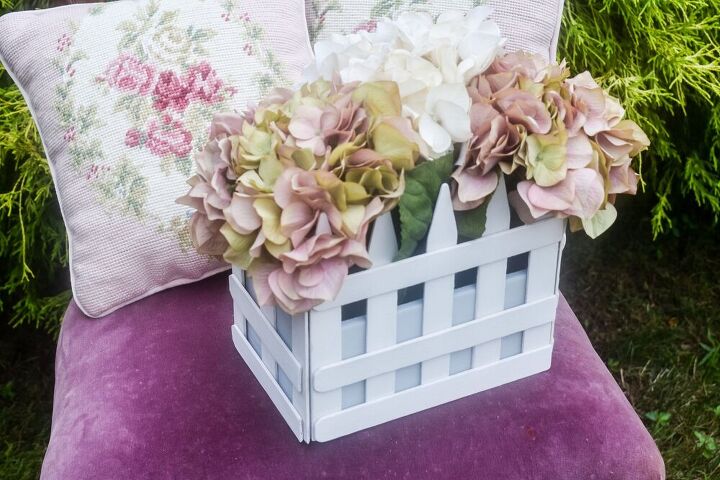
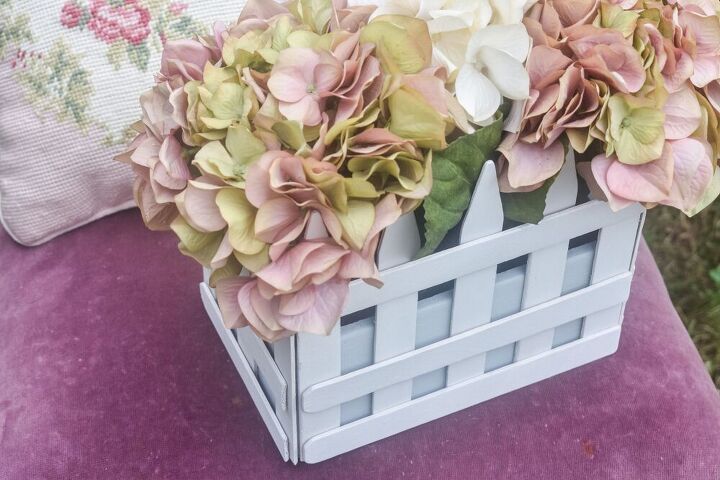
I filled my planter with faux hydrangea blossoms. I just love how it looks on my purple velvet upholstered chair with Laura Ashley pillows.
Resources for this project:
See all materials


Comments
Join the conversation
-
very pretty!!!!
-
Very nice! I like your version better than the original. Lovely centerpiece. 💕


Frequently asked questions
Have a question about this project?