


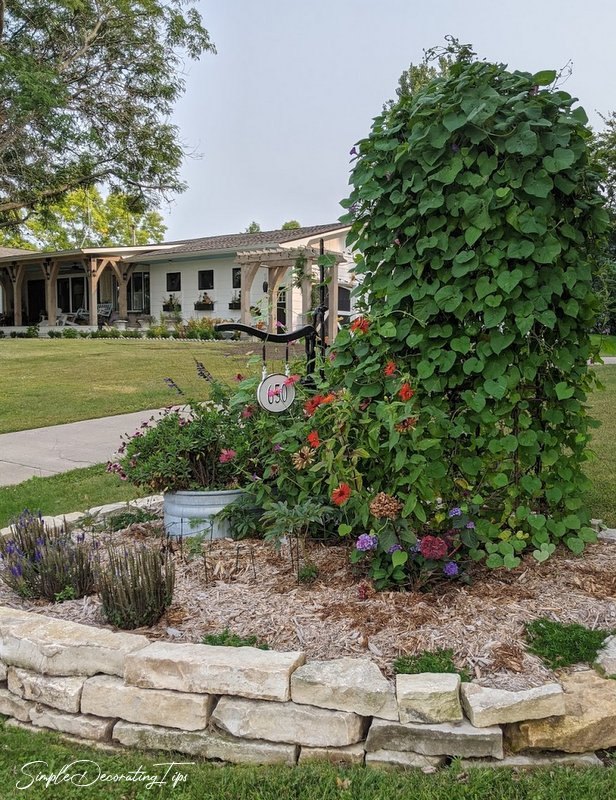
Dry Stack Stone Planter
Hi, I'm Liz from the decorating and DIY blog SimpleDecoratingTips.com

Yay! Spring is here and with it come many gardening and landscape plans. My husband and I actually made this dry stack stone planter last year. I’ve been saving it to share with you until now in case one of you is considering to DIY your own dry stack planter for the first time. Hopefully the tips I’ve figured out in the process will help with your project.
A huge advantage to building a dry stack stone planter, (or wall) is what it doesn’t require! For a mortared stone wall, we’d have to have footings buried 3 or 4 feet in the ground. We are in the Midwest and get cold winters. The frost goes into the ground that deep. If you don’t have footings deeper than the frost line, the mortared stone wall will crack and fall apart when the frost heaves it up. With a dry stack stone wall, footings are not needed. The stones have enough give and take that the frost shouldn’t cause them to topple.
Somewhere, years ago, I had seen an address marker hanging off an old pump handle and filed it away in my head for future reference. Our newly renovated home, seemed the right place to pull that creative entity out of the archives and put it to use. Our house is on a slope, which gives us the opportunity for a dry stack stone planter to look built in to the hill.
I found the old pump and ordered the address plaque. My husband had his metal working friend make the pump arm to stay extended out for the address plaque to hang from. He also welded a special flanged tube to connect to the concrete footing fitted to mount the pump on. If you have questions about those details, let me know, I’d be glad to get the answers for you.
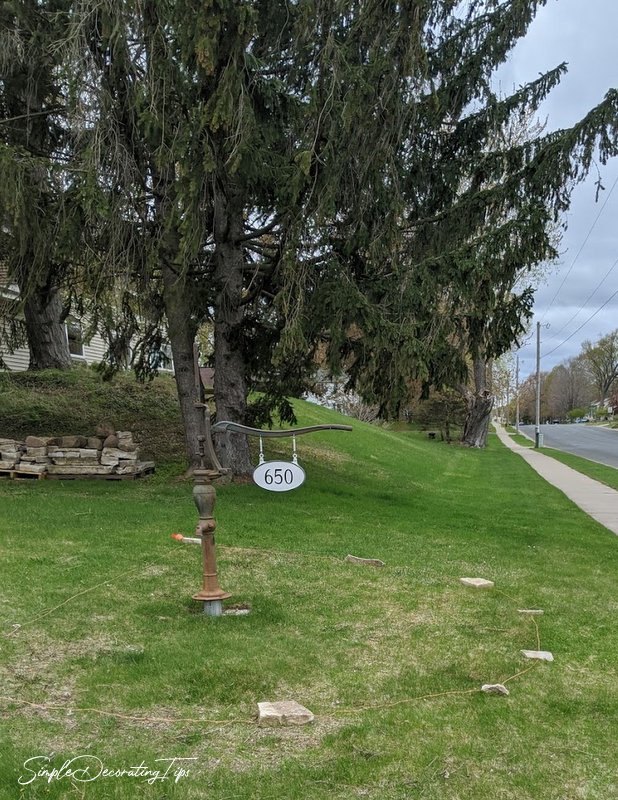
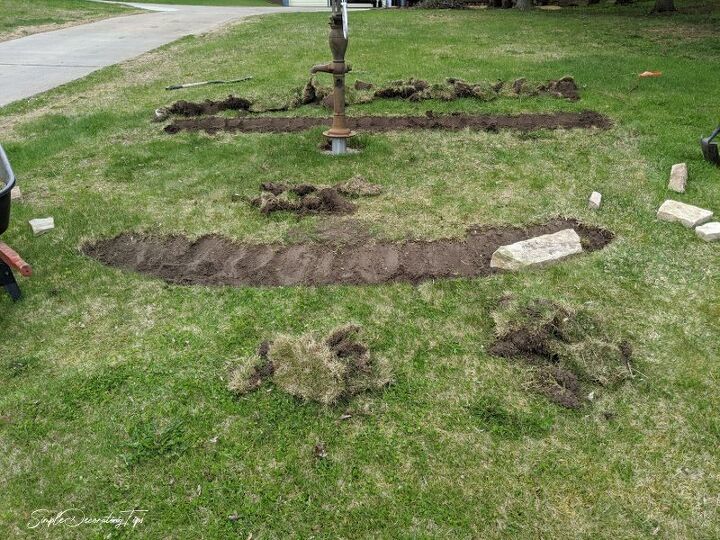
Once the pump was mounted in the yard, I could visualize how the planter size and shape should look better. Using a landscape string, I determined the size and shape for the planter.
Here’s a tip… Be sure to view it from the road and not just right at the planter. It looks much larger close up, but from a distance, even a little distance like the road, it looks drastically smaller.
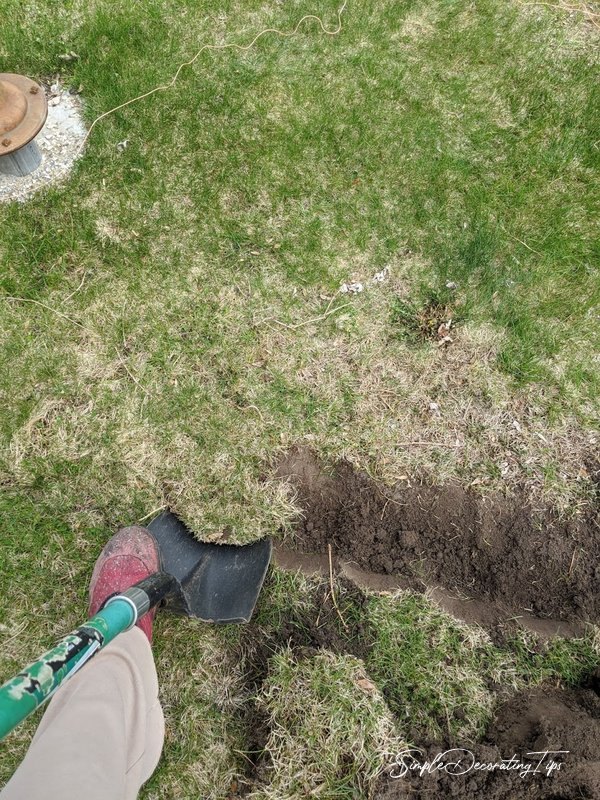
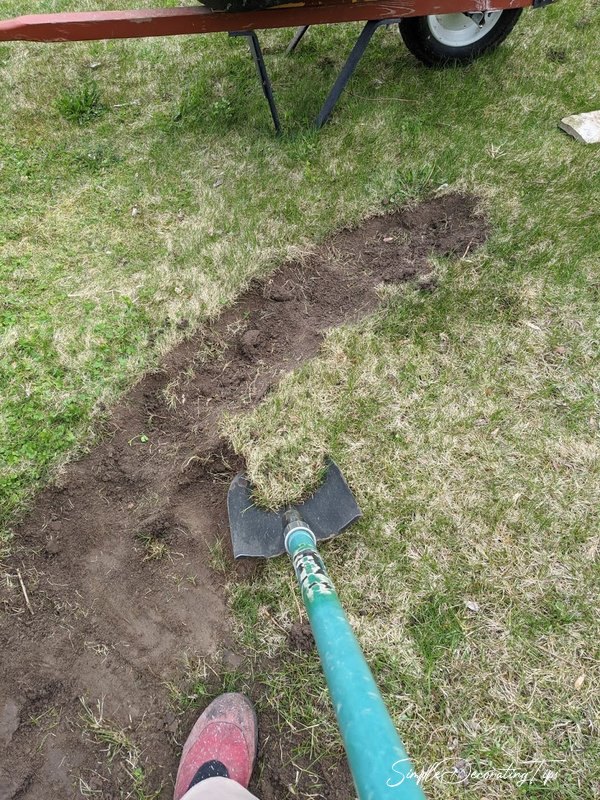
After the shape and size of the dry stack rock planter was decided, I dug out the grass for the first course of rocks.
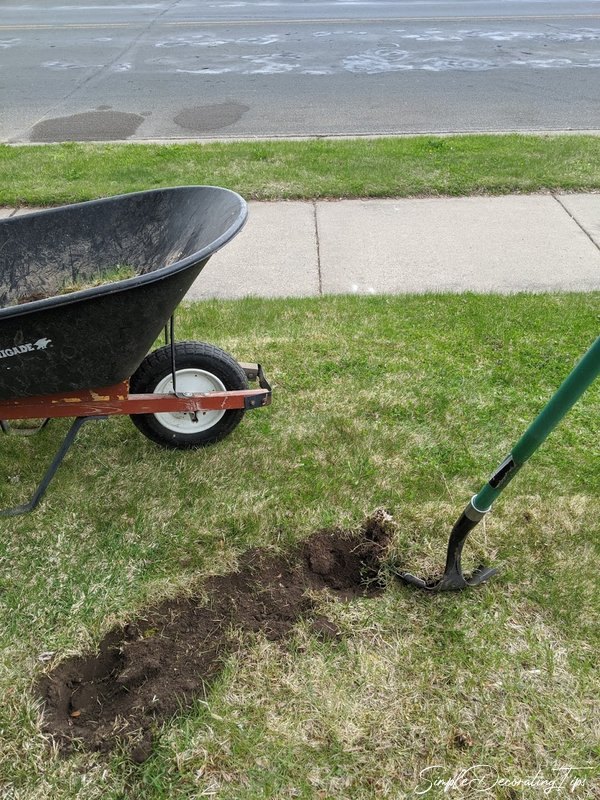
Here’s a tip… If it’s been a while since it’s rained and the ground is super hard, water it a bit the day before you’re going to dig and it’ll be much easier. Just don’t overwater it if you have a lot of clay or you’ll have mud!
The first stone went in, and by the second or third stone, we realized it’s impossible to tell where ‘level’ is without an actual level. DUH! We both knew that but apparently forgot that part for a minute…
After re-grouping with a long straight board and level in hand. We started over.
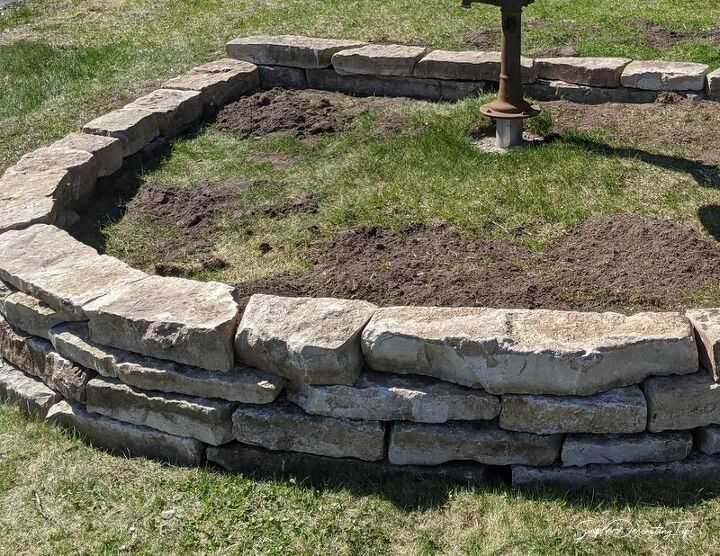
Working with limestone like this isn’t too hard if you’re strong. Some of the pieces are quite heavy, so it was really helpful to have my husband do most of the heavy lifting. (This will make his day when reads that I said he did ‘most of the heavy lifting’!)
Here are some pretty basic and simple rules for dry stacking stones that I’ve figured out in the process:
- Stagger Seams: Try to stagger the seams from the course of stones below it. This helps give the wall strength.
- Board and Level: Use a level on a long straight board to get an over all idea of where level is. Have the board up on it’s side, to prevent it from bowing in the middle while trying to determine level.
- Course Set-Back: Set the front of each course of stones slightly back from the ones below it. This will prevent the the top layer of stones from tipping forward over the stones below it.
- Angle In: I like to slightly angle my stones so that they are tipping slightly back into the planter. This is very slight, but again gives them a little more strength once filled with backfill on the planter side.
- Shims: Have plenty of scrap stone material and/or resin shims to use to adjust the stones slightly so there is no wobble. A wobble can lead to a wall collapse pretty easily.
After a few stones, we worked out a system… I’d tell him the size and shape of the stone we needed next. He’d bring over a few to choose from.
Pretty soon, we’d given names to the stones for reference, US states were popular… We knew what we meant, although to a passerby it might have been a bit strange. “How about the chubby state of Wisconsin?” or “I need a long narrow one, like that Tennessee number over there.”
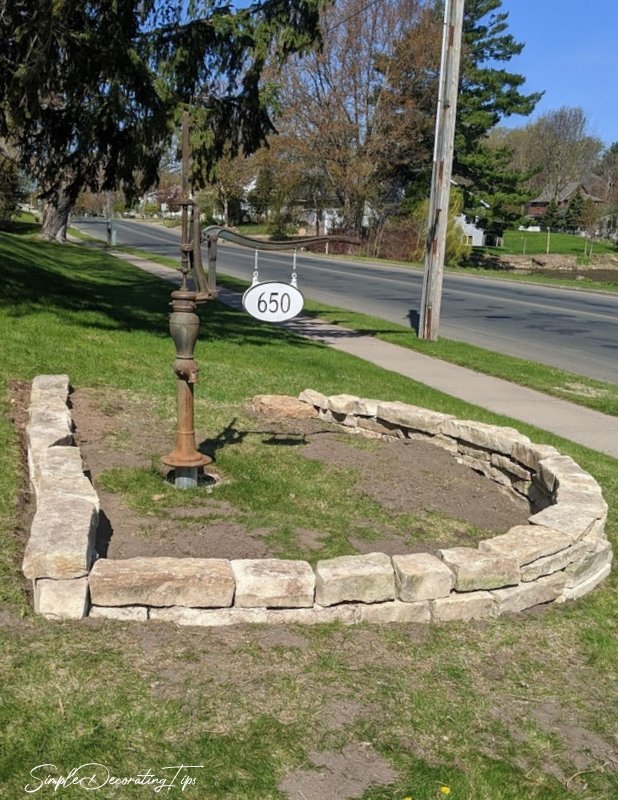
After a long afternoon of work, we created a (fairly) level top with 4 courses of dry stack stones in the front and 2 courses of stones in the back.
Once the planter wall filled with top soil, I added the galvanized tank under the pump. I also painted the pump black.
Planting a mix of perennials and annuals gave it instant appeal while the perennials need to take time to settle in. Adding cedar mulch helps keep weeds at bay and keep the moisture in the soil.
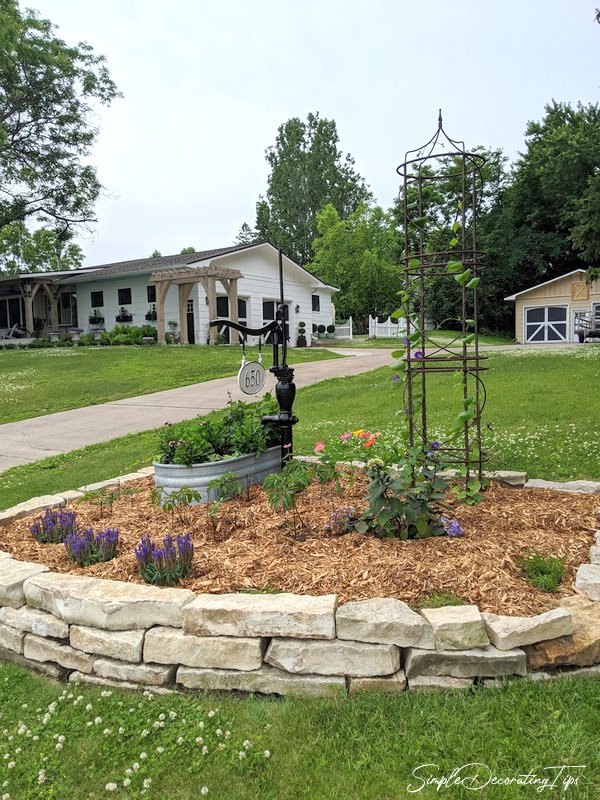
The morning glories completely covered the trellis. There is a clematis in the planter on the trellis too, but they take a few years to really get established, so the instant huge morning glory show was fun!
We’re super happy with our dry stack stone planter. I’m itching to get out there and start planting again. It’ll be a few weeks before that’ll happen.
I'd love for you to stop by my site Simple Decorating Tips and see more garden and landscaping projects I've written about!


Comments
Join the conversation
-
Very pretty except maybe a clematis (or 2) instead of the morning glory vine? It grows fast but overtakes the planter.
-
Quite attractive


Frequently asked questions
Have a question about this project?
Your link doesn't work?
Very beautiful, although I think the over growth of morning glories take away from the address sign and antique tub some no ?
How did you mount the pump in the ground?