


How to Shape Resin Into a Bowl
Recently our international blogger group had the challenge to create something out of resin. This was my first attempt at the challenge. I wanted to try and shape resin around an object to get an interesting shape. I knew I wanted to make a bowl of some description but in the end, I was not happy with the colour. So it got chuck to the back of my shed. But every time I go in my shed it catches my eye and I think to myself, I loved the idea just not the colour. So I wanted to share the idea with you, you can just choose your own colours.
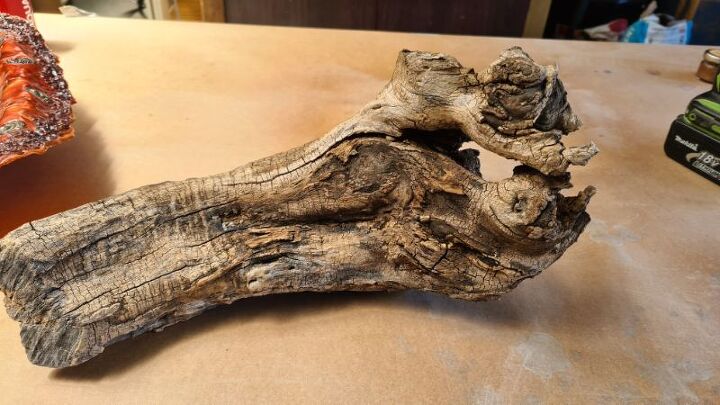
Find an interesting shaped object
You need to find an object with an interesting shape, something like the wooden stump I use below. So if you are going to recreate this project I would recommend you do this for a better effect.
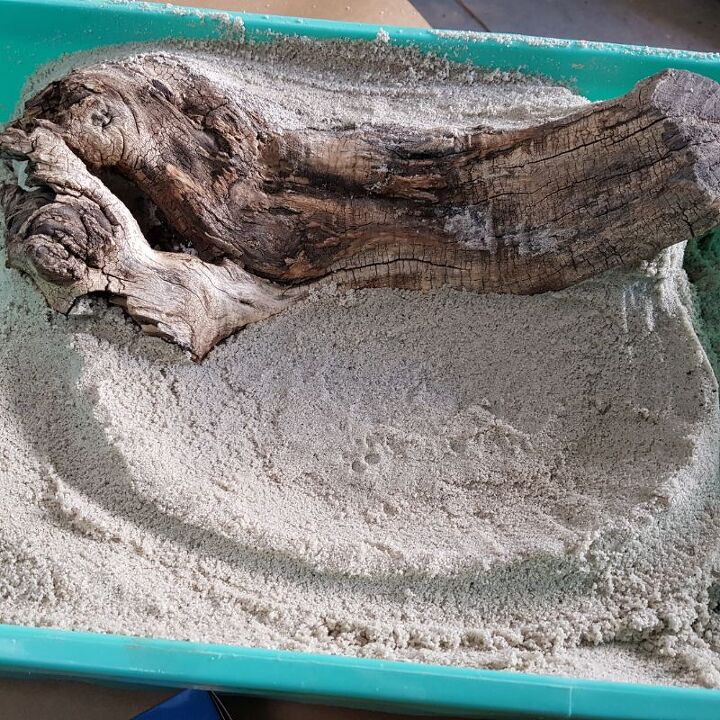
To create a mould for my resin, I used the sandpit I made for my niece. I wet the sand so it would be easier to shape. I put the wooden stump in the position I wanted and packed the sand around the stump. Next, I used my hands to create a bowl shape in the sand like the image above. You can create a lip in the sand for added effect.
Make your resin shape
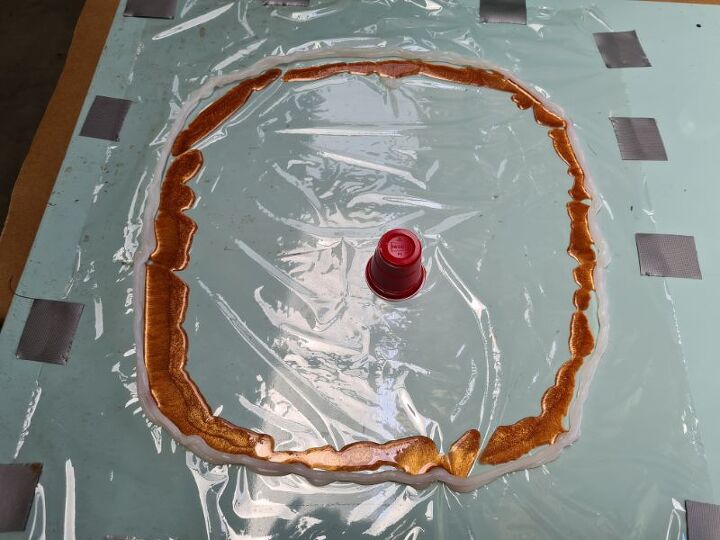
You can use some plastic wrap taped to a surface as a base for your mould. I used some silicone sealer to make a dam to keep the resin in place while it sets. I forgot to take a picture, but you can see the silicone wall in this image above.
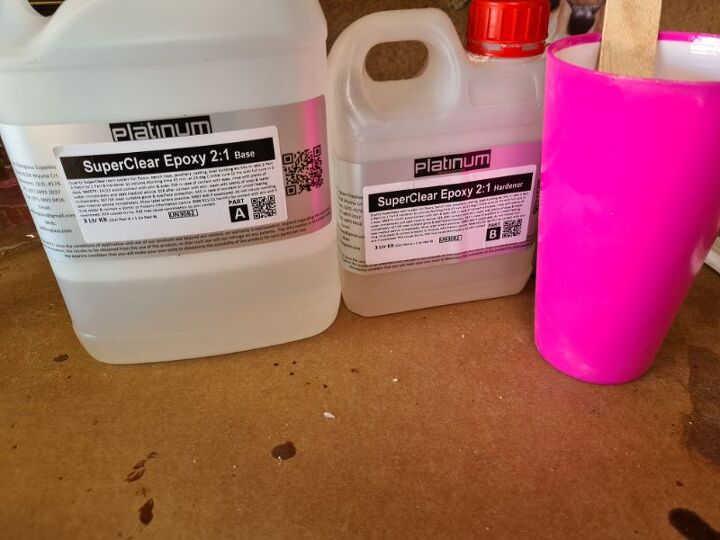
Mixed your resin
Mix your resin according to the manufacturer’s instructions as they are not all the same. I mixed one large batch in a larger cup first and once it is mixed well I poured it into smaller containers.
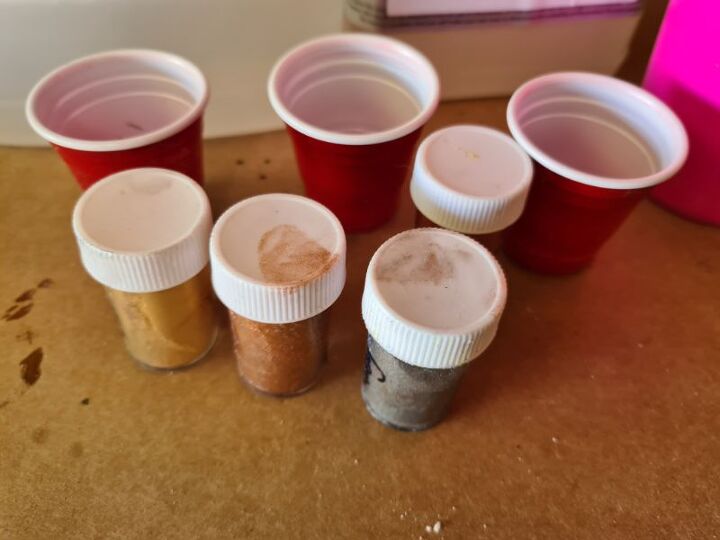
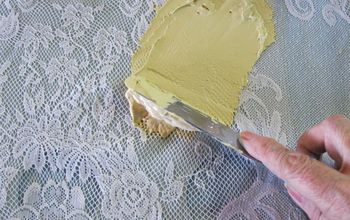
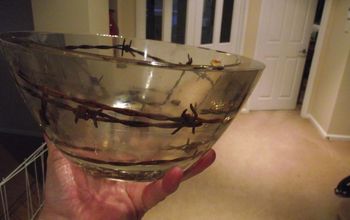
In the smaller containers, you can add your colour pigment or mica powder. I used bronze, silver and gold in this project. When I poured the resin I alternated the colours in circles around the inside of the silicone wall. Once the surface was covered I used a heat gun to move the colours around and blend them together.
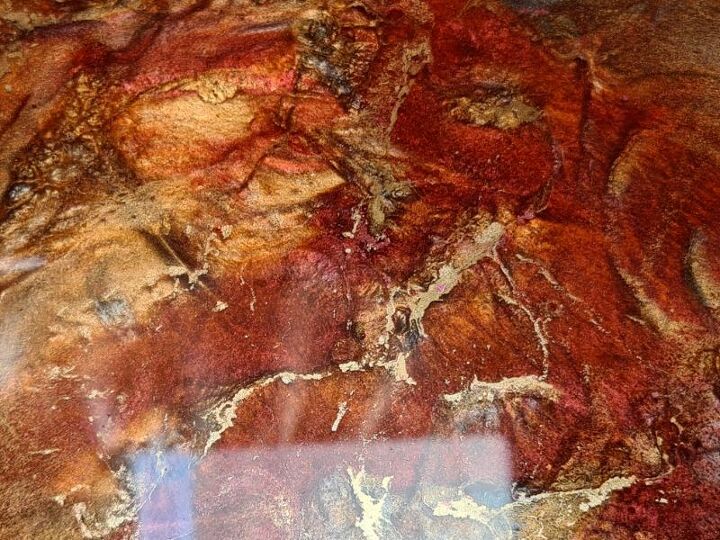
The image below was the colours when I first poured them and I was beyond thrilled. But sadly they blended into each other after a while, a possible reason could be that the surface was not 100% flat. After a few minutes, you may see some bubbles forming on the surface of your resin. To remove them you will need a flame of some description, I like to use a creme Brule torch.
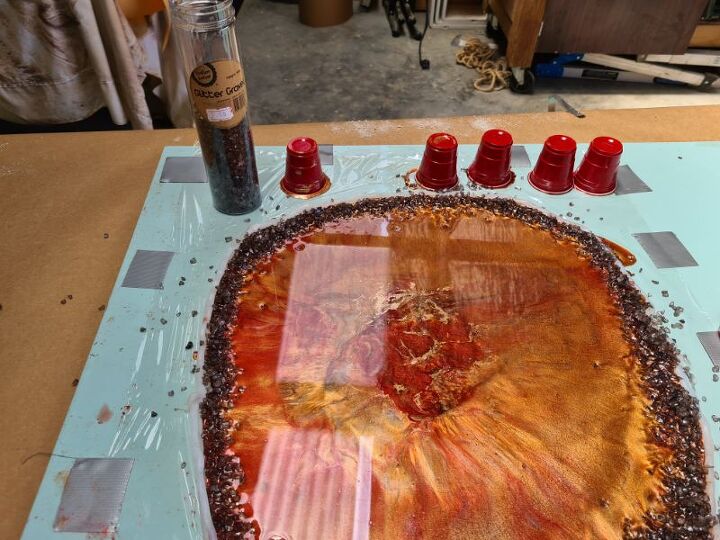
Swipe the flame over the surface and the bubbles will pop. To get a better look around the edges you can add some glitter gravel you get from the budget stores. I added the gravel and beads just after pouring the resin. The image below shows how the resin seemed to pull to the centre of the resin shape. This is why I believe my surface was not flat.

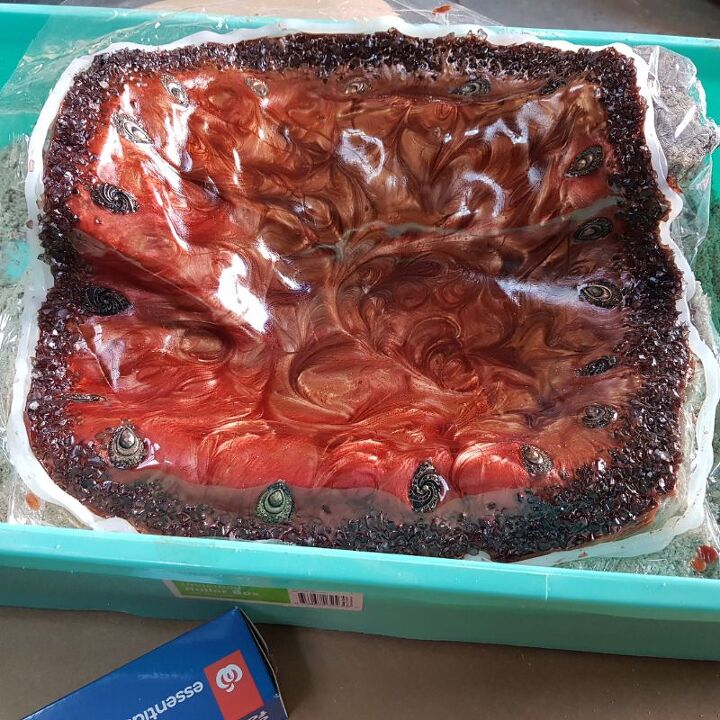
To try and get a prettier surface and save my project, I used a stir stick and swirled the resin. You can also add some beads into the resin for added effect. I left my resin to dry for about 8 hours. The resin will be set but not rock solid. You should be able to mould it into shape using a small amount of pressure.
Shape the resin to the mould
I slid the resin off the surface and placed it over the stump, don’t remove the plastic wrap just yet. You can gently push the resin down around the shape of the stump and the sand. The resin can then be left until it is totally hard.
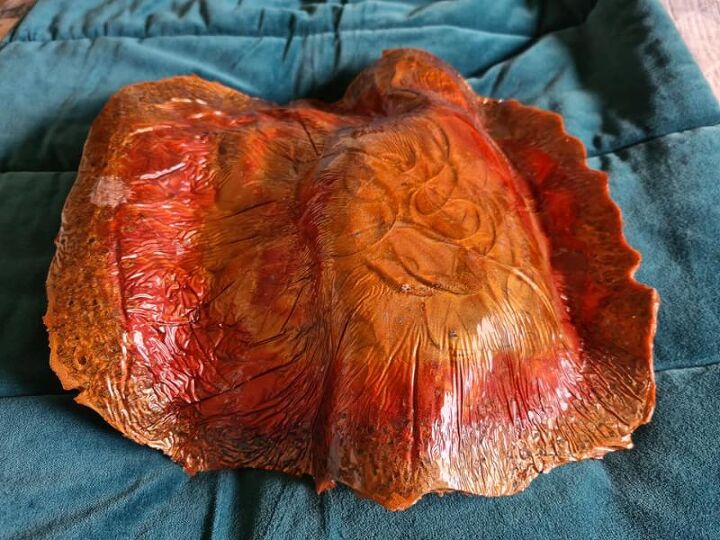
I leave my resin for 24hours then I know for sure that it has set. You can then remove the plastic from the back. At this stage, you can no longer change the shape.
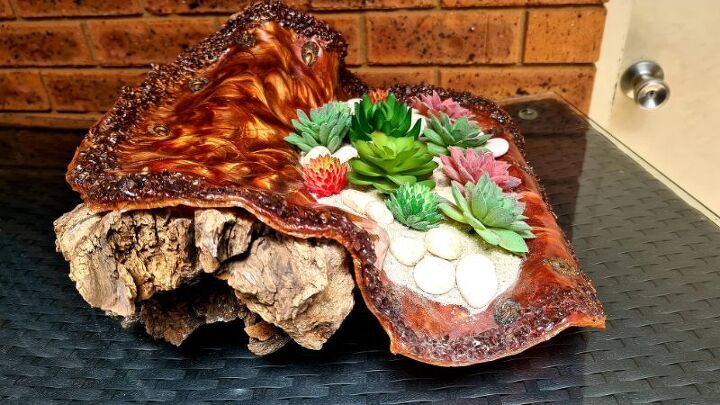
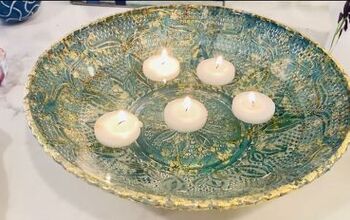
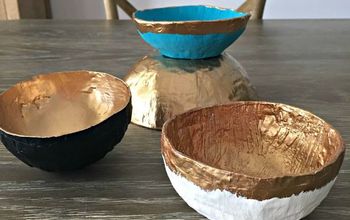
Place the resin over the stump and you have resin in a cool shape. This shaped resin can be used as a planter or as storage for jewellery. I am sure there are many uses.
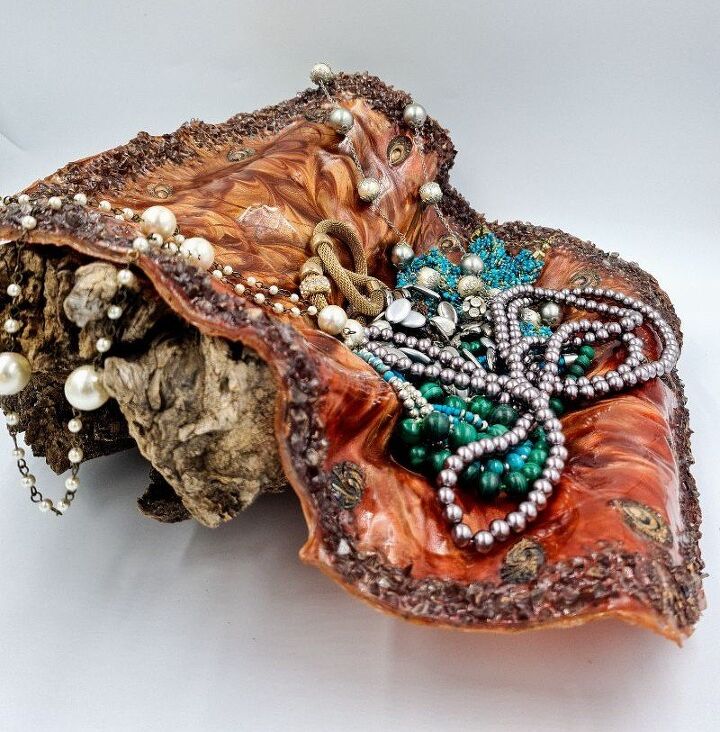
Here is what it would look like as jewellery storage. Your cost will depend on what products you have at home. The time below excludes drying time.
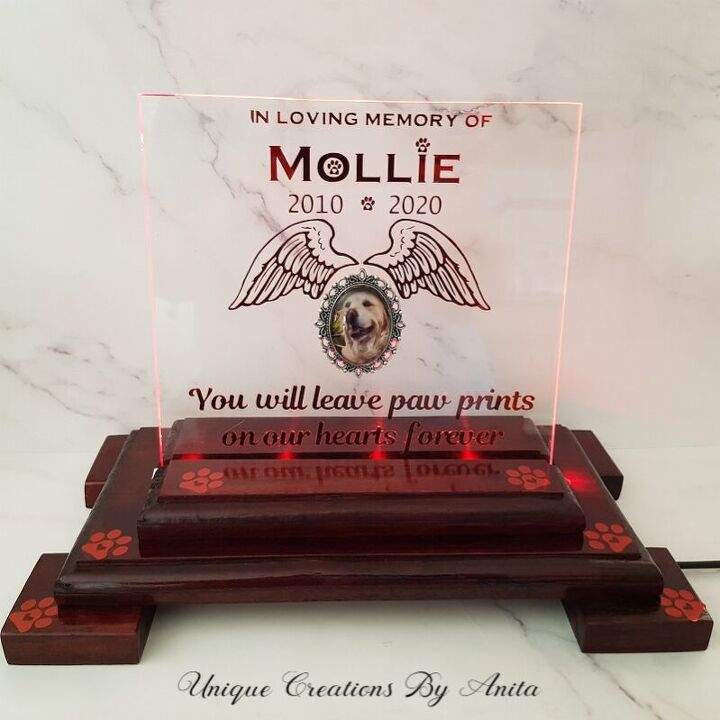
Are you looking for DIY ways to remember that loved one or pet that has passed away. This memorial plaque is a great idea.

This antique commode chair was in such poor shape but I loved the look. I have added some tips to my post to help you with that furniture restoration you are too afraid to tackle. I also turned this chair into a feature chair without affecting the original purpose of this chair.
Resources for this project:
See all materials


Comments
Join the conversation
-
Wow, this is incredible Anita (love the memorial plaque too)! The more I see of your resin projects, the more I want to give it a go :)
-
Wow, that’s really beautiful 🙀🙀🙀


Frequently asked questions
Have a question about this project?
I work with two part epoxy a lot and mine dries a lot quicker than 8 hours. Am I understanding you correctly that you let your pour dry 8 hours and then continue to shape it and let it dry for another 24 hours? Maybe your pour is thicker and takes longer to dry than the crafts that I do with epoxy....