


Cool Summer Lighting- Sea Glass in an Ice Bucket

This has to be one of the easiest, nicest, coolest upcycles that I've done in awhile even if I say so to myself! I bet you'll want one too for your Tiki bar or outdoor space this SUMMER after you set your eyes on it!

Now this project is quite flexible so I want to put that out there right away but you'll have to use your imagination for the project substitutes. For example, if you don't have access to sea glass try glass marbles and if you don't have an ice bucket check out the dollar store or thrift store for clear plastic containers. With that in mind I'll show you the steps to create this one and you can run with it and personalize yours to create a custom light.
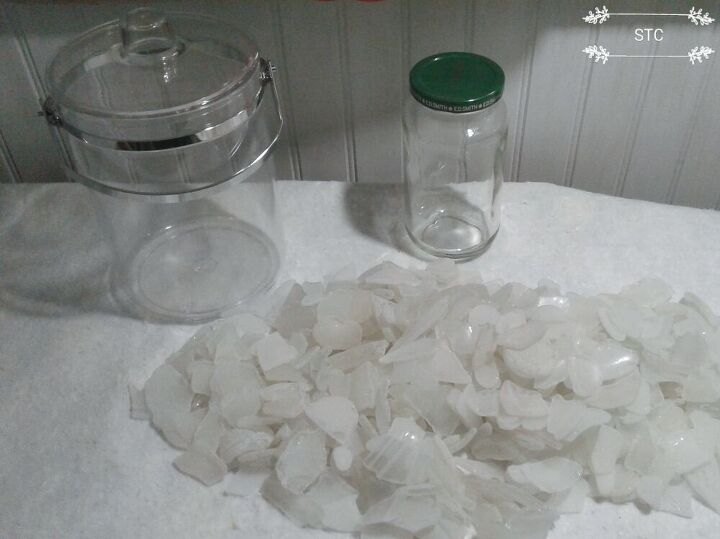
It's just very basic items that I used to create this, you'll need a clear container, a clear, recycled jar that fits within your container and some sea glass. I also used a drill, white paint, E6000 glue, painters tape and a small string of fairy lights.
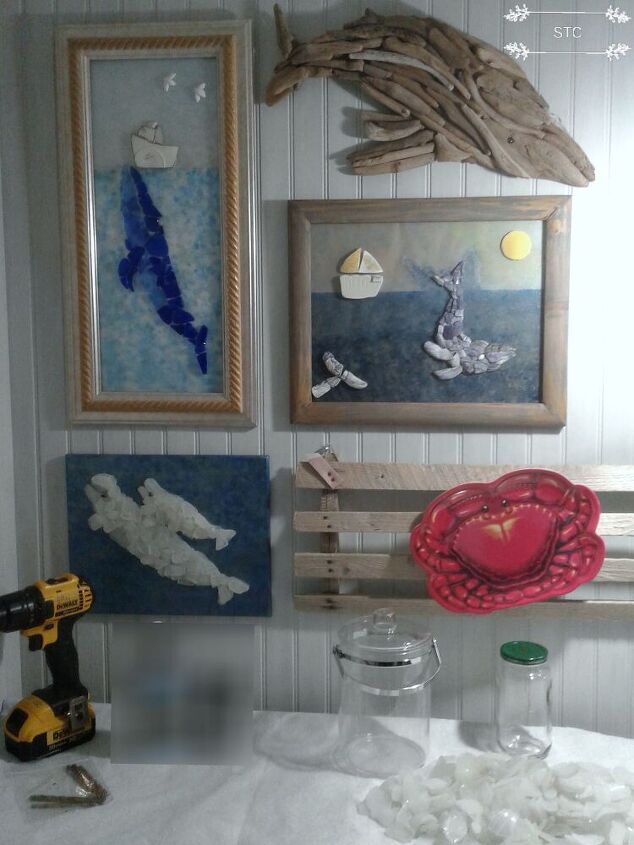
As you can tell I love creating things with sea glass, normally these projects take hours but this one luckily is just going to take a few minutes!
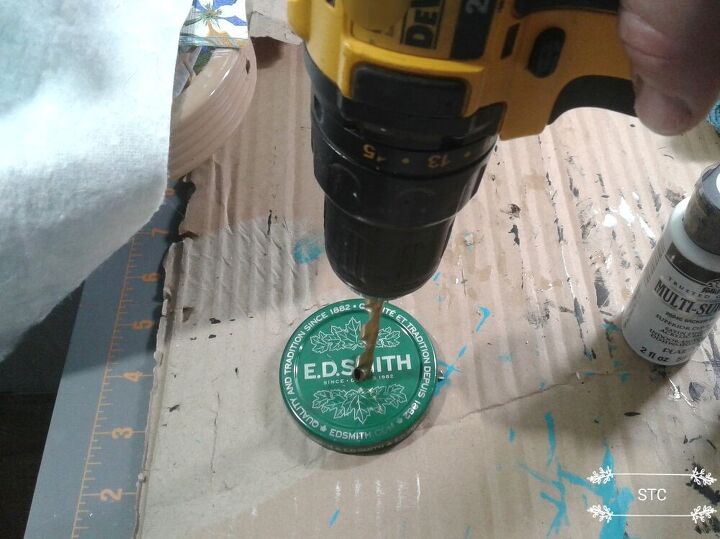
I created a small hole in the jam jar lid to create a place for the light string push button making it easy to turn the light on and off. My particular string had a push button, yours may have a switch either way this is my idea to make it easy to access.
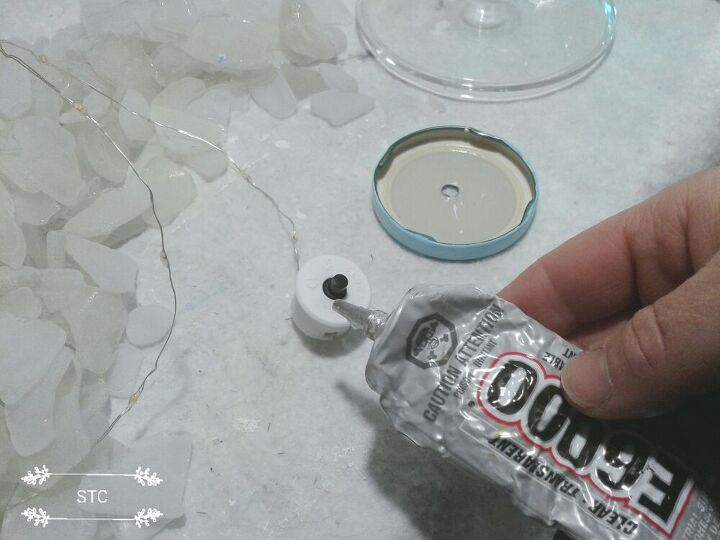
So here you'll see my light button, it was sold within a large, decor type lightbulb at a dollar store but....I broke the bulb! Therefore the fairy lights were a great item to try to reuse in some other way, this was the way! So, back to the instructions you'll need to glue the battery part of your string to the bottom of the lid. I used E6000 because it hasnt failed me yet and its my go-to glue for slick, smooth surfaces like plastic and glass.

I wanted a solid stick so I kept the items together with painters tape until the glue had bonded. The longest part of this project will be waiting for paint and glue to dry, you can either watch and wait or speed it up with a heat gun like I did!
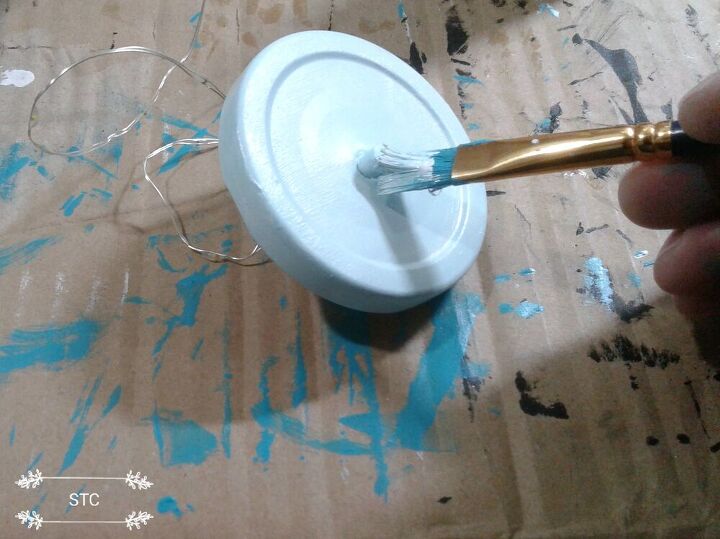
Oops, I forgot to mention I had painted the lid with one coat of paint while I was figuring this all out but after the light was attached I painted it again to cover over the black light button. I used a multi surface craft paint but spray paint would be perfect too and faster!

Just like that, it's now assembly time!! The clear inner container for the light project needs to be smaller on the width and a little shorter than the ice bucket, next you'll see why.
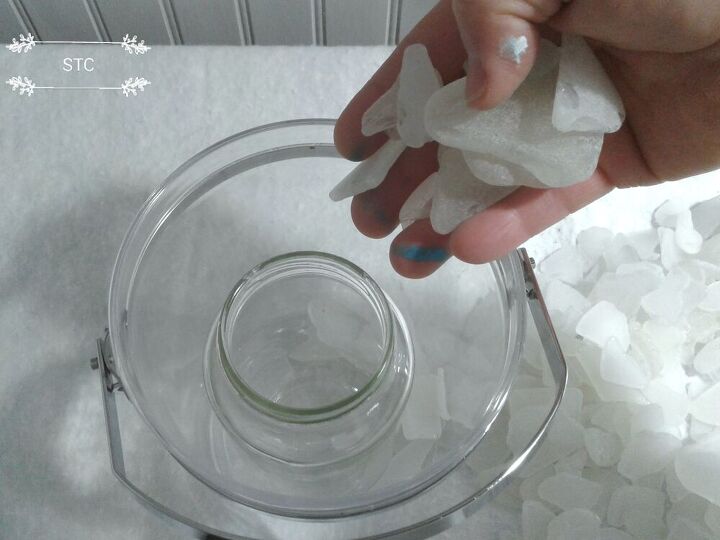
Now you see it right? The clear glass jar serves several purposes here, one is that you'll use less of the filler in my case sea glass, it'll keep the light less heavy overall and it'll serve as a protection for your tiny lightstring. Cha-ching!
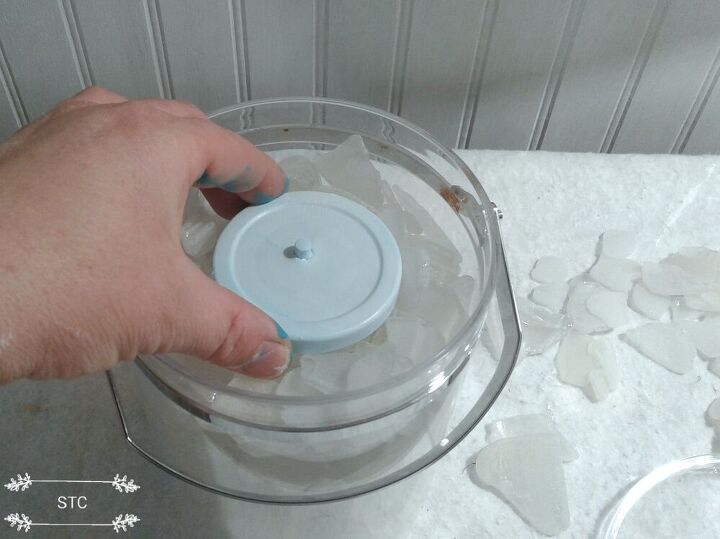
Once it's almost filled I added the jam jar lid back on, the string lights were gently pushed down into the jar and the lid screwed in place.
Next I finished filling the bucket making sure to keep the button switch free to use.
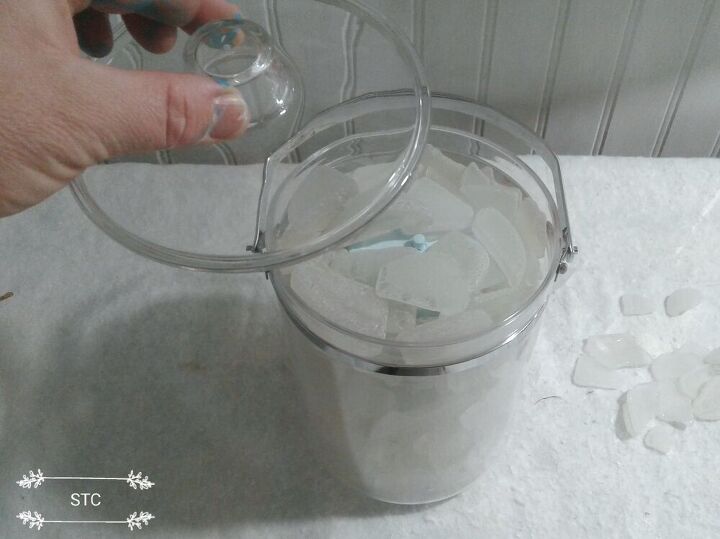
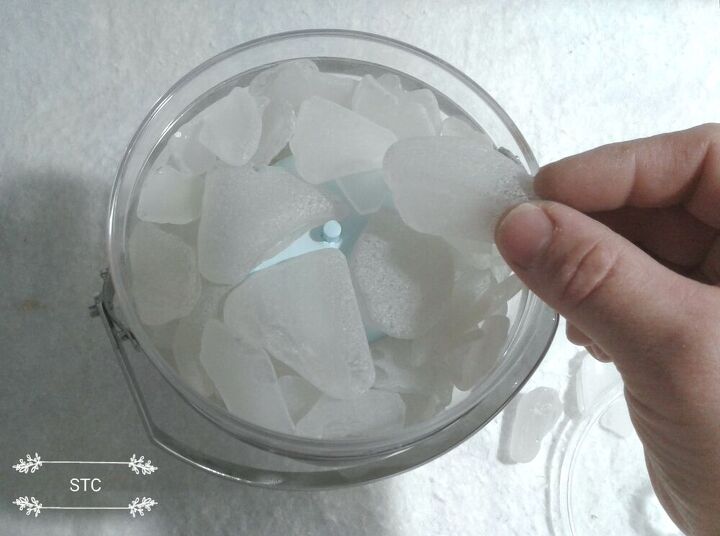
Fill the bucket or container ensuring that you still can secure the lid back on first. I cant wait to show you the finished look turned onnnnn.....eeeeek!

All together now.....awwwwwwwwh! Isn't that cool? I was screaming inside, yes I did it!! The best part is now you can too!!
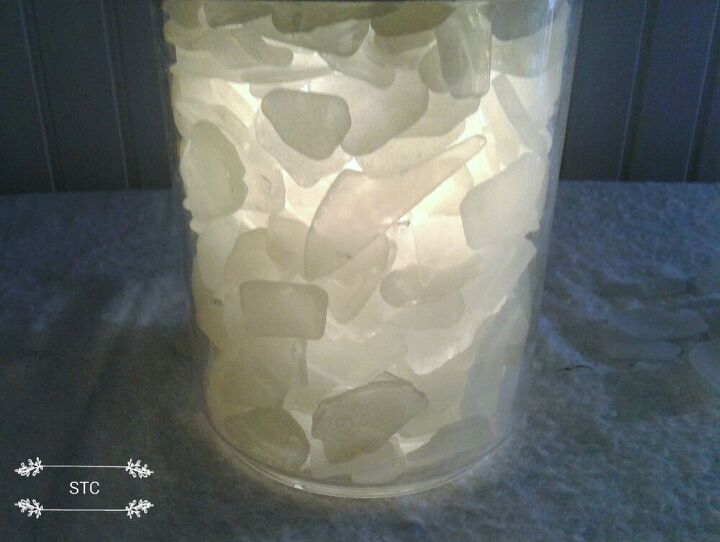
In case you thought it was only nice from a distance, nope it's pretty amazing close up too with all of the different shapes of glass. Dare I say it? It even looks like the real deal here....ICE!!
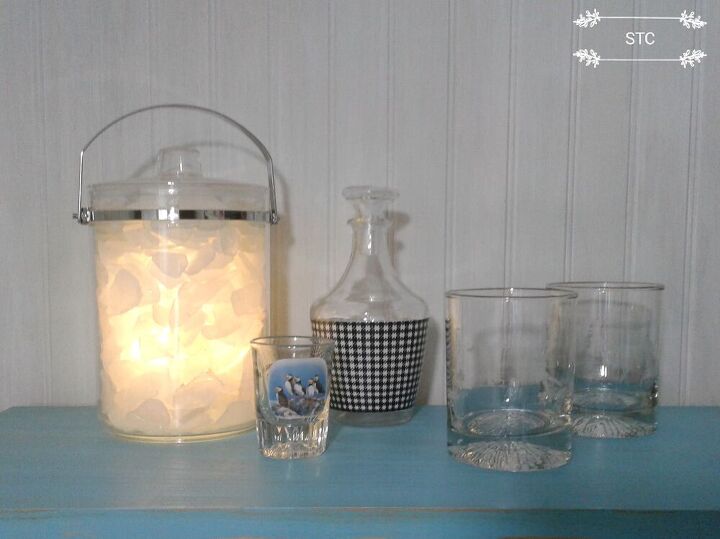
Lets get this party started huh?? Sorry, I dont own a bar but it's pretty neat to use just as beach decor but I set it up as if it were for a bar conversation piece.
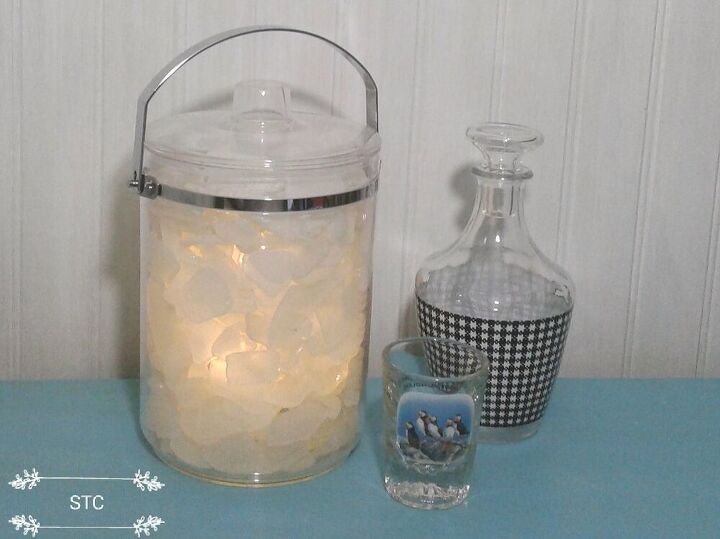
A vintage decanter, a recycled ice bucket and a souviner shot glass is cute and simple enough for me. I was so excited to share this simple and easy Summer project with you because I know it'll attract attention and in a cool way. It'll be your trick of the Summer to share with guests... "see our ice doesn't melt!!"
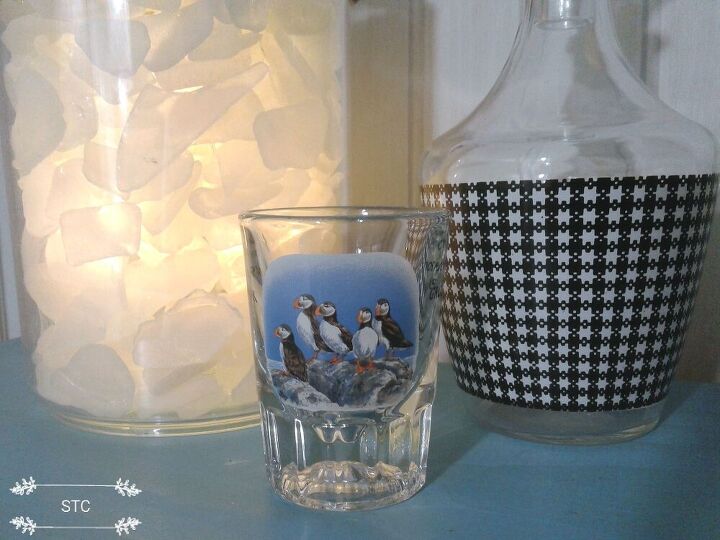
Oh and if you've followed my posts long enough now you'll know I love birds especially these Atlantic puffins! They are here now in our Province nesting and feeding on a tiny migratory fish called capelin. They are super adorable but even more so placed beside such an awesome light huh??? Ahem, that was one last plug for the light because it's so flipping easy and awesome and cool lol ! Enjoy my friends, until we see you at the next post!
Comments
Join the conversation
-
Wow, Your love of whales crafts are also awesome. I love the ice bucket and YOU are the one who thought of it and made it happen. Congratulations. Whole set up is lovely. Puffins...where do you live? Beverly the list maker....always writing it down, seldom completing the tasks....woe is me! LOL
-
Such a beautiful, creative idea! We have a camper in Michigan I will make some of these for when we’re setting outside in the evening!


Frequently asked questions
Have a question about this project?
Coulsn't tea lights be simply put in a jar without all the drilling and taping?
How would a string of mini lights work?
This is gorgeous! Do you think colored sea glass would work or would the light not be able to shine through as well as with the clear sea glass? 😊