Vintage Window Jewelry Cabinet

ScavengerChic
by ScavengerChic
Around Christmas time I was the proud recipient of a half dozen vintage windows. At the time I had no idea what I was going to do with them but a cabinet (or a coffee table) was definitely on the top of my list.
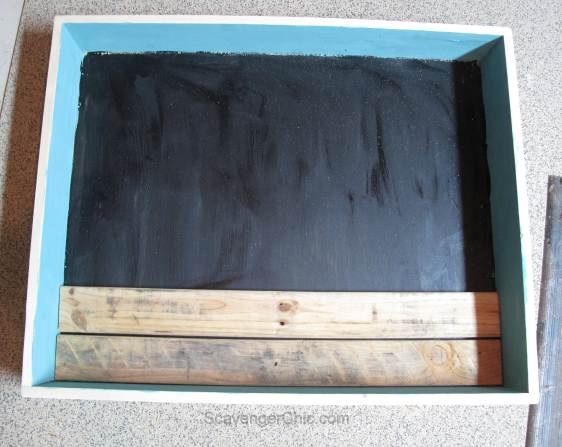
I started playing around with the window and had bought 1x6's to make a box to house the window but my project was just not coming together.


It wasn't until my daughter-in-law helped me out with a Facebook page (who knew it was that complicated) and mentioned a jewelry cabinet that my project finally took shape. The window that I had been fooling around with, that only had an inner depth of 2 1/2 inches, would make a perfect jewelry cupboard and be a great way to thank my daughter-in-law for all her help.
On my website I have about 25 pictures to take you step by step in the building of the cabinet but here I'm going to give you a brief overview. Hopefully I'll entice you to stop by!


Using the window as a guide, cut a backing board slightly larger than the window.


1/6's were than added to form a frame around the base.


The back of the cabinet was painted black as a backdrop for the pallet wood (still to come)


The interior sides of the cabinet were painted teal and and outer cabinet semi gloss white. Pallet wood was then cut to fit snugly as a backdrop for the jewelry cabinet.
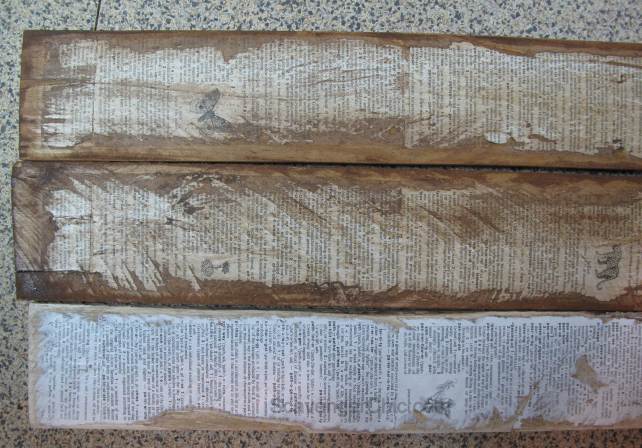
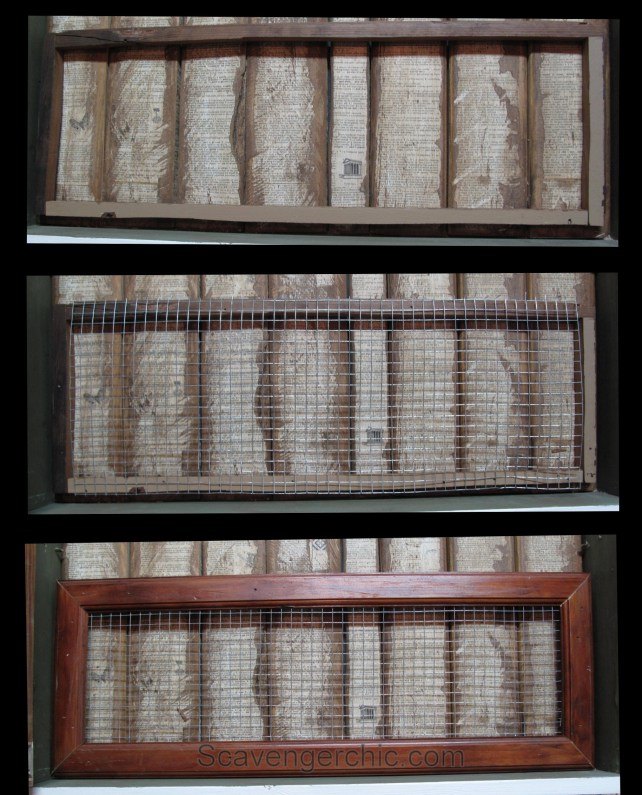
Modpodged dictionary pages to the pallet wood, sanded the edges and then used a dark wax to seal. These were then nailed into place to the back of the cupboard.
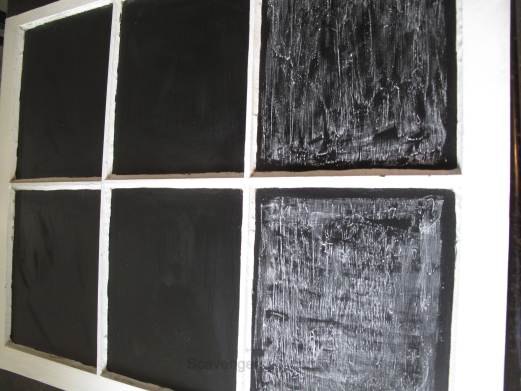
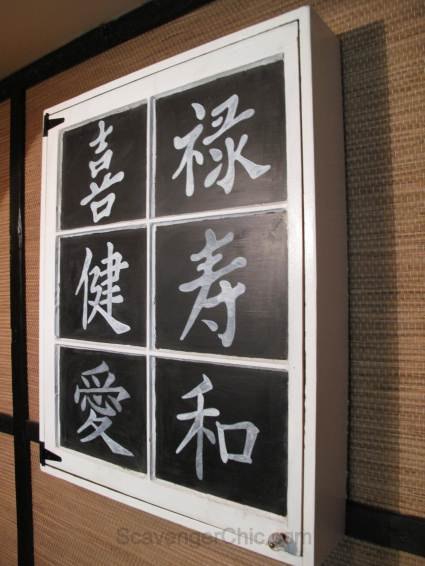
On the window...applied 2 coats of a chalkboard paint and then conditioned the paint with a layer of chalk. The chalk was then erased.
Transferred Chinese characters to each pane of the window using a chalkboard pen.
The bottom of the cabinet was left for earring storage.


1. Using some thin pieces of leftover boards, create a rectangle and attach it directly to the cabinet with nails. Whatever scrap wood you have available should work, you just want to elevate the mesh off the pallet wood. The only requirement is that it should be able to be hidden by the trim pieces (last photo)


2. Using staples attach wire mesh to the boards you just nailed on.


3. Miter the ends of decorative molding and using finishing nails attach to all of the above. You can finish the molding any way you like, mine was pulled out of our old bathroom so it already had a nice finish.
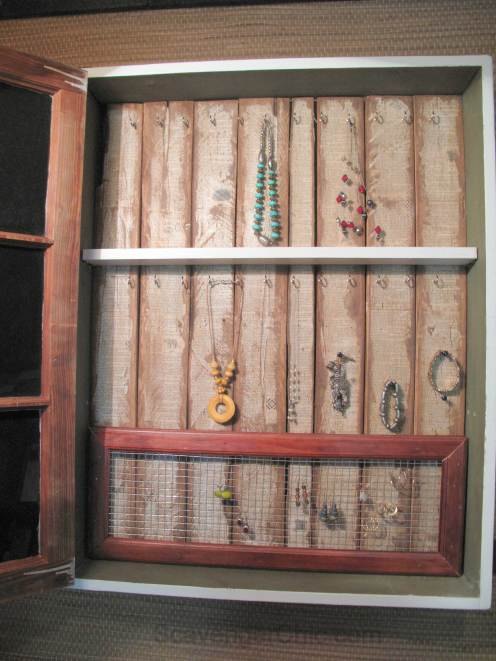
Screw hooks were added for necklaces and long screws for bracelets, watches or loopy earrings.
To hang firmly on the wall,installed a cleat. A knob was screwed onto the front and a magnetic closure was added.


No more tangled necklaces.


ScavengerChic
Want more details about this and other DIY projects? Check out my blog post!
Go
Frequently asked questions
Have a question about this project?
Comments
Join the conversation
Next