


How to Stencil an Exotic Indian Retreat Space

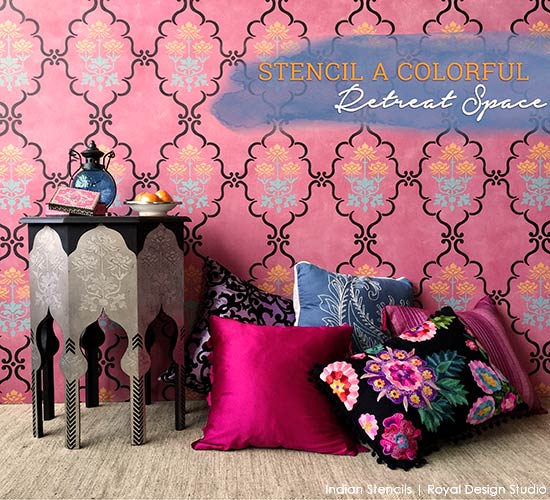
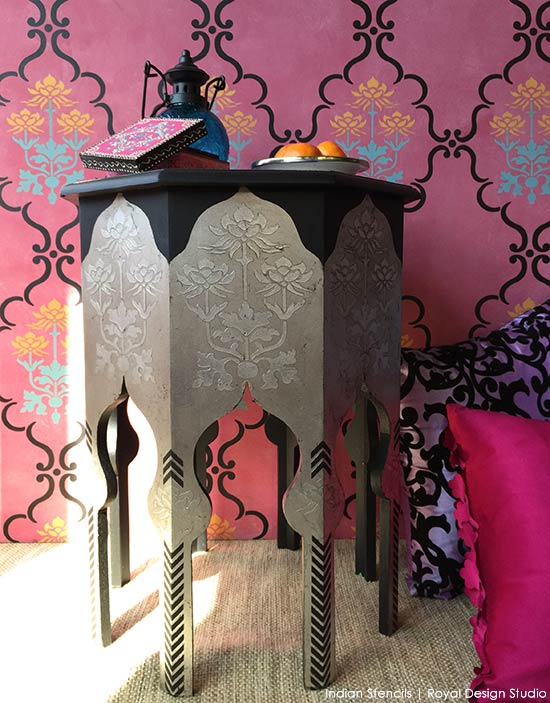
Our India Stencils Collection takes center stage in this colorful stencil tutorial. Learn how to transform a pretty but plain wooden table (we found ours at Home Goods!) into one that looks like intricate etched metal. We've paired it with a pretty pink stenciled wall treatment that uses Chalk Paint® decorative paint to create a faux fresco effect. Read on to learn how to create this exotic retreat space for yourself!
Stencils & Supplies by Royal Design Studio
Stencils & Supplies by Royal Design Studio
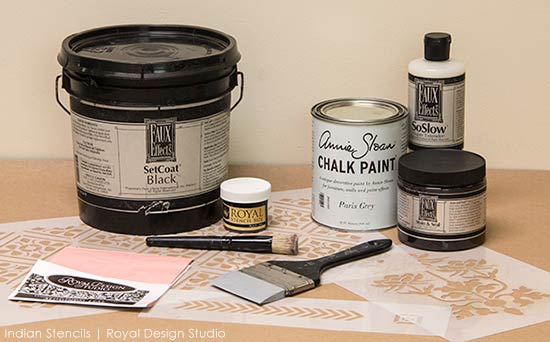
Supplies
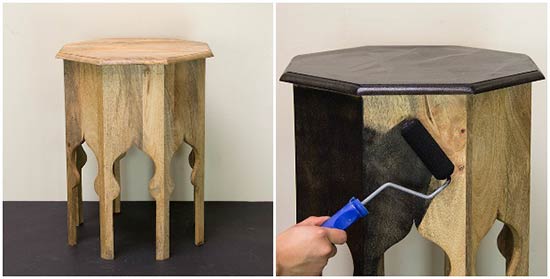
Start by base coating your table with Black SetCoat or a good quality black latex paint using a foam roller and brush. Apply two coats of paint and allow drying between coats and after last coat.
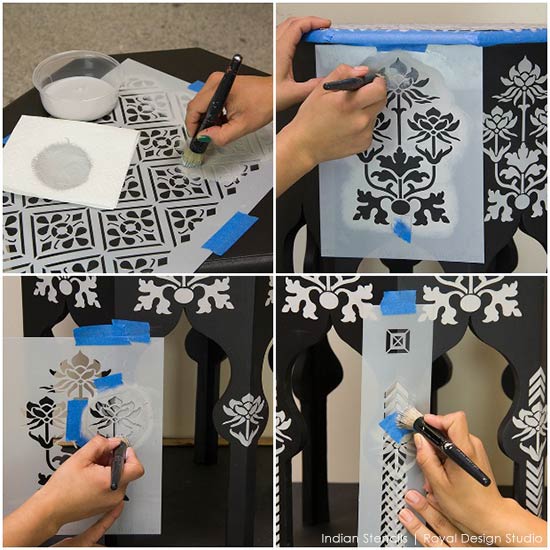
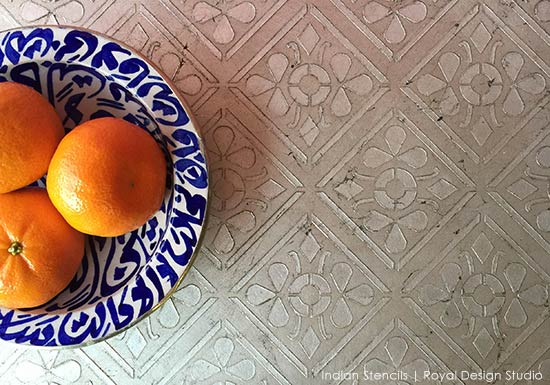
Use painter's tape to mask off the outer beveled lip of the table top, as this will remain black. Center the Anisa Embroidery Damask Stencil on the table top and secure it with a tape. Stencil the pattern allover using a " stencil brush with Chalk Paint(R). The Chalk Paint(R) will dry VERY quickly. In order to build up a higher edge to the design, stencil each area twice.
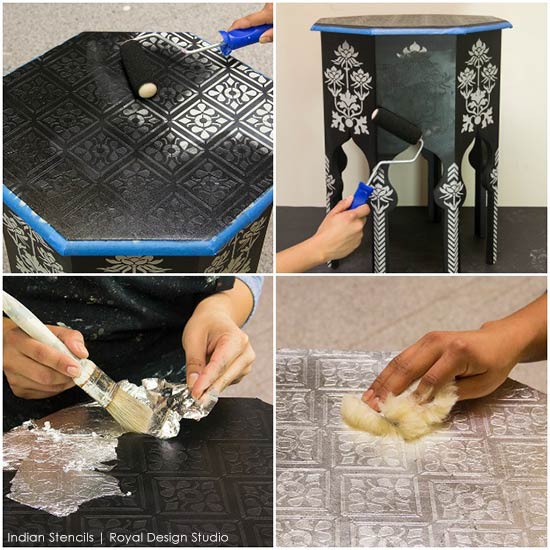
Use a small foam roller to cover the table top and sides of the table with two layers of Black Stencil Size. Allow 10 to 15 min of drying time between coats and before moving on to the next step.
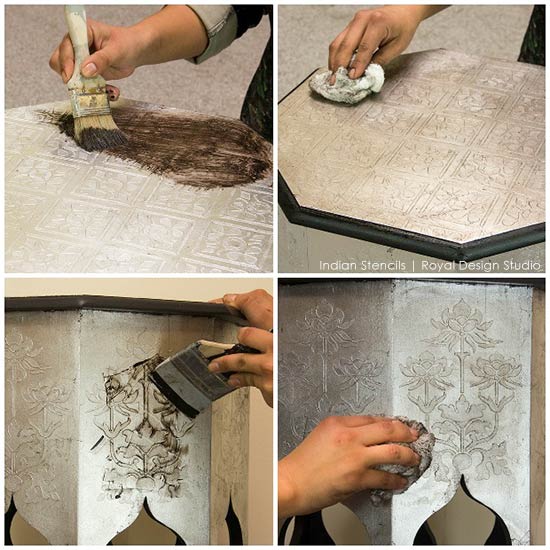
Mix Van Dyke Brown Stain and Seal 1:1 with Slo Creme Extender to create a glaze and give you more working time. Use a chip brush to apply the stain mix in small, workable areas. Remove the excess stain and soften any obvious brush strokes out by blotting is softly with cheesecloth. Repeat on the table sides and allow to dry. This will protect and stain the leaf to give it an aged look and will highlight the embossed effect.
Use a piece of cheesecloth to evenly distribute the stain and get rid of any lines. Re-place the stencil and remove the excess stain from the stenciled areas by wiping over the pattern with clean cheesecloth. This will leave your raised stencil patterns to show lighter against the darker background. Repeat on all the stenciled areas.
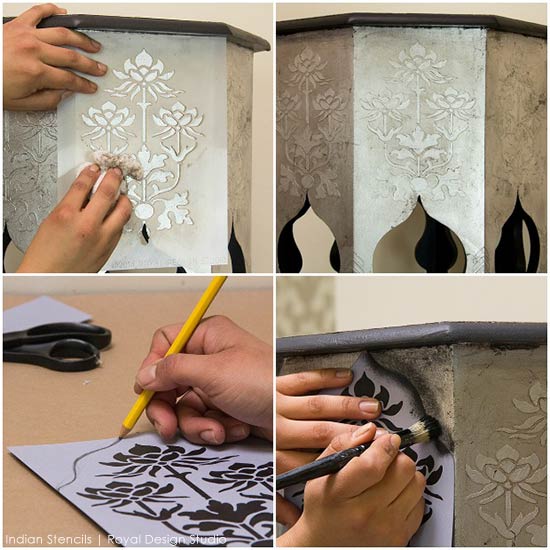
We also replaced the small chevron stencil pattern on the legs and re-stenciled it with black paint to give the legs more "weight" and create a more balanced look for the black overall. For added protection, seal the table with Clear Wax or your favorite water-based topcoat.
We thought the black and silver stenciled table would look even MORE stunning against a pretty pink background, but wanted to create a mottled "fresco" effect on the wall rather than just using flat paint. Here's how....
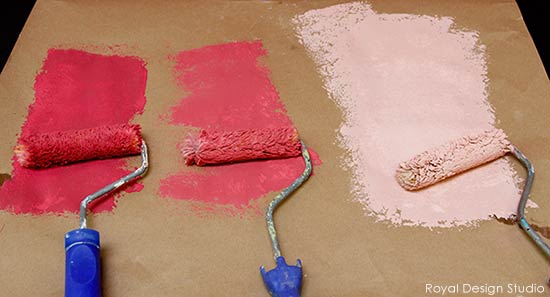
Create 3 custom Chalk Paint(R) color mixes using the following colors and paint ratios:
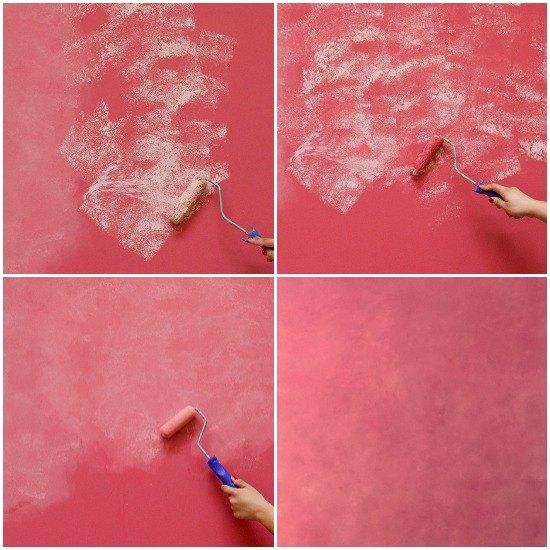
Base coat your wall with the Medium Pink Color and allow to dry.
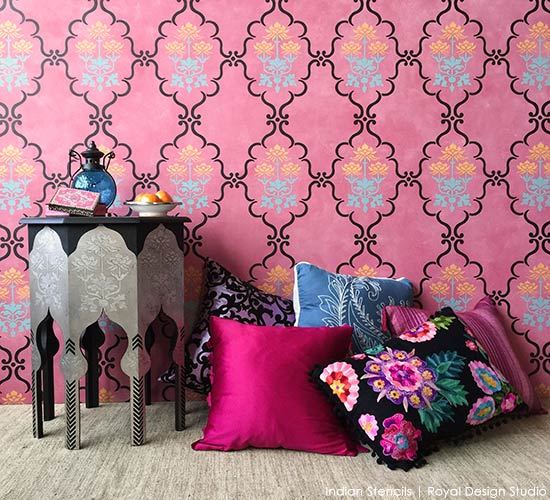
For the wall stenciling, combine the Kamal Lotus Flower with the graceful Raj Trellis Stencil (also available as a stencil set!)
Comments
Join the conversation
1 comment
-
AMAZING. Bold choice of color and it works so well!


Frequently asked questions
Have a question about this project?