


Bathroom Vanity Tray From a Frame and Jars

by
Marc Erick
7 Materials
$6
2 Hours
Easy
So , as a true crafter (perhaps hoarder ☺) I have accumulated an abundance of picture frames. I decided to challenge myself to create something that would be purposeful and great for a gift. What I came up with was a bathroom vanity tray. I hope you enjoy this project.
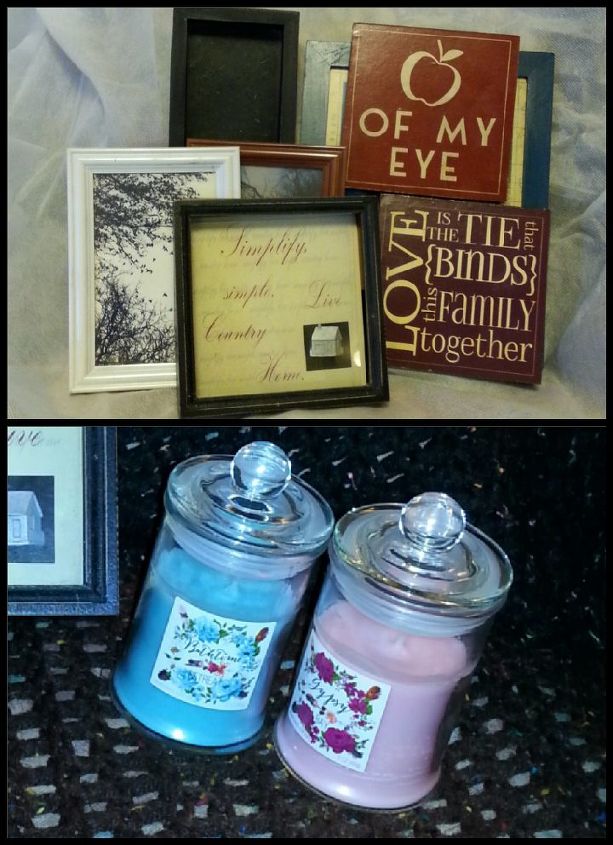
I found these frames and pictures at the thrift store and these jar candles at the dollar store. The jars are perfect for this project and at this time they're abundant at every dollar store (in my area, anyway ), and I get the added enjoyment of burning the candle first! The first thing I did was gather the materials...this is a list of what I used : a frame- I used frames witha bit of depth or even actual shadow box frames, jars- any small jar will work just remember they need to fit inside the frame and deep enough to hold the contents (ie q-tips), sand- I used colored craft sand and actual beach sand, felt, cardboard or foamcore, tacky glue, spray acrylic, permanent glue, scissors, pencil and trinkets for decoration- I used shells, stickers and earrings, twine
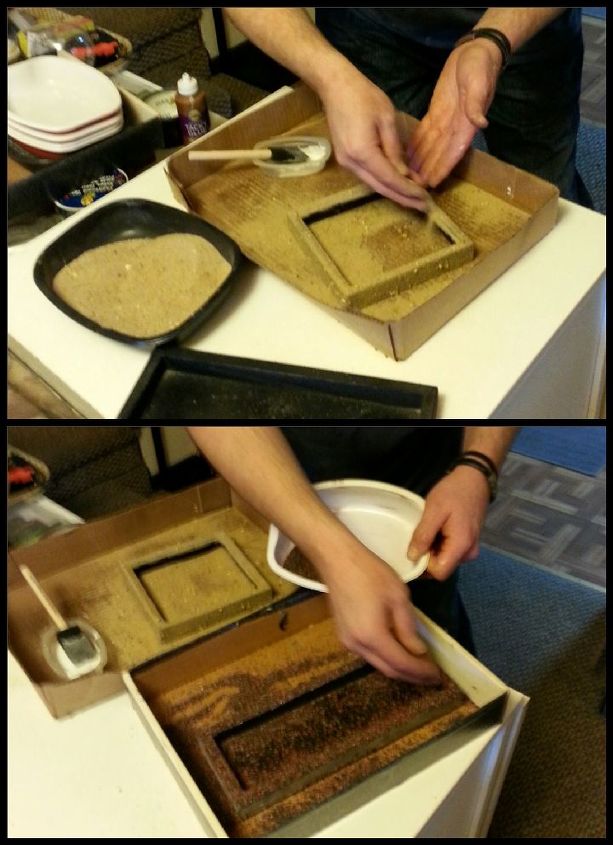
Take apart the frame, saving the glass and backing for another use, make sure the frame is clean and give it a quick sanding...just so there's no oil or residue on it. Wash the jars as well, removing any labels and dry thoroughly. Coat the frame with a thick coat of tacky glue and add the sand. I did one with beach sand and one with colored craft sand. Allow to dry completely. Then spray with acrylic spray to seal it up and give it a nice gloss.
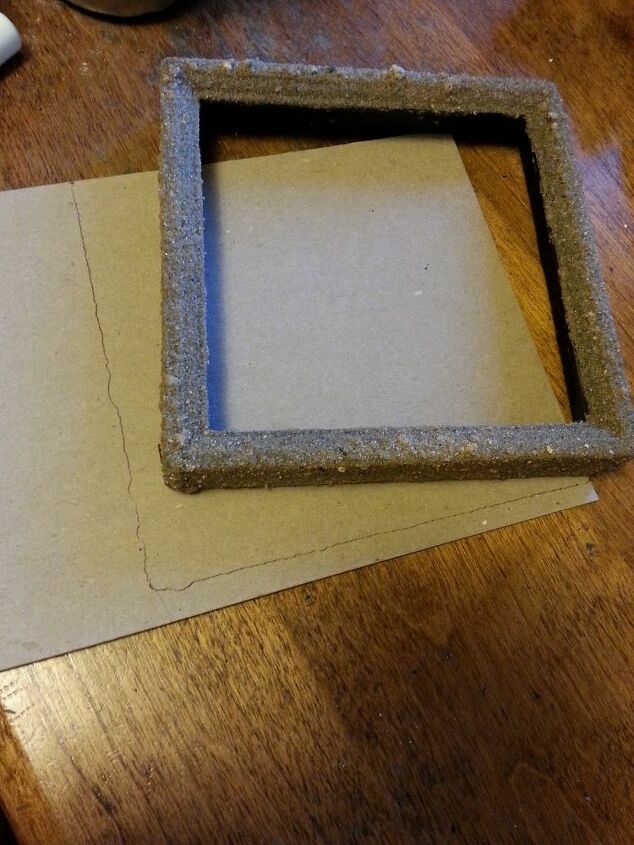
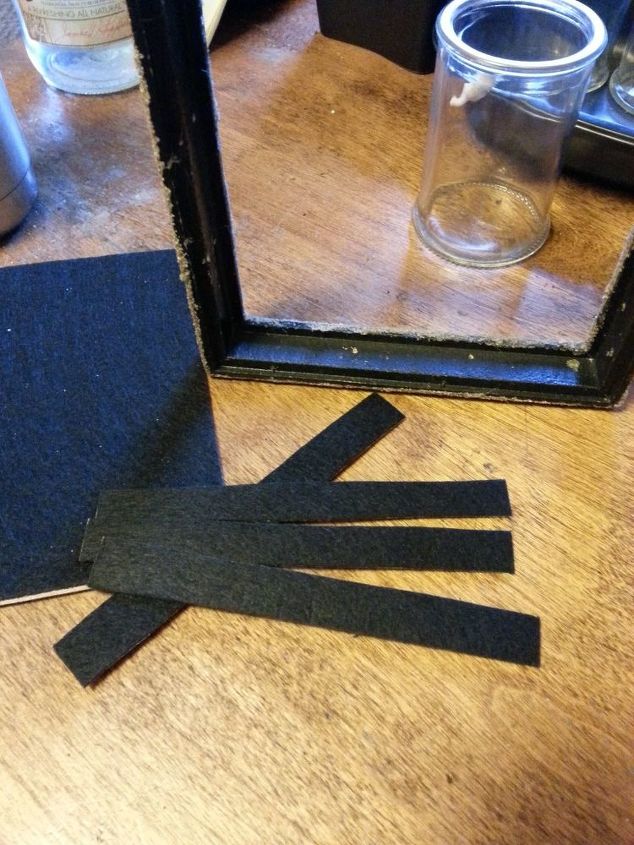
Now use the frame to trace onto cardboard or foam core...this will be the base of the tray. Cut the base and use that to trace onto the felt...you'll need two of these, one for the inside and one for the bottom . Cut out the felt...I used self stick felt squares and found that it to be sooooo much easier to trace and cut as opposed to regular felt! Cut the second felt square about an eighth of an inch smaller all around as this one will need to fit inside the frame.

Since we're already cutting felt, we'll now cut the inside ' lip' liners of the frame. Measure the inside depth of the frame and cut strips of felt to fit, each strip will be slightly shorter as you work your way around.
Now we'll back-step a bit. Using the cardboard or foam core cut-out, attach to the bottom of the frame using permanent glue . I lined the entire bottom edge of the frame with a generous amount of glue, placed the frame on top and weighed it down with some canned goods. Allow to dry completely. Now we'll attach the felt. Glue or stick the larger piece of felt to the outside bottom of the frame, turn over and glue the small strips of felt to the inside lips of the frame. Finally, glue or stick the slightly smaller felt to the inside bottom of the frame.
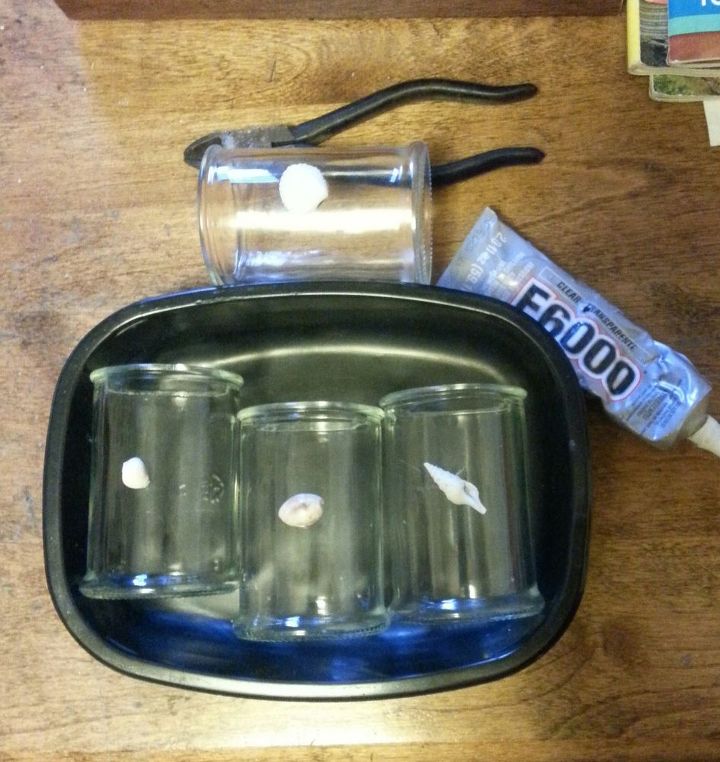
While the felt was drying a bit, add embellishments to the jars. I used permanent glue to attach small seashells to one set and stickers for the second. I also tied small twine bows to the lids.
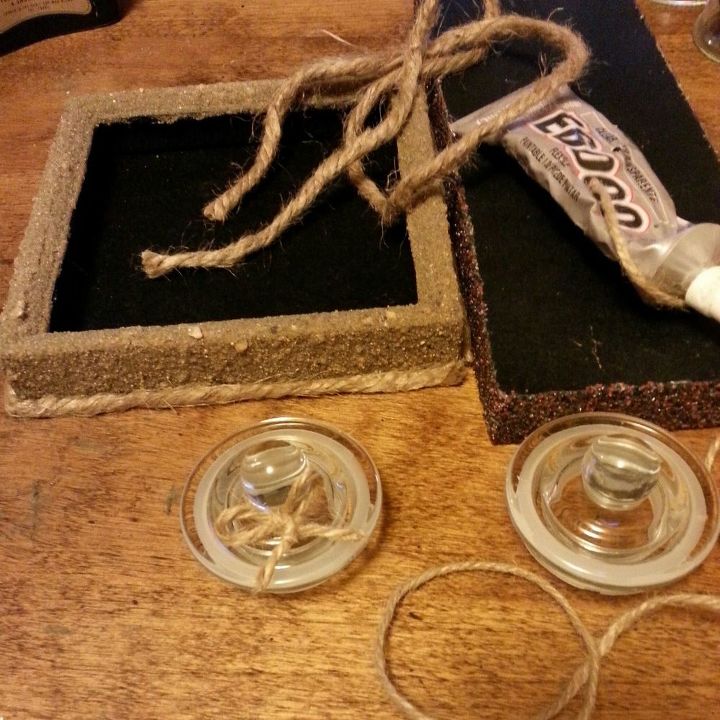
Next we'll line the bottom outside edge of the frame with twine. Use permanent glue to line the bottom edge of the frame, add the rope/twine, snip off any excess twine for a nice fit (I started and ended at a corner of the frame. ) The glue will set pretty quickly, however I kept gently pressing the twine all around for a minute or two. Allow to dry completely. Fill your jars with cotton balls, q-tips, hair bands, band-aids, etc. Place the jars into the tray and you're finished!
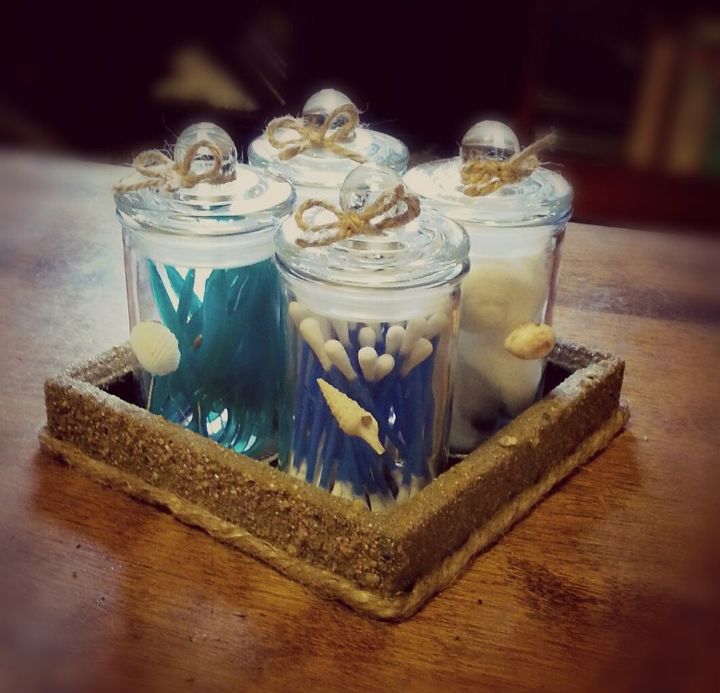
This one I made for my mother in law in a nautical theme.
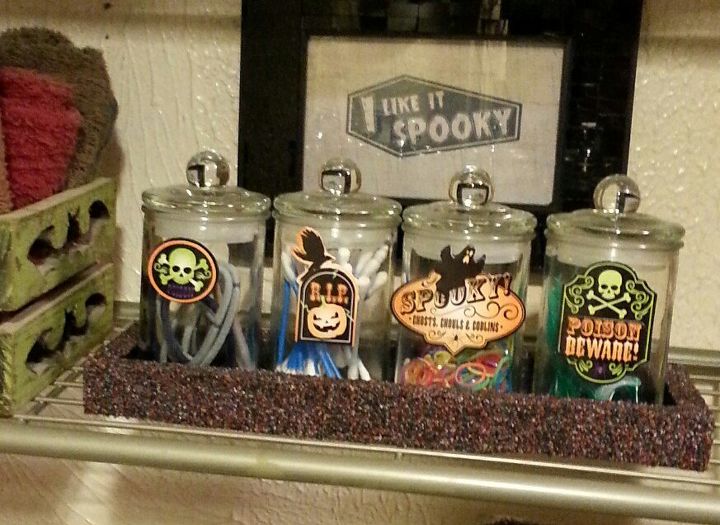
And this for our bathroom. ..yup, our bathroom is Halloween themed 😀 I hope you found this project fun and inspiring! You could make these in any size or theme! Happy Crafting!


Any price and availability information displayed on [relevant Amazon Site(s), as applicable] at the time of purchase will apply to the purchase of this product.
Hometalk may collect a small share of sales from the links on this page.More info
Comments
Join the conversation
1 comment
-
How lovely! Thank you for sharing your idea!!


Frequently asked questions
Have a question about this project?