


DIY Makeup Organizer: Keep Your Beauty Essentials in Order!
Is your messy makeup drawer causing you anxiety and making your morning routine stressful?
I'm going to show you how to establish order with this brilliant and practical DIY Makeup Organizer.
Tools and Materials:
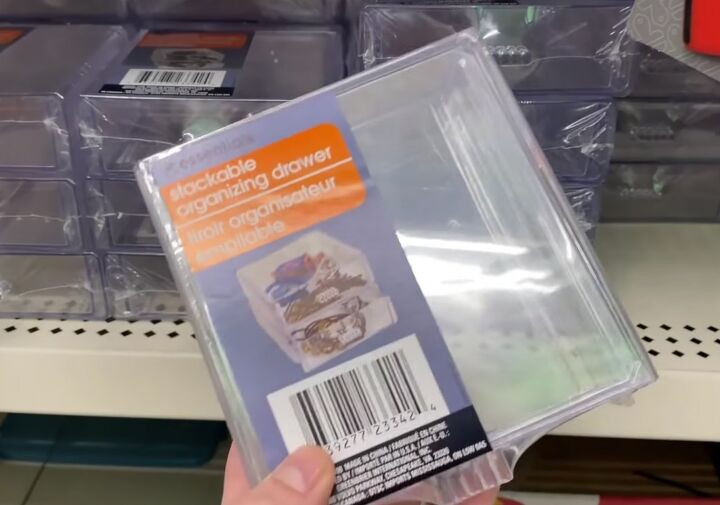
- Stackable organizer drawers
- Box cutter
- E6000 adhesive
- Hot glue gun
- Mirrors
- Painter's tape
- White acrylic paint
- Silver metallic paint
- Foam brush
- Exacto blade
- Cake pans
- Marbles
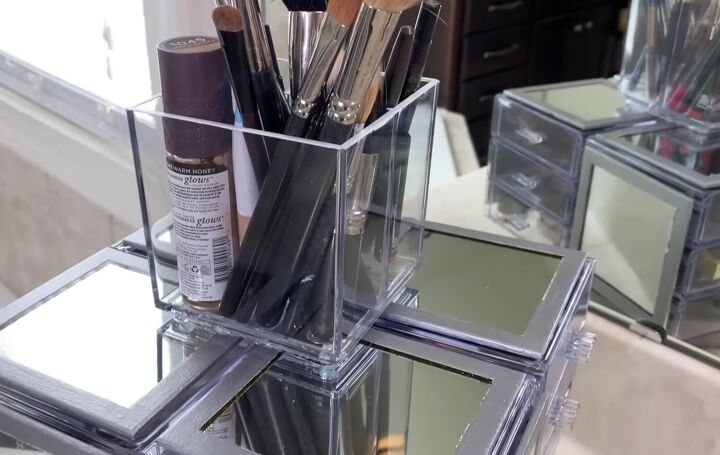
- Small organizer for brushes or other makeup products
Hometalk may receive a small affiliate commission from purchases made via Amazon links in this article but at no cost to you.
Let me show you how to use the supplies to create the perfect makeup and accessory holder!
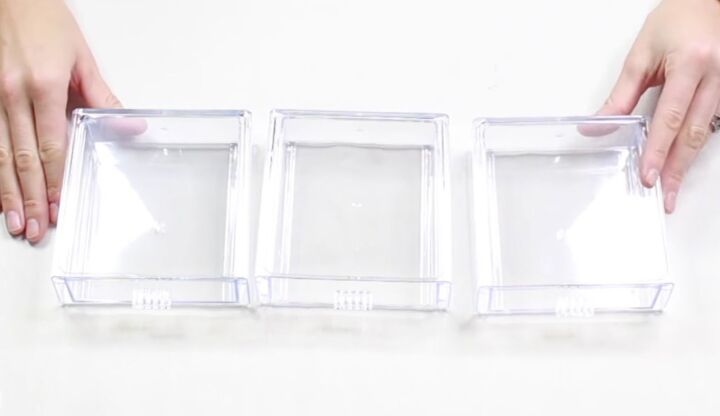
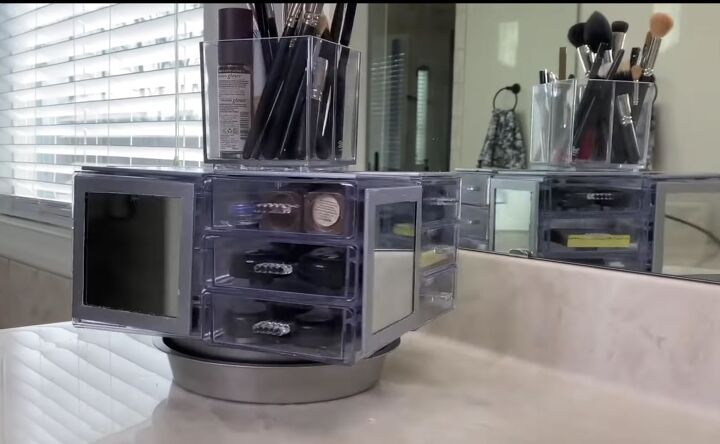
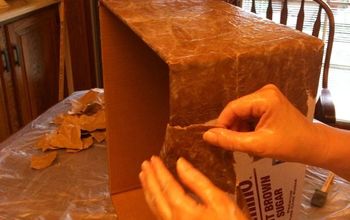
1. Stack 'Em Up
I used my handy dandy box cutter to open up this stack of drawers and once I had them unwrapped, I wanted to stack them.
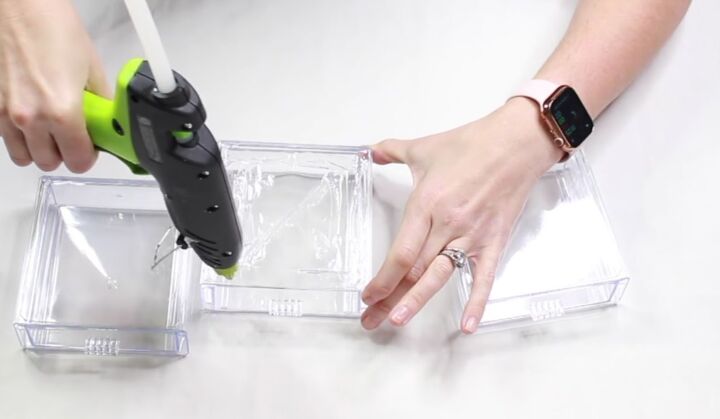
I wanted to make sure they stayed together so I used a combination of E6000 and hot glue to make that happen.
I started with the one on the bottom and I added a little bit of the E6000 on the inside just to kind of reinforce it.
Then I added a little bit of hot glue around the edges.

Before the glues could dry, I went ahead and stacked another one on top and made sure it was lined up.
You also want to make sure that no glue is coming out of the top.
Then I did the same thing to the top one.
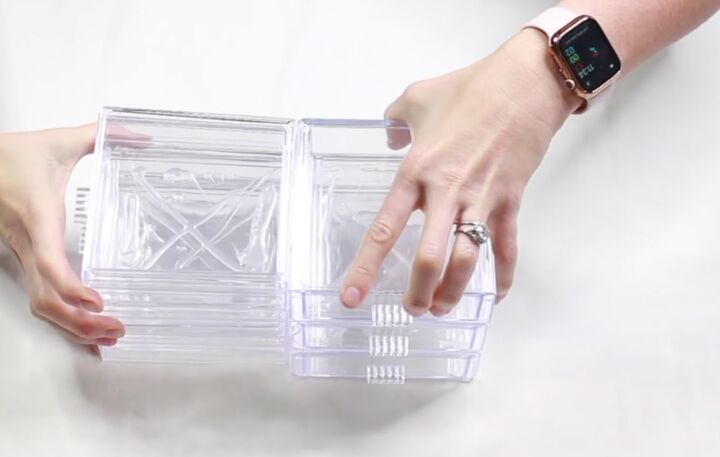
I also did the same process three more times with the other stackables that I had and then set them all aside to dry. Once the drawers were dry, I wanted to focus on gluing the stacks together. I essentially wanted to assemble them all into one large piece.
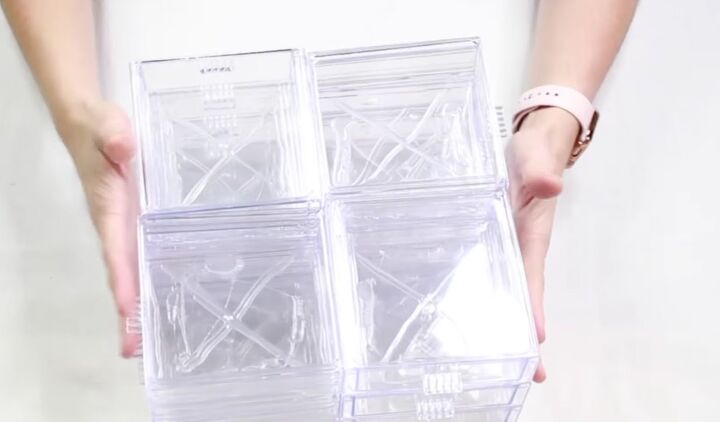
I used the same hot glue and E6000 to add glue to the sides that would be together. I made sure to press them together for a few minutes until the glue started to dry and then went ahead and kept adding to it. I took the one and placed them back to the side.
I followed the same process as before but with the drawers facing the other way this time. By facing the drawers in different directions it will create drawers on all sides when I am done.
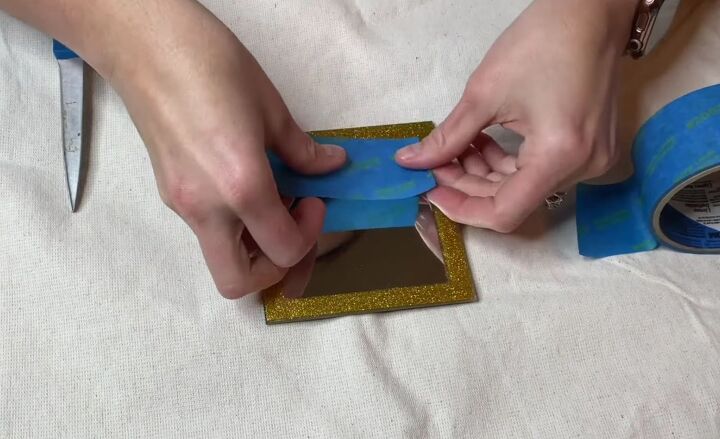
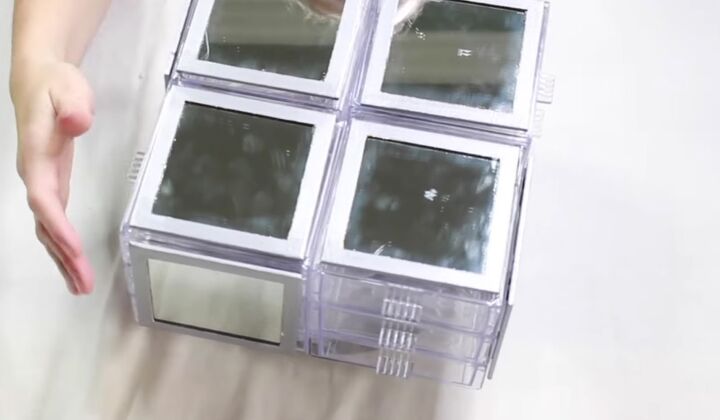
2. Add Mirrors
After the drawers were all set together, I wanted to add some mirrors. I didn’t like the color of the mirrors because they originally were gold.
Taking some painter’s tape I cut it to size so that I could paint the edges of the mirror to make it look closer to the color I wanted.
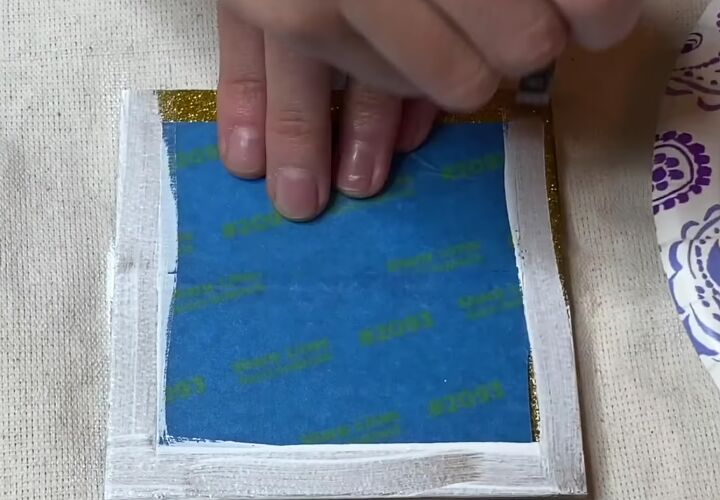
First I applied some white acrylic paint. I applied about two layers of white acrylic paint to the glitter border.
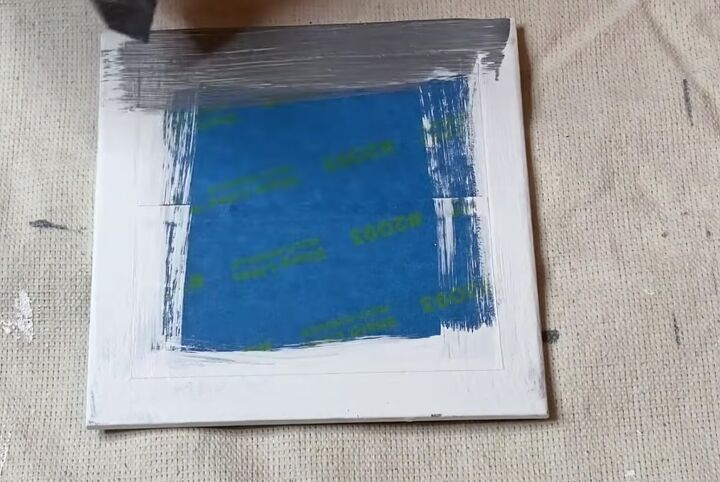
Once the white paint had enough time to dry, I used a Folk Art silver metallic paint and a foam brush to apply two layers. I left it all dry overnight when I was done.
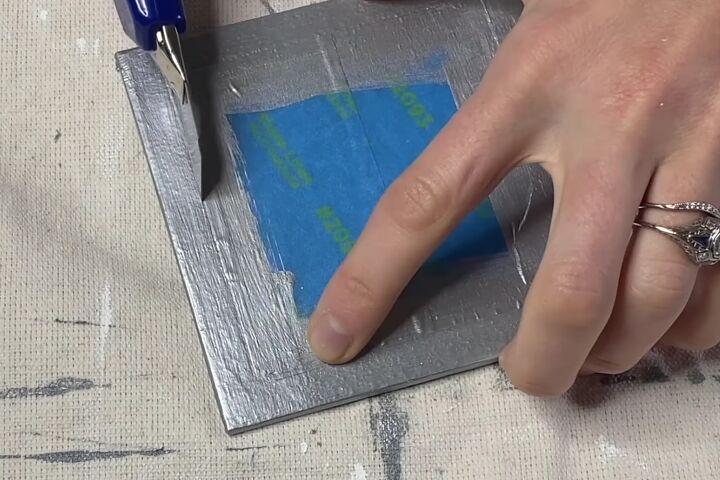
The next morning I used my Exacto blade and traced the edges of the tape, where the tape met the borderer of the paint. I gave it a little bit of a guideline so that it makes it a little bit easier to remove.
There was a little bit of peeling when I removed the paint so I went back and did some touch-ups.
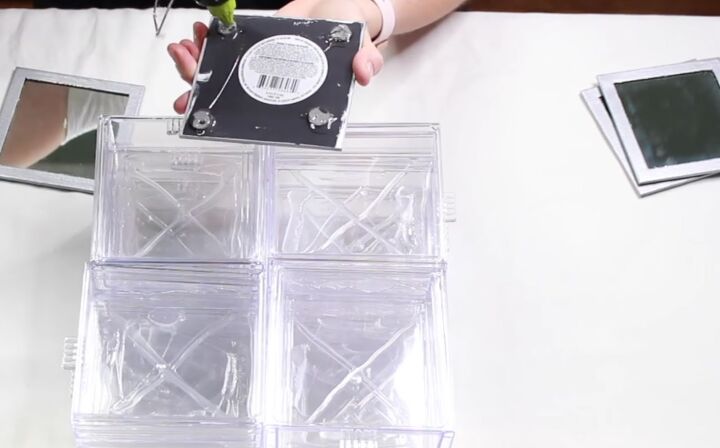
3. Attach Mirrors to Drawers
With the mirrors finished, I went ahead and added hot glue to the back and placed four on the top of my stacked drawers.
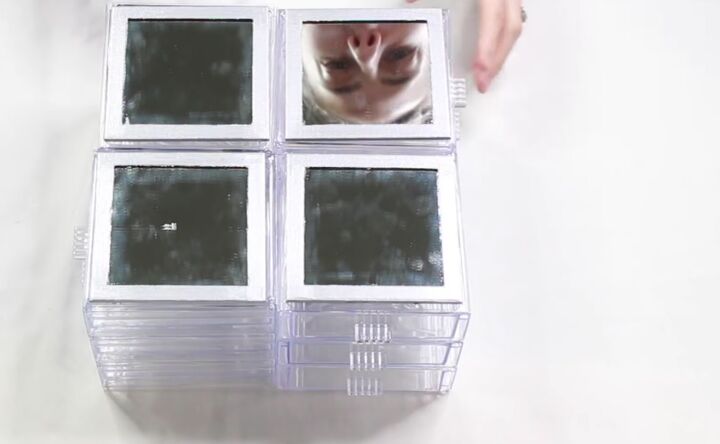
After adding them to the top, I also went ahead and added them to each side that didn’t have drawers.
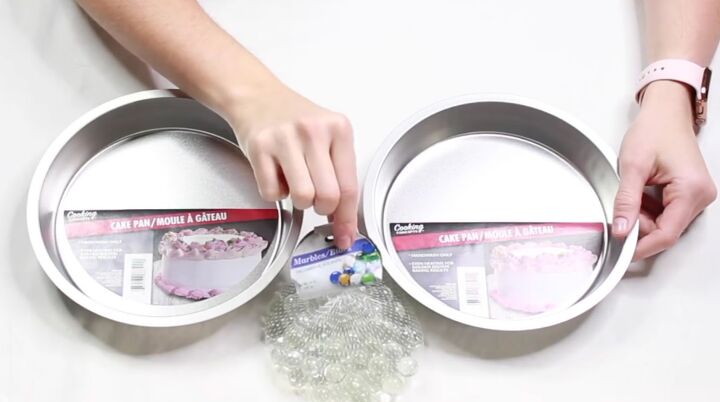
4. Make it Spin
To create the spinning part of my organizer, I used two cake pans that I got at Dollar Tree and some marbles.
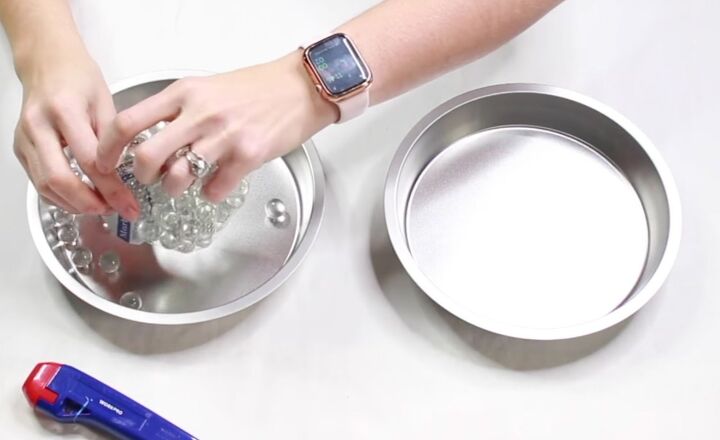
First I filled one of the cake pans with the marbles.
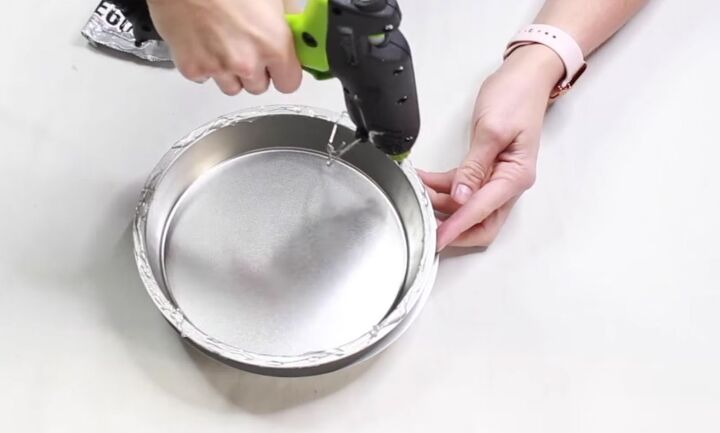
Then I put a layer of E6000 and hot glue around the edge of the second pan and set the organizer on top of the glue and pan.
When the glue was dry, I went ahead and set the pan and organizer on top of the marbles so that it would turn.
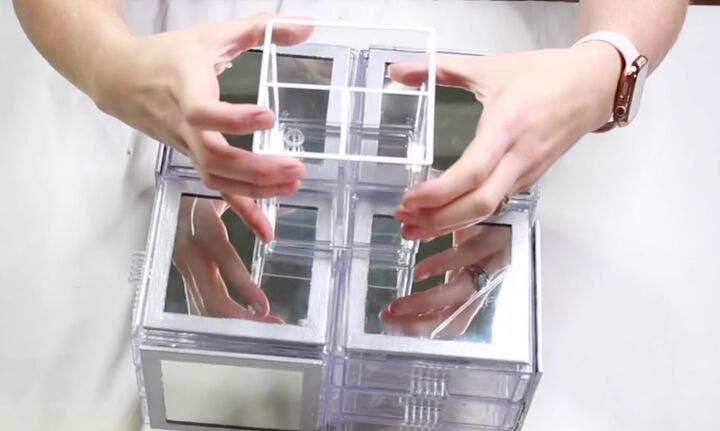
5. Add an Organizer On Top
Finally, I wanted to add one more organizer on the very top. I decided to add a small organizer for brushes but you could do one for lipstick or any other type of makeup product.
I stuck it to the top of the organizer with the same combination of E6000 and hot glue.
More DIY Organizers
DIY Makeup Organizer Tutorial
Your new spinning DIY makeup organizer is ready to keep your beauty essentials in check. It's a stylish addition to your bathroom, and it can hold all your makeup treasures.
Have you tried making your DIY makeup organizer? Share your thoughts, experiences, or any creative twists you've added in the comments below.
Resources for this project:
See all materials


Comments
Join the conversation
-
I don't even know how you thought of this!! Wow 😀
-
You are so clever. It looks amazing.


Frequently asked questions
Have a question about this project?
Turning a bunch of marbles into a turntable is such a clever idea! Absolutely genius! I love this. TYFS
Did you mention the total cost of this project?
@joe Jones , we know you can purchase this, but where's the fun in that?