


Cedar Chest Redo...

1 Material
1 Week
Medium
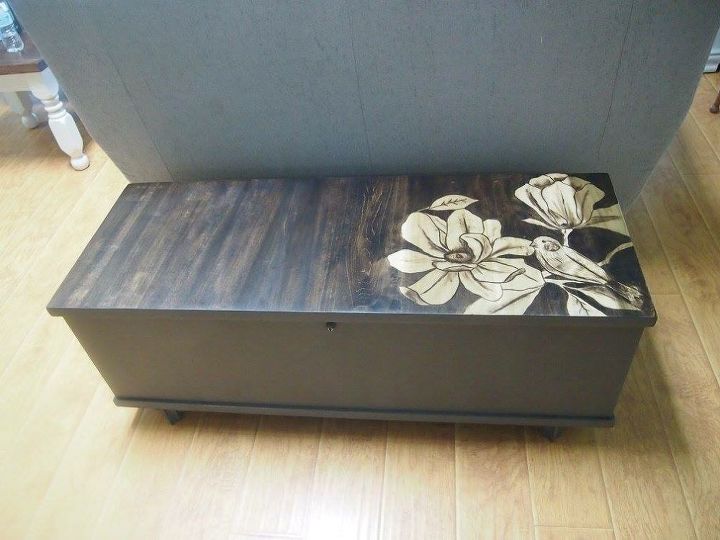
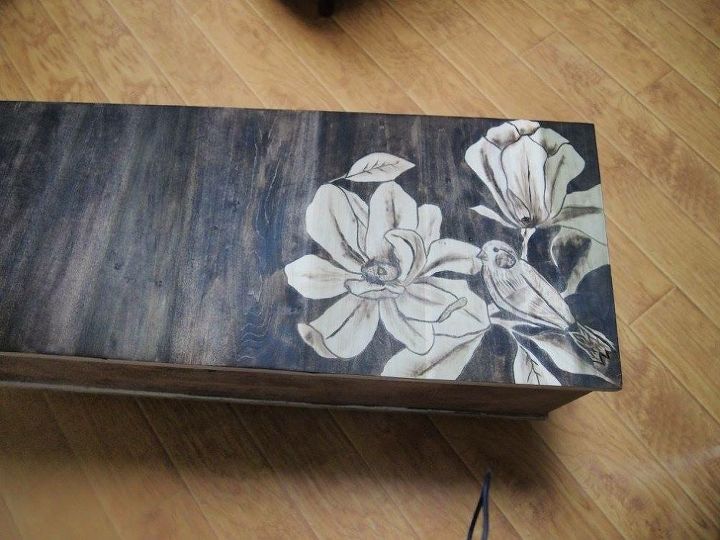
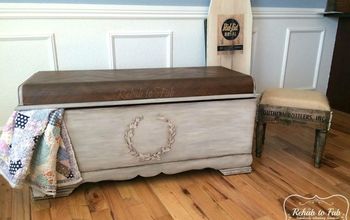
A friend had this ceder chest since the 1960’s. She had painted it and upholstered the top, then it went into storage and sat for a very long time. She called me up and asked if I would redo it and if I could stain shade a design on the top. When she dropped it off I was pretty sure it was solid wood so I started sanding only to find out it was a ceder lined chest and the outside had laminate over a VERY THIN piece of sheet plywood. I started at the corner and as you can see in the pictures I hit particle board really quick! I immediately stopped and assessed the damage. The only fix I could come up with would be to put a thin layer of stainable wood filler and hand sand even. I applied the wood filler and let it sit overnight. The next day I hand sanded the bad area very gently and sanded down the rest with 120grit paper, careful to move quickly and not to apply any pressure or stay in one area too long. This made the sanding process soooo long. After I got it all off the top I noticed the wood was green in some places, but that was just the way the wood was and there was nothing I could do so I chose a very dark stain and placed the stained design where the bad area was in hopes to kind of conceal it. She just asked me to put a flower and a bird, she did not care what kinds. I chose a magnolia to go with the little bird. I drew my design on very lightly with a pencil and then I use a small angled brush dipped in stain with excess dabbed off to outline the design, I then use a combination of brushes and my finger wrapped in soft cloth dipped in stain to create the image. I painted the bottom of the chest a deep grey and went over with a dark stain to make it more rustic like she wanted it. I poly wiped the whole piece and then put a clear wax over. She absolutely loved the final outcome.
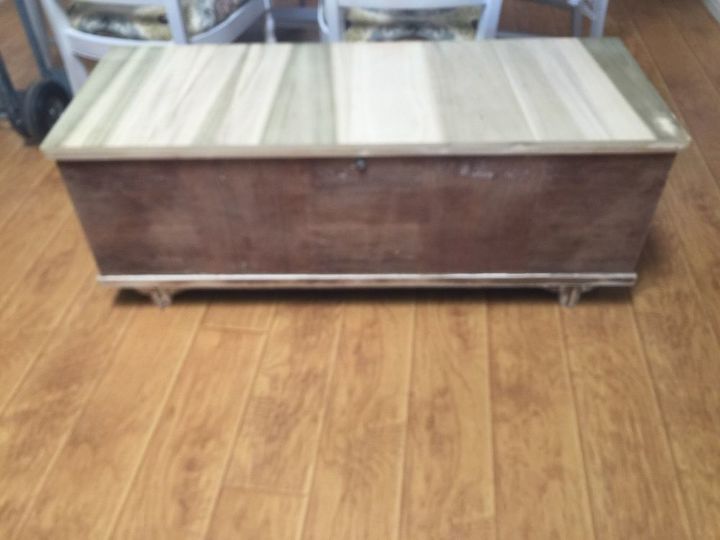
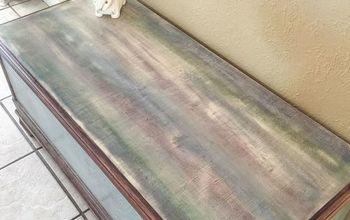
The chest all sanded down. If you look at the bottom right you can see the sanding mistake, it is that white spot. The chest was painted white and was upholstered on top. You can also see the different color of wood that was underneath the laminate.
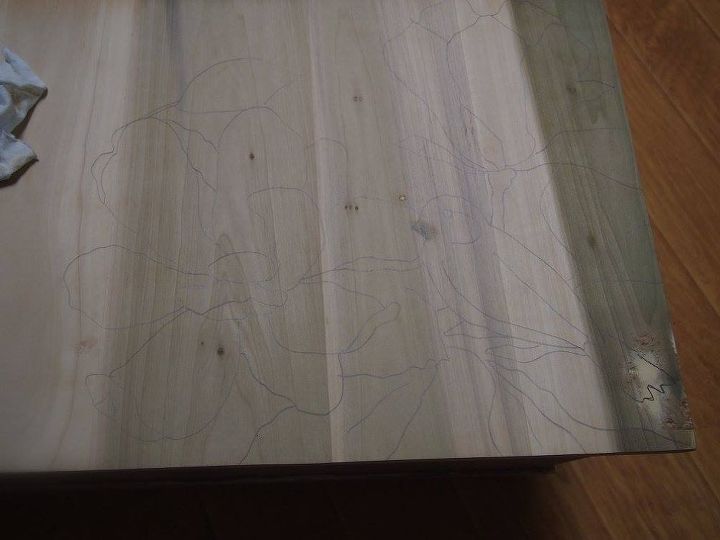
Look closely and you will see the image drawn on. Notice the flaw still on the bottom right
Painted and stained but not sealed yet
I still wanted the top darker, this is before I went back over with stain again to make it darker.
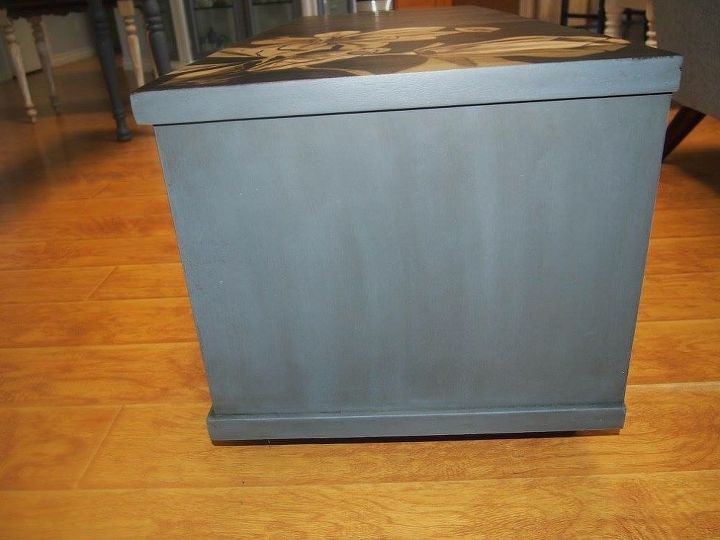
Side painted
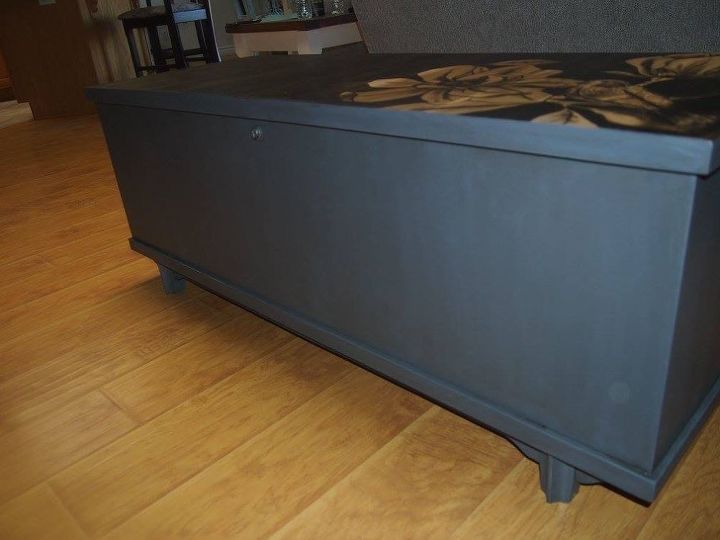
Front painted
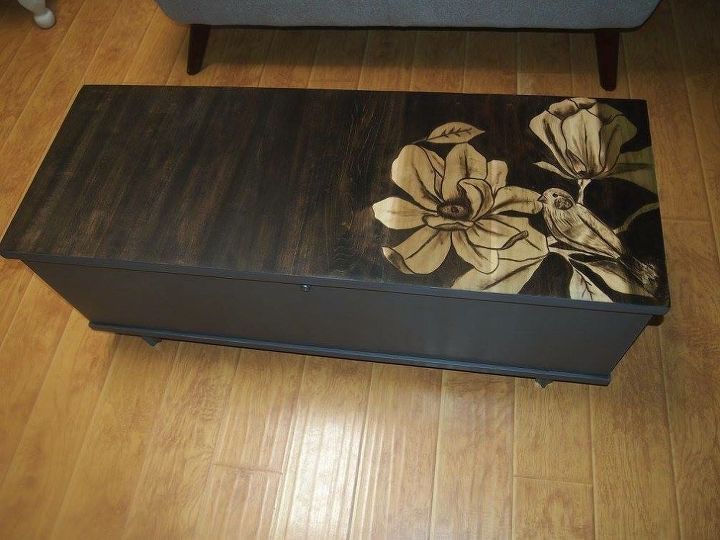
Top, much darker and birds tail and dark stain covered the flaw beautifully.
Comments
Join the conversation
4 of 6 comments
-
I love this!!!
-
Beautiful. It looks amazing. What's not to love. Great job!


Frequently asked questions
Have a question about this project?
Awesome. Where did you learn how to do staining. I would like to learn . Thank you.