


How to Paint a Fabric Bed Frame

Bye-bye boring bed! I’ve been seeing life through sage green-tinted glasses lately (thanks Instagram…) so I woke up one morning and decided, on a whim, that I would paint our bed frame. I went into this project with the enthusiasm of a labrador puppy. I tried EVERYTHING so that I could show you how to paint your fabric bed frame with the best techniques – and probably even sleep in it the very same night, weather allowing.
Find more makeovers on the VeryLiv blog!

On that note, “made in a day” may not apply if you’re currently experiencing subzero temperatures unless you crank up the heat to make the paint dry faster. I completed this project during a heatwave – also not ideal for obviously sweaty reasons. I’d say fall and spring are the best time to paint your bed, so get yourself a gallon of your favorite paint and read on for the lowdown on painting beds!
Step 1: Gather your courage
It’s probably going to be an emotional rollercoaster once you’ve finished your first coat. Painting a fabric bed frame is nothing if not thrilling. It’s a 3 step process, you see:
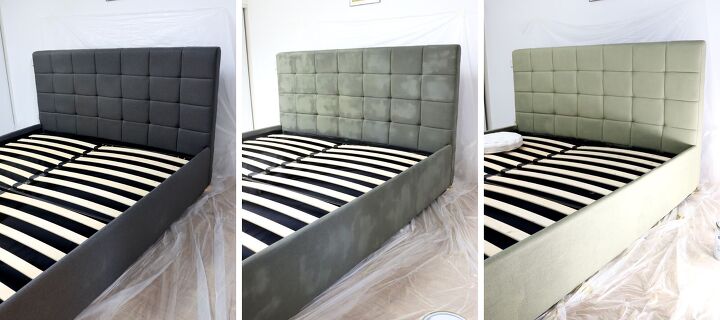
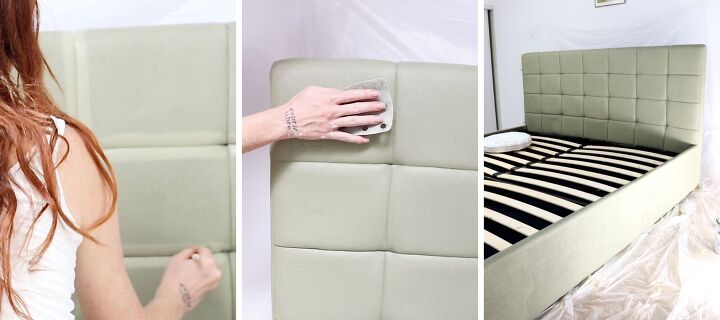
1: Original bed
2: Horribly blotchy bed
3: Beautiful brand new bed
I knew it before I started but that didn’t stop me from freaking out at Step 2… See that middle picture above? That’s Step 2 – when you may or may not be running around thinking you’ve ruined a perfectly fine bed frame.
Here’s what’s happening:
- Acrylic paint is a thick resin that hardens. You don’t want that resin to form a layer on top of the fabric, that would look weird and caked on.
- Rather, you’ll be rubbing it in so that it soaks into the fabric fibers. This way the fabric will be dyed instead of painted and the grain will still be visible.
- In order to soak in, you’ll have to dilute the paint a little and apply it in several coats. And yes, the first coat will look blotchy and make you want to cry.
Step 2: Protect the painting area
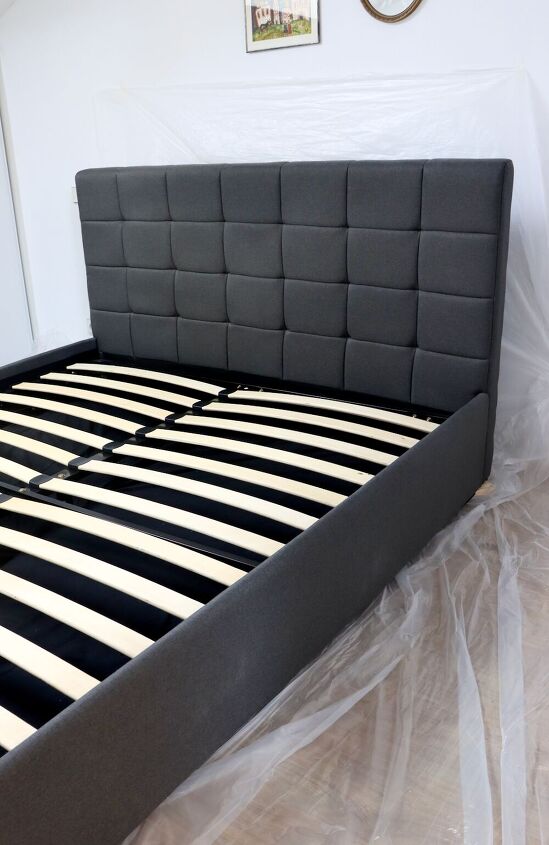
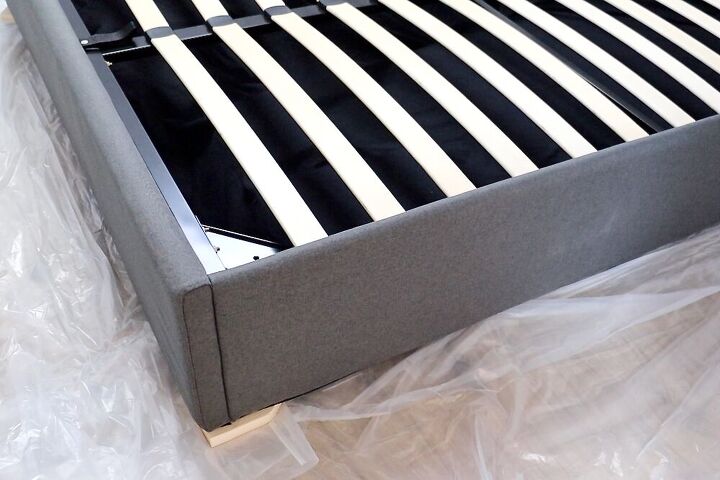
Before you start, push the bed off the wall. Slide a plastic drop cloth underneath and tape it to the floor and/or the wall to keep it in place. If you have a storage bed like mine, lay a piece of cloth to protect your storage area. You can even place a drop cloth over the wooden slats, although I didn’t bother with that.
If your bed is very low, slide a block of wood under each leg to elevate the bottom off the floor. This will make painting much easier (and cleaner).
Step 3: Apply the first coat of paint
First, dilute your paint. This depends on how thick your paint is to start with. As a rule of thumb, dilute to the consistency of half and half. For me, this meant 3/4 paint & 1/4 water.
Here comes the first coat, brace yourself. The good news for you is that I ended up trying different ways to apply paint to fabric. Here’s the rundown:
- Paintbrush & spray bottle: the most commonly accepted way to paint onto fabric – except it didn’t work for me. It was too time-consuming for an entire bed frame and the results were very inconsistent. On top of that, I hadn’t even covered an 8″ square that my hand was already aching!
- Sponge: sponging paint onto the fabric actually worked well! The paint soaked into the fibers more uniformly than with the paintbrush. However, it was also very slow and tiring so not the most efficient method.
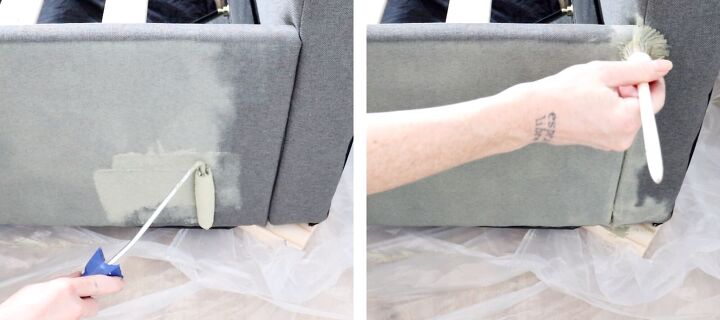
- Paint roller: My savior. It suddenly became so easy to apply the paint once I started with the roller. The results were the most consistent, with no streaking, and SO FAST. Eventually switching to a large paint roller reduced my painting time for one coat to just over 20 minutes for the whole bed frame!
The winning combo was a paint roller and sponge combination for super-smooth results. I applied the paint with the roller, covering a large surface, and, if needed, equalized the paint by rubbing with the sponge. I still used a round paintbrush for the corners and other tight spots.
Step 4: More coats! (and finishing touches)
After your first coat has dried, which could take a few hours, prepare for the second coat. This time, you’ll want to dilute the paint even less than for the first coat. I barely added a dash of water to 2 cups of paint. Just enough to thin it down a little and make it easier to get on the paint roller. Apply with the roller and sponge combo and let it dry.
At this point, grab your sandpaper and give the whole bed frame a light sanding. It will help soften your fabric which gets more rigid with every coat of paint. You’ll start feeling the difference between the sanded and non-sanded areas immediately. This will release some dust so make sure to wipe it off with a microfiber cloth.
If your bed was a light color to start with, 2 coats may well be enough. As you can see, mine was a dark charcoal grey and I needed to apply 3 coats to get perfect coverage.
Find me on Pinterest for more easy DIY ideas!

Resources for this project:
See all materials


Comments
Join the conversation
-
This looks great. I know it took a lot of courage, but just look at the results.


Frequently asked questions
Have a question about this project?
I don't see a storage area. Does it have drawers?