


Refurbished End Table

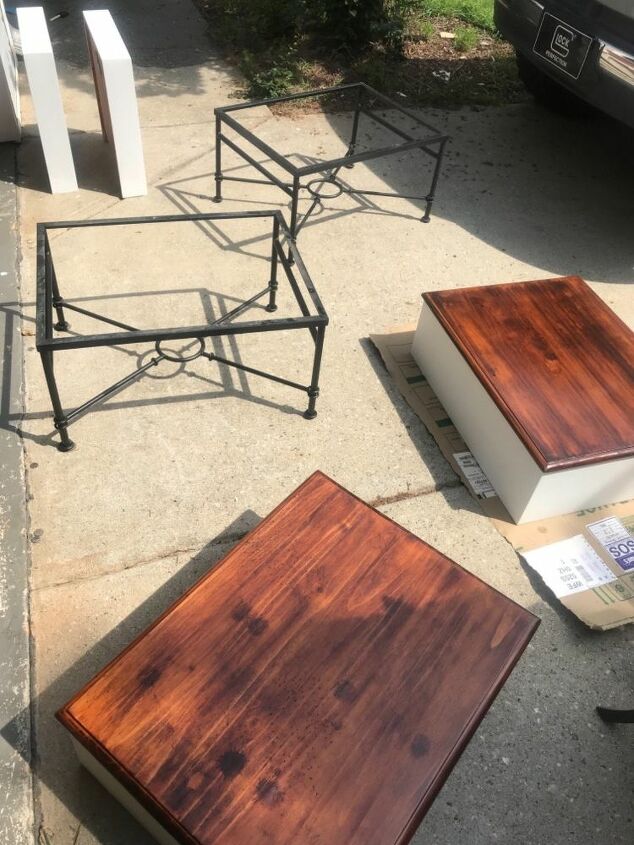
After purchasing an American Drew, solid wood, king size poster bed to refinish, and giving it new life with a few coats of white chalk paint, our shabby chick grey night stands we’re looking very sad, and small in comparison! I found a pair of gorgeous end tables on the Facebook market for $30 and instantly knew they would be a perfect addition to my master bedroom makeover! They are solid wood and had so much potential! But this golden color was just awful!
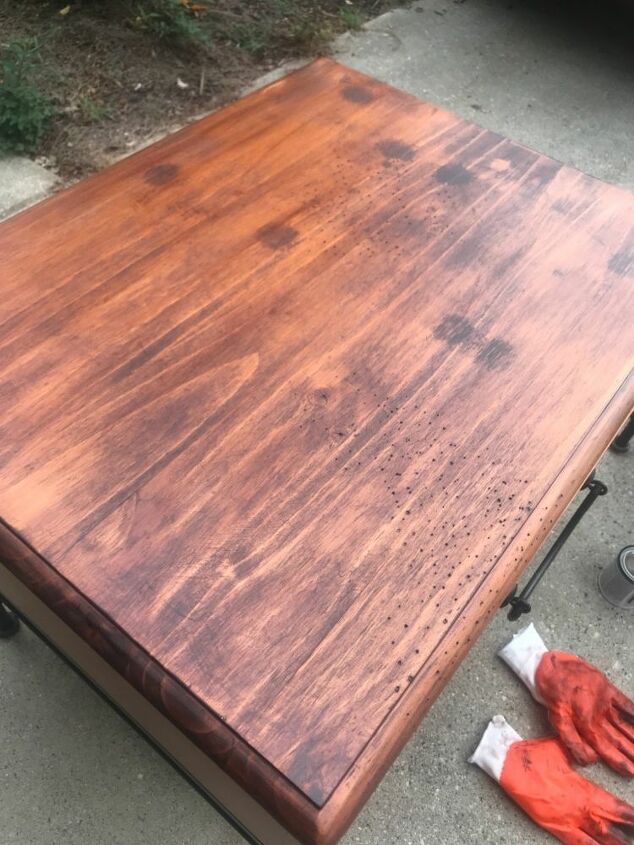
When refinishing any wood furniture I always evaluate the damages. This particular piece looked like someone had taken a key and had a party on the table top, I already knew I wanted to stain the top, so I would need to sand rather than strip them. Look the piece over thoroughly. Sometimes the damage may require wood filler if the scratches are too deep, other times some aggressive sanding may do the trick. If a piece isn’t solid wood and has a veneer, painting the piece may be the best bed. I wanted a two toned affect with this tables, a stained top, and pained sides. I find chalk paint to be pretty durable but wanted a stained top on these because I don’t want the wear from excessive use the scuffing paint, our previous night stand had a chalk painted top and looked really rough after 3 years of cleaning and water glasses and so on...
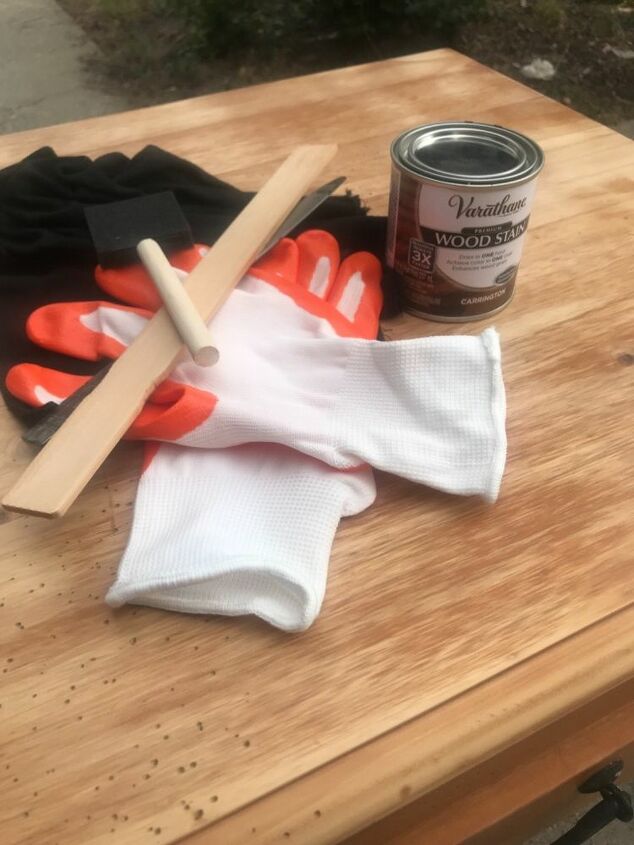
Gather your supplies:
—orbital sander and sandpaper ranging from 150 to 220 (if staining)
—chalk paint in color/brand of choice (I used Rustoleum Linen White since it’s what I used for the bed, I find this brand to be just okay, coverage isn’t as good as other brands, like Annie Sloan, but it is very cost effective and readily available at your local Home Depot, the bed and the end tables all took 3 coats for full coverage)
—TSP or other deglosser of choice
—sanding block
—tack cloth
—stain of choice, if staining, I chose Varathayne Carrington, I love the one coat coverage it provides and it’s such a rich color, this is always my go to stain brand for any project.
—top coat
—Polyurethane if staining
—paint brushes, I like the Wooster short angled brush for almost any project, it just feels great in your hand and the angle cut of the bristles rally gets into any book or cranny you may come across.
—tools to remove hardware, will vary by piece
I started by standing the top of my tables, I started with 150 grit sand paper and donors with 220 until majority of the scratches were sanded out and the previous finish was mostly removed. I wanted a rustic appearance for the table top so I didn’t stress too much that it wasn’t completely perfect, if you want more of a polished look you may also want to use some sort of stripper to endure all the previous stain and varnish are removed.
Use our tack cloth and diligently remove all the dust from sanding, and your ready to stain! I didn't use any prestain conditioner for this piece, again, because I wanted a more rustic look, for a more even, predictable stain, a prestain conditioner would be best. I opted for 2 coats of stain for the table tops, this gave it more richness. Always stain with the wood grain, and always follow manufacturers directions for dry times. I typically use lint free cloths to app;y stain, but the label will also gibe you recommendations, if in doubt, listen to the label.
I always start with the stain because I tend to be messy. Once the stained tops are completely dry, grab your TSP and give the sides and drawers and hardware a good scrubbing, folow the directions on the bottle on how long to let it sit, then wipe off remaining product with a clean wet cloth. Let dry completely, then your ready to paint!
I applied 3 coats of the chalk paint to all sides and drawers, and finished with 1 coat of topcoat in matte. Once the sides are dry it was time to put the hardware and base back and apply the polyurethane to the tops! I always save the poly for last, its like the icing on the cake to me, the grand finale! The best part! I just love the instant gratification it provides. I always follow the label for these, i applied with the grain with a foam brush in light even strokes. I onl used 1 coat but additional coats are recommended for durability.
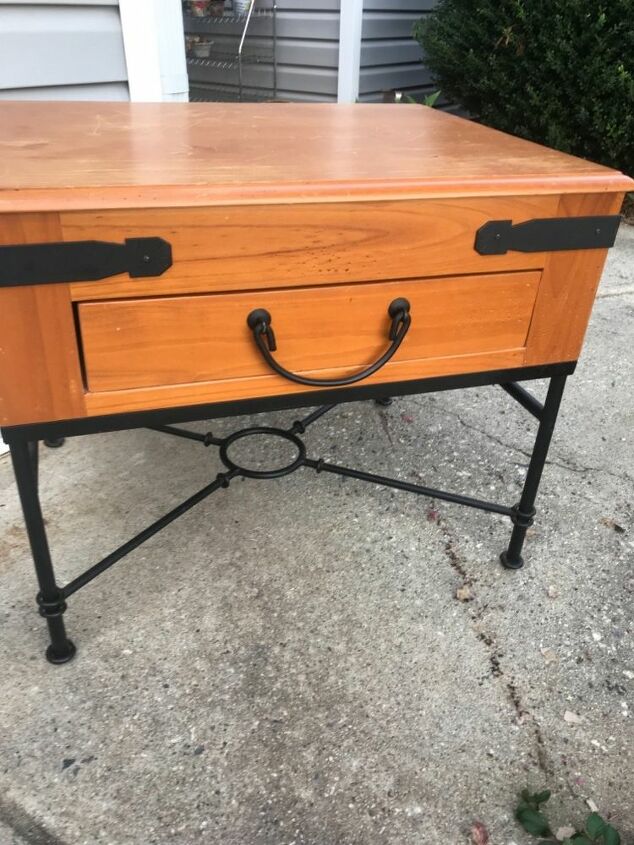
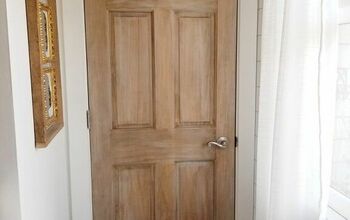
Before- golden yellow, dated and damaged
Varathayne Carrington was my color choice for the table tops, rich and warm and the perfect contrast to the bright Linen White used for the rest of the project.

I use this any time I am painting any furniture! You will be amazed at the filth you will get off of furniture! Even if it appears clean. I promise, it’s not!
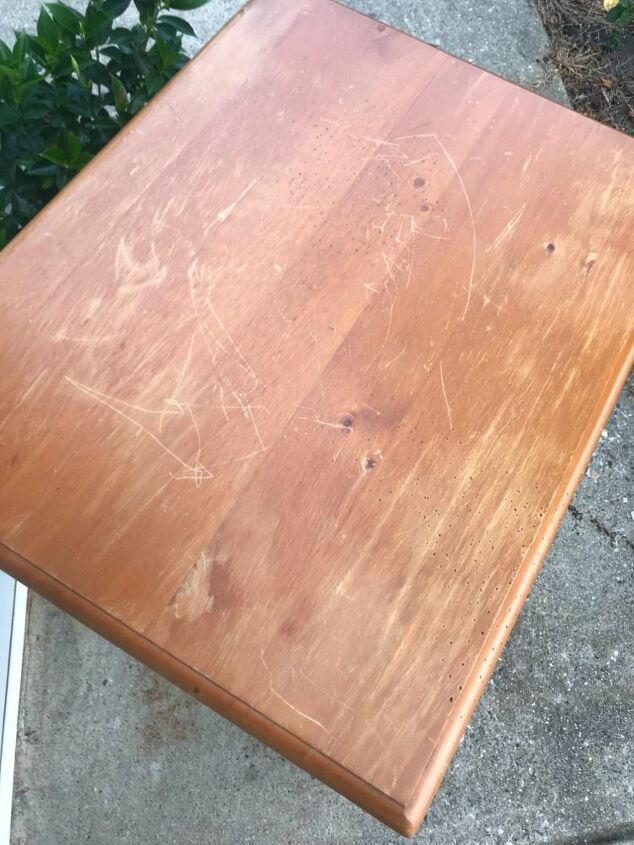
Yikes! The gouges in this were daunting
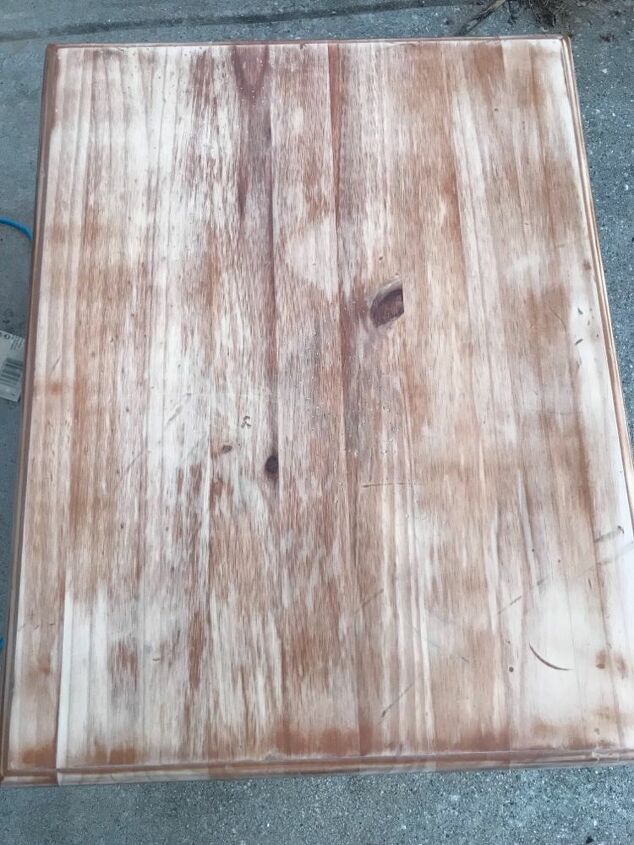
Sanded down and ready to stain!
1st coat, I opted for 2 on these for more richness
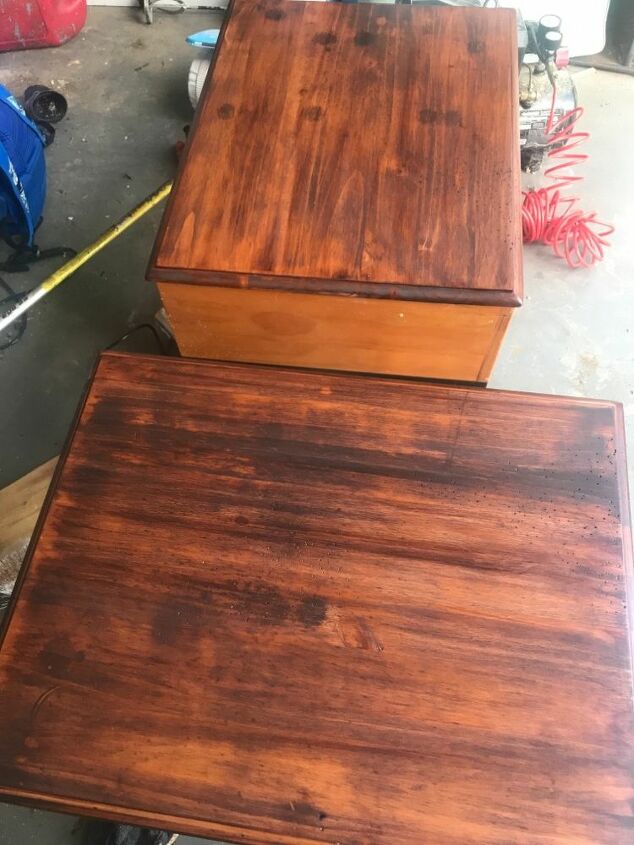
2nd coat of stain! So much richness!
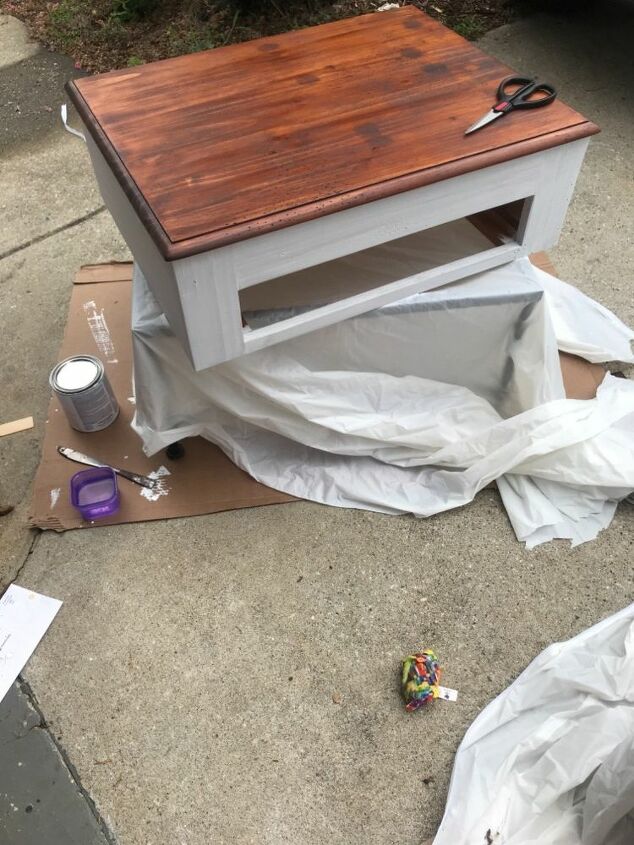
1st of 3 coats of the linen white!
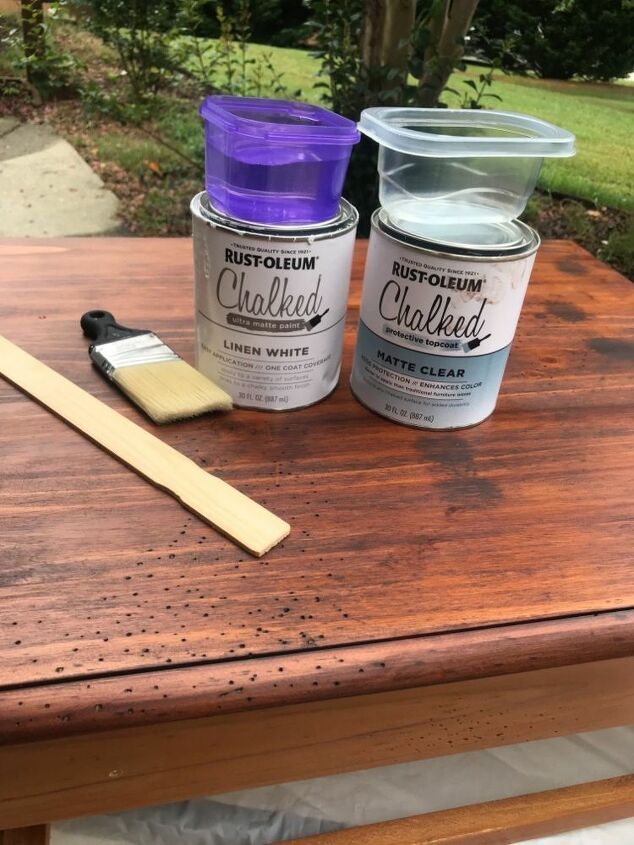
This top coat is non yellowing but adds durability to the chalky finish!
Ready to reassemble!
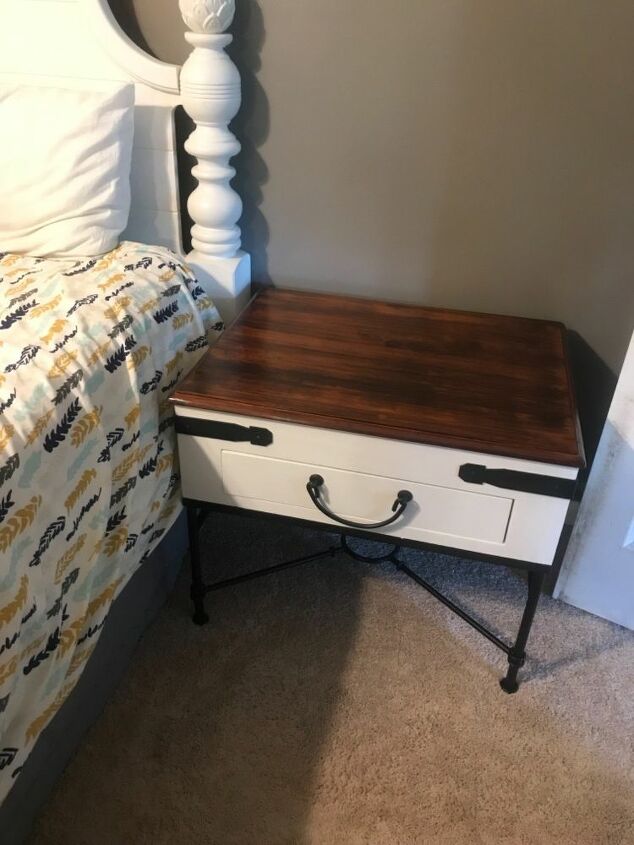
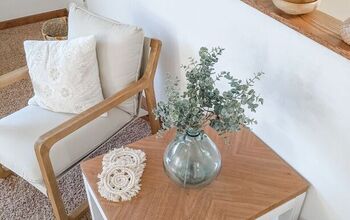
Sitting pretty next to the bed
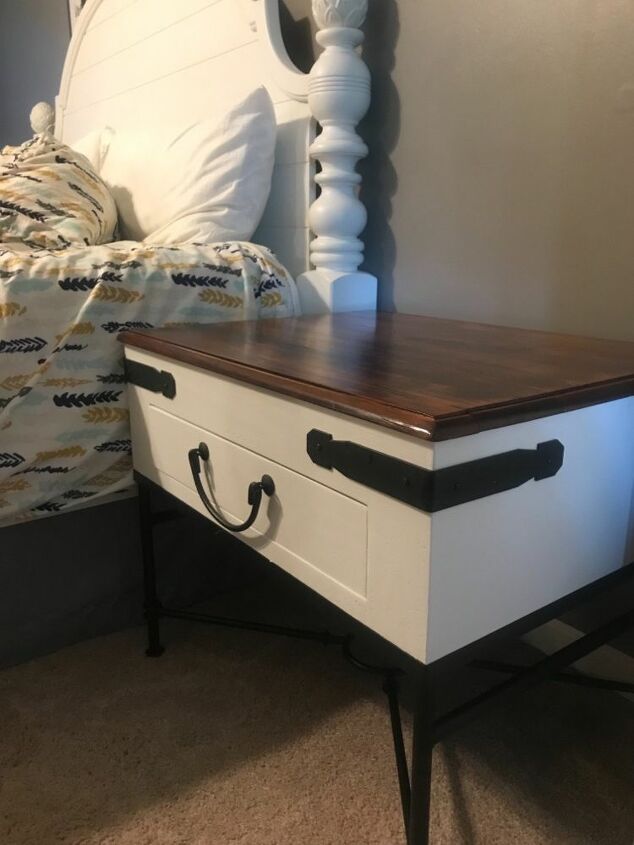
I love the contract of the rich, warm stain, the chalky linen white and the black iron hardware!
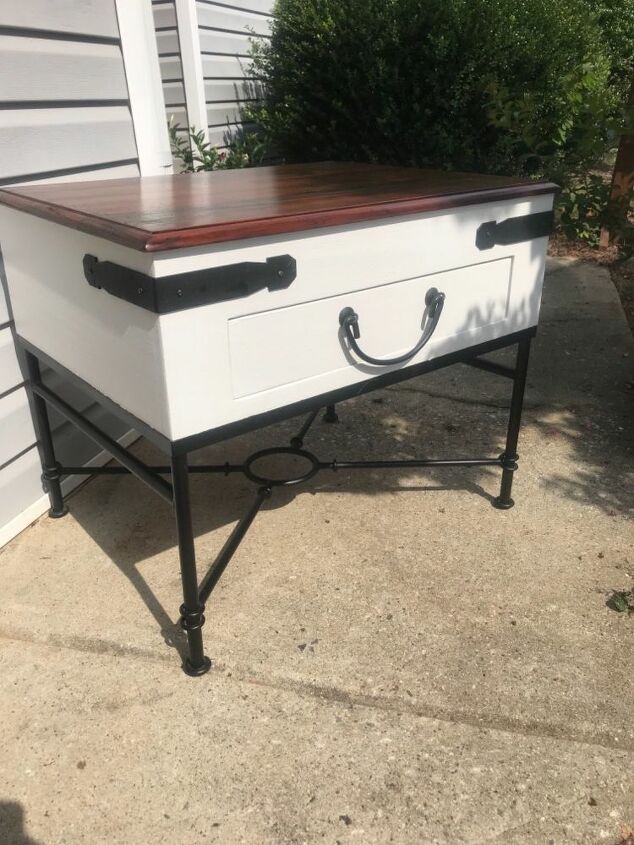
Love how these turned out!
Resources for this project:
See all materials


Comments
Join the conversation
-
I love these! Great job!!
-
nicely done, thanks for the instructions


Frequently asked questions
Have a question about this project?
Did you refresh the wrought iron with black spray paint? It looks so good and I love the contrast of colors.