


How to Build a Farmhouse Kid's Table
3 Materials
$40
2 Days
Medium
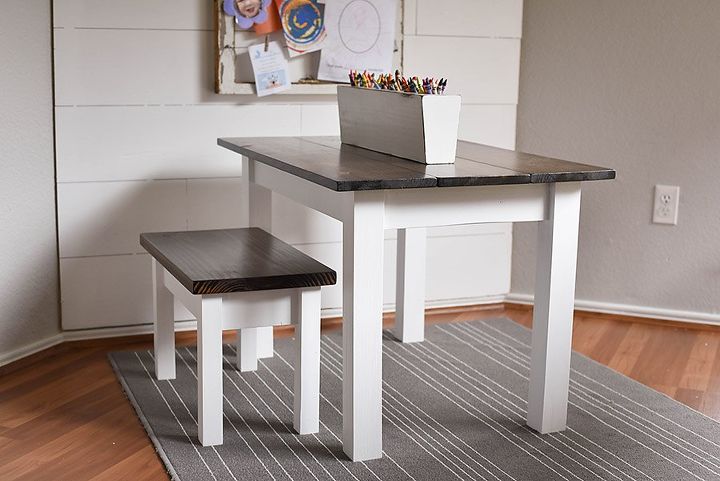
We decided to give our kid’s table a farmhouse or country cottage feel because it is important to us that it still blend in with the classic style of our home. So much of kid’s furniture can be an eye sore – neon colors and bold patterns just would fit in our home.
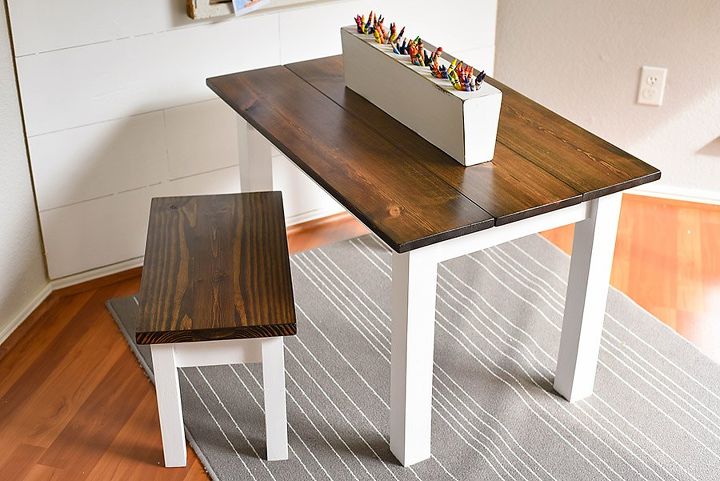
When I went to look for a kid’s table in the style we wanted, I saw options ranging from $250 to well north of $300. Let’s just say that’s not exactly in our budget. I knew we could create something gorgeous for much less, so we designed this Classic Farmhouse Style Kid’s Table and Bench.
For the Kid’s Farmhouse Table, you will need:
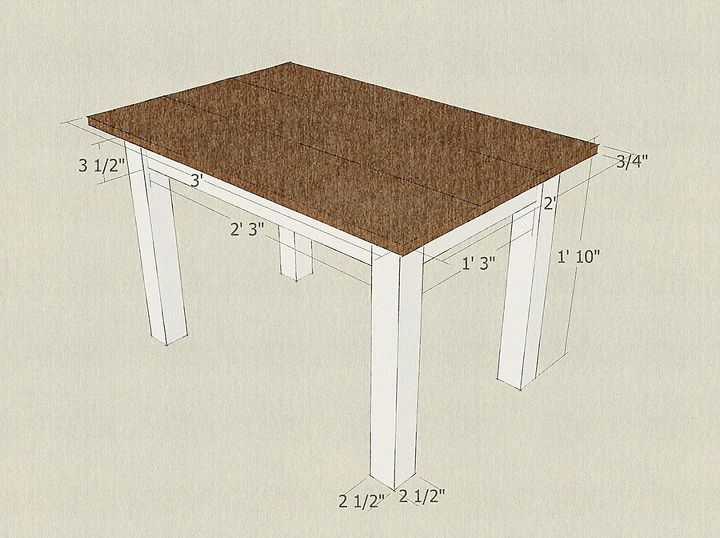
- 4 Table Legs – 2.5″ x 2.5″ cut to 22″
- 2 Long Stretchers – 1×4″ cut to 27″
- 2 Short Stretchers – 1×4″ cut to 15″
- 1 Cross Section – 1×4″ measured to fit
- 3 Top Planks – 1×8″ cut to 36″
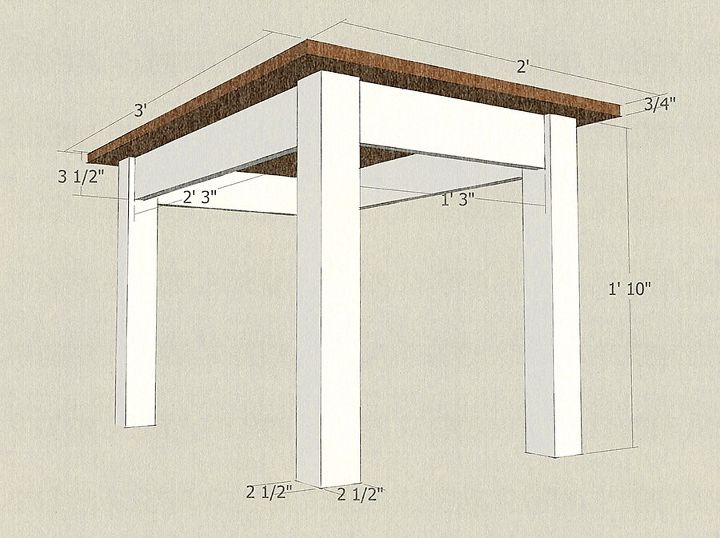
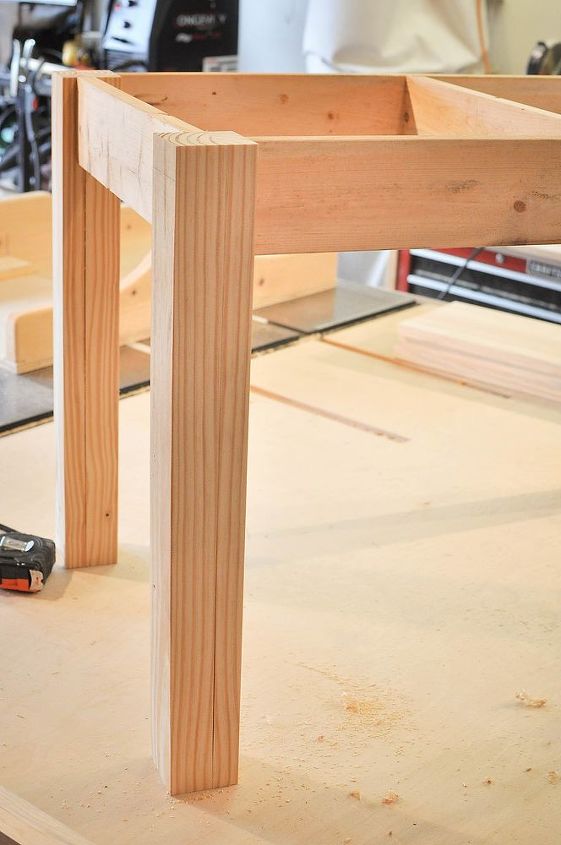
We started by cutting 8, 24″ pieces of 2×4″. Then we glued together two pieces of 2x4s to make the wood thick enough for 2.5″ square legs.
While that was gluing, we selected the best 1×4″ boards we could find – we were looking for straight boards with no visible knots to be the stretchers. These pieces run between the legs of the table and provide support and stability for the table top. We cut the 1×4″ boards into (2) 15″ pieces for the short end of the table and (2) 27″ pieces for the long end of the table.
Once the glue for the table legs was dry, we ripped the wood (which was now 3×3.5″) into (4) 2.5×2.5″ legs. Then we cut the legs to their final length – 22″. You can adjust the length of the legs to make your table shorter or taller depending on the age of your kids. If you like the look of this table, but don’t have kids, you could also cut the legs to 12″ to make a coffee table.
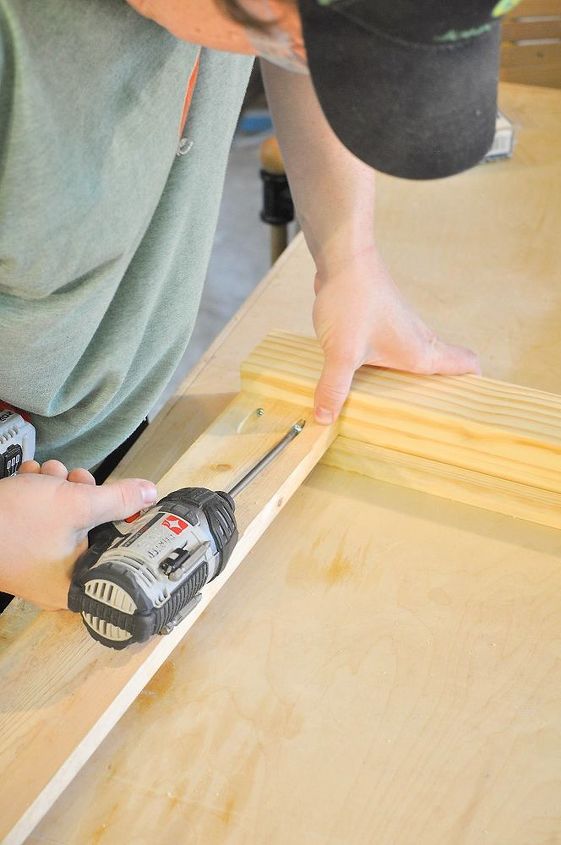
We used a Kreg Jig to attach the table legs to the stretchers, screwing the long sides together first.
We used a scrap of wood to raise the stretcher on both ends so it is recessed between the legs.
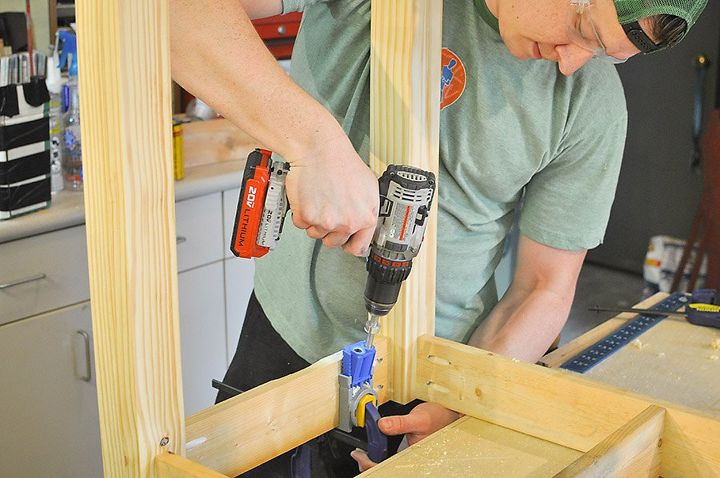
Measure and cut the 1×4 to length for the center support and use Kreg Jig to attach this cross beam directly in the center of the two longer stretchers, supporting the table.
We also used the Kreg Jig to pre-drill the pocket holes for attaching the top planks.
We sanded the base of the table after it had been assembled. If you are a beginner to woodworking, you might like to read our beginner’s guide on How to Prep, Sand, and Stain Wood, but for the base we started with 80 grit sandpaper. Then we moved on to 120 grit and finished with 220 grit because we were planning to paint the base.
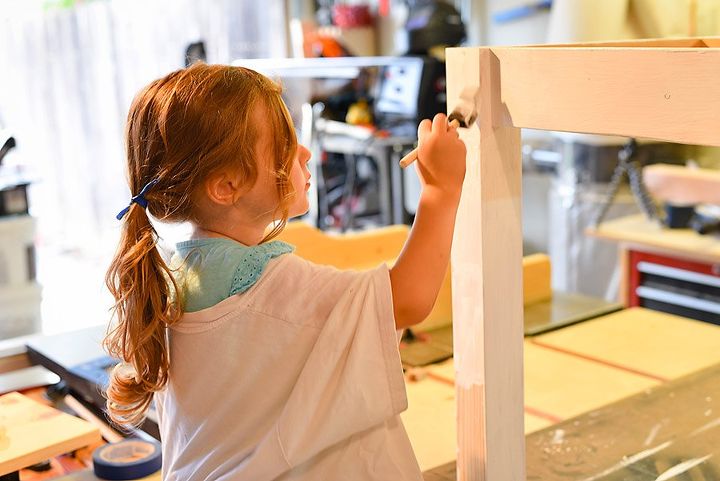
Then we painted the base using an un-tinted, plain white paint. Another option is to stain the base of the table before painting it (like we did with the Kid’s Wall Mounted Bookshelves) so that when it inevitably gets scratched and dinged, it would just show the stained wood giving the table a vintage feel.
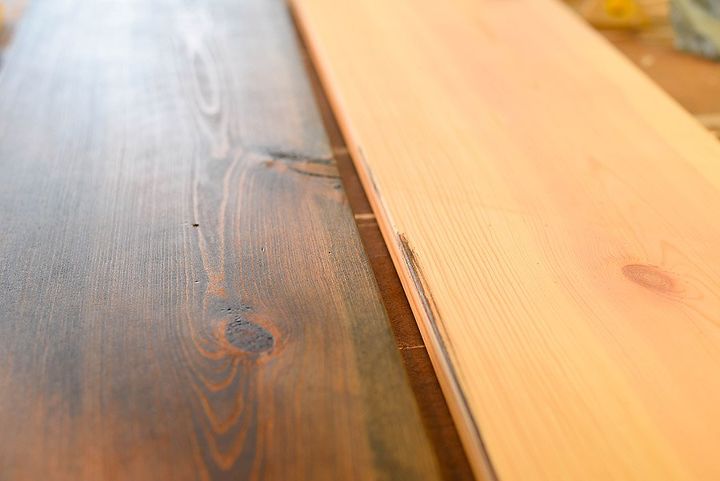
We sanded the top planks starting with 80 grit and moving up to 120 grit and 220 grit. Because we stained the top pieces, we finished with 320 grit to give the wood a very smooth finish.
We stained the wood tops using an oil-based stain in the color Jacobean. And applied three coats of polycrylic. We found it easiest to apply three coats of polycrylic to the bottom before flipping the planks over and applying three coats to the top.

Finally, we attached the top planks to the base using the pre-drilled pocket holes.
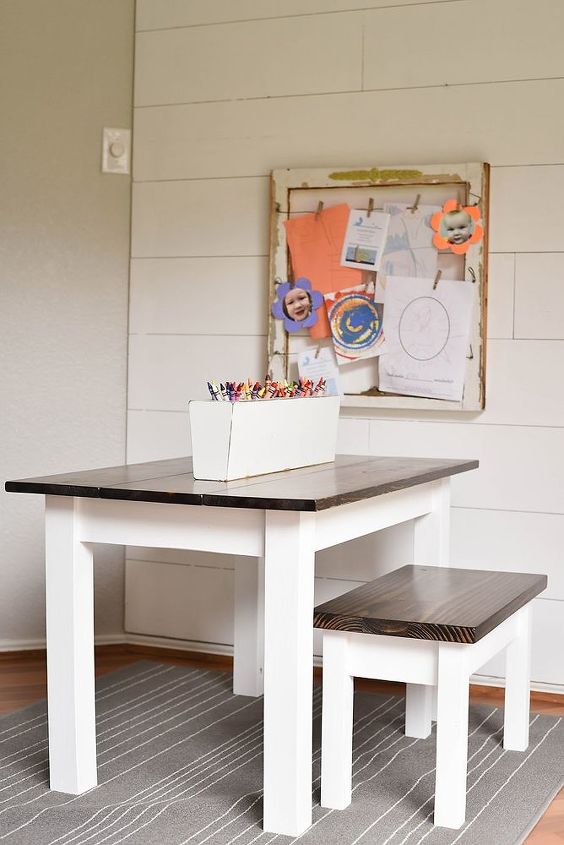
Then I immediately fell in love. Did you know you could fall in love with a kid’s table? I didn’t, but it’s the only way I can describe what happened next. It looked just like the gorgeous Farmhouse tables I constantly pin on Pinterest, but in miniature. Swoon!
Resources for this project:

Wood (See Cut List in Post)


Any price and availability information displayed on [relevant Amazon Site(s), as applicable] at the time of purchase will apply to the purchase of this product.
Hometalk may collect a small share of sales from the links on this page.More info

Want more details about this and other DIY projects? Check out my blog post!


Frequently asked questions
Have a question about this project?