


How to Make a DIY Oval Tabletop For a Unique Dining Table
Today, I'm excited to guide you through the process of a DIY oval tabletop. Whether you're looking to refresh your old furniture or add a unique touch to a new project, an oval tabletop can be a stunning addition.
In this step-by-step tutorial, I'll walk you through the process, from gathering supplies to the final finishing touches. Let's get started!
Tools and materials
- Wooden Boards
- Measuring Tape
- Pencil
- Sawhorses
- Wood Glue
- Clamps
- Jigsaw
- Flush Trim Router Bit
- Safety Gear
- Sandpaper
- Sanding Block
- Finishing Materials: Stain, paint, or finish of your choice.
- Paintbrushes/Rags for applying the finish
Steps
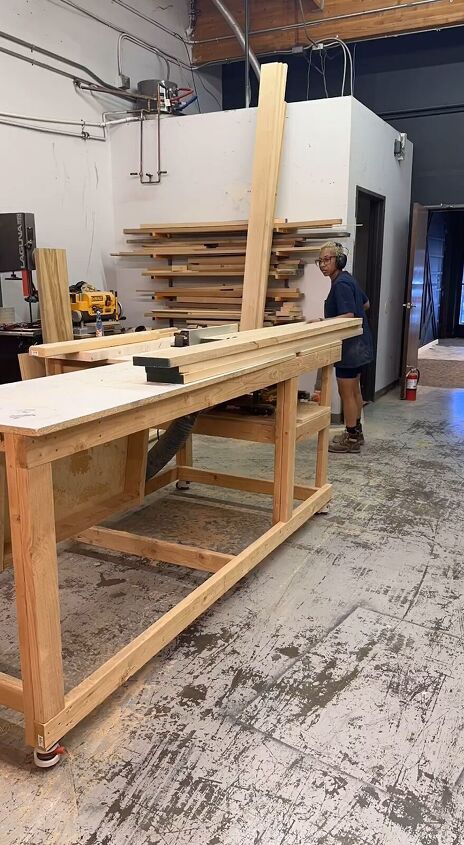
Step 1: Prepare Your Workspace
Begin by cleaning the wooden boards to remove any dirt or debris. Lay out the boards on your sawhorses or a sturdy work surface. Ensure they are close together, forming a rough rectangular shape.
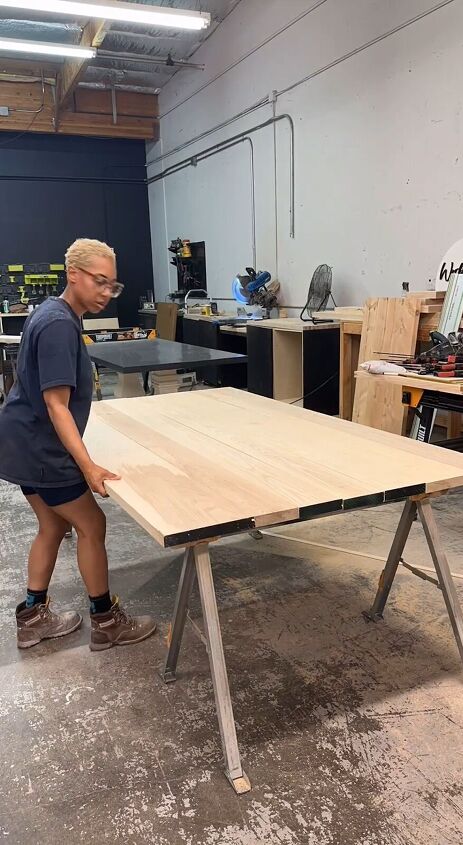
Step 2: Glue and Clamp the Boards
Apply a generous amount of wood glue along the edges where the boards meet. Press them firmly together, ensuring they are aligned.
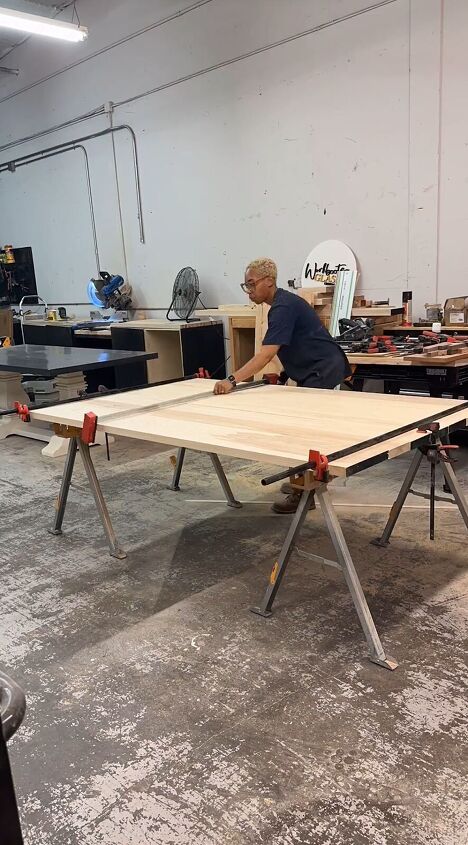
Use clamps to hold the boards in place as the glue dries. Allow the glue to set according to the manufacturer's instructions, usually at least a few hours.
Step 3: Mark the Oval Shape
Determine the desired size and proportions of your oval tabletop. Measure and mark the center point of your rectangular board arrangement. Then, use a measuring tape and pencil to mark the oval's outline. You can create a template or freehand the shape for a more organic look.
Step 4: Cut the Oval with a Jigsaw
Put on your safety gear and carefully use a jigsaw to cut along the marked oval outline. Go slow and steady, following the lines as closely as possible. Take your time to achieve a smooth and precise curve.

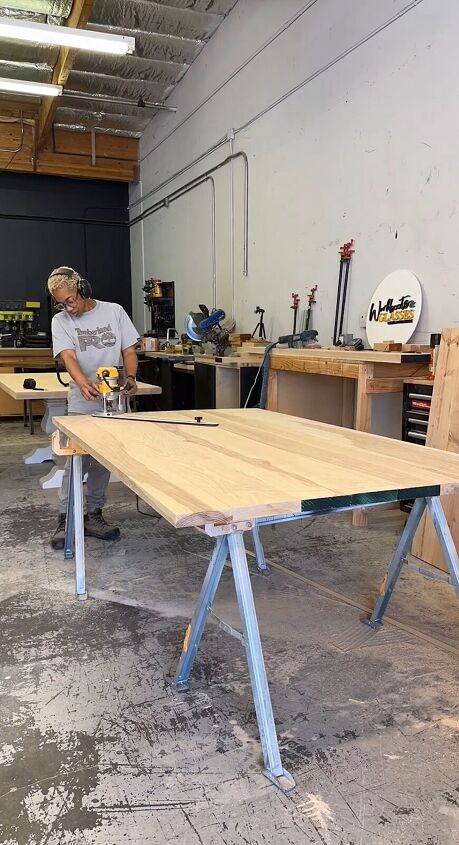
Step 5: Smooth the Edges with a Flush Trim Router Bit
Attach a flush-trim router bit to your router. Gently run the router along the edges of your oval tabletop. This will ensure the edges are smooth and uniform, giving your tabletop a professional finish.
Step 6: Sand and Finish
Sand the entire surface of your oval tabletop using various grits of sandpaper to achieve a smooth, even finish. After sanding, wipe away any dust. Apply your chosen finish, whether it's stain, paint, or varnish, following the manufacturer's instructions. Allow it to dry completely.
Step 7: Final Touches
Inspect your tabletop for any imperfections and sand or touch up the finish as needed. Once you're satisfied with the result, your DIY oval tabletop is ready to be attached to your table base or incorporated into your project.

DIY oval tabletop
Congratulations on creating your own beautiful oval tabletop! This DIY project can add a unique and stylish touch to your furniture.
Remember that practice makes perfect, so don't be discouraged if your first attempt isn't flawless. With time and experience, you'll master the art of crafting stunning oval tabletops. Enjoy your new creation!
Follow @workbootsandglasses on Instagram for more DIY ideas.
Comments
Join the conversation
-
Looks amazing. Great tutorial. Some people would use glue and a Kreg jig or biscuit joiner to glue the boards together. Also alternate the grain when gluing up the boards to prevent checking or cupping of the top.


Frequently asked questions
Have a question about this project?