


How to Build a Kitchen Pantry Closet
Hello friends! Have you ever felt like you don’t have enough storage space in your kitchen? I definitely do! Today, I am sharing how to build a kitchen pantry closet with step-by-step instructions so that you can add more storage space to your kitchen. Of course, this tutorial can also work for a linen closet and anywhere else you want to build a closet for extra storage space.
When we built our kitchen we thought we had plenty of cabinets to store all our dry goods and small appliances. But we quickly realized we didn’t. Especially when one of our favorite places to shop is Costco.
So this meant we needed to add kitchen cabinets or pantry closet somewhere in our limited space.
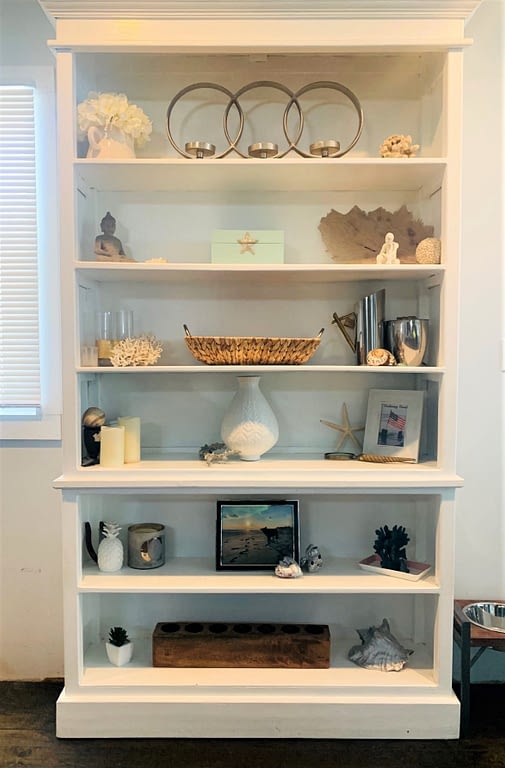
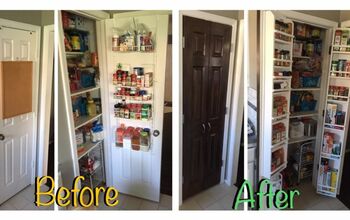
Finding the space to build a kitchen pantry closetFinding the space to add kitchen cabinets or closet seemed impossible. We have an open floor plan and there is no wall space to add cabinets or pantry. Till one day, I had a lightbulb moment! I had a free-standing bookshelf next to my kitchen which would be perfect for a pantry. Although, it was a good place for me to display my decorative items, It was more of a useful space for a kitchen pantry closet.
Plans for the pantry
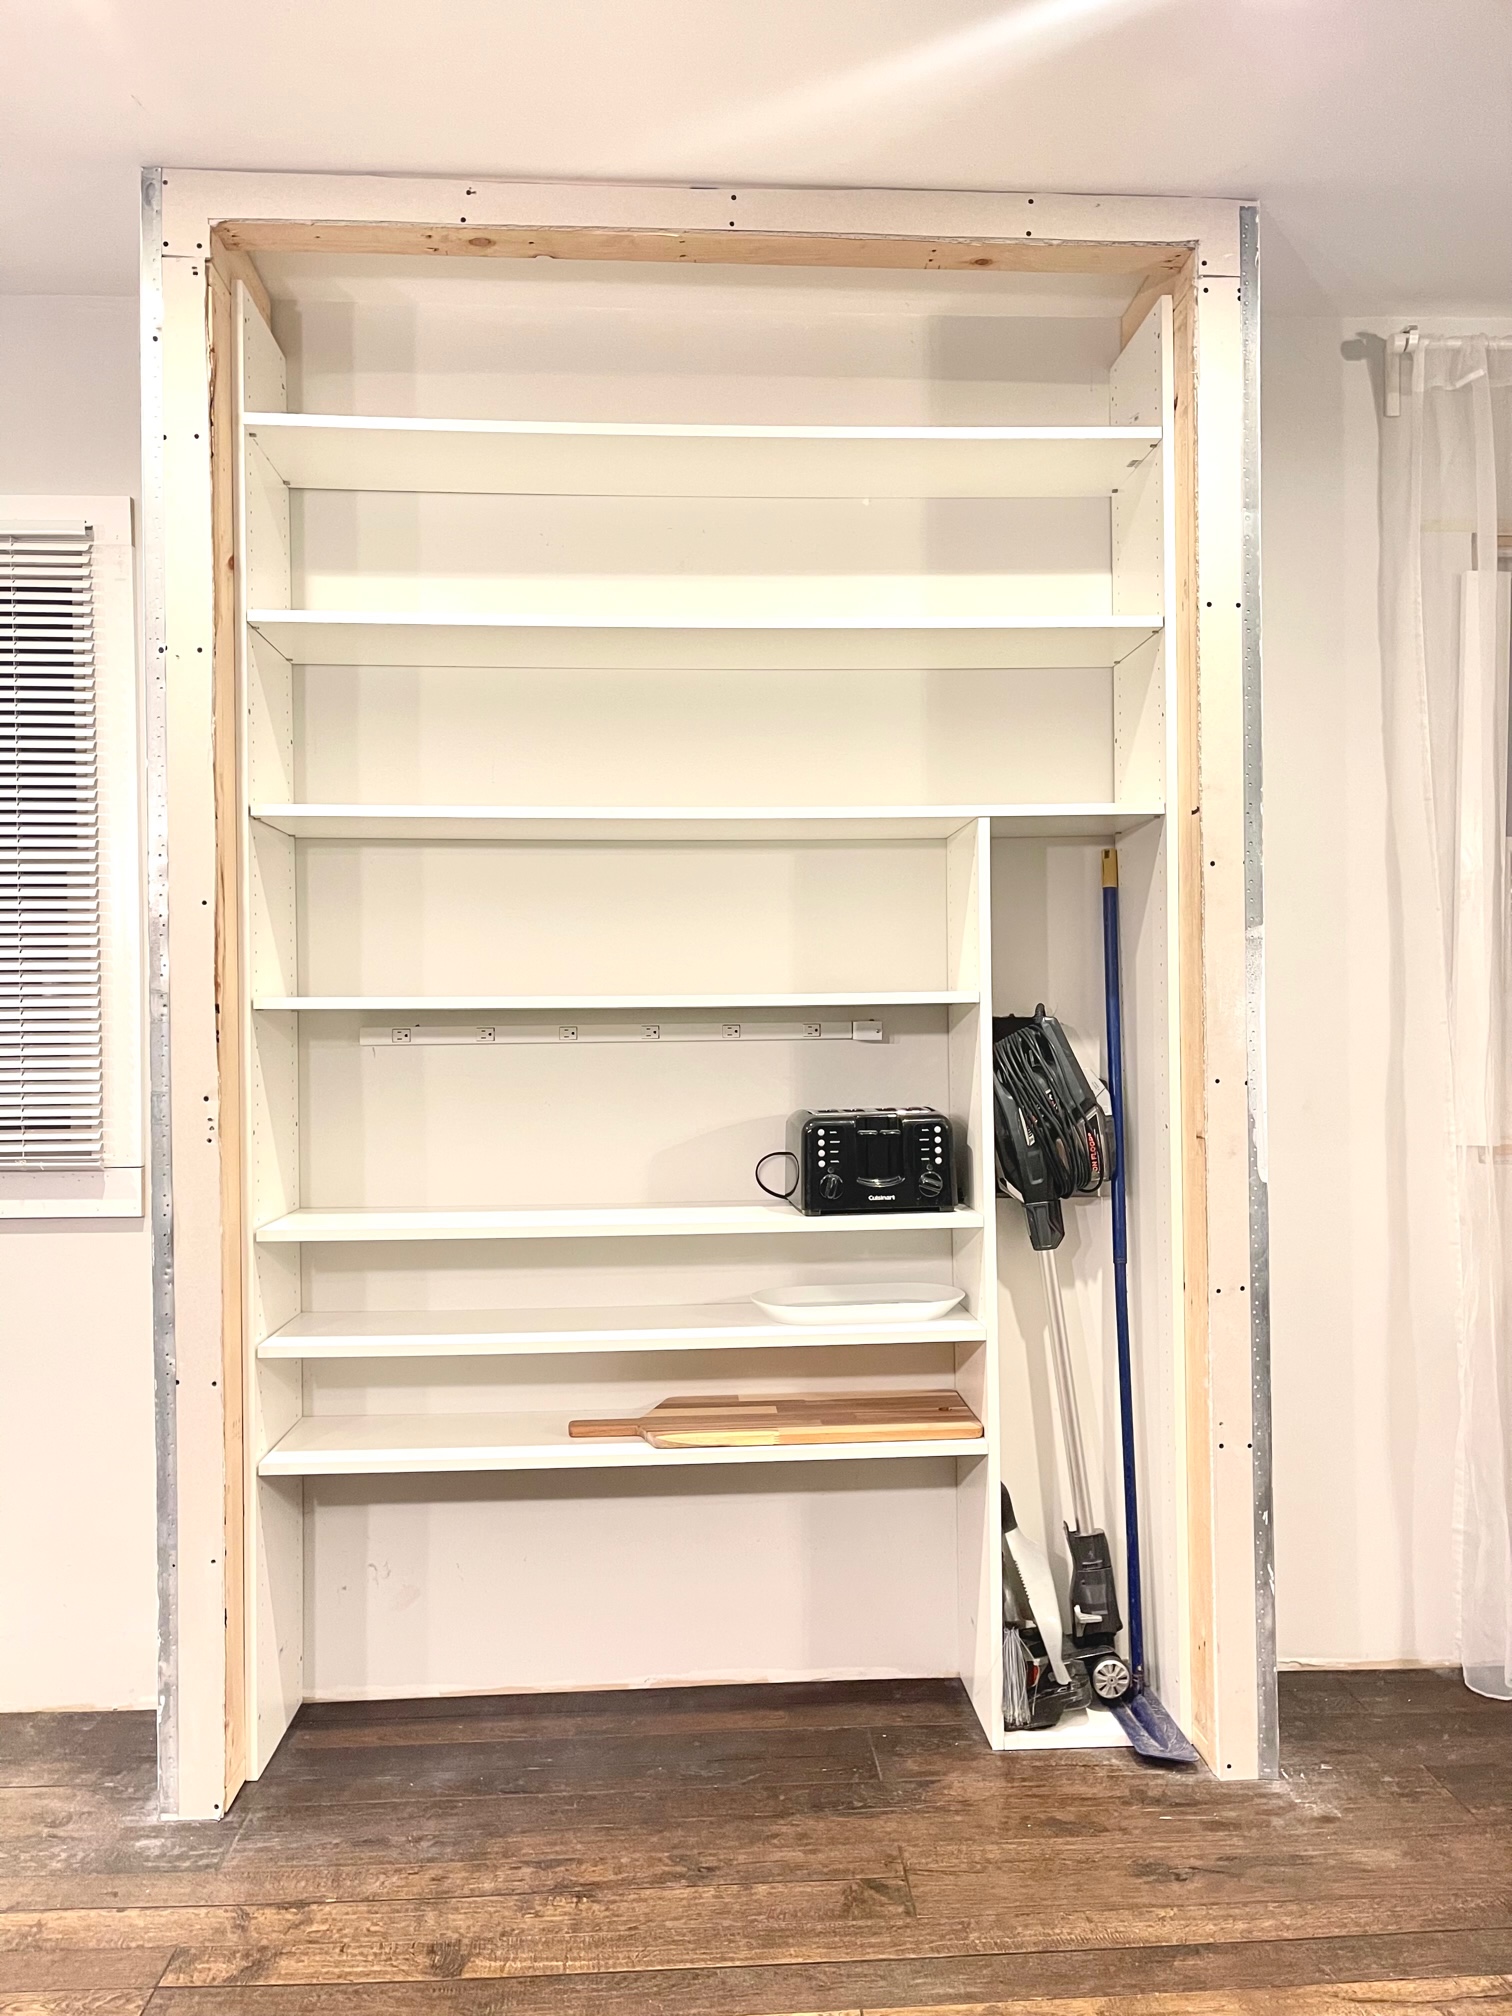
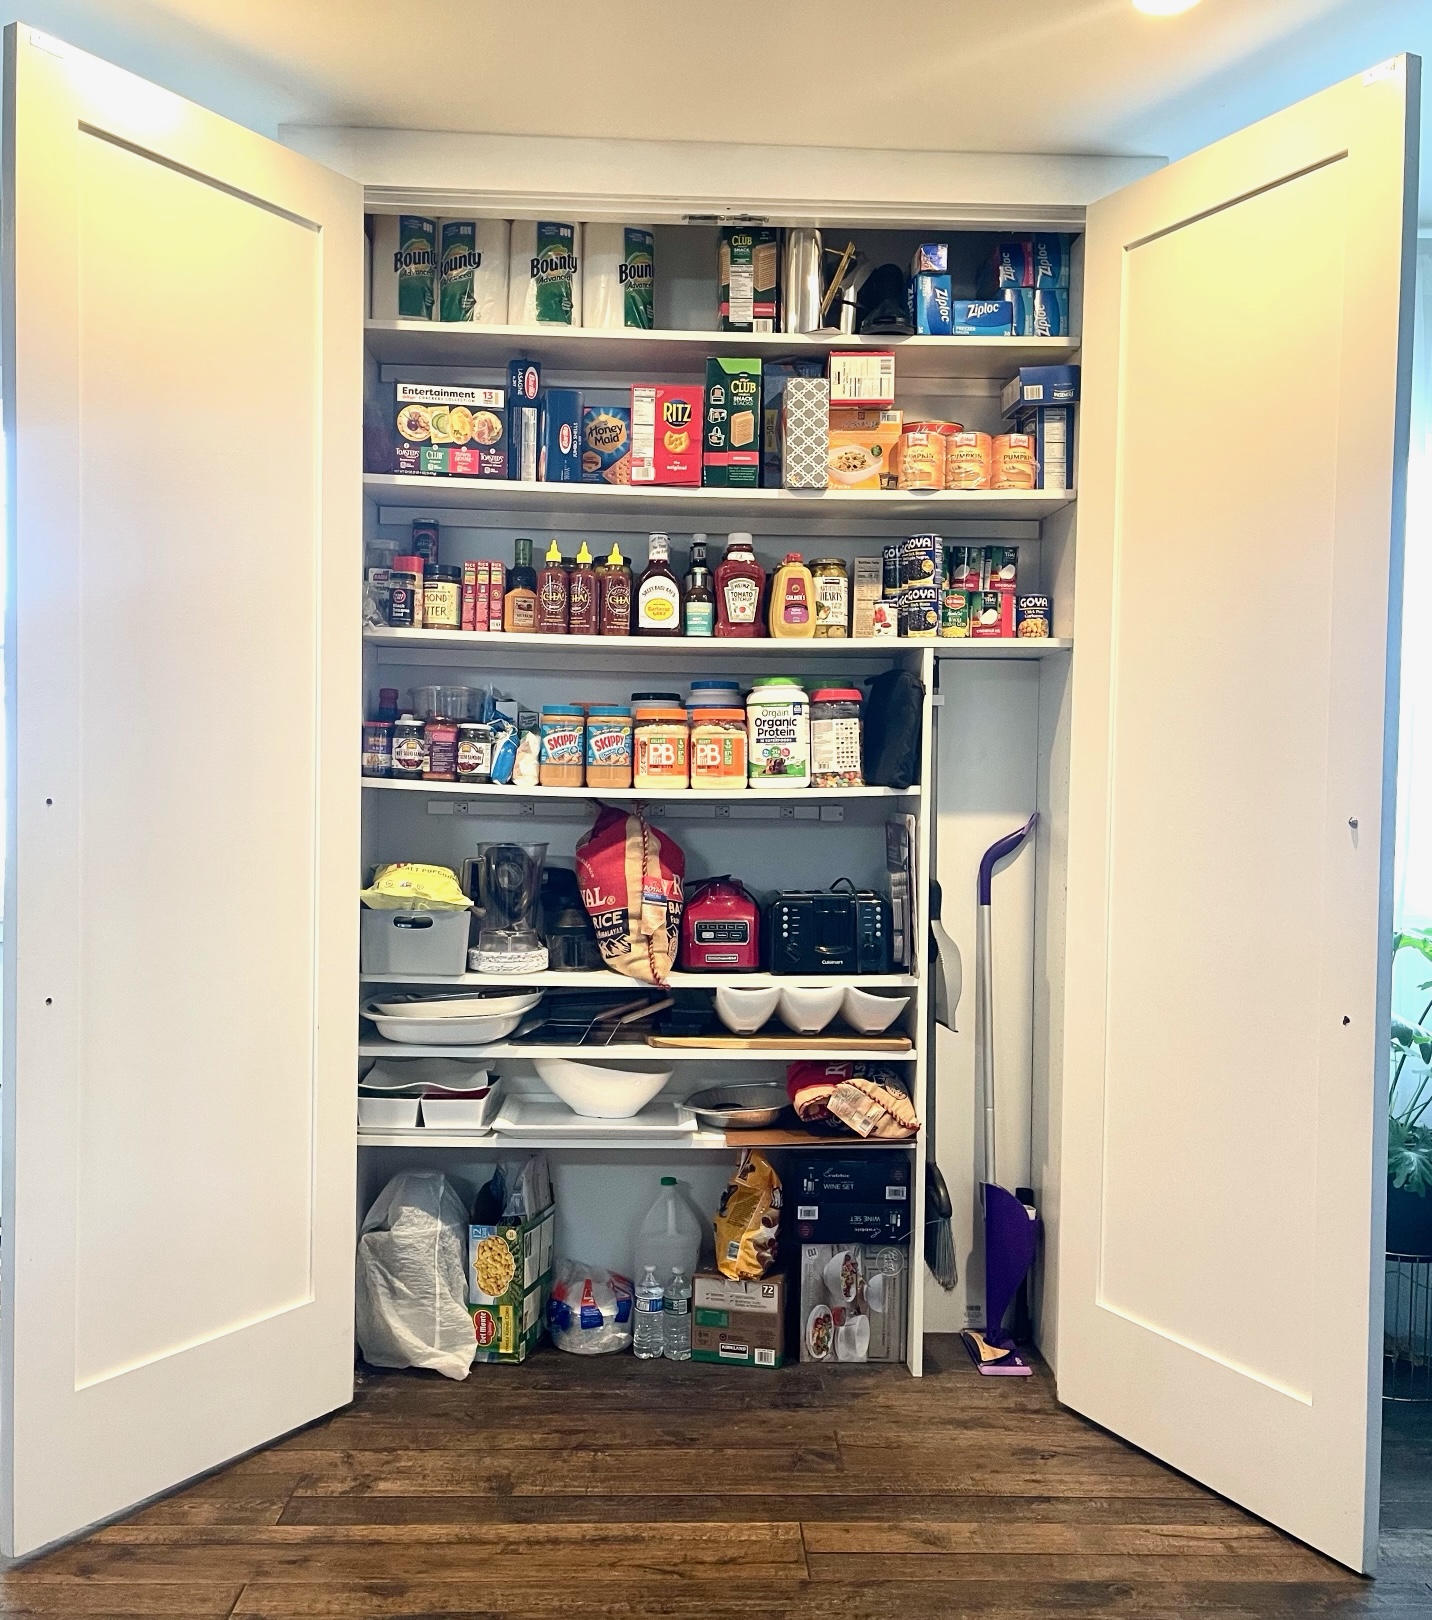
I wanted to keep the closet in similar dimensions as the bookshelf to avoid extending it out too much so as not to obstruct the path. When designing the plans for the shelves, we took into account all the items that will be stored in the pantry closet. We allocated a taller section for the broom, a mop, and a vacuum cleaner. We also added an electrical power strip so that if we didn’t want to move some of the smaller appliances, they can be used inside the closet. I love this feature.
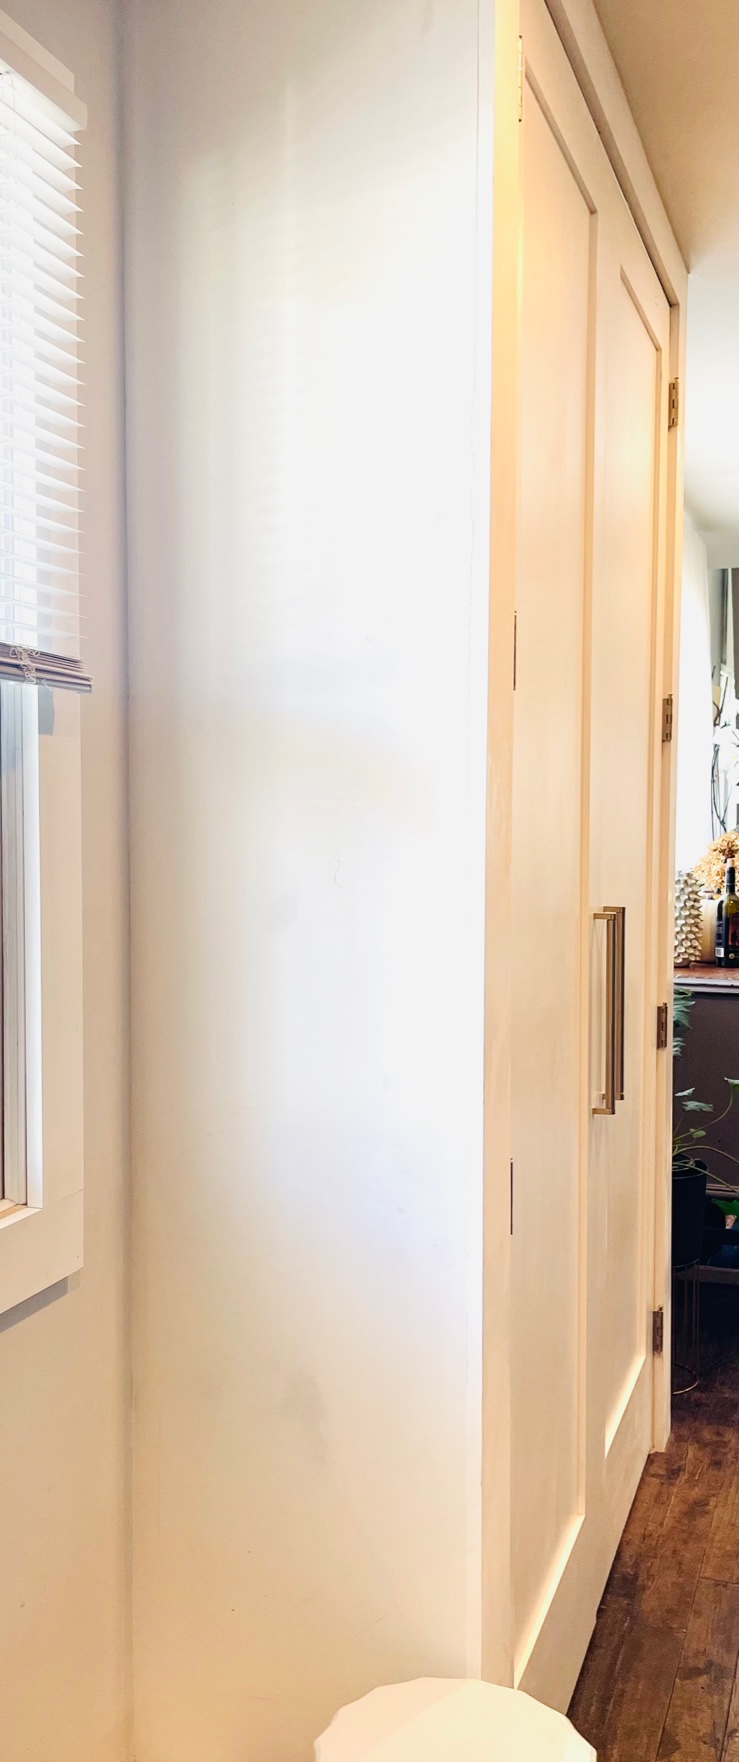
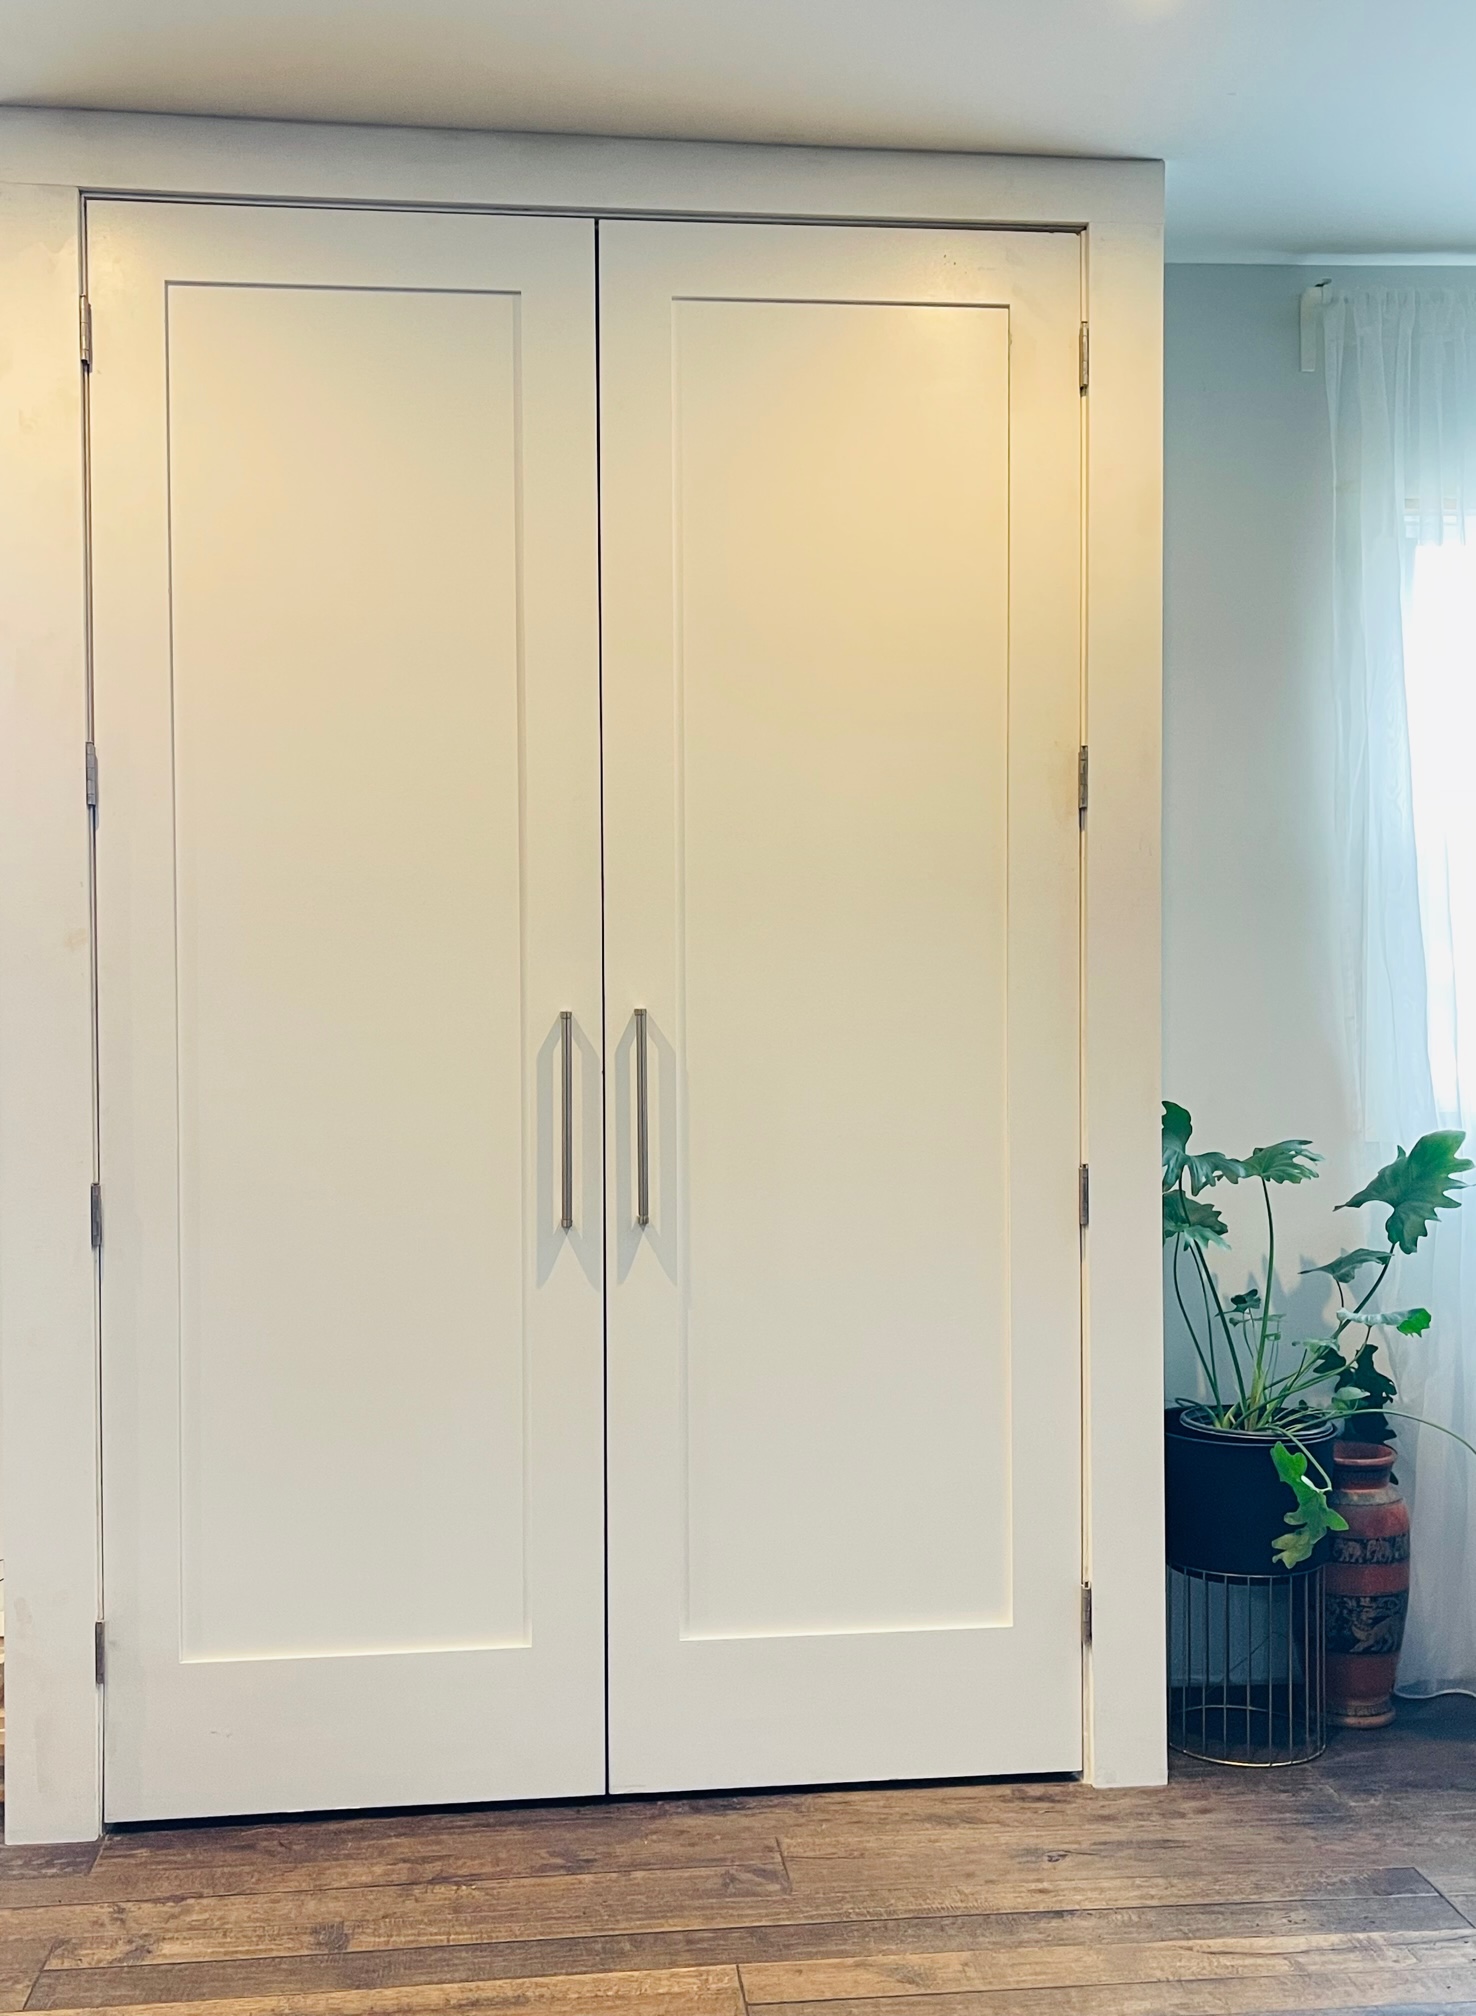
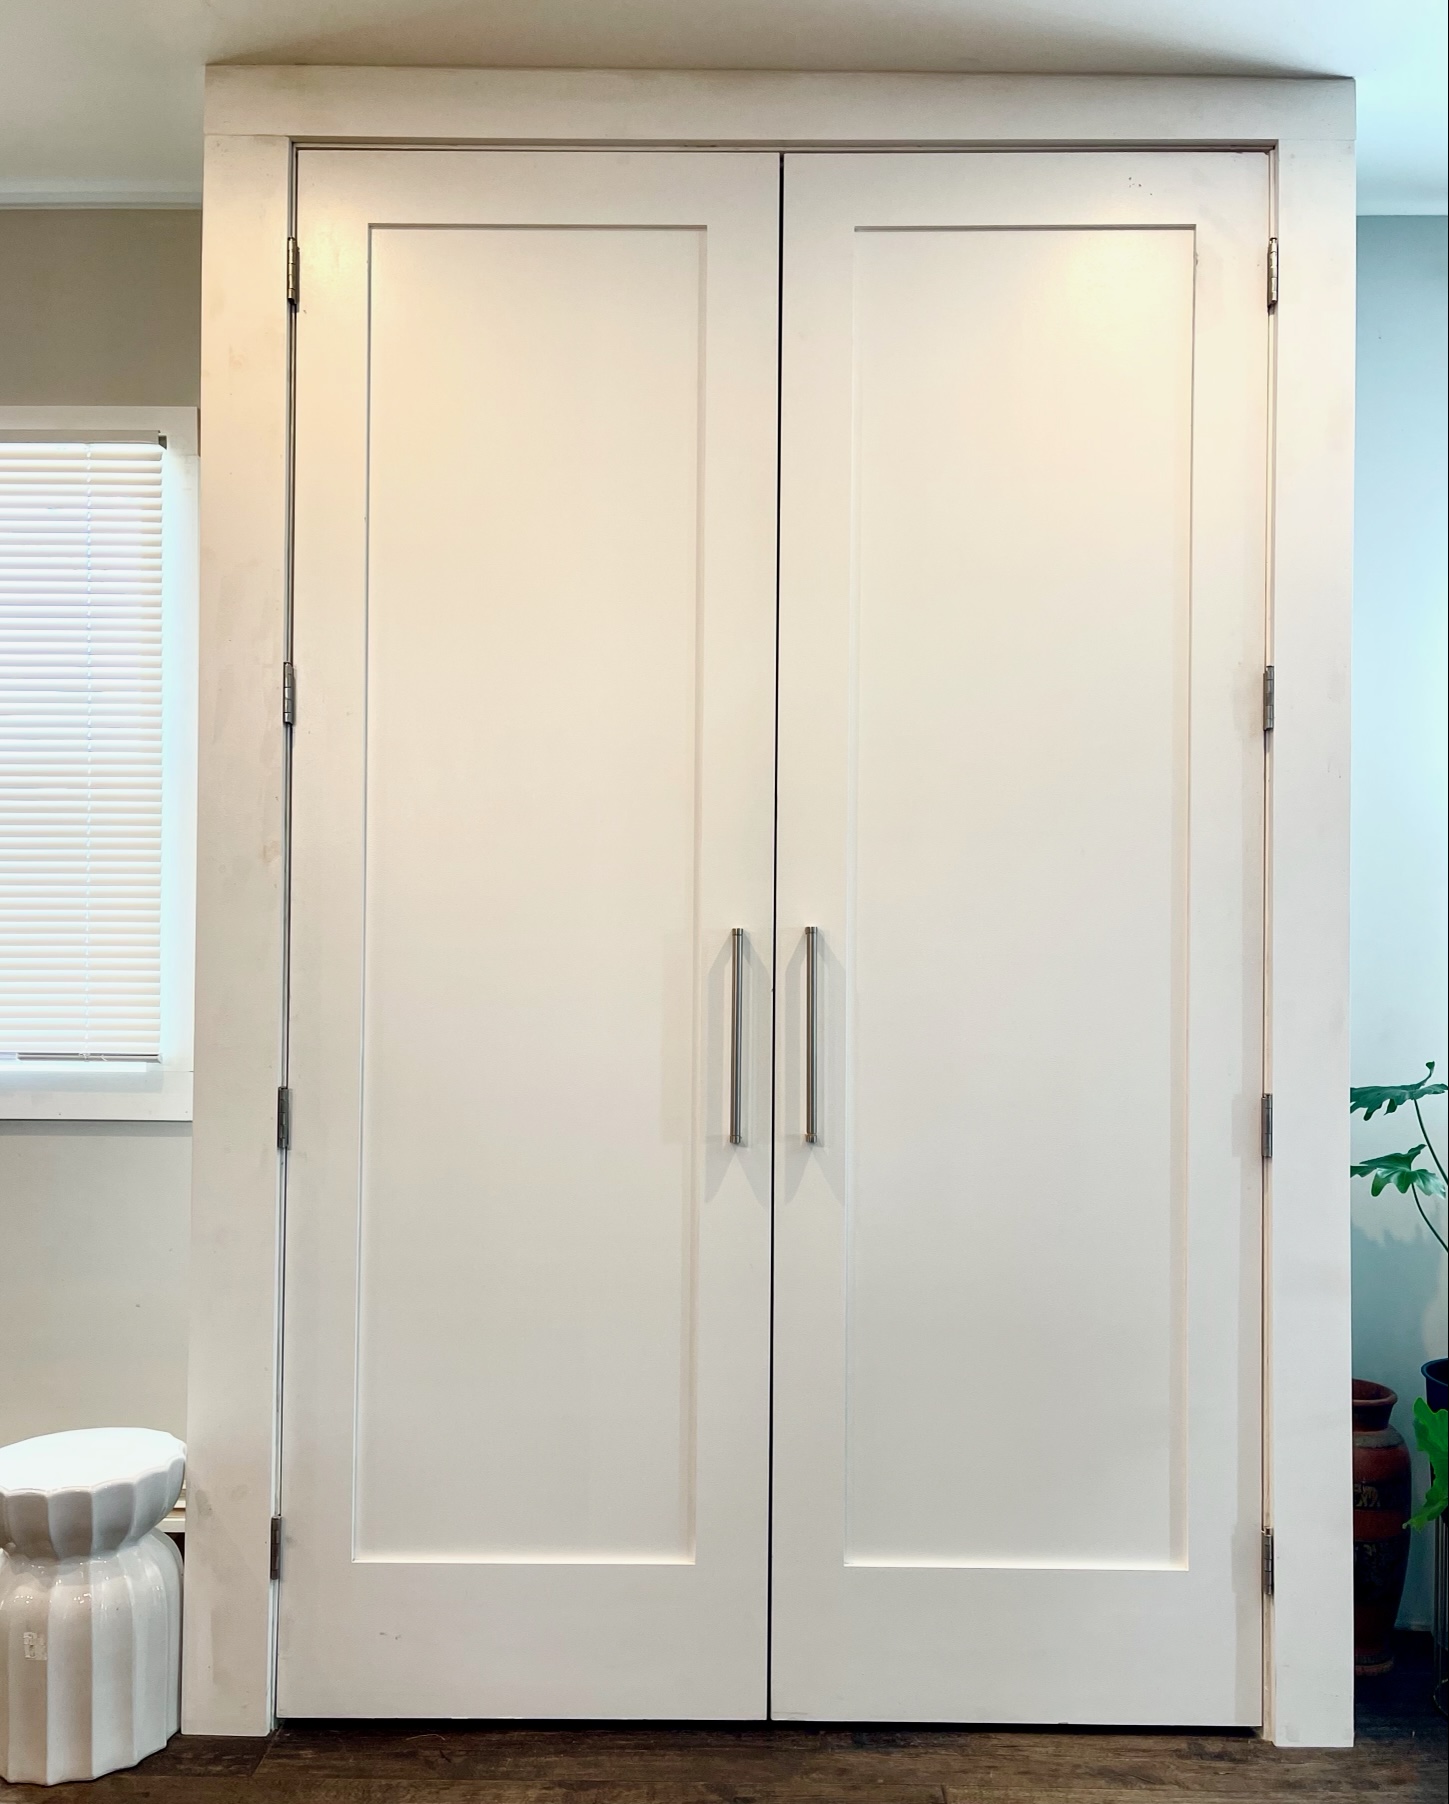
We put custom 8ft doors to the pantry so that we had easy access to top shelves and to maximize the space. I also love the grander appearance of the taller doors.
Supplies needed to build the kitchen pantry
2″ X 4″ studs
1″ X 2″ wood
1″ X 6″ painted molding
Drywall
Drywall compound
Screws
Drywall screws
Sanding block/Palm sander
Doors
Shelves
Door handles
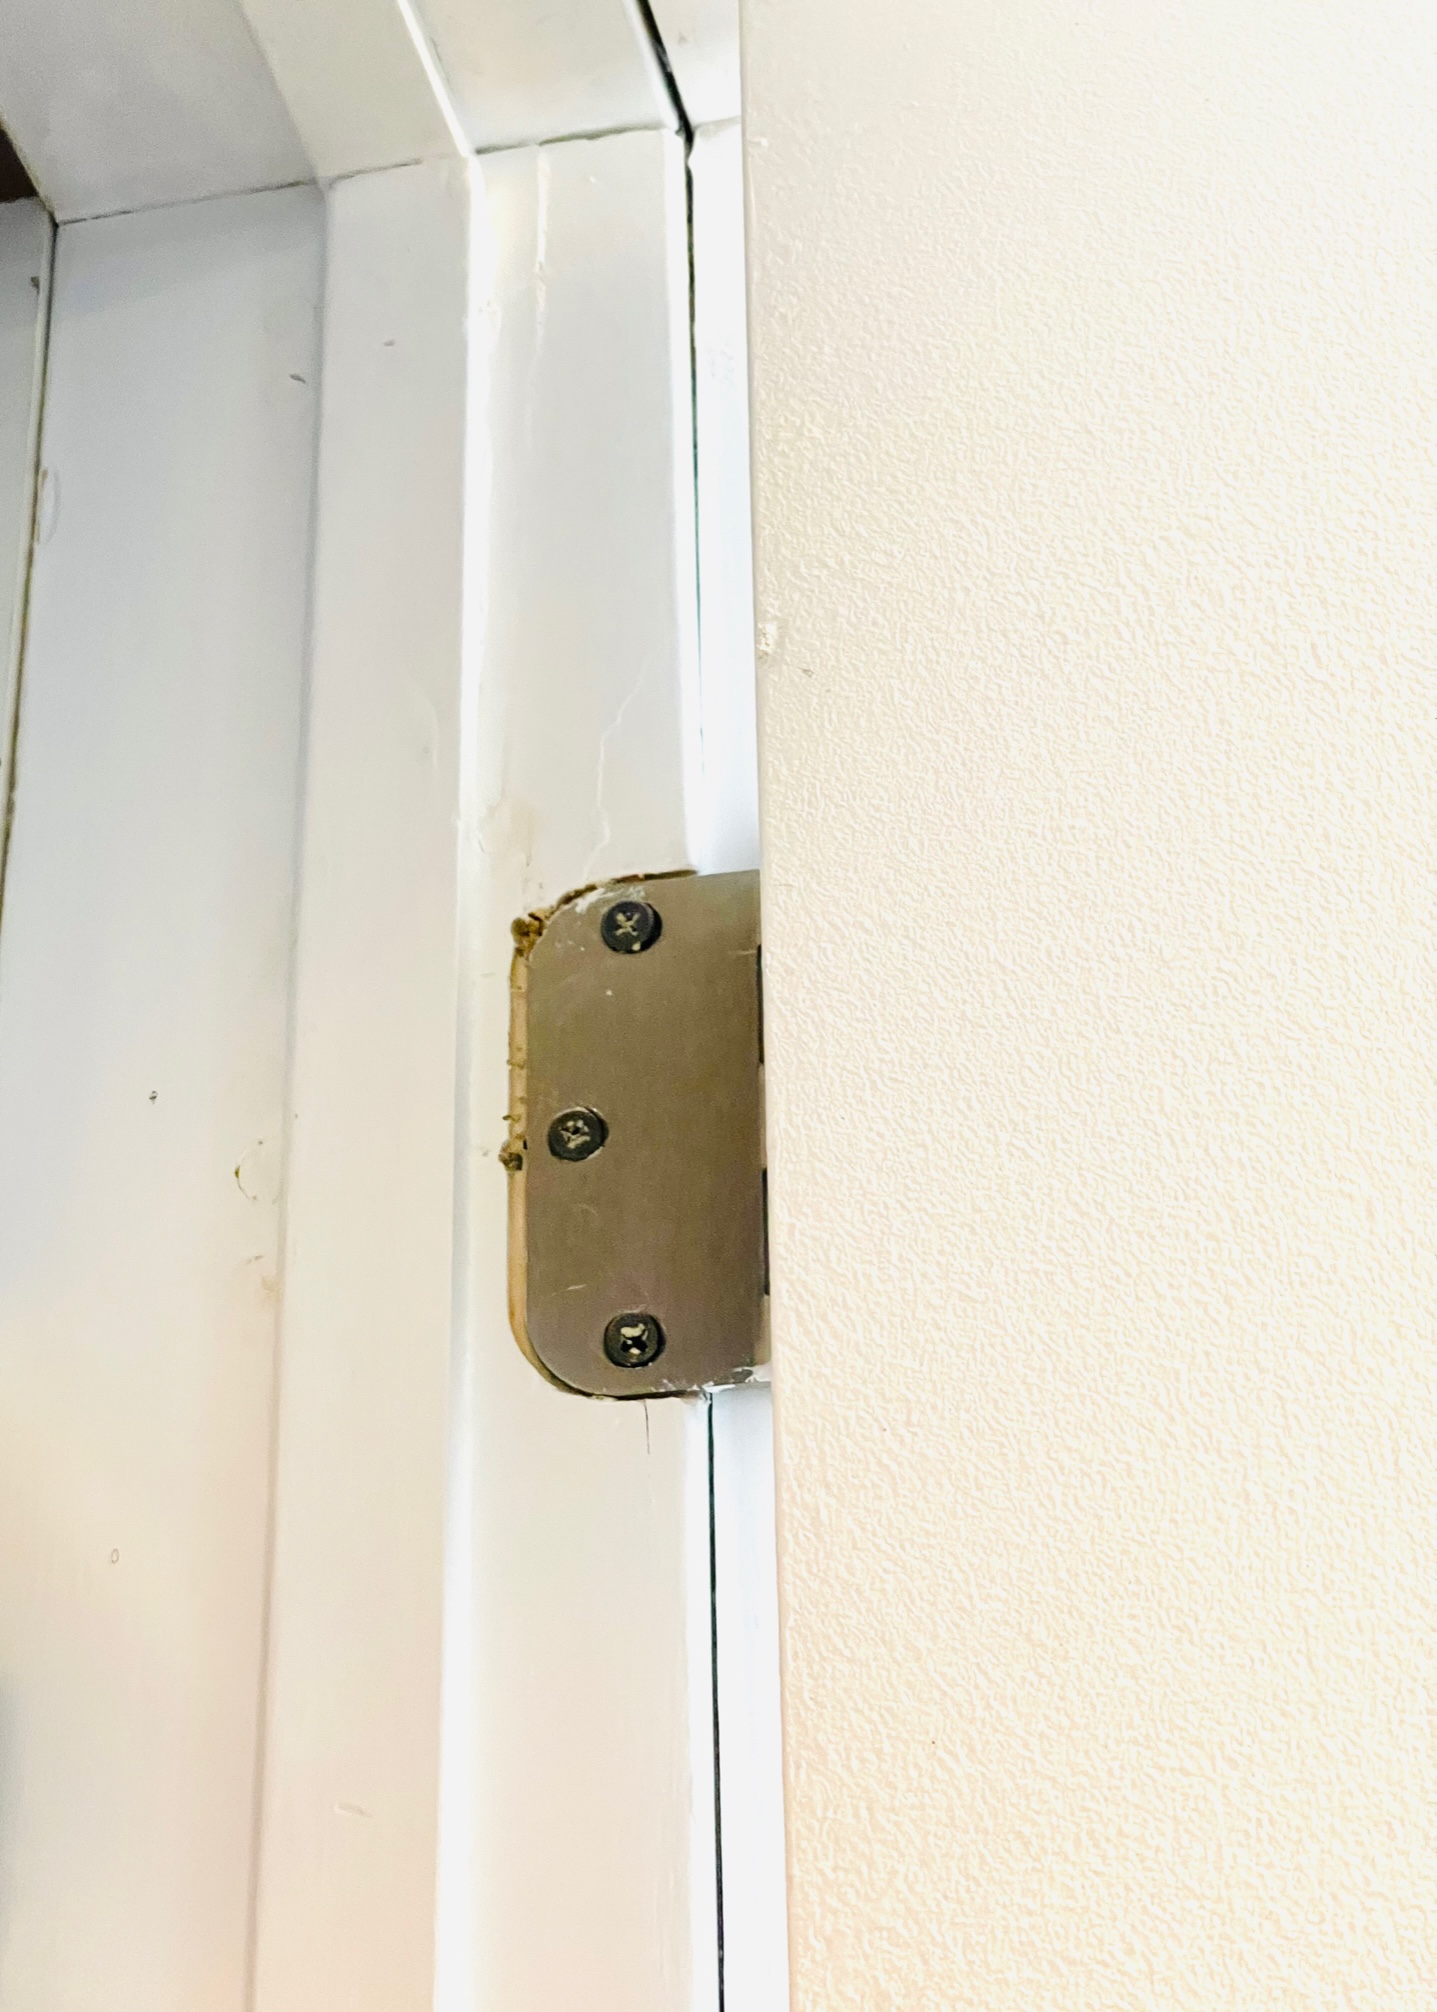
Door Hinges
How to build the kitchen pantry-DIY tutorial
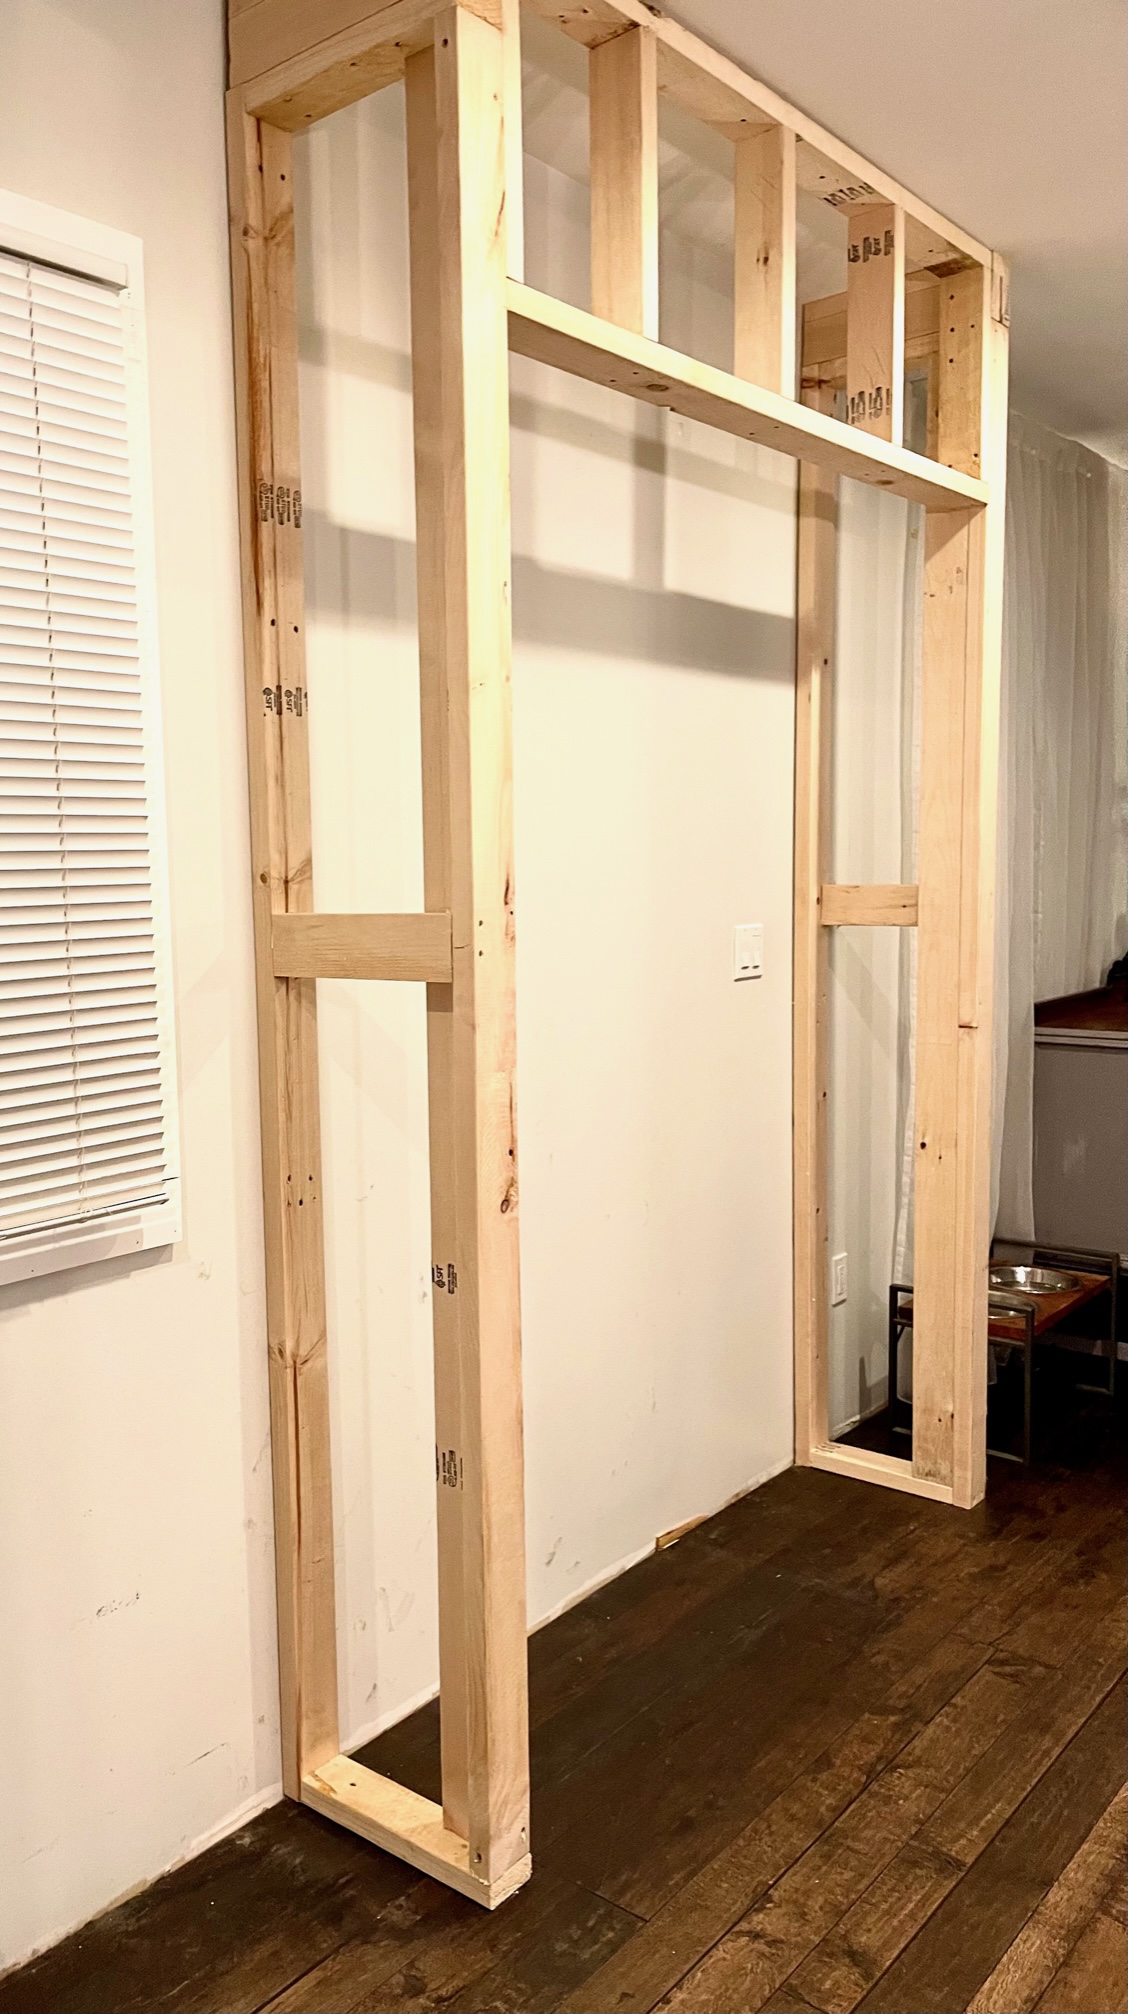
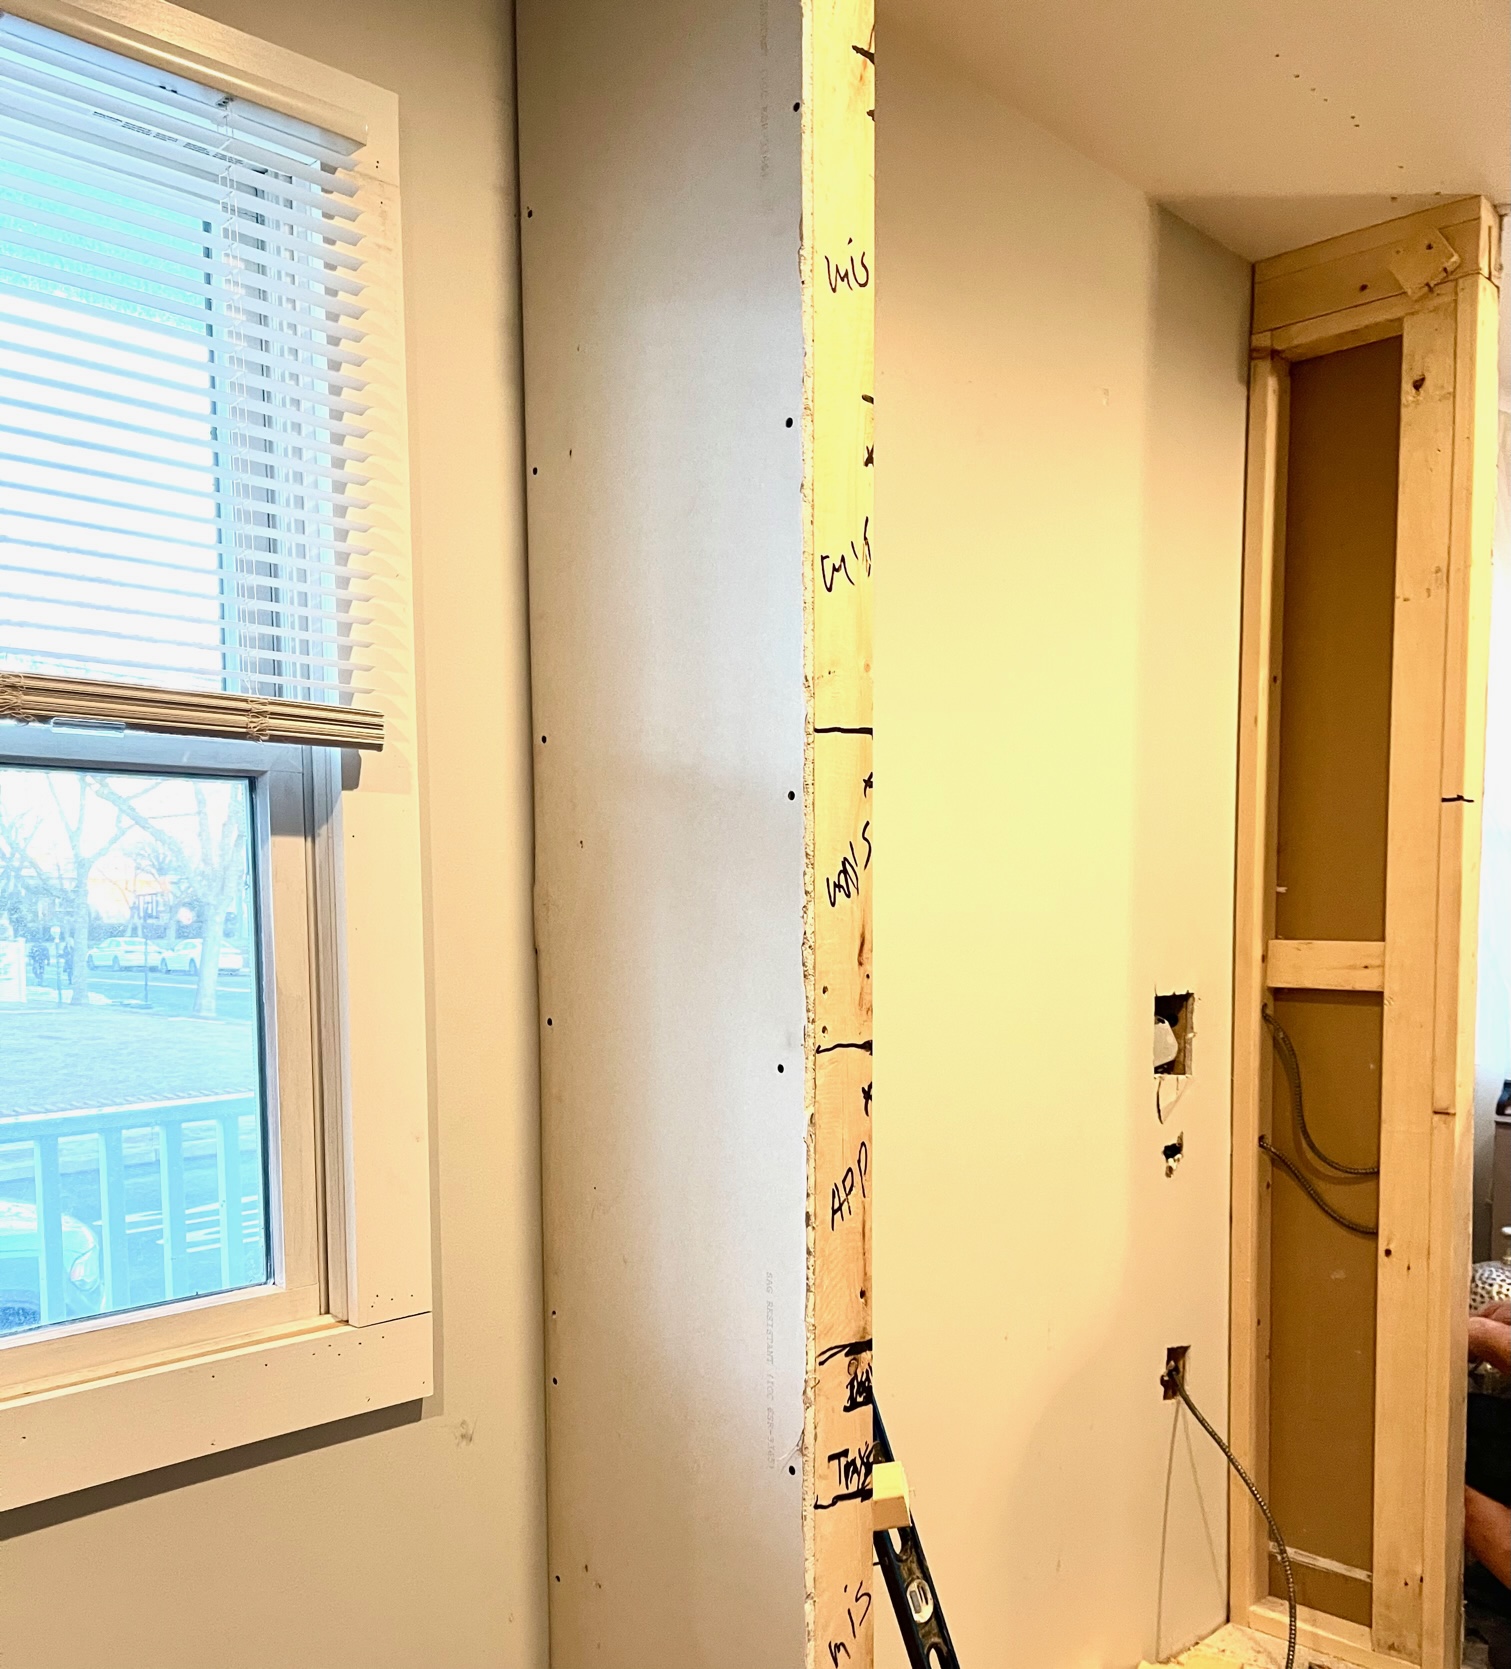
The dimensions for the pantry were 8ft tall X 6ft Wide and 1-1/2ft deep. If you are planning to build a pantry, the space you have will dictate the size of your pantry.
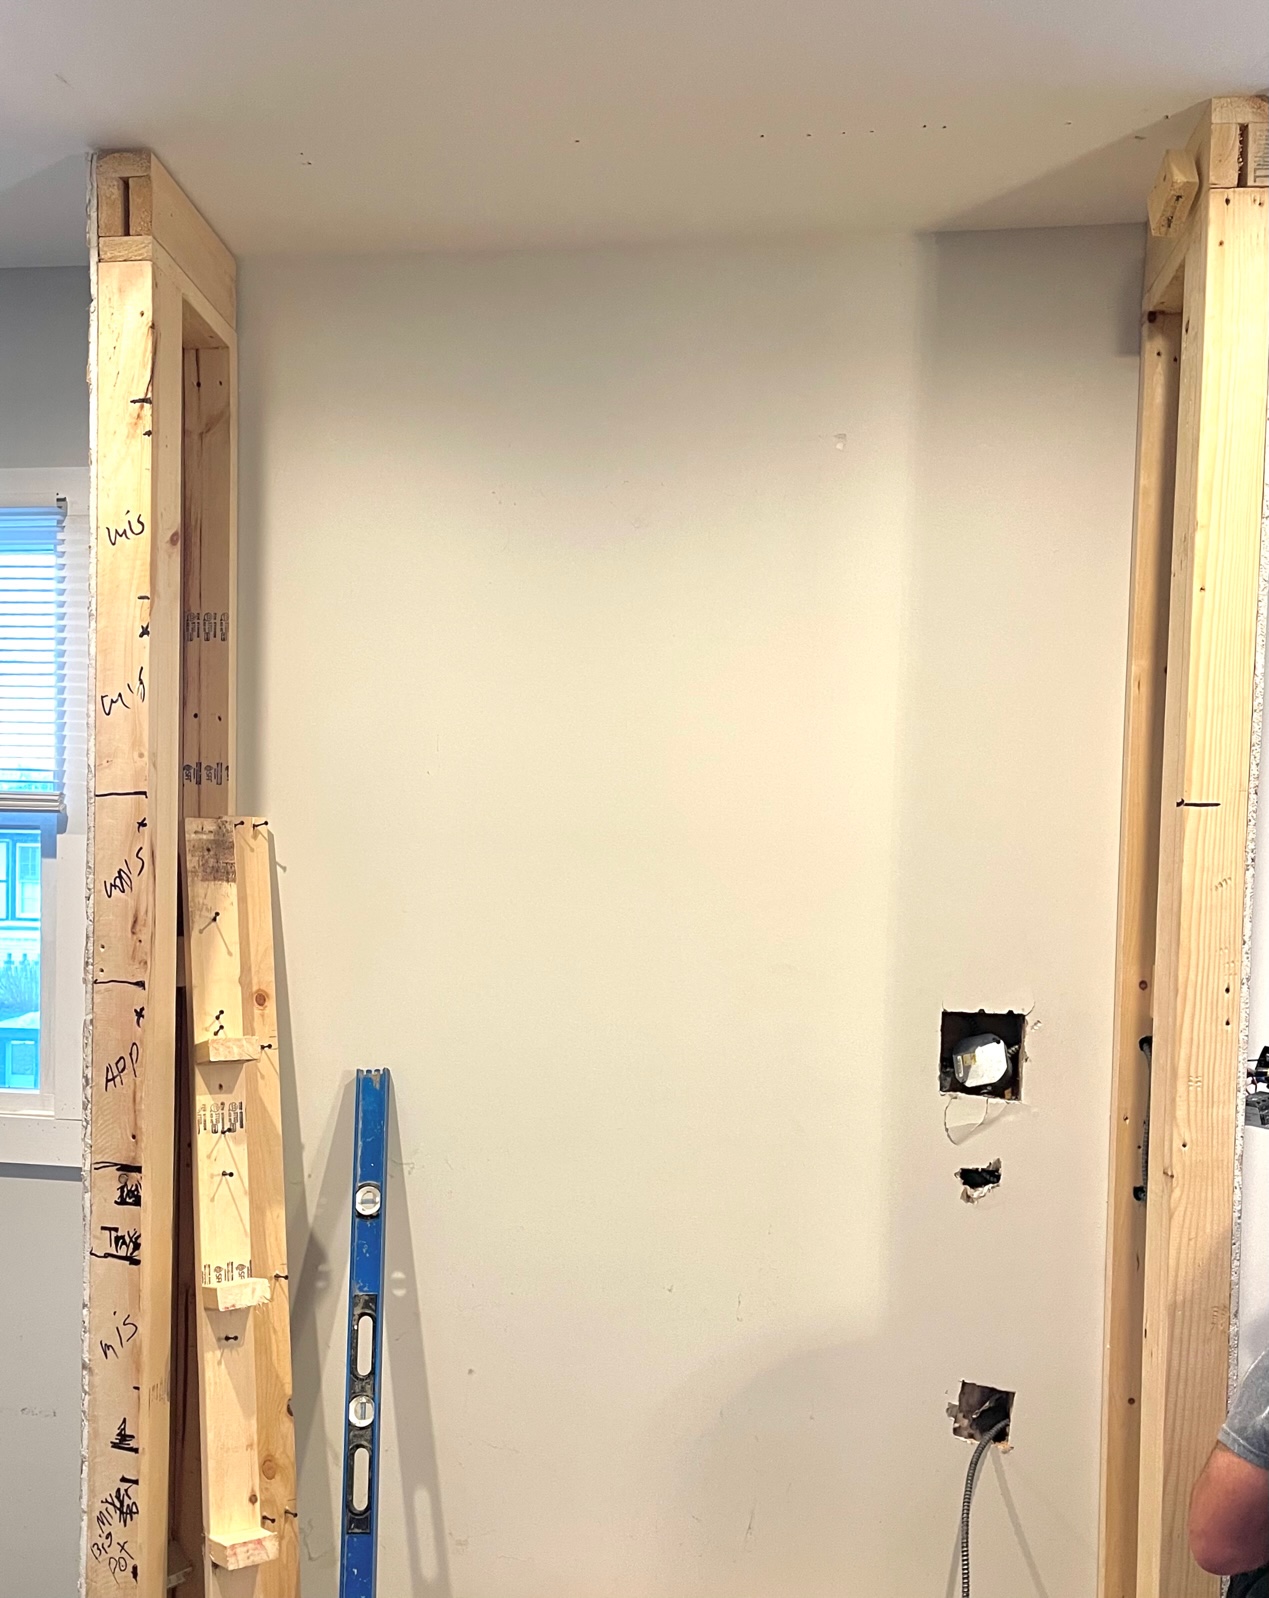
We started by framing the outside of the pantry with 2 X 4 studs to create walls on each side. Then cut drywall to size and secured it to the wood frame.
You can see the steps below… At first, we had framed to put two standard doors for the pantry. But we realized that we would lose valuable space on the top shelf and the access would be more difficult. So we decided to order custom doors from a local windows and doors store.
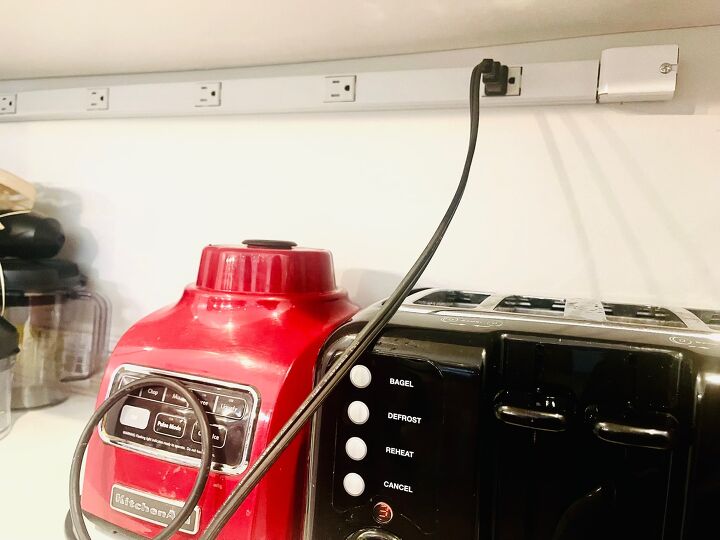
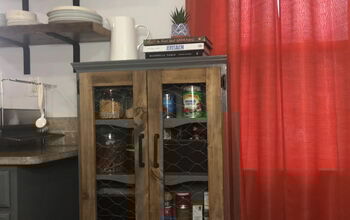
My husband installed a power strip for small appliances inside the pantry. It’s great for an electric pencil sharpener, toaster, or small broiler.

Installing the shelves for the Kitchen pantry
Next, we started installing the kitchen pantry shelves. We allocated a tall section for brooms, vacuum cleaners, mop since we didn’t have a broom closet. We determined the height of the shelves by the items we would put there.
Installing the shelves is pretty straightforward.
After you determine the height of each shelf, make your pencil marks on the wall where the shelves are going to be. Now it’s time to cut 1″ X 2″ strips of wood and secure them to the back of the wall and sides for the shelf to rest on.
Then measure and cut the shelf boards to size and install.
For the broom storage area, we cut the whiteboard panel to the height and secured it to the shelf on top.
After the shelves were installed the sides were plastered and painted the same color as the walls. We framed around the door with 1″ X 6″ molding to finish and it looks great!
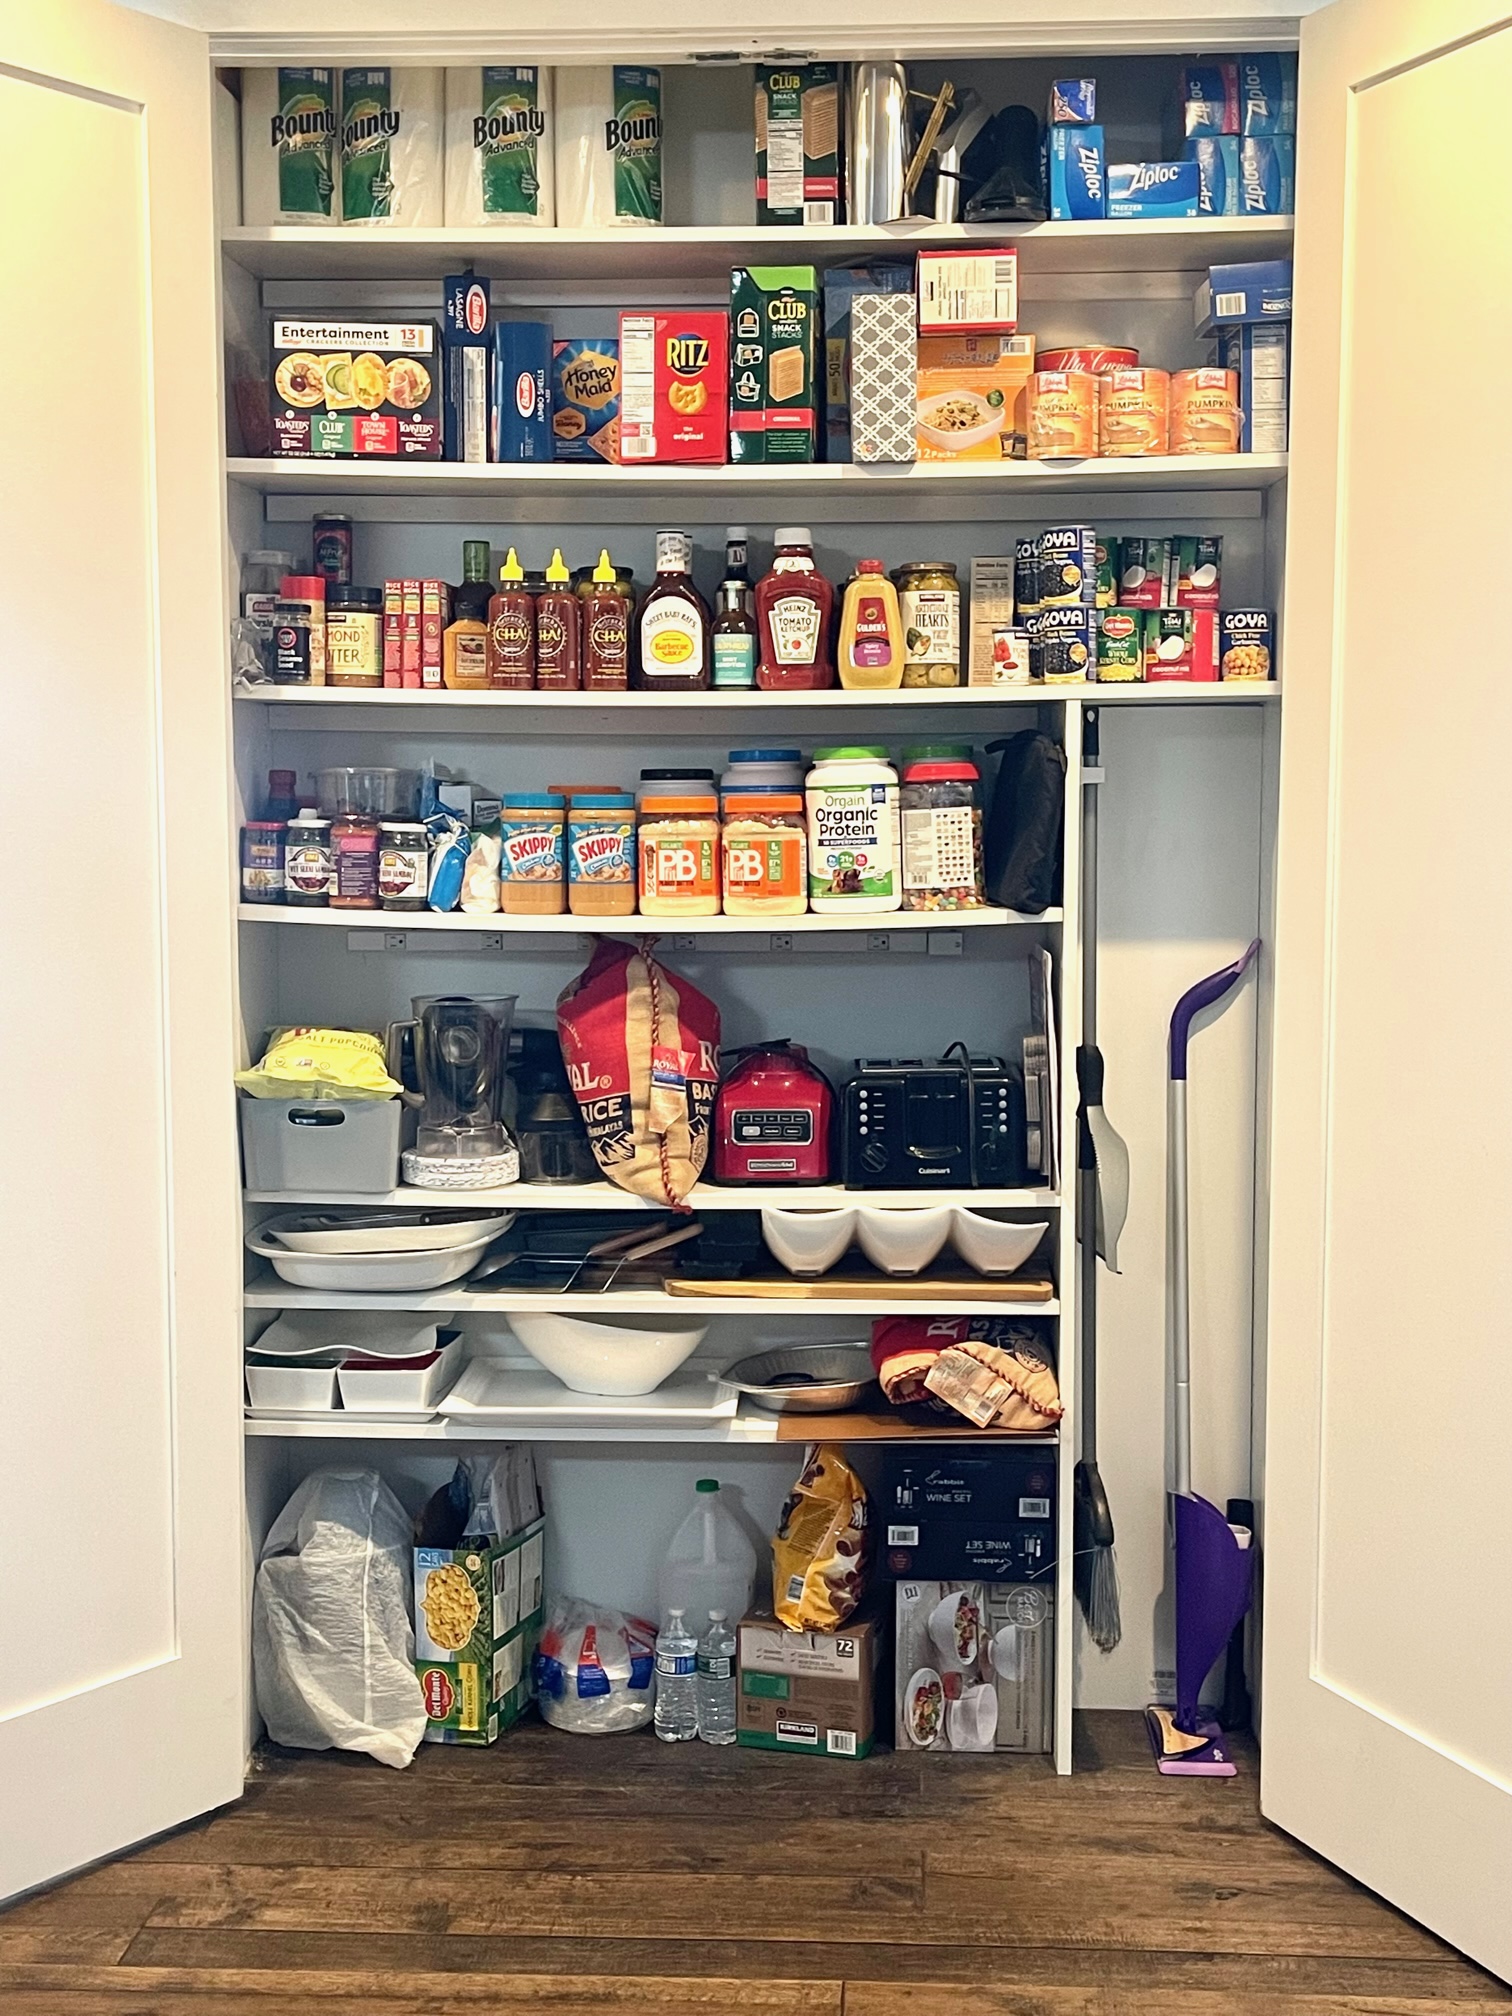
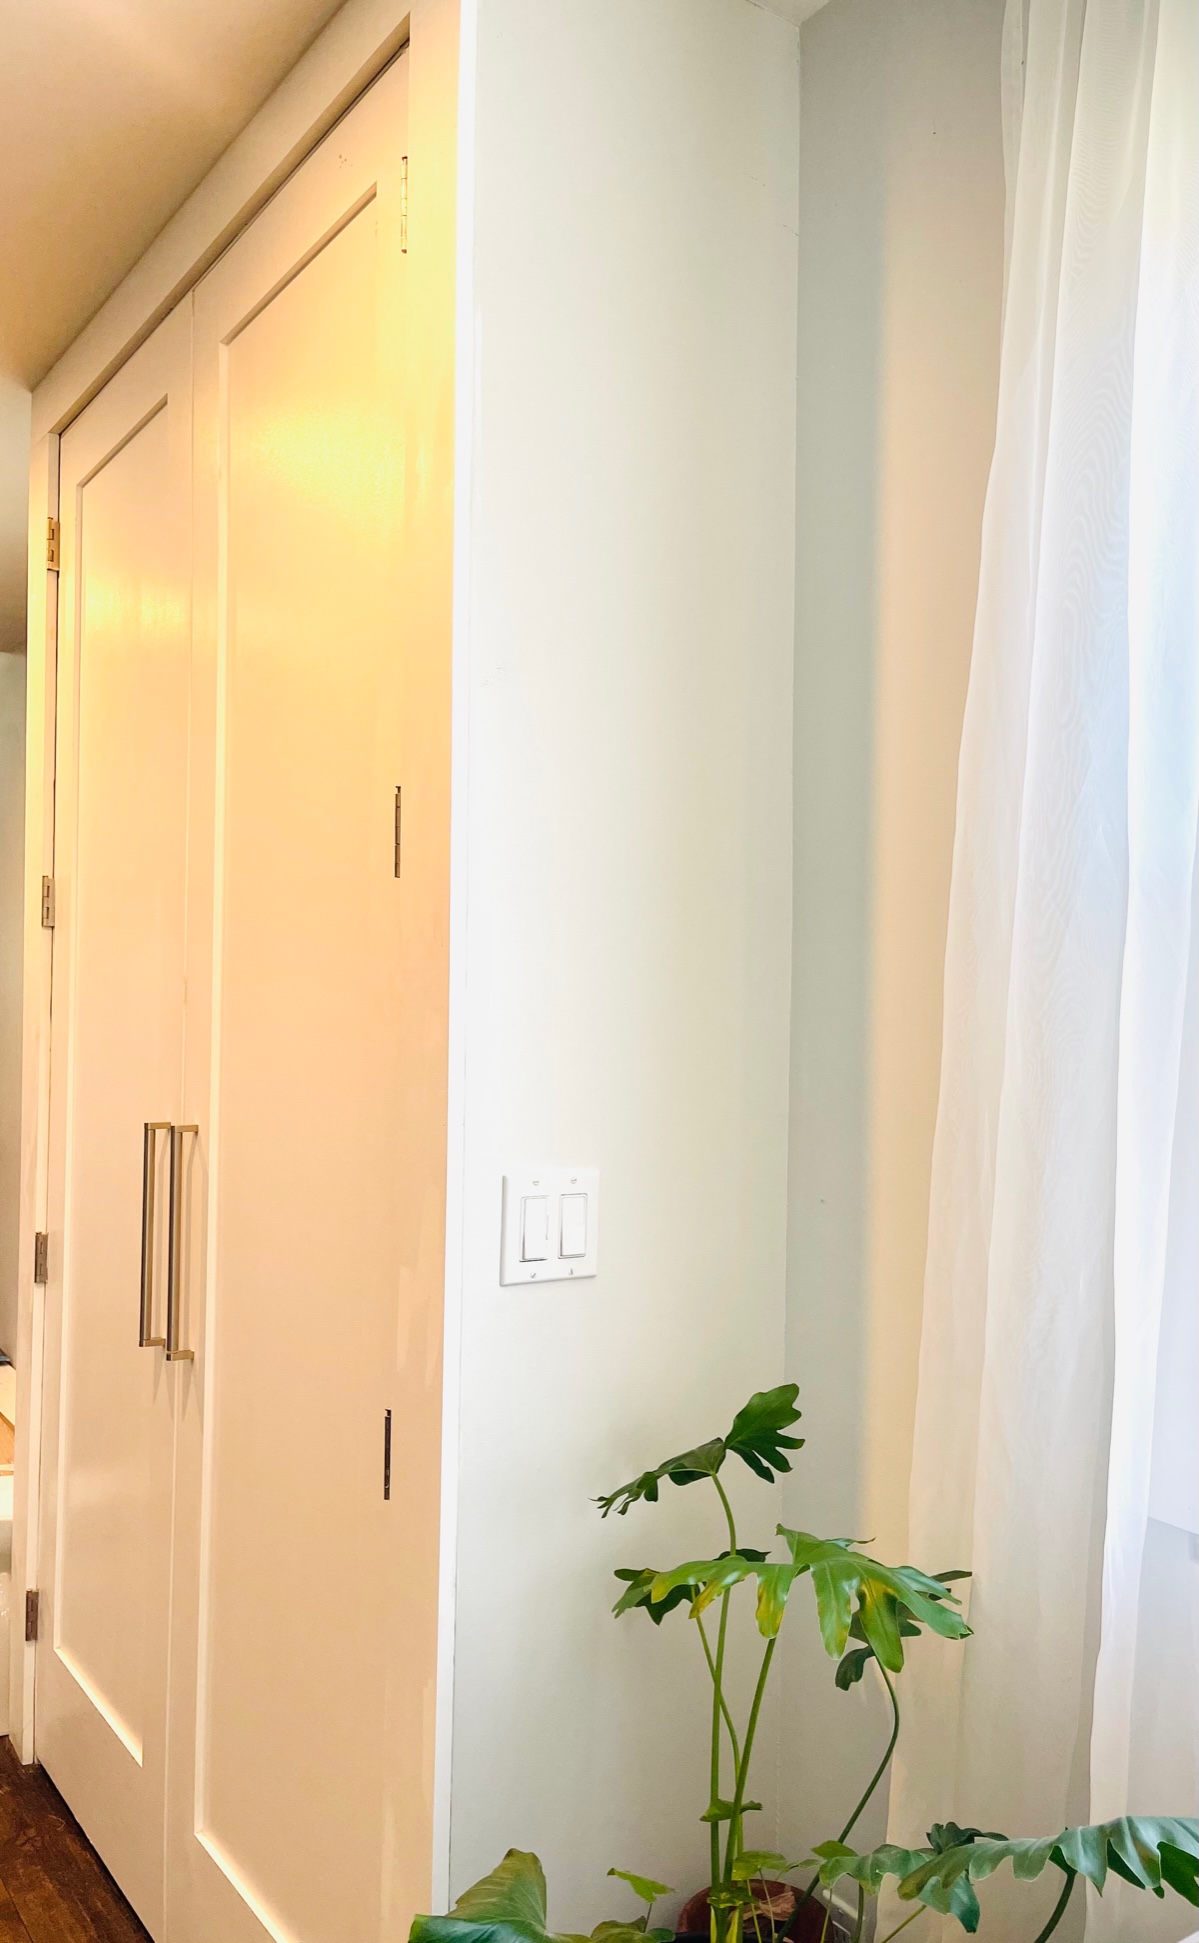
Finally, add the door handles and paint. There you have it, a practical and affordable kitchen storage solution that can be done in a couple of days or in one day.
I love the way it turned out, just have to touch up with a little paint and another great addition to our home is complete.
You can also see how Amanda Seaghetti used a part of her dining area to build a well-needed pantry in one day.
If you need inspiration on other DIY projects, check out them out here.
Thank you for stopping by!

Comments
Join the conversation
-
Hi, this came out beautifully. I also saw a slight sag but until I read the other comments I thought it was me lol. You can reinforce your shelves many ways. The easiest is to get L brackets with no diagonal bar and screw into wall and under the sagging shelf that way you won't loose space.
how to reinforce sagging shelves
Could you please tell me where you got your doors? They are perfect. Thank you for sharing your project and for answering my question.
-
As others noted, the shelves are the issue. Looks like you are using just the cheap particle board shelves. 5/8 plywood would be much stronger. Or 1/2 plywood with a face frame, then it would most likely have a closer match to your kitchen cabinets.


Frequently asked questions
Have a question about this project?
beautiful job! you should try to put a pull out shelf just below the powerstrip. when you need to make toast or something you could just pull the shelf out for easier access. the heat could mess up the upper shelf if toasting right under it. does this make sense?
Where did you get the doors?
We are on track to build one almost identical so this helps me have an idea what mine will look like. We are planning to use the white wire shelving with the tracks up the back so shelves will also be adjustable. great job!