


How to Make This Easy DIY Cement Garden Stool in Just 5 Easy Steps!
This concrete stool makes the perfect addition to any outdoor space. Learn how to make your own cement stools with this easy step-by-step DIY project today.
This post contains affiliate links. Please see my full disclosure policy for more details.
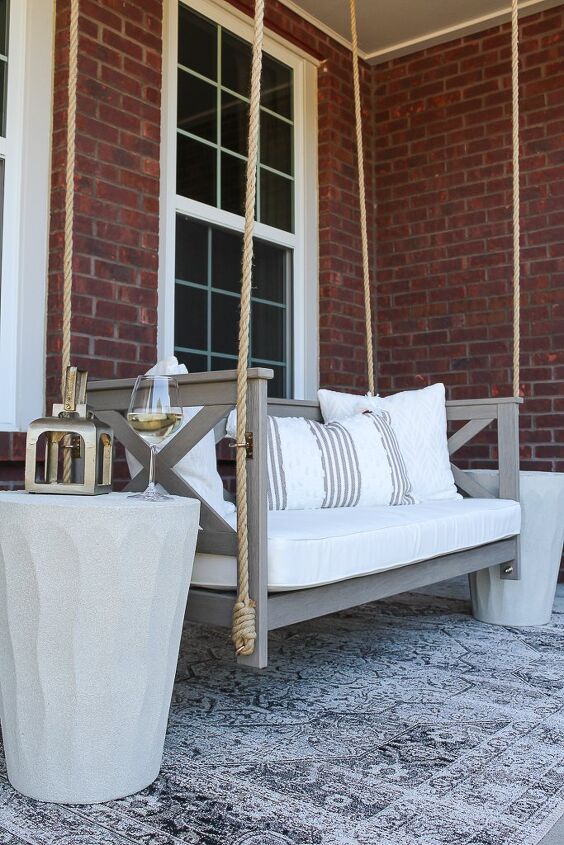
I’ve been eyeing these concrete garden stools for sometime now, but I wasn’t about to pay over $200 for a simple piece of outdoor furniture. And since I’m no stranger to DIY concrete projects, having made these beauties a couple of summers ago, I decided to take on this project too.
Now I did make a few modifications to these cute little stools. Like sealing them with a lighter colored and textured spray paint. But I absolutely love how they turned out. I ended up using each one as a side table and placed them on opposite sides of our porch swing.
Perfect for sipping on morning coffee!
So let’s dive in to how I made these DIY stools.
DIY cement garden stool materials
- Cooking Spray or vegetable oil
- construction adhesive
- (2) 55lb bags of concrete ( I used this brand which is available at Home Depot, but you definitely can go cheaper)
- Spray Paint (optional but I do recommend some type of sealant)
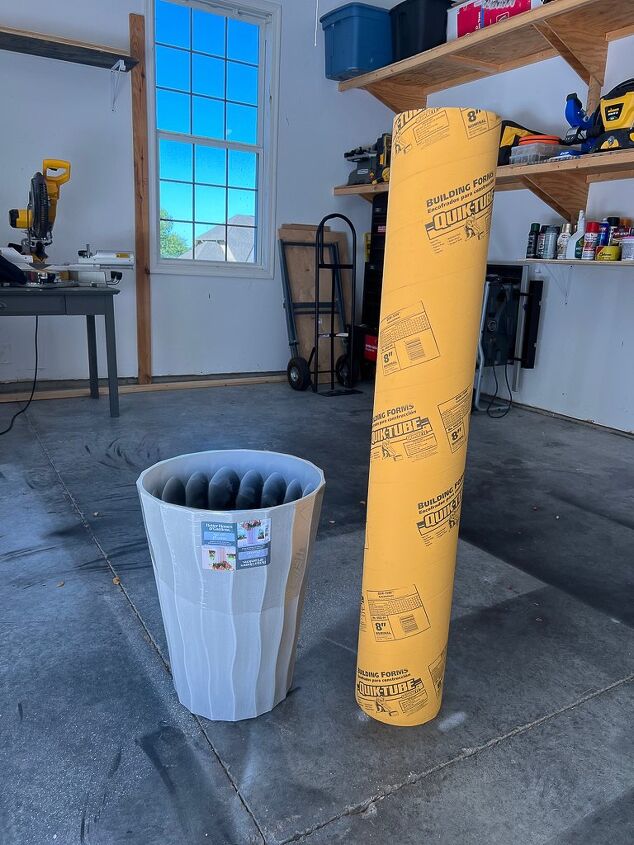
- Concrete Mold (I used a simple outdoor planter from Walmart)
- concrete form tube ( I used 8 inch, but your size will depend on the diameter of the planter you choose)
- small piece of scrap wood to cover top of concrete form tube
DIY cement garden stool tools
- Rubber Mallet
- 5-gallon bucket
- Power Drill and cement mixer attachment
- level
How to make the DIY cement garden stool
Now before you get started, I just want to preface that working with concrete does have a little bit of a learning curve to it. Your first attempt may not be quite perfect, but the great thing about this project is that you can easily cover any minor imperfections with a simple can of spray paint.
Also, if you choose to go with the type of cement that I used, I gotta wan you that this stuff dries and sets, super fast. Which means that you’ll probably see the different pour lines from mixing separate batches of concrete. So if that bothers you at all, then you’ll probably want to use a more traditional cement mixture.
You can see exactly what I’m talking about in this photo here. I wasn’t prepared with how quickly this material cured, but I was super happy that I was able to use my new stools after just a few hours.
And lastly, concrete is heavy! So if you plan to mix and pour this on your own, which I was able to do, then I suggest working in small batches. Don’t go crazy trying to fill your 5-gallon bucket to the top with concrete.
Okay, let’s get started!
Step 1 – Prepare your bucket mold
Did you know you can use practically any plastic object for concrete forms or molds?! I stumbled across the perfect planters at walmart to mimic the look of the tables I was going for. But you can choose any bucket or planter in your desired to shape.
The key to removing the dried concrete from your mold is in using a release agent. Without getting too technical, a release agent is basically just a slick coating that lines the entire mold to prevent the concrete from adhering to it.
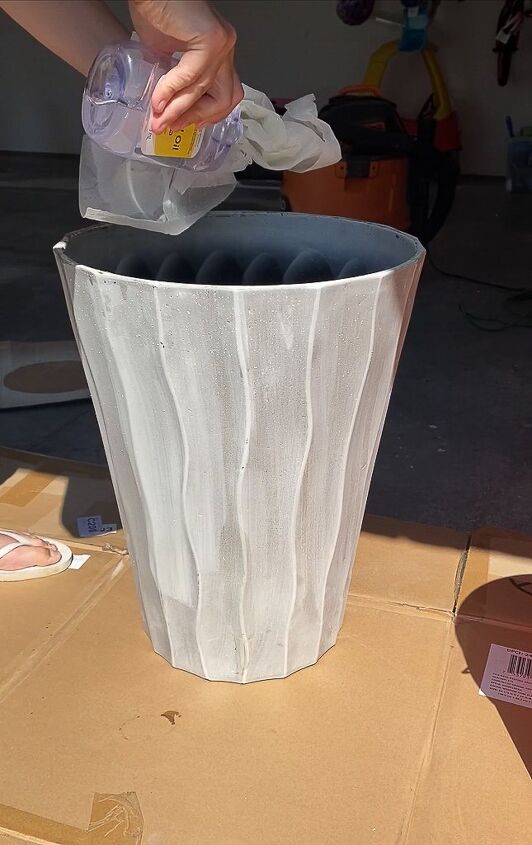
You can use any type of vegetable oil, or cooking spray, but I happened to have some mineral oil lying around and worked perfectly. Just make sure that you apply it generously. This isn’t the time to skimp on materials.
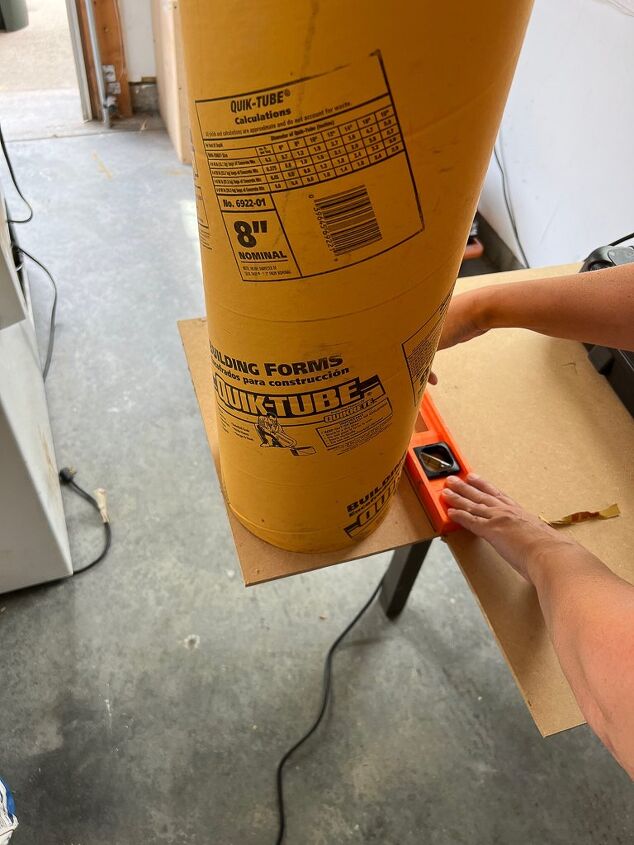
Step 2 – Modify your concrete form tube
I knew that if I poured the cement for these stools into a solid mold they’d be entirely too heavy for anyone to move or lift. So I decided to se a concrete form tube in the center of the planter and simply pour my concrete mixture around it. But I had a little modification to do.
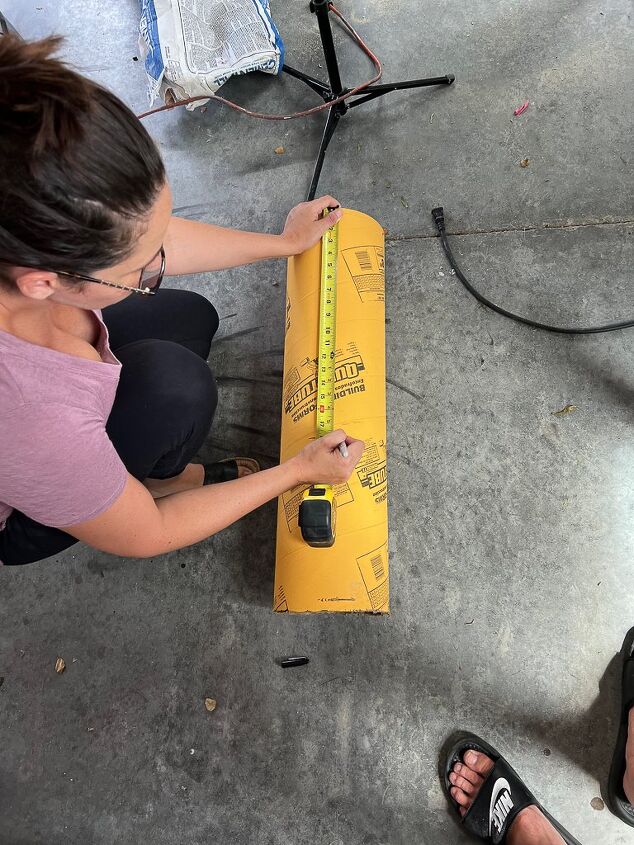
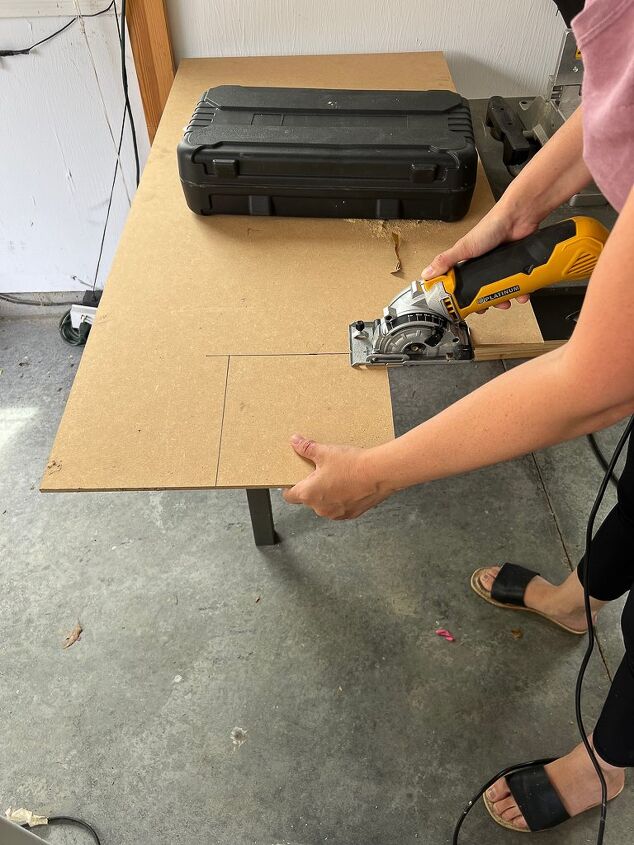
I used a jab saw to cut the length of the tube down to size. I wanted the tube itself to be about an inch or two shorter than the actual planter so that I could pour a solid layer for the concrete tops.
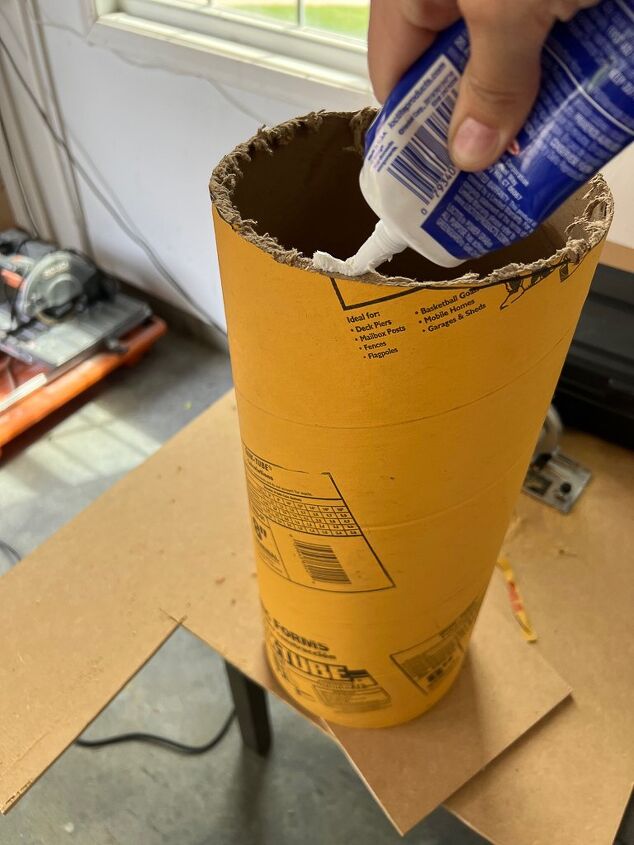
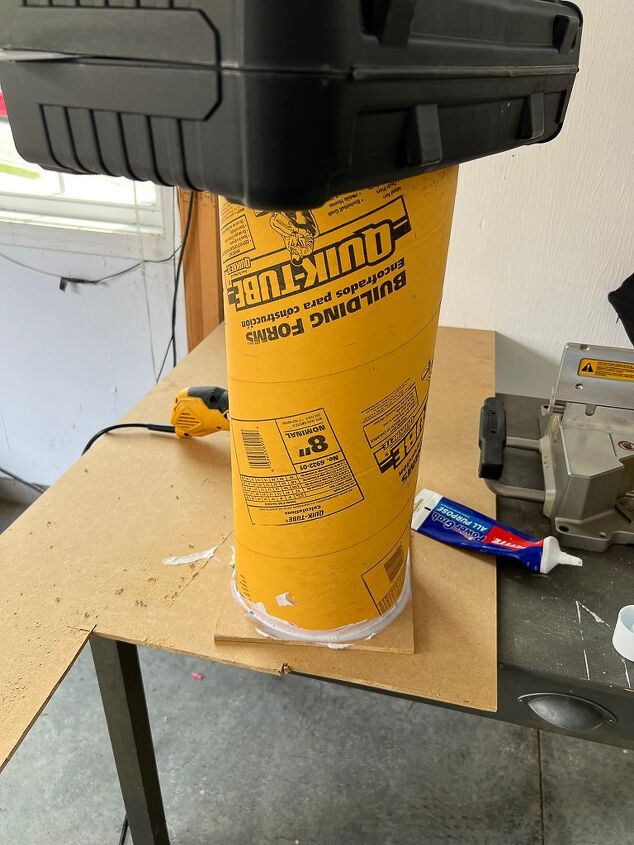
Then I trimmed down a spare piece of plywood, just large enough to cap the top of the concrete tube, and applied construction adhesive to the rim of the tube.
I immediately capped the tube with the wood piece and allowed it to set up and dry for a few hours.
Step 3 – Prepare your concrete mixture
The next step is to prepare your concrete mixture. Start by adding water first and gradually mixing in your cement as you go to reach a cake batter like consistency.
You don’t want it to be overly watery, but you also can’t have it so thick that it doesn’t pour easily. It’s really about finding that happy medium.
Step 4 – Pour your concrete mixture
Start by pouring a thin layer in the bottom of your planter or mold. Mine was roughly half an inch. Next set your capped concrete form directly in the middle of your planter. Make sure to settle it in nice and snug so that it resists shifting around too much.
Next, pour in your first batch of cement directly into the side of your planter. No need to worry about pouring around the concrete form tube. As long as you have the right consistency, your cement will settle around it on it’s own.
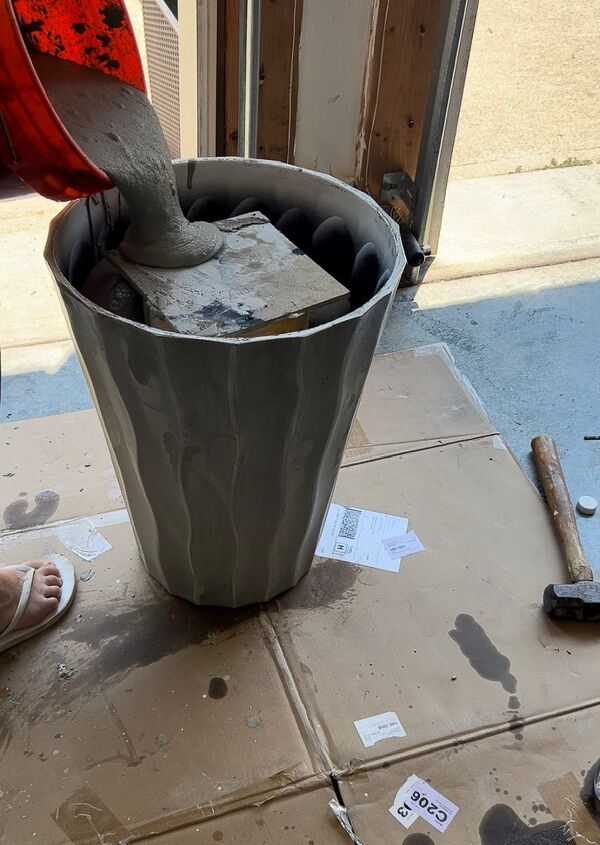
It’s a great idea to use a rubber mallet and tap on the sides of the bucket to release any air bubbles after you finish pouring each batch. This allows the concrete to further settle and prevents large cracks as it dries.
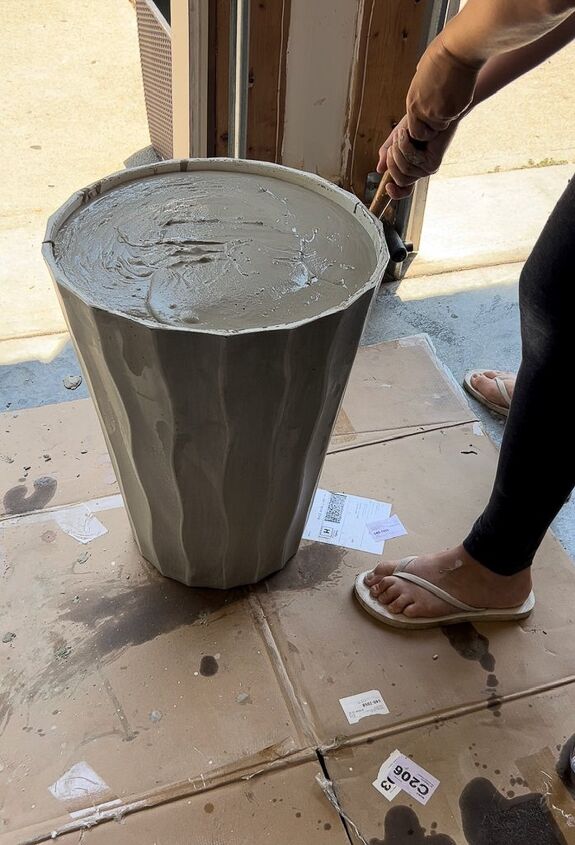
Continue repeating this process until your planter, or mold is full. Since the cement is fairly self-leveling, I would recommend leaving about a half of an inch remaining at the top of your planter. This will prevent you from having to scrape off and level and extra cement. And you eliminate a lot of mess this way.
Trust me on this one. I learned the hard way.
Now, walk away, and resist messing with or touching the cement in the planter as it cures, because doing so can cause additional air bubbles and cracks.
Step 5 – Release your concrete mold
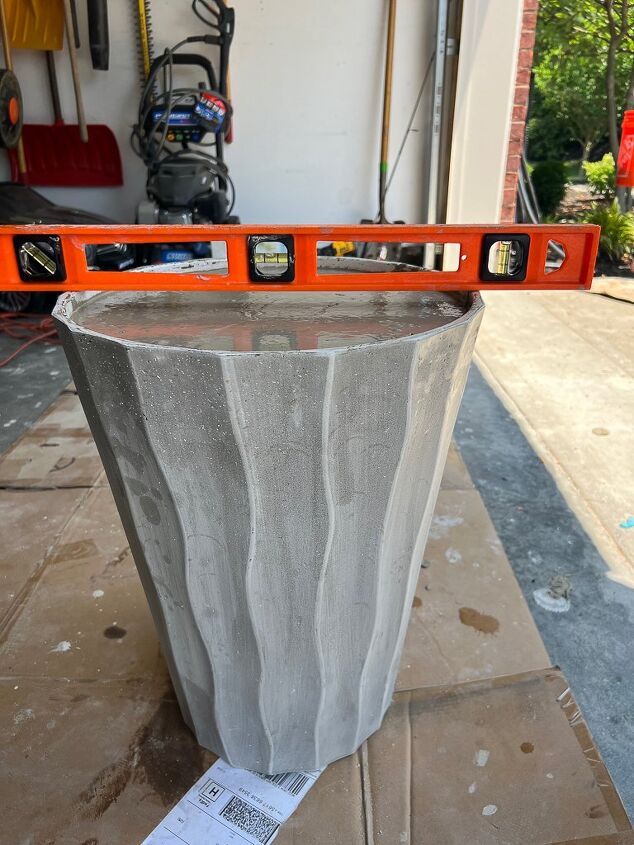
My mind was blown when I realized how truly fast setting this new cement actually was. In just a few hours my concrete was completely dried and cured, ready to be removed from the mold.
Gently tip your stool upside down onto a soft work surface, like your grassy yard or a layer of carboard.
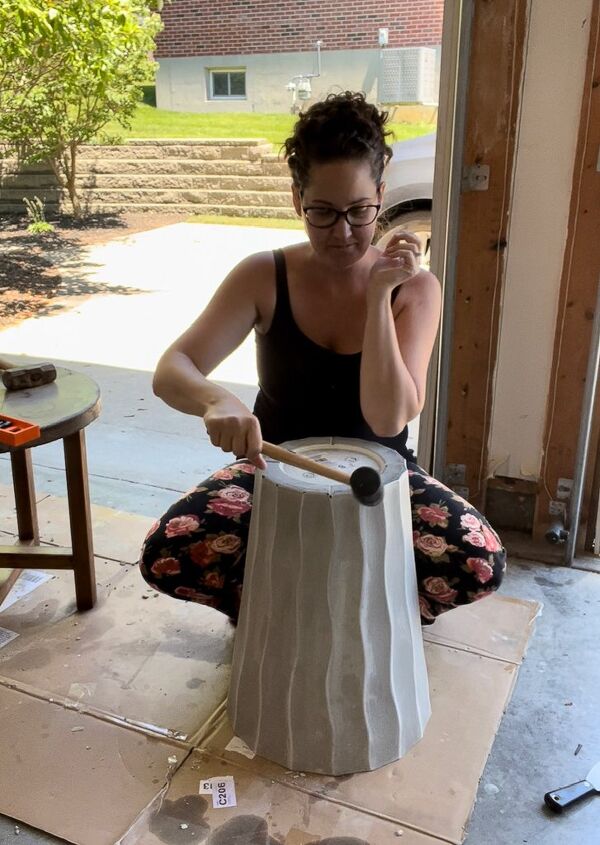
Next, begin tapping on the bottom of the stool mold with your rubber mallet. Gently now, we don’t want to cause any cracks, but just firm enough to start opening up the gaps between the dried cement and the sides of your mold.
Then continue tapping all around the sides. Be patient. Depending on the size of your mold, this could take a little while. I almost threw in the towel, but was so happy to hear the mold finally release.
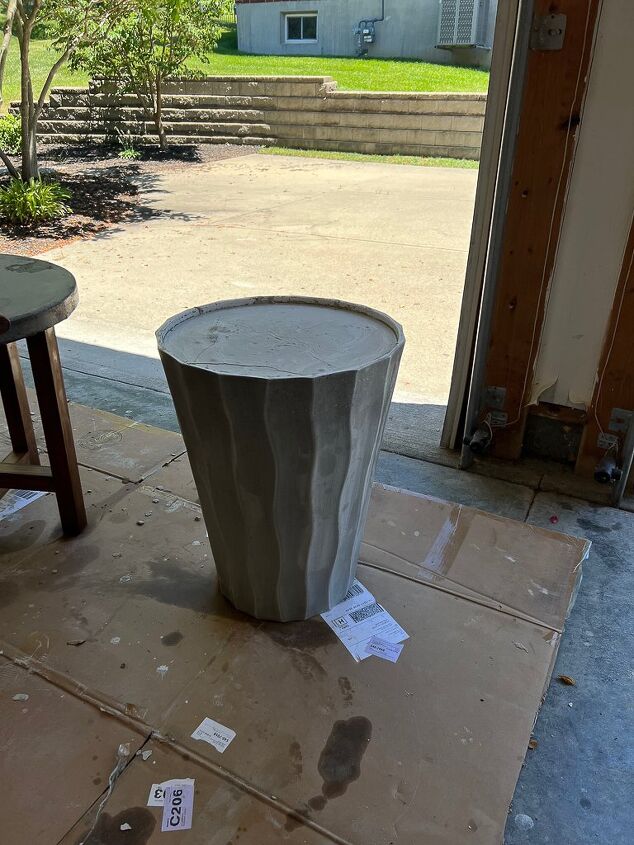
I lifted it up, and had a perfectly formed cement garden stool!
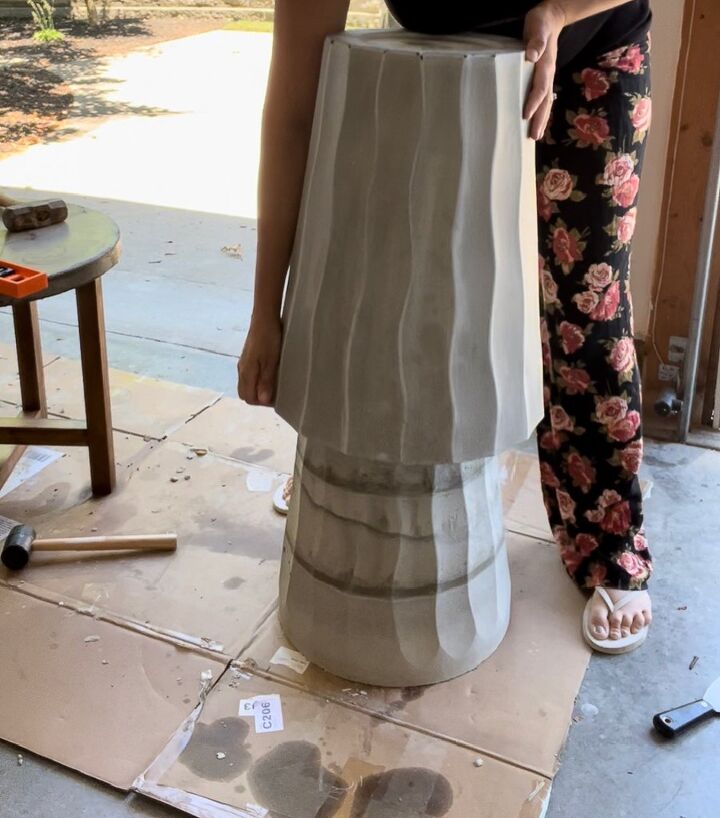
Notice those pour lines? I don’t think I’d have these if I used traditional concrete mix, but because of the fast setting nature of this brand, it was drying as quickly as I was pouring it.
No worries though! I used a textured spray paint to seal it and give it a nice uniform color.
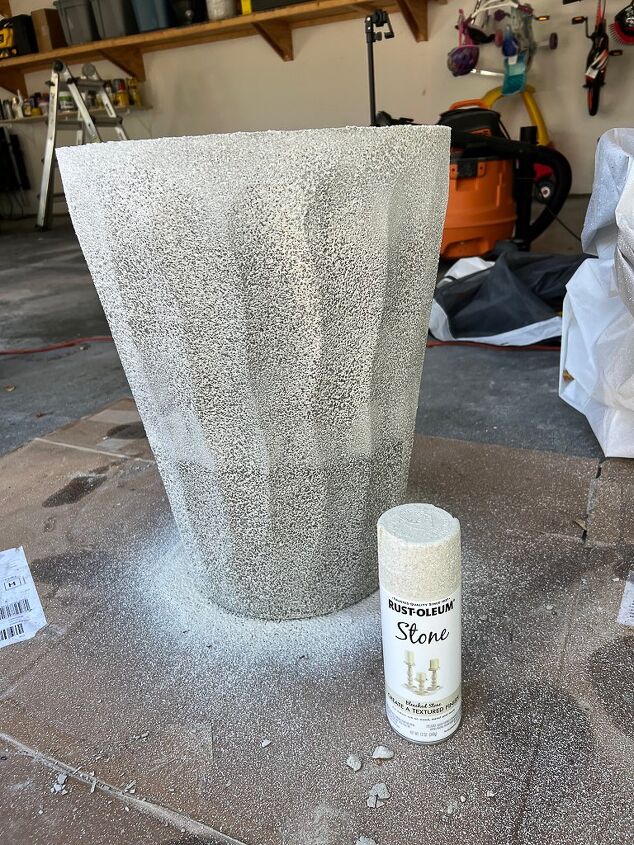
Aren’t they gorgeous?! I hope this inspired you to go take on your very own concrete stool project. They really do make the perfect accent piece to your outdoor furniture.

Have any questions? Drop them in the comments below, I love hearing from you!

Resources for this project:
See all materials


Comments
Join the conversation
-
Love it!!!!❤️
-
Love it ,got idea for around the pool +
I also liked it when I saw the pouring lines .


Frequently asked questions
Have a question about this project?
That came out absolutely beautiful. It would have cost a fortune in any store. Great job. Have you ever put something in the middle to make a pllanter?