


Kids Table

We are homeschooling our 6 year old, and wanting him to get familiar with tools at a young age. So we decided it was time for him to help build a kids table. We had a bunch of scrap wood, screws, nails and stain. We found a 10 foot long piece of wood that was 8 inches wide. We decided to cut it in 22 inch sections (since that’s how wide our other kids table was), plus since the piece of wood was 8 inches wide, 3 of them together would be 24 inches wide. So, the top of the table would be 22 inches by 24 inches. We also had some primed 1x2’s we could use as the legs. We cut these down to 22 inches long as well and cute 4 of them for 4 legs. We found some other scraps for the support system underneath the top of the top piece. My husband used a his miter and table saw to cut down the pieces. Then James was able to do the rest. He drilled the support system together with a drill and screws. Then he used the drill and screws to attach the 3 pieces for the top. Then my husband helped him use a nail gun to attach the legs. Then we used a stain to stain the top of the table. Turned out pretty good for a 6 year old!
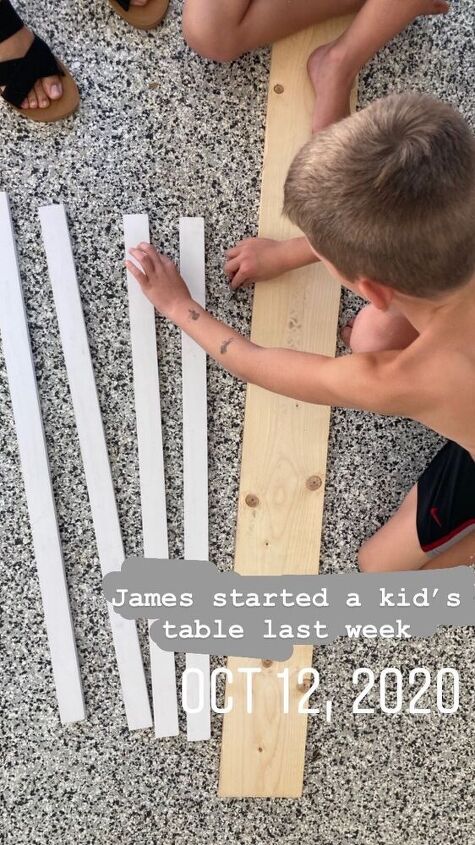
Sort out all the wood and get ready to cut them down.
Cut down all the pieces.
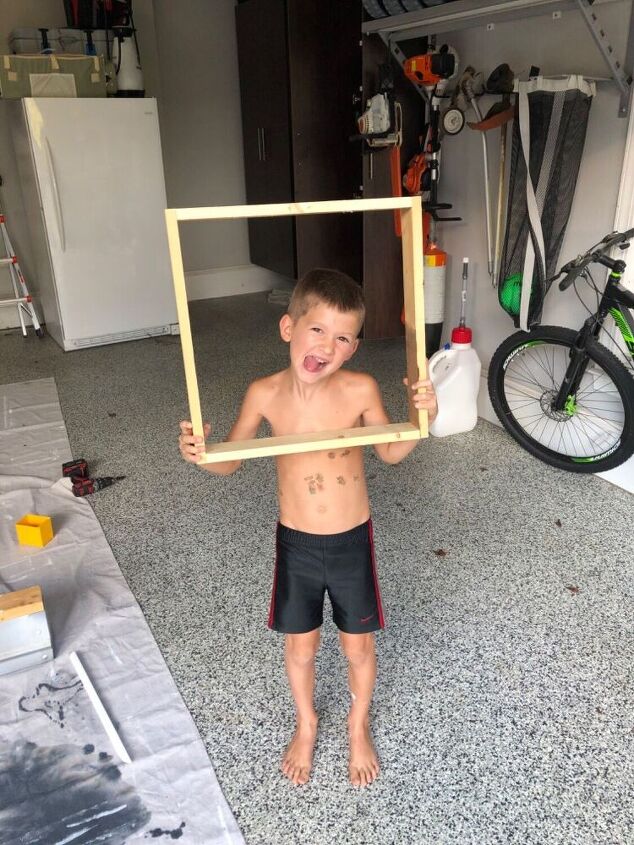
Get the support for the table assembled and ready to attach the top pieces
Attach the top pieces with a drill and screws
pick our a stain and stain the top part.
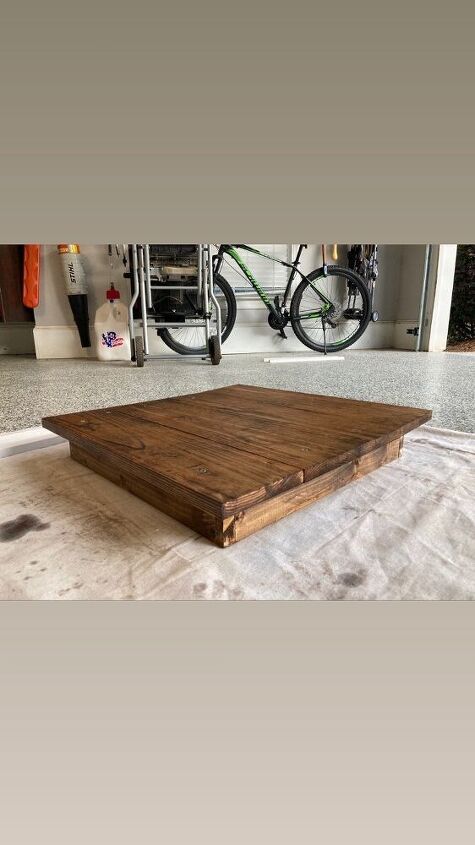
Let stain dry before attaching the legs.
Attach the primed 1x2’s with a nail gun.

Enjoy the table!


Comments
Join the conversation
-
That is a cool table. Bet James loves it cause helped make it. He did an amazing job.


Frequently asked questions
Have a question about this project?