Easy DIY Hinged HOOPHOUSE for Raised Bed

by
Christopher Walser Brandsdal
(IC: vlogger)
$100
3 Hours
Easy
This is my take at a hinged hoophouse for my raised bed. I am really happy with the way it turned out! It's a simple and cheap build that gives your raised bed the little extra.
{
"id": "3929495",
"alt": "",
"title": "",
"video_link": "https://www.youtube.com/embed/C3qoVN-XnIM",
"youtube_video_id": "C3qoVN-XnIM"
}
{
"width": 634,
"height": 357,
"showRelated": true
}
Check out the video above to learn how to build your own. Don't be scared. I'll talk you through it.
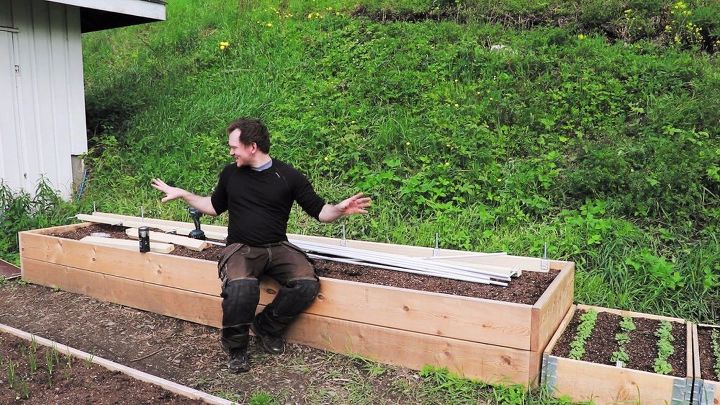
First I started off with the raised bed I made last year for my peppers. The box is about four meters long and one meter wide. It's made with 1.5" by 8" untreated wood.
I started off by making the L-brackets for the pvc-pipes to go onto. Drilled a center hole and cut them to length.
Then I drilled out a sink hole to allow the head of the bolt to fit "inside" the wood for the brackets. I spaced the holes to fit seven hoops. Since my bed was almost 400cm the spacing came out to be 65.5cm.
This is what the brackets looks like after I assembled it with M10 bolts and nuts. Tighten well.
Attached the brackets to the board. The head of the bolt fits in the pre-drilled holes.
Then I assembled the frame with wood screws in each corner. I also put in a crossbar, but that was fastened with L-brackets. All brackets for the hoops is inwards facing. The frame is made from 1.5" by 4" untreated wood.
I used three hinges in the back.
Then it was time to place the 16mm 2 meter long pvc pipes to the brackets. The arch stands about 85cm tall.
Then it was time to place the 16mm 2 meter long pvc pipes to the brackets. The arch stands about 85cm tall.
I ued two connected pvc pipes of 2 meter tied with zip ties to the hoops to make sure that the spacing at the top was correct. If not they would bend inwards when I put on the plastic.
Nothing fancy here. This is just regular builders plastic. I got a roll of 30 meter at a local store. This is not UV-protected, so you might consider using real greenhouse plastic if it's available to you. I might change it out in the future. I then screwed on a small piece of wood to fasten the plastic to the frame. I first did the long edges, and then the ends. It's very important to get the plastic tight to the hoops!
On each side I mounted a gas cylinder rated at 24kg. I will change them out to a bit stronger cylinders in the future to be on the safe side. I did this to be able to let the frame stay open without any other support.
And BAM! You just extended your growing season a month or so! Here in the mountains of Norway I will use it for my peppers this year. We get really cold temperatures at night, so this is perfect to keep the temperature more consistent through the nights.
If you liked this tutorial, and would like to see how it turns out this season, you might consider subscribing to my YouTobe channel where I garden outdoors and indoors all year long! Here is a link to my channel: https://youtube.com/cwbrandsdal
Enjoyed the project?
Published June 27th, 2017 4:25 PM
Comments
Join the conversation
2 of 24 comments
-
 Shantel M Ahrens
on Aug 03, 2017
I have raised gardens however this would help a bunch....
-
-
 Marlene Cheladyn
on Mar 27, 2019
Great job! Always wanted to do something similar. Unfortunately we get lots of wind here. Not all the time, but several times through the growing season. Working to slow that down
-












Frequently asked questions
Have a question about this project?
Wow that looks terrific! Have you considered selling these as kits? Not everyone has all the tools or know how to be able to do something like this.
Can you add a list of all your materials and how many of each item is needed. and size of covering to get
Brilliant idea! However, I tried installing gas cylinders on my raised bed hinged hoophouse but failed during the installation. I installed one but when I tried to lower it, it bent. They were a different brand but similar to the ones in your video (10 inches / 45 lbs). Can you please provide more details as to how you installed yours? In the video it goes too fast for me but I see you measuring but I am not clear on the measurements. Thank you!