


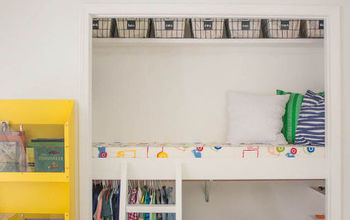
DIY Built-ins Inside of Closet

Another builder grade closet makeover comin’ atcha! After my last two closet makeovers ( entryway and pantry) I've gained some confidence, and decided to make some built-ins in my closet. This was the first big build I did completely on my own. It was relatively easy, so it makes for a great beginner build!
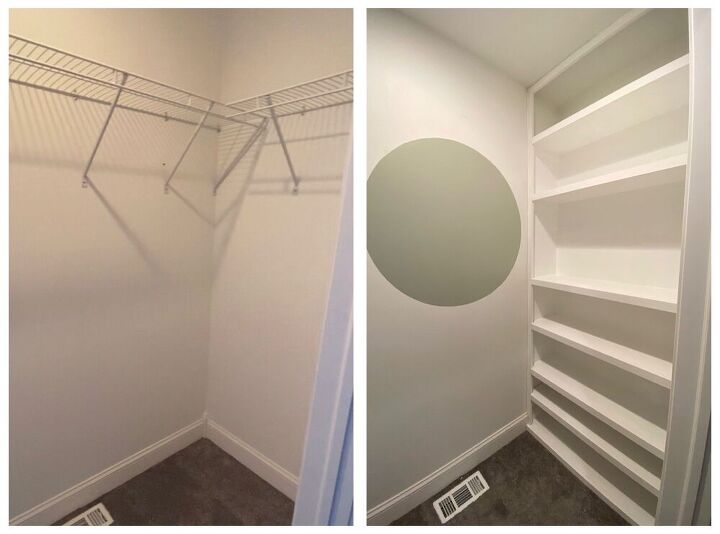
Of course, first I had to remove everything from the closet, including the wire shelving. I patched all the holes, touched up some paint, and painted a fun accent wall before getting started.
I did not remove the baseboards, although I do recommend it. It makes for a much cleaner look and is normally a very easy process. For some reason our builder used an excessive amount of liquid nails to attach ours (which we learned the hard way), so I avoided this at all costs.
Also, you’ll notice I paint after each step. This is because it would be very hard to get a brush/roller inside of the built-ins once they're complete, so I do recommend this as well.
What I used:
3/4 inch plywood (cabinet grade)
1x2s
Toggle screws
Brad nails
Liquid nails
Wood filler
Caulk
Paint
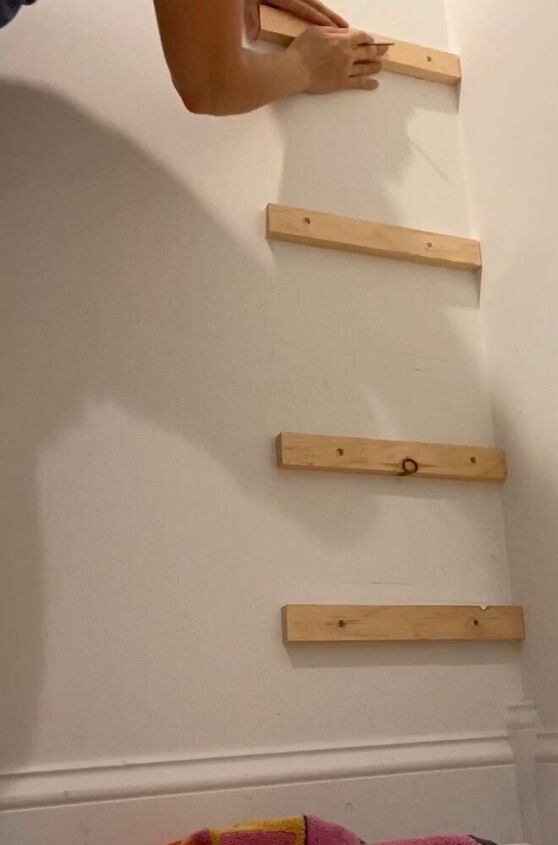
Step 1: Attach supports
First, I cut my 1x2s to size and attached them to the sides of the walls. I didn’t have any studs where I needed them, so I used 2 toggle screws in each one. I counter sunk my screw heads to ensure a flush finish. Then, I woodfilled my counter sink holes, sanded them, and painted the 1x2s.
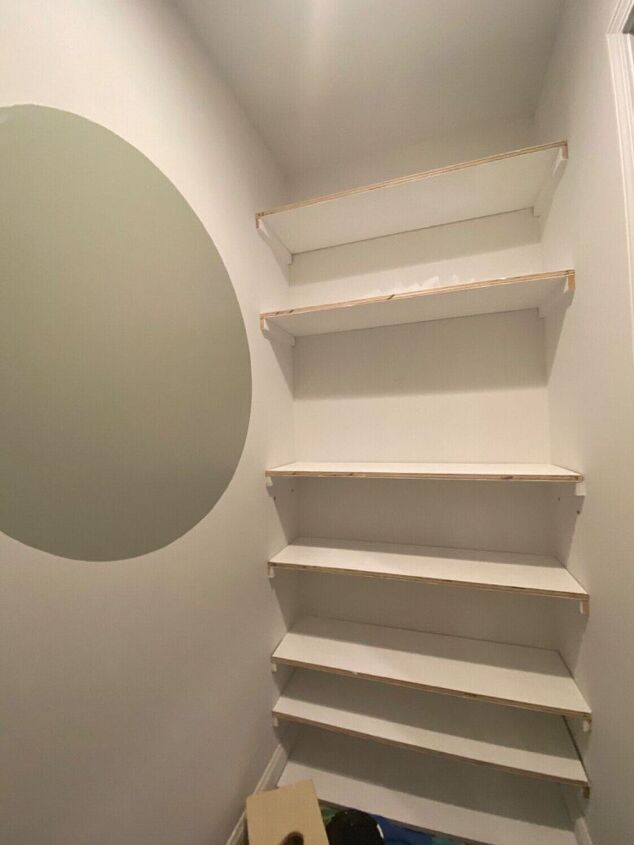
Step 2: Attach shelves
Next I cut my plywood to size for my shelves. After painting them, I used liquid nails to attach them to the supports. Once dry, I caulked all of my seams.
Step 3: Frame
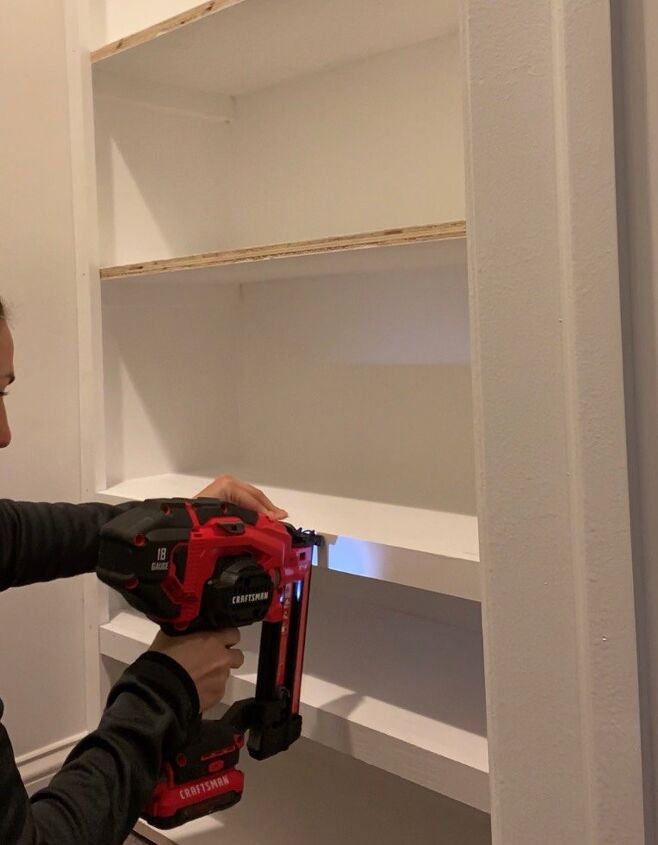
I framed out the “built ins” with 1x2s for a more finished look. I cut them to size and painted each one. I attached my vertical pieces first, then the horizontal pieces. I used liquid nails and brad nails to attach them. Because I didn’t remove the baseboards, I had to notch out my trim pieces around them.
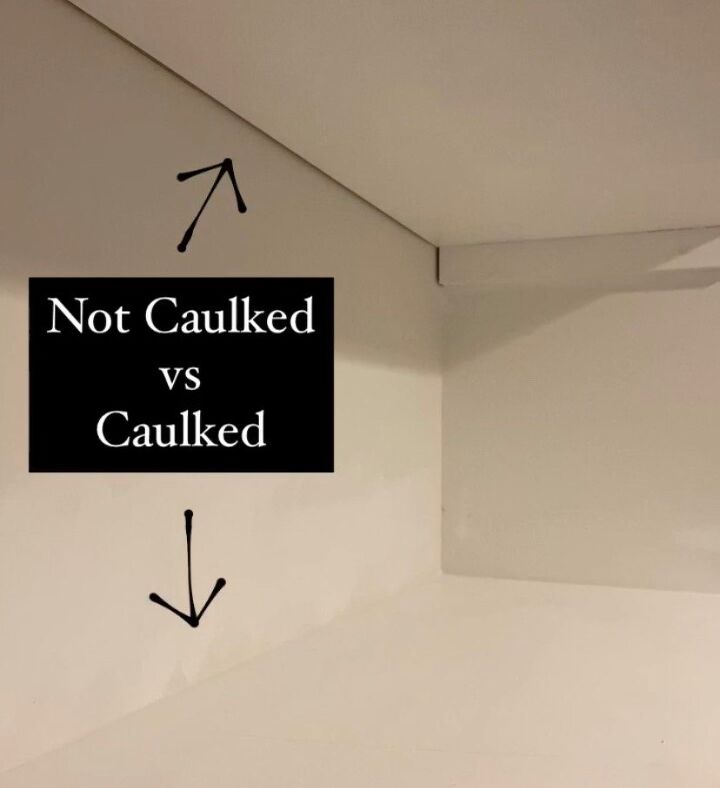
Step 4: Caulk, woodfill, and paint
Finally, I caulked all remaining gaps for a seamless look. I also woodfilled the spaces where the 1x2s met, and where my brad nails left holes. To finish off, I sanded the wood filler, and gave everything one more coat of paint.
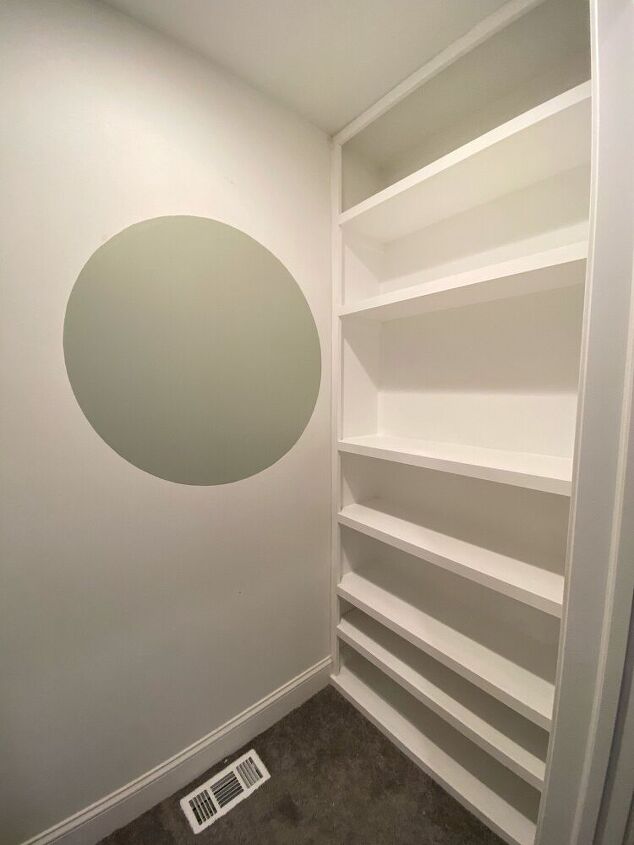
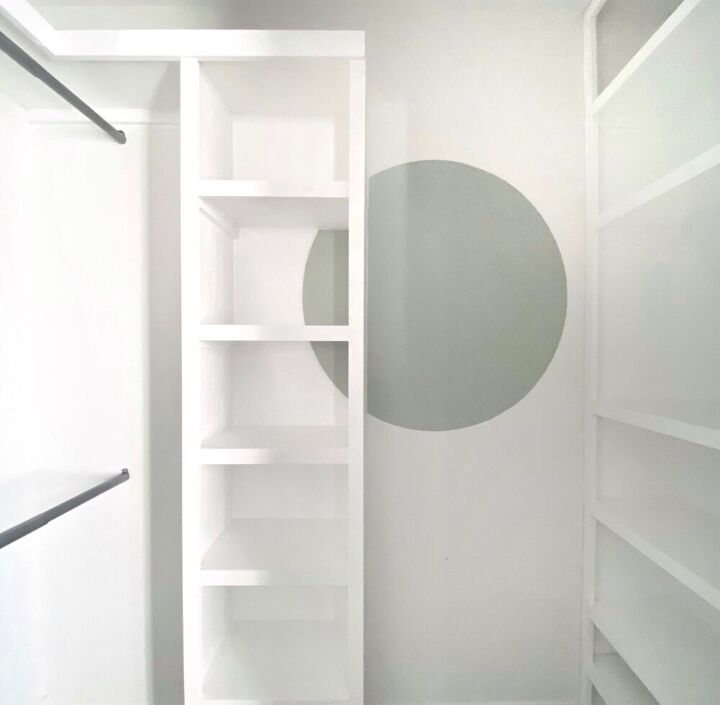
These built ins are completely customizable and help you get the most out of your space. This was my first big solo build, and I’m so happy with how they came out! It’s a perfect project for beginner DIY-ers, and a great way to upgrade a boring builder grade closet.
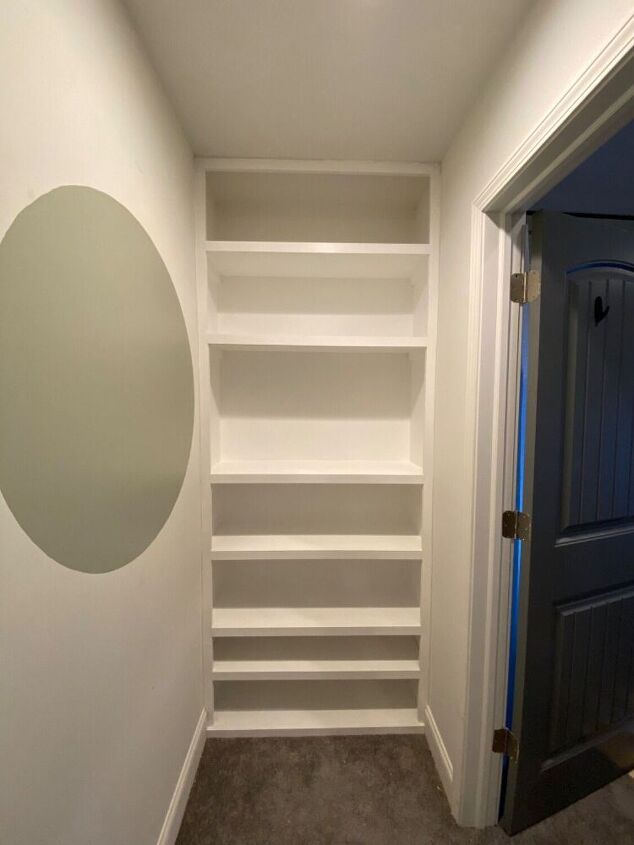
Edit: This was just step one of my closet makeover. Below, you can see the completely finished space!
Resources for this project:
See all materials


Comments
Join the conversation
-
Do you happen to have a step by step for the other side of the closet? Thank you!!


Frequently asked questions
Have a question about this project?