


Make Your Own Oversized Chalkboard Lazy Susan

Do you ever feel like your Lazy Susan is boring and just not large enough for what you'd like to put on it? We get that and made an oversized grain cloth farmhouse chalkboard Lazy Susan that you'll love! The chalkboard portion will allow you to label your food that's on the Lazy Susan. Here's how to make one for your home.
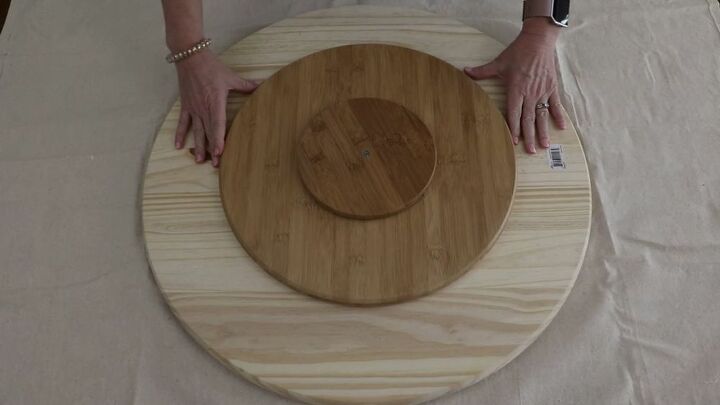
Step 1: Take your average size Lazy Susan and wood glue and a large round of wood. Glue the Lazy Susan onto the wood round and sit something heavy on it like books and let the glue dry before you turn it over.
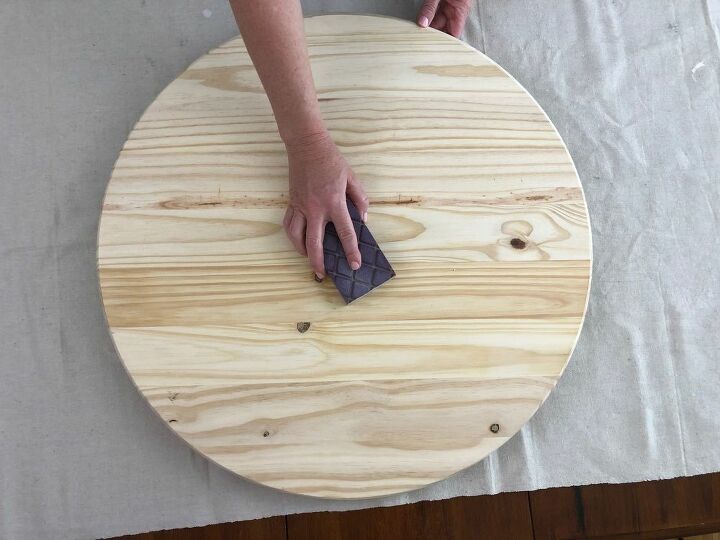
Step 2: Sand down the wood round to prepare it for painting. You need a good smooth surface.
Step 3: After you've sanded, take the time to wipe down the wood with a damp paper towel. This will ensure you don't paint and have any debris painted on your project.
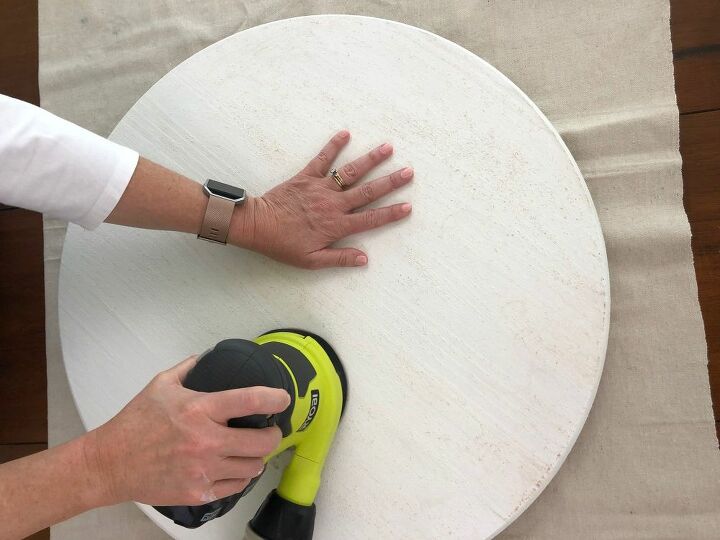
Step 4 & 5: Paint wood round with a primer and once it has had a chance to dry, sand it smooth.
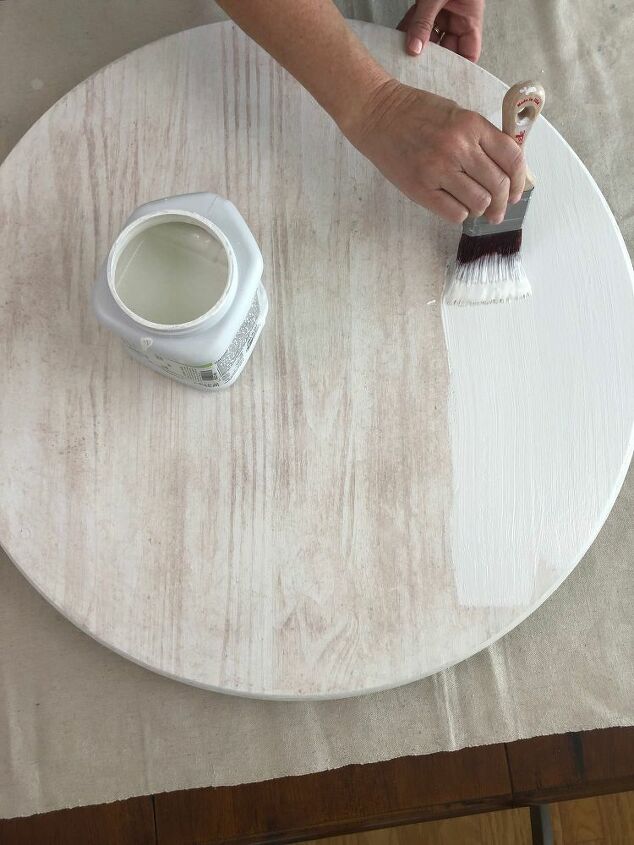
Step 6: Now it's time to paint the wood round with acrylic paint. We choose white because we added grain cloth stripes. If you'd like to add the stripes or another accent, make sure you allow the acrylic to dry beforehand.
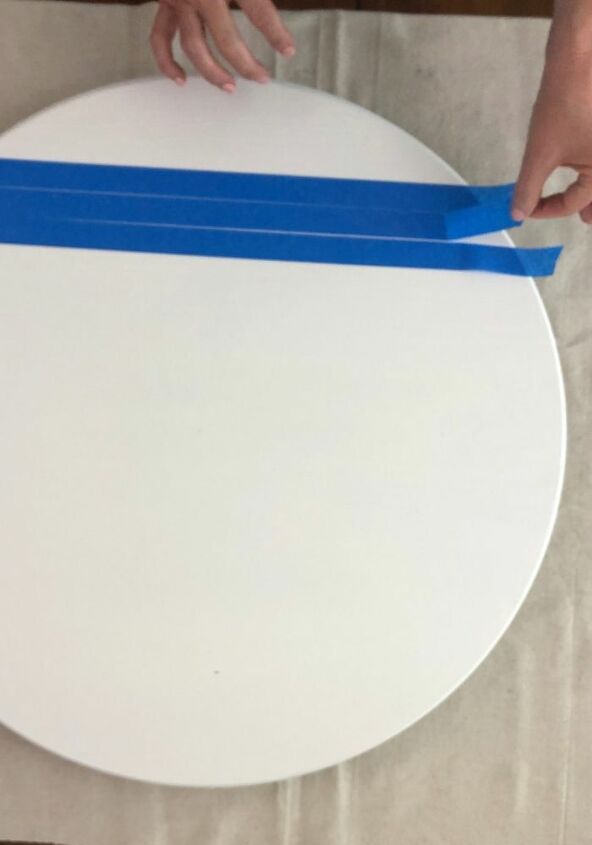
Step 7: Now it's time to add the ticking stripes. To get the thickest stripe you will stick three 1" pieces of painters tape onto the Lazy Susan.
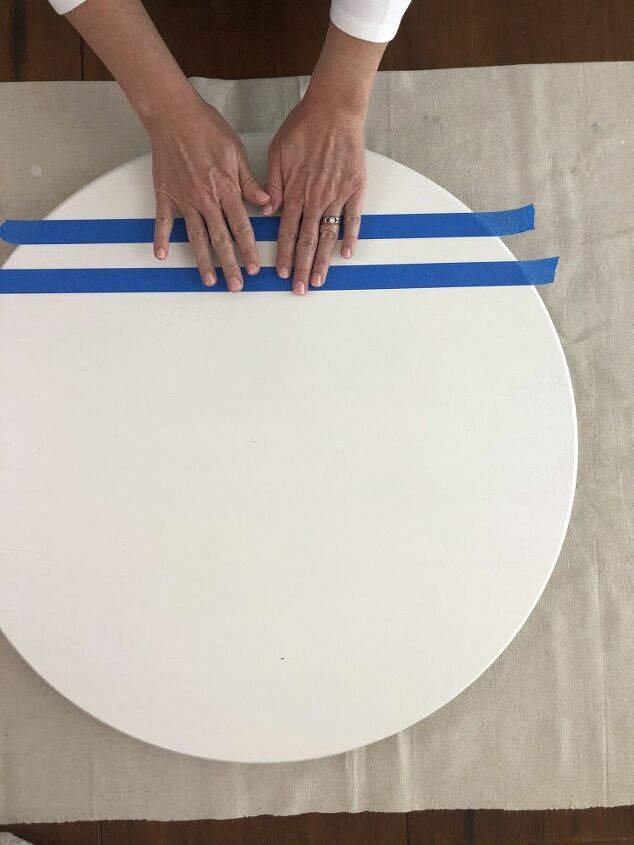
Then remove the middle piece.
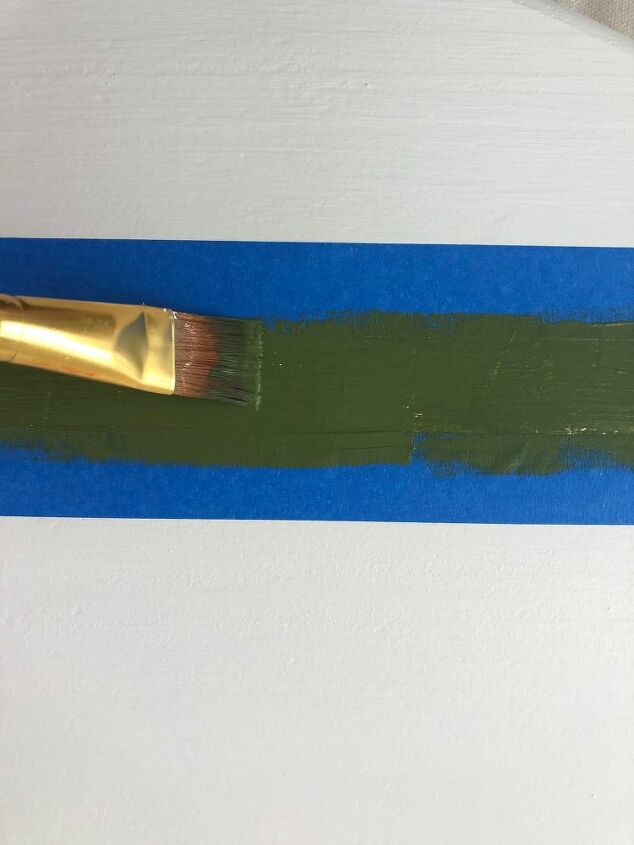
With the outer two pieces of tape remaining, paint the first stripe. Then you can paint your stripes with whatever acrylic paint you'd like. We chose this "alligator" green color, because it will match so many different tablescapes. Can't you just imagine the green in the winter on a Christmas table, or in the spring with some lovely flowers that are in season.
In order to paint the thin ticking lines, make sure the thick line has completely dried and then measure the distance from the thickest stripe you want on each side and tape the thin lines with two pieces of tape and paint.
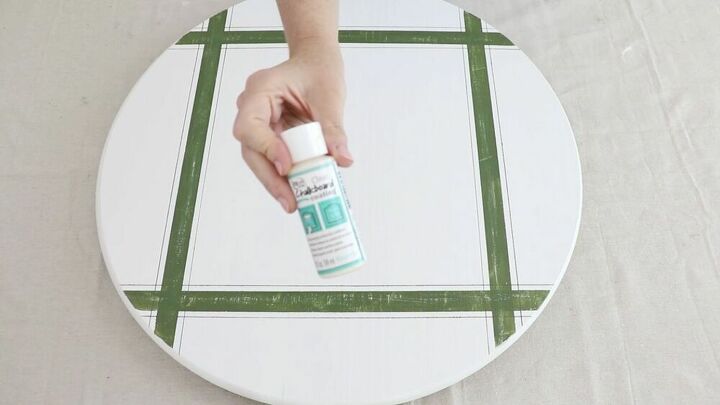
Step 9: Now it's time to chalkboard paint your Lazy Susan. We used this clear chalkboard paint because we already have all of the colors we want.
Follow the directions on your chalkboard paint bottle. We had to paint left to right, then allow the paint to dry and paint again top to bottom.
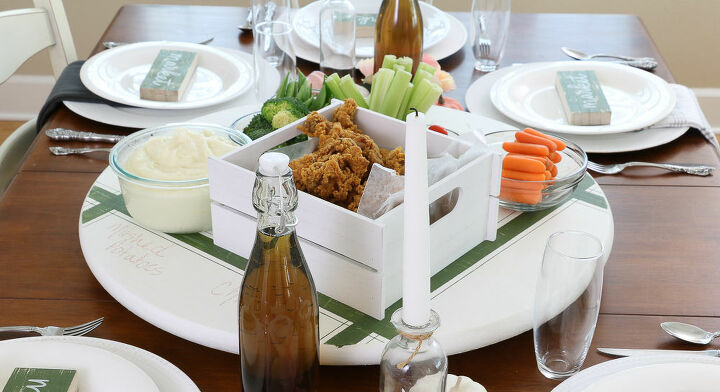
It's time to set your table, fill your Lazy Susan and label your foods and ENJOY!
We've already started imagining using this Lazy Susan and incooperating the idea of a , we have several posts that will have you falling in love with the concept. Go check them out!
Resources for this project:
See all materials


Comments
Join the conversation
-
We just saw a patio table with a built-in Lazy Susan and it looked so cool. Unfortunately the table we bought to match our chairs didn't come with the Lazy Susan. Your project inspired me and I will try make one for our new table. Can't wait to get started. Thanks for your post.
-
I helped make some of the books you used for weight. I recognized the covers and spines. 😊


Frequently asked questions
Have a question about this project?
"ChalkBoard" paint in clear??? In lieu of using a poly clear coat or what. Why the clear chalkboard paint?
By aunt and uncle had a huge lazy Susan like this on their table and it made meals and game night so easy (and fun, as a kid!). Great job!!
Question:
What are the blocks on the plates?
Where can you buy a lazy Susan at?